Sony NWZ-A816WHI Quick Start Guide - Page 13
Parts and Controls
 |
View all Sony NWZ-A816WHI manuals
Add to My Manuals
Save this manual to your list of manuals |
Page 13 highlights
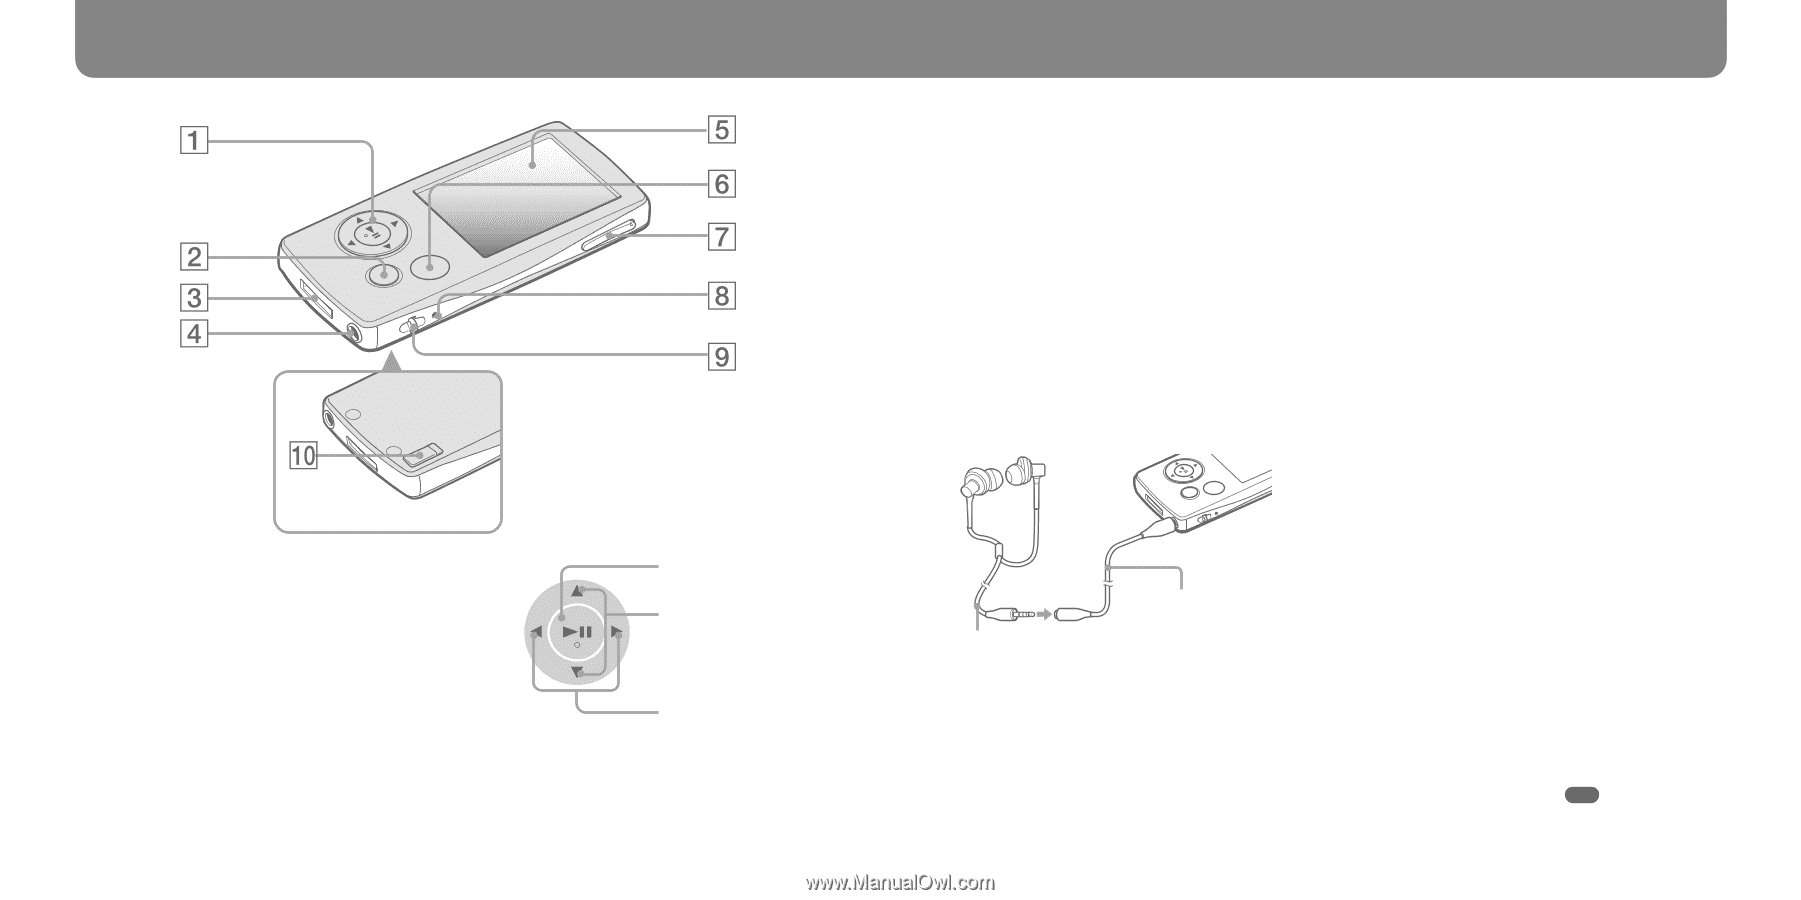
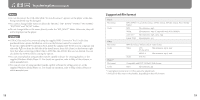
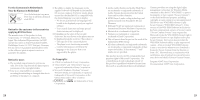
Parts and Controls Front Rear 5-way button Press the button to start playback. Press the button to confirm after (play/pause/ confirm) button*1 / buttons selecting an item with the button. The 5-way button performs different functions, depending on the displayed screens. For details, refer to the "Player / buttons Controls and Their Screens" of the BACK/HOME button*2 Operation Guide (PDF file). Press to go up one list screen level, or to return to the previous menu. Press and hold the BACK/HOME button to display the 24 Home menu. WM‑PORT jack Use this jack to connect the supplied USB cable, or optional peripheral devices, such as supported accessories for the WM‑PORT. Headphone jack For connecting the headphones or the headphone extension cord. Insert the jack pin until it clicks into place. If the headphones are not connected properly, the sound may be affected. When using the headphone extension cord OPTION/PWR OFF button*2 Displays the Option menu. If you press and hold the OPTION/PWR OFF button, the screen turns off and the player enters the standby mode. If the standby mode is retained for about a day, the player turns off completely automatically ( page 8). VOL +*1/- button Adjusts the volume. RESET button Resets the player when you press the RESET button with a small pin, etc. Strap hole This is used to attach a strap (sold separately). HOLD switch You can protect the player against accidental Headphone extension cord operation by using the HOLD switch when carrying it. By sliding the HOLD switch in Headphones the direction of the arrow, all operation Display buttons are disabled. If you slide the HOLD switch to the opposite position, the HOLD The display may vary, depending on function is released. functions. For details, refer to the Operation *1 There are tactile dots. Use them to help with Guide (PDF file). button operations. *2 Functions marked with on the player are activated if you press and hold the corresponding buttons. 25
-
 1
1 -
2
-
3
-
4
-
5
-
6
-
7
-
 8
8 -
 9
9 -
 10
10 -
 11
11 -
 12
12 -
 13
13 -
 14
14 -
 15
15 -
 16
16
 |
 |