Sony PAM-200 Installation Manual
Sony PAM-200 - Mounting Kit For Projector Manual
 |
UPC - 027242240773
View all Sony PAM-200 manuals
Add to My Manuals
Save this manual to your list of manuals |
Sony PAM-200 manual content summary:
- Sony PAM-200 | Installation Manual - Page 1
INSTALLATION MANUAL IN-PAM200.R0 PAM-200 Universal Projector Mount Sony Electronics 16540 West Bernardo Drive San Diego, CA 92127 www.sony.com - Sony PAM-200 | Installation Manual - Page 2
PAM-200 Table of Contents Parts List ...- 3 Installation Tools ...- 3 Features ...- 4 Selecting the Proper Mounting Hardware...- 4 Attaching the Mount ...- 5 Optional Hardware...- 5 Ceiling Installation...- 6 Height Adjustment ...- 6 Safety Warning ...- 7 Concrete Mounting ...- 7 Technical - Sony PAM-200 | Installation Manual - Page 3
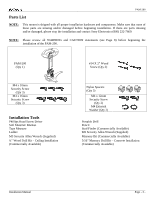
PAM-200 Parts List NOTE: This mount is shipped with all proper installation hardware and components. Make sure that none of these parts are missing and/or damaged before beginning installation. If there are parts missing and/or damaged, please stop the installation and contact Sony Electronics (800) - Sony PAM-200 | Installation Manual - Page 4
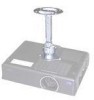
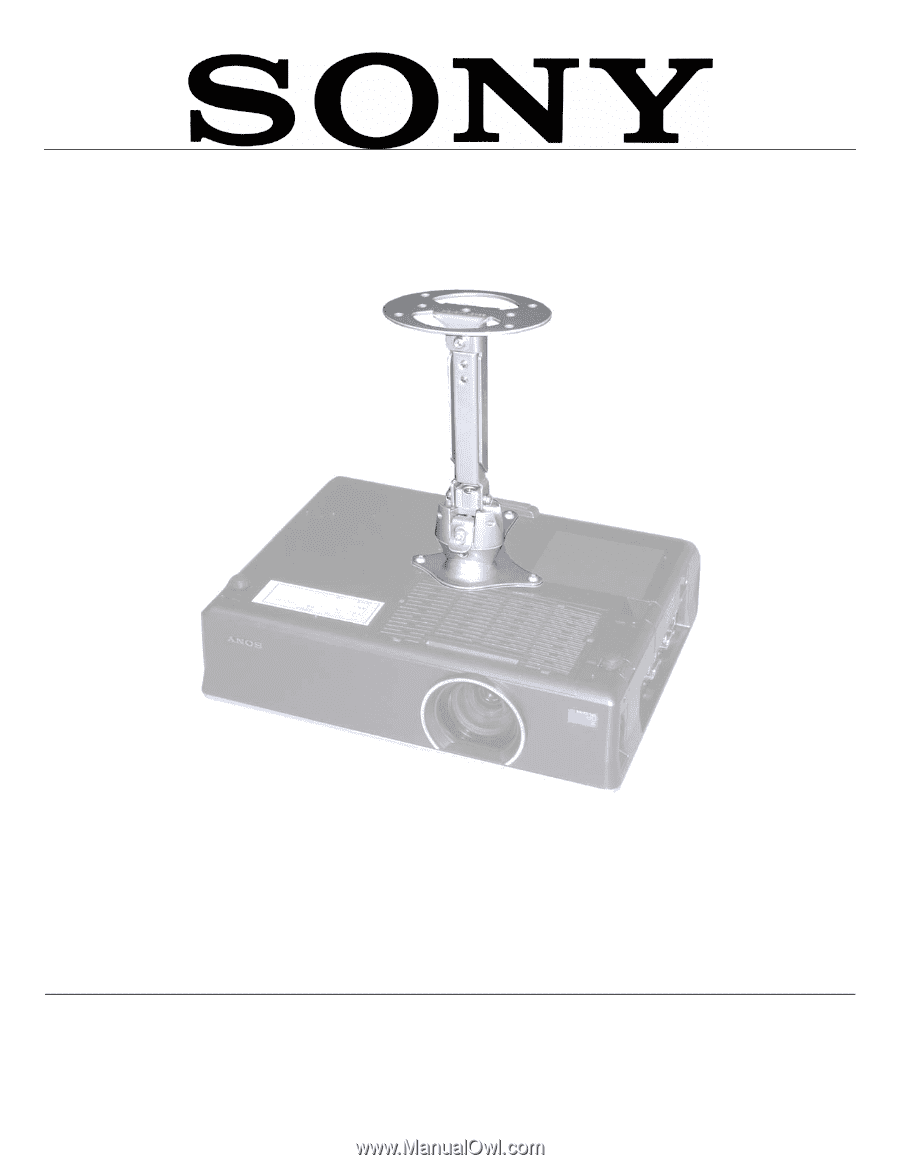
purchase of your new Sony Electronics PAM-200 Projector Mount. The projector mount can be configured for ceiling installations. The PAM-200 features MagnaGuide™ Technology which assists the installer for quicker installation times and peace of mind. The PAM-200 Projector Mount is height adjustable - Sony PAM-200 | Installation Manual - Page 5
plate not cover any access plates that allow the user to access the interior of the projector. The following steps will allow the user to mount the PAM-200 projector bracket to the Sony projector without fear of blocking any ventilation access plates. Nylon Spacer M5 Allen Wrench M4 x 16mm - Sony PAM-200 | Installation Manual - Page 6
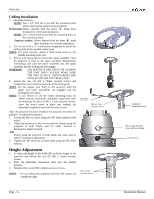
PAM-200 Ceiling Installation 1. Mounting Surfaces NOTE: Use a 1/4" drill bit to pre-drill the mounting holes before securing the wood screws (supplied). Wood studs: Where denoted with the letter 'A', mark these locations for wood stud installation. NOTE: Use a masonry bit to pre-drill the mounting - Sony PAM-200 | Installation Manual - Page 7
secured, there will be an increased risk of attachment failure, which could result in damage to the projector. Concrete Mounting NOTE: The PAM-200 can be mounted to a ceiling with a minimum 6" thickness. Concrete wedge anchors must be used for concrete installation. It is recommended that ¼" wedge - Sony PAM-200 | Installation Manual - Page 8
USE, ATTACHMENTS OR MODIFICATIONS. WARNING: THE CEILING STRUCTURE MUST BE CAPABLE OF SUPPORTING 25LBS. IF NOT, THE CEILING STRUCTURE MUST BE REINFORCED. PROPER INSTALLATION PROCEDURE BY A QUALIFIED SERVICE TECHNICIAN, AS OUTLINED IN THE INSTALLATION INSTRUCTIONS, MUST BE ADHERED TO. FAILURE TO DO
-
 1
1 -
 2
2 -
 3
3 -
 4
4 -
 5
5 -
 6
6 -
 7
7 -
8
 |
 |
IN-PAM200.R0
INSTALLATION MANUAL
PAM-200
Universal Projector Mount
Sony Electronics
16540 West Bernardo Drive
San Diego, CA
92127
www.sony.com