Sony PCWA-A200 Access Point Help File - Page 24
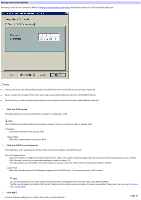
Set each of the Connection Mode and Common Parameters and click NEXT.
 |
View all Sony PCWA-A200 manuals
Add to My Manuals
Save this manual to your list of manuals |
Page 24 highlights
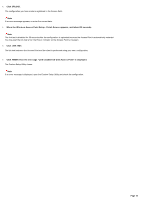
Hint Any remaining steps uses the same ones as for normal use of the Custom Access Point Setup Utility. Here, w e w ill explain using and example of connecting to the LAN (w ithout a DHCP server) and selecting the LAN connection mode to enable sharing of files and the printer. You can select the Cable Modem connection mode. 5. Se t e ach of the Conne ction M ode and Com m on Param e te rs and click NEXT. The Setup of LAN Connection Mode screen is displayed. 6. M anually s e t the WAN s ide (Ethe rne t s ide ) IP addre s s . Consult w ith the netw ork manager regarding the setting of this IP address. 7. Click NEXT. A screen appears asking you to confirm the mode you have selected. Page 24
-
 1
1 -
2
-
3
-
4
-
5
-
6
-
7
-
8
-
9
-
10
-
11
-
12
-
13
-
14
-
15
-
16
-
17
-
18
-
 19
19 -
 20
20 -
 21
21 -
 22
22 -
 23
23 -
 24
24 -
 25
25 -
 26
26 -
 27
27 -
 28
28 -
 29
29 -
30
-
31
-
32
-
33
-
34
-
35
-
36
-
37
-
38
-
39
-
40
-
41
-
42
-
43
-
44
-
45
-
46
-
47
-
48
-
49
-
50
-
51
-
52
-
53
-
54
-
55
-
56
-
57
-
58
-
59
-
60
-
61
 |
 |
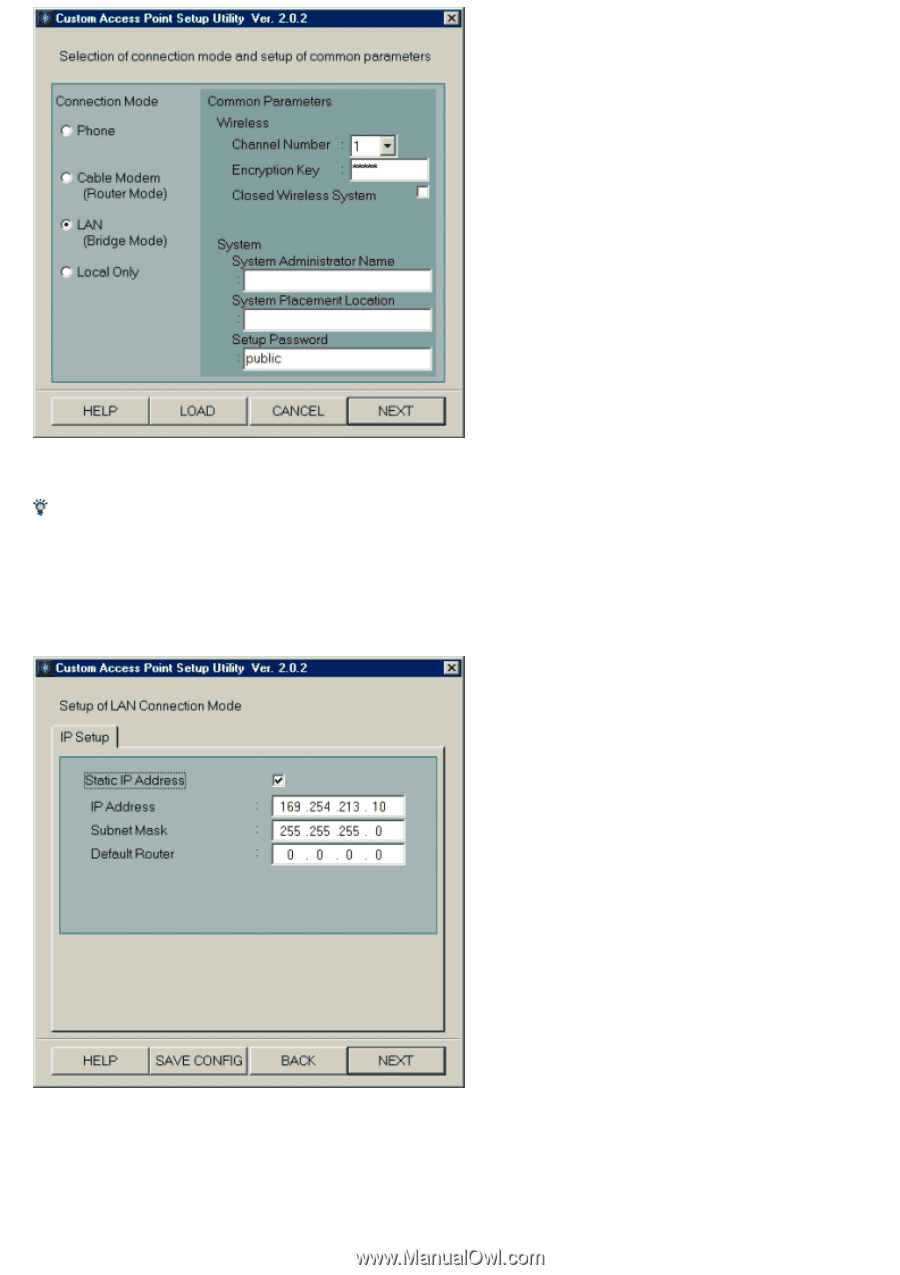
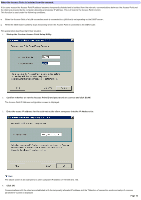
Hint
Any remaining steps uses the same ones as for normal use of the Custom Access Point Setup Utility. Here, w e w ill explain using and example of connecting
to the LAN (without a DHCP server) and selecting the LAN connection mode to enable sharing of files and the printer. You can select the Cable Modem
connection mode.
5.
Set each of the Connection Mode and Common Parameters and click NEXT.
The Setup of LAN Connection Mode screen is displayed.
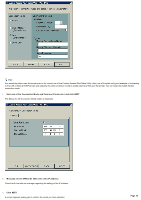
6.
Manually set the WAN side (Ethernet side) IP address.
Consult w ith the netw ork manager regarding the setting of this IP address.
7.
Click NEXT.
A screen appears asking you to confirm the mode you have selected.
Page 24