Sony PEG-NR70V Read This First Operating Instructions - Page 39
Step 5: Connecting your Sony CLIÉ Handheld and your computer via the cradle
 |
UPC - 027242603011
View all Sony PEG-NR70V manuals
Add to My Manuals
Save this manual to your list of manuals |
Page 39 highlights
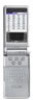
Chapter 2 Setting up your Sony CLIÉ Handheld - Basics Step 5: Connecting your Sony CLIÉ Handheld and your computer via the cradle The cradle that comes with your CLIÉ handheld enables you to synchronize the information on your CLIÉ handheld with the Palm™ Desktop for CLIÉ software on your computer using HotSync® technology. 1 Connect the USB connector of the cradle to a USB connector on your computer. To the wall outlet 2 Place your CLIÉ handheld on the cradle. Your CLIÉ handheld can be in either the "turned style," "opened style," or "carrying style" when you place it into the cradle. Insert your CLIÉ handheld at an angle to the cradle, and lay it back to fit it into place. 39
-
 1
1 -
2
-
3
-
4
-
5
-
6
-
7
-
8
-
9
-
10
-
11
-
12
-
13
-
14
-
15
-
16
-
17
-
18
-
19
-
20
-
21
-
22
-
23
-
24
-
25
-
26
-
27
-
28
-
29
-
30
-
31
-
32
-
33
-
 34
34 -
 35
35 -
 36
36 -
 37
37 -
 38
38 -
 39
39 -
 40
40 -
 41
41 -
 42
42 -
 43
43 -
 44
44 -
45
-
46
-
47
-
48
-
49
-
50
-
51
-
52
-
53
-
54
-
55
-
56
-
57
-
58
-
59
-
60
-
61
-
62
-
63
-
64
-
65
-
66
-
67
-
68
 |
 |

39
Setting up your Sony CLIÉ Handheld – Basics
Chapter 2
Step 5:
Connecting your Sony CLIÉ Handheld
and your computer via the cradle
The cradle that comes with your CLIÉ handheld enables you to
synchronize the information on your CLIÉ handheld with the Palm
™
Desktop for CLIÉ software on your computer using HotSync
®
technology.
1
Connect the USB connector of the cradle to a USB
connector on your computer.
2
Place your CLIÉ handheld on the cradle.
Your CLIÉ handheld can be in either the “turned style,” “opened
style,” or “carrying style” when you place it into the cradle.
To the wall outlet
Insert your CLIÉ handheld at an angle to the
cradle, and lay it back to fit it into place.