Sony RDR-GX255 Operating Instructions - Page 20
Step 5: Connecting the Power Cord
 |
View all Sony RDR-GX255 manuals
Add to My Manuals
Save this manual to your list of manuals |
Page 20 highlights
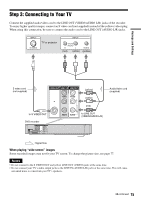
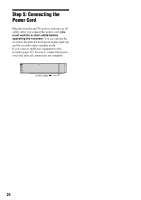
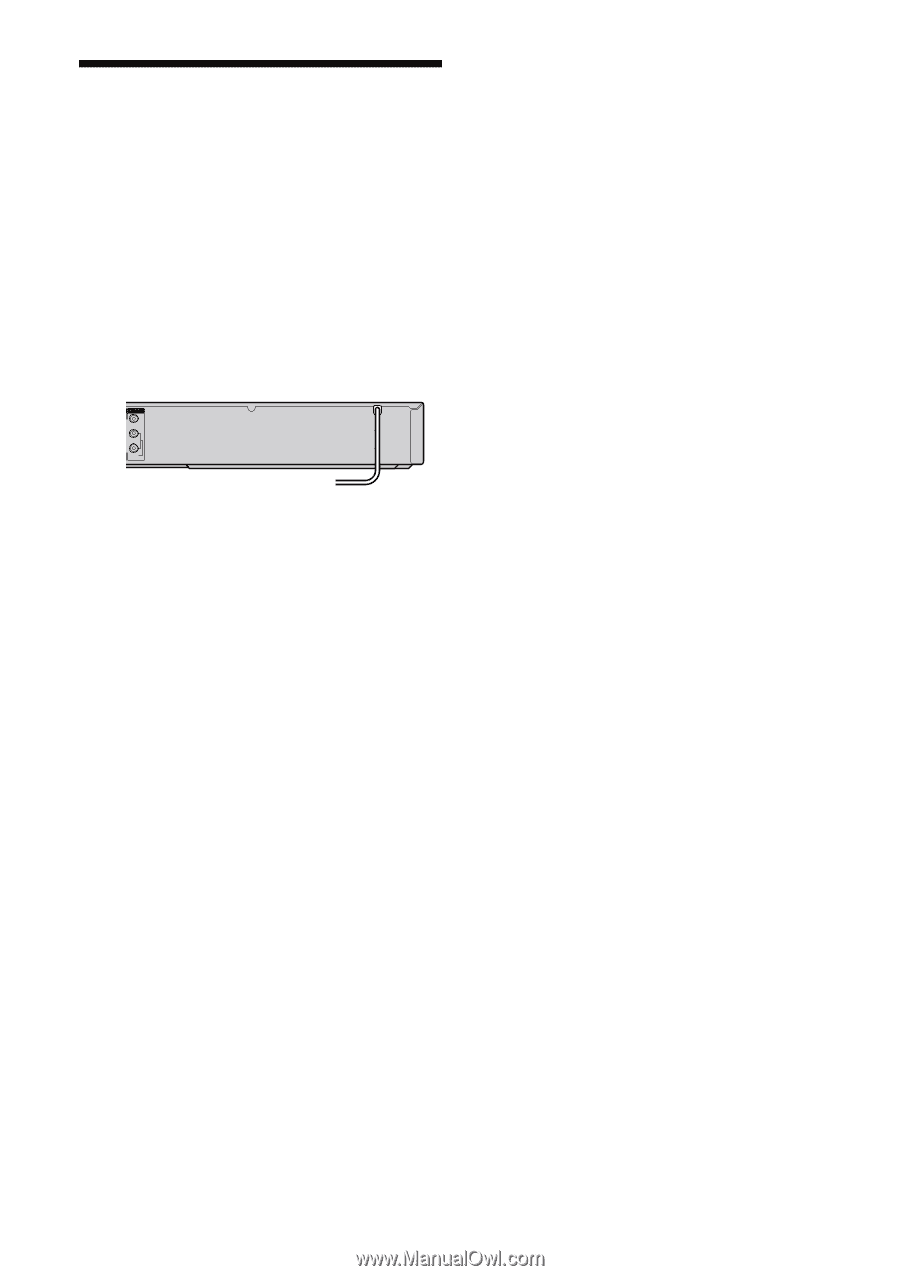
Step 5: Connecting the Power Cord Plug the recorder and TV power cords into an AC outlet. After you connect the power cord, you must wait for a short while before operating the recorder. You can operate the recorder only after the front panel display lights up and the recorder enters standby mode. If you connect additional equipment to this recorder (page 27), be sure to connect the power cord only after all connections are complete. LINE OUT VIDEO L R AUDIO to AC outlet < 20
-
 1
1 -
2
-
3
-
4
-
5
-
6
-
7
-
8
-
9
-
10
-
11
-
12
-
13
-
14
-
 15
15 -
 16
16 -
 17
17 -
 18
18 -
 19
19 -
 20
20 -
 21
21 -
 22
22 -
 23
23 -
 24
24 -
 25
25 -
26
-
27
-
28
-
29
-
30
-
31
-
32
-
33
-
34
-
35
-
36
-
37
-
38
-
39
-
40
-
41
-
42
-
43
-
44
-
45
-
46
-
47
-
48
-
49
-
50
-
51
-
52
-
53
-
54
-
55
-
56
-
57
-
58
-
59
-
60
-
61
-
62
-
63
-
64
-
65
-
66
-
67
-
68
-
69
-
70
-
71
-
72
-
73
-
74
-
75
-
76
-
77
-
78
-
79
-
80
-
81
-
82
-
83
-
84
-
85
-
86
-
87
-
88
-
89
-
90
-
91
-
92
-
93
-
94
-
95
-
96
-
97
-
98
-
99
-
100
-
101
-
102
-
103
-
104
-
105
-
106
-
107
-
108
-
109
-
110
-
111
-
112
-
113
-
114
-
115
-
116
-
117
-
118
-
119
-
120
-
121
-
122
-
123
-
124
-
125
-
126
-
127
-
128
 |
 |
20
Step 5: Connecting the
Power Cord
Plug the recorder and TV power cords into an AC
outlet. After you connect the power cord,
you
must wait for a short while before
operating the recorder
.
You can operate the
recorder only after the front panel display lights up
and the recorder enters standby mode.
If you connect additional equipment to this
recorder (page 27), be sure to connect the power
cord only after all connections are complete.
L
R
VIDEO
AUDIO
LINE OUT
to AC outlet
<