Sony RM-VZ320 Operating Instructions
Sony RM-VZ320 - Remote Commander Manual
 |
UPC - 027242780071
View all Sony RM-VZ320 manuals
Add to My Manuals
Save this manual to your list of manuals |
Sony RM-VZ320 manual content summary:
- Sony RM-VZ320 | Operating Instructions - Page 1
Troubleshooting If you have problems setting up or using the RM-VZ320: Carefully perform the setup procedure of "Startup Guide." If the RM-VZ320 does not work, try repeating the setup procedure using another manufacturer's code (if listed for your device). If you still cannot operate the RM-VZ320 - Sony RM-VZ320 | Operating Instructions - Page 2
al cliente Luego de leer este manual, si todavía no puede lograr que el RM-VZ320 funcione apropiadamente, llame a la Línea de ayuda de asistencia al cliente de Sony al 1-800-822-2217. Guía TV / Téléviseur / TV Brand Code No. Brand Code No. HHTaahvrmeeramfnoy/lKloarwdoinng Hcoeldioes numbers
-
 1
1 -
 2
2
 |
 |
4-170-641-
12
(1)
Remote Commander
RM-VZ320
©2010
Sony Corporation
Printed in China
Operating Instructions
Manual de instrucciones (parte posterior)
English
For the Customers in the U.S.A.
WARNING
This equipment has been tested and found to comply with the limits for a Class B digital
device, pursuant to Part 15 of the FCC Rules.
These limits are designed to provide
reasonable protection against harmful interference in a residential installation.
This
equipment generates, uses and can radiate radio frequency energy and, if not installed
and used in accordance with the instructions, may cause harmful interference to radio
communications.
However, there is no guarantee that interference will not occur in a
particular installation.
If this equipment
does cause harmful interference to radio or
television reception, which can be determined by turning the equipment off and on, the
user is encouraged to try to correct the interference by one or more of the following
measures:
Reorient or relocate the receiving antenna.
Increase the separation between the equipment and receiver.
Connect the equipment into an outlet on a circuit different from that to which the
receiver is connected.
Consult the dealer or an experienced radio/TV technician for help.
You are cautioned that any changes or modifications not expressly approved in this
manual could void your authority to operate this equipment.
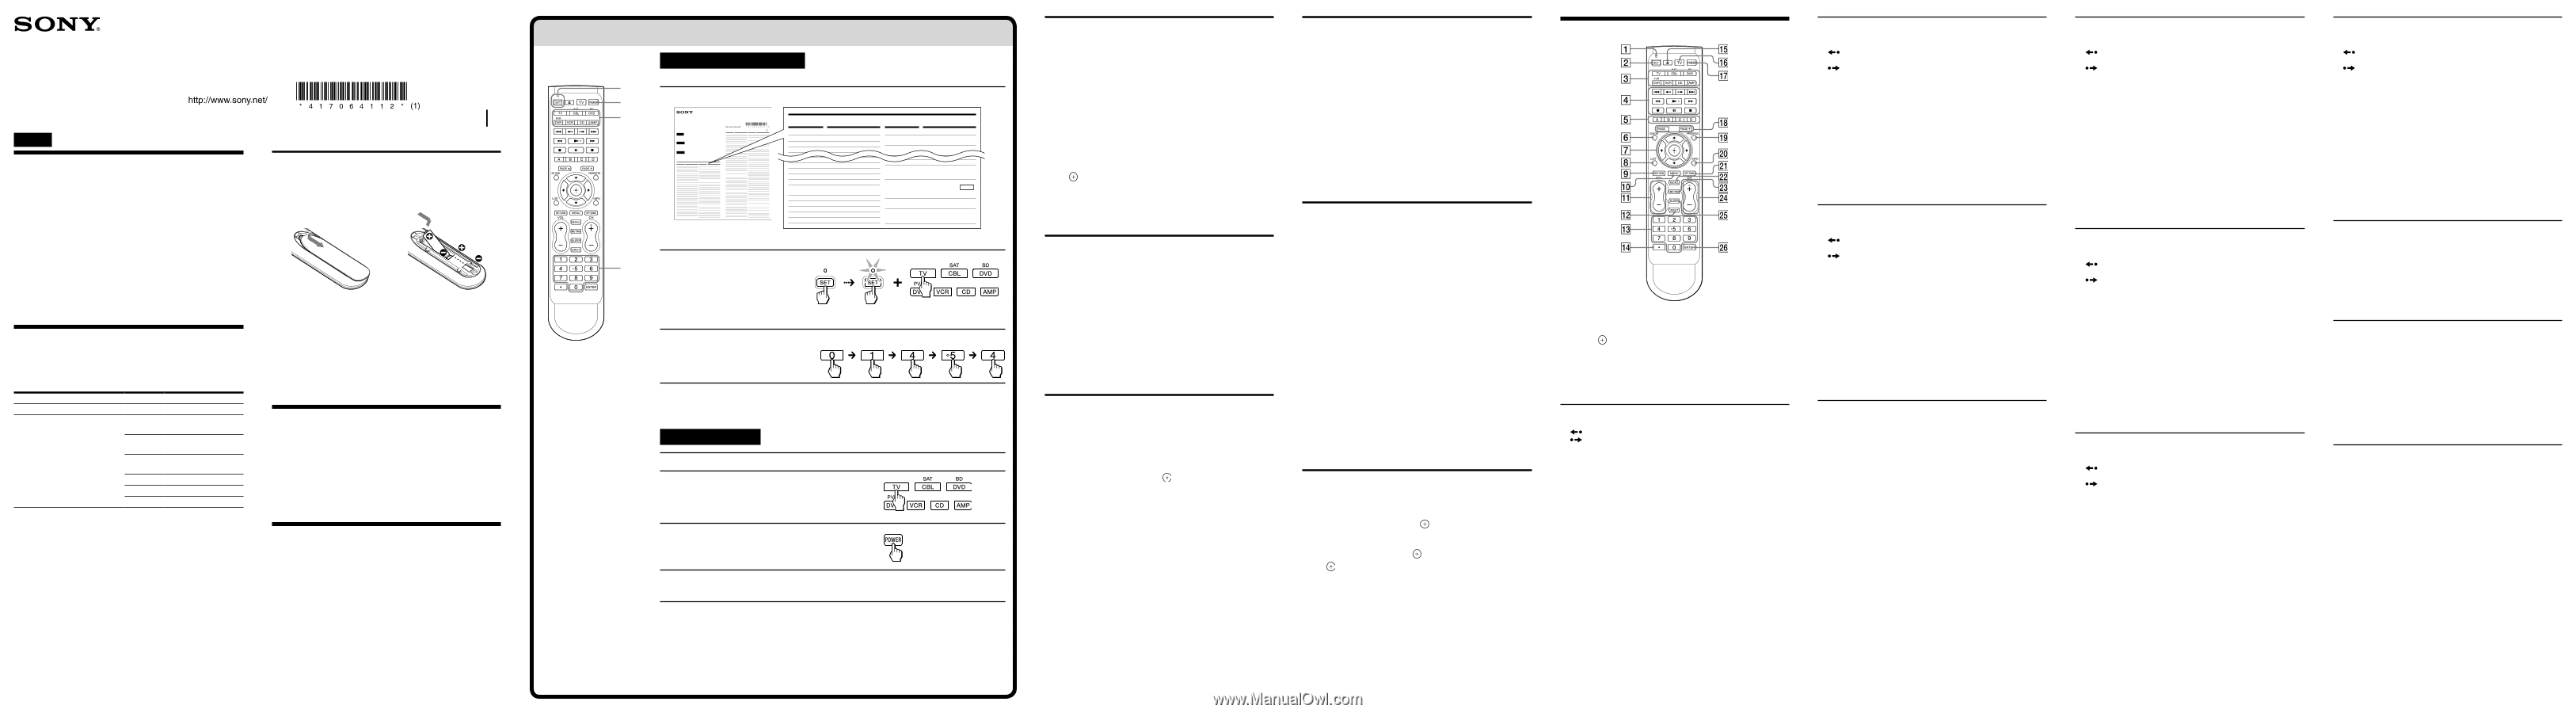
Setting Up the RM-VZ320
The RM-VZ320 is preset at the factory to operate Sony brand A/V devices
set to any of the Device Select buttons (see the table below).
To use with non-Sony A/V devices, or Sony devices that are not preset at the
factory, set the manufacturer’s code for each device.
Devices
Button
Factory setting*
TV
TV
Sony TV (00810)
TV, IPTV, Cable set top box,
Satellite receiver, Digital-to-analog
converter, DVD player, DVD
recorder, Blu-ray Disc/HD-DVD
player, DVR (digital video
recorder), PVR (personal video
recorder), VCR, Video accessory,
CD player, Cassette deck, DVD
Home Theater, Amplifier, Receiver
CBL (SAT)
Cable set top box (non-
Sony) (51376)
DVD (BD)
Sony DVD player
(11033)
DVR (PVR)
Sony digital video
recorder (22676)
VCR
Sony VCR (60032)
CD
Sony CD player (70000)
AMP
Sony receiver (82586)
*
The five-digit code is the preset manufacturer’s code.
Note
Only a TV can be assigned to the
TV
Device Select button. You can assign any device to
the other Device Select buttons.
Installing the batteries
Slide open the battery compartment and insert two size AA (R6) dry
batteries (not supplied).
Insert the batteries (negative end first) into the battery compartment as
shown below.
1
2
Battery life
Under normal conditions, size AA (LR6) alkaline batteries will last up to one
year. If the RM-VZ320 does not operate properly, the batteries might be
drained. Replace both batteries with new ones.
Notes
Replace the batteries within 2 minutes after removing them, and do not press any
button when replacing the batteries. Otherwise, your code settings may be cleared.
Do not use an old battery with a new one, or mix different types of batteries together.
If the electrolyte inside the battery should leak, wipe the contaminated area of the
battery compartment with a cloth and replace the old batteries with new ones. To
prevent electrolyte from leaking, remove the batteries when you plan not to use the
RM-VZ320 for a long period of time.
Specifications
Operating distance
Approx. 11 m (36 ft) (varies depending on devices of
different manufacturers)
Power requirements
Two size AA (R6) dry batteries (not supplied)
Battery life
Approx. 1 year when using size AA (LR6) alkaline batteries
(varies depending on frequency of button use - up to approx.
300 times per day.)
Dimensions
Approx. 52 × 236 × 26 mm (2
1
/
8
× 9
3
/
8
× 1
1
/
16
in.)
(w/h/d)
Mass
Approx. 120 g (4.2 oz) (not including batteries)
Design and specifications are subject to change without notice.
Troubleshooting
If you have problems setting up or using the RM-VZ320:
Carefully perform the setup procedure of “Startup Guide.” If the RM-VZ320 does not
work, try repeating the setup procedure using another manufacturer’s code (if listed
for your device). If you still cannot operate the RM-VZ320, try the Search function
(see “Searching for the correct code”).
Aim the RM-VZ320 directly at the device.
Remove any obstacles in the path between the RM-VZ320 and the device.
Make sure you have pressed the correct Device Select button.
Check that the device has infrared remote capability. For example, if your device did
not come with a remote control, it probably is not capable of being controlled by the
RM-VZ320.
The batteries are weak, or not inserted correctly. Replace them with new ones or insert
them correctly.
For the customers in the U.S.A.
Customer Support Information
After you have read through this manual, if you still cannot get the RM-VZ320 to work
properly, call the Sony Customer Support Helpline at
1-800-822-2217.
Startup Guide
This guide shows you how to set up and use the RM-VZ320 to operate your devices.
If your Sony device has already been preset, see “Operate the device.”
Set the manufacturer’s code
Example: To set up a Philips TV
1
Find the manufacturer’s code in the supplied “Manufacturer’s Code List.”
4-170-685-
12
(1)
RM-VZ320
©2010
Sony Corporation
Printed in China
English
The following tables show brand names (
Brand
) and their corresponding
code numbers (
Code No.
).
To set the manufacturer’s code, refer to the Operating Instructions.
Français
Le tableau ci-dessous indique des marques (
Brand
) et les codes
correspondants (
Code No.
).
Pour régler le code de fabricant, reportez-vous au mode d’emploi.
Español
La siguiente tabla muestra los nombres de las marcas (
Brand
) y el número
de código correspondiente (
Code No.
).
Para establecer el código del fabricante, consulte el Manual de instrucciones.
Manufacturer’s Code List
Liste des codes d’appareil par fabricant
Lista de códigos del fabricante
TV / Téléviseur / TV
Brand
Code No.
Acer
01339
Action
00650
Admiral
00093, 00463
Advent
00761, 00783, 00842
Akai
00672, 00702, 00812, 01675,
02232
Akira
00753, 01733
Alfide
00672
Anam
00250
Anam National
00250, 00650
Anhua
00051
AOC
00093, 00178, 00451, 01365,
01589, 02014, 02087
Apex Digital
00156, 00748, 00765, 00767,
00879, 02397
Astar
01738
Audiovox
00451, 00802, 00846, 00875
Aventura
00171
Baile
00661
Beijing
00661, 00812
Bell & Howell
00154
BenQ
01032, 01315
BGH
00876, 00898
Blue Sky
01254, 02153
BPL
01472, 01476, 01477, 01543
Broksonic
00463
Cailing
00748
Carver
00054
Celebrity
00000
Celera
00765
Changcheng
00051, 00661
Changfeng
00753
Changhong
00156, 00765, 00767, 00783,
01156
Chun Yun
00000, 01687, 01756
Chung Hsin
00053
Cinema
00672
Cineral
00451
Citizen
01671, 01672
Brand
Code No.
Coby
01634, 02306, 02315, 02344,
02345, 02348
Commercial
Solutions
00047, 01447
Conrowa
00145, 00156, 00753, 01156
Continental
02357
Crosley
00000, 00054
Crown
00672
Crown Mustang
00672
Curtis
02352
Curtis Mathes
00047, 00054, 00093, 00145,
00154, 00166, 00451, 00702,
01147, 01347, 01661
Daewoo
00154, 00178, 00451, 00661,
00672, 01661
Dayu
00661
Dell
01080, 01178, 01264, 01863
Denon
00145
Digisonic
01826
Digital Lifestyles
01765
DirecTV
01501
Dumont
00017
Durabrand
00171, 00178, 00463, 01034
Dynex
01463, 01780, 01785, 01810,
02049, 02184
Electroband
00000
Electrograph
01755
Electrohome
00463, 01670, 01672
Elektra
00017, 01661
Element
01687, 02183
Emerson
00017, 00154, 00171, 00178,
00451, 00463, 01394, 01661,
01864
Emprex
01422, 01765
Encross
00876
Envision
00813, 01365, 01589, 02014,
02087
ESA
00171, 00812
Fisher
00154
Fortress
00093
Frigidaire
01826
Brand
Code No.
Fujimaro
01498, 01687
Fujimaru
01687
Fujitsu
00683, 00809, 00853
Funai
00000, 00171, 01271
Furi
00145
Gateway
01755, 01756
GE
00047, 00051, 00178, 00451,
01347, 01447, 01454, 02359
GFM
00171
Gibralter
00017
Gibson
01826
Go Video
00886
GoldStar
00154, 00178
Gradiente
00053
Grundig
00672, 00683
Haier
01034, 01748, 01749, 01753,
02309, 02449
Hallmark
00178
Hankook
00178
Hanns.G
01783
Hannspree
01348, 01745, 01783, 01826
Harman/Kardon
00054
Havermy
00093
Helios
00865
Hello Kitty
00451
Heran
01826
Herosonic
01826
Hewlett Packard
01494, 01502, 01642
Hisense
00145, 00156, 00748, 00753,
01156, 01314, 02098, 02183,
02355, 02419
Hitachi
00145, 00156, 00178, 01145,
01156, 01256, 01643, 02215,
02431, 02433
Hongmei
00093
HP
01494, 01502, 01642
Huafa
00145
Huari
00145
Humax
01501
Huodateji
00051
iLo
01684
Imperial Crown
00661
Infinity
00054
Insignia
00171, 01204, 01423, 01517,
01564, 01710, 01780, 01892,
02002, 02049, 02088, 02417
Inteq
00017
IRT
00451, 01661
JBL
00054
JCB
00000
Jean
00051, 00156
Jensen
00761
Jiahua
00051
Jinfeng
00051
Jinxing
00054, 00145, 00156
JVC
00053, 00463, 00650, 00731,
01253, 01601, 01774, 02271
Kangli
00661
KDS
01498, 01687
Ken Brown
01321
Kioto
00054
KLH
00765, 00767
Kolin
00053, 00150, 01240, 01331,
01610, 01755
Konka
00748
Brand
Code No.
Kreisen
00876
Kunlun
00051, 00661
LG
00017, 00178, 00856, 01178,
01265, 01423, 01768, 02358,
02424
LXI
00047, 00054, 00154, 00156,
00178
M&S
00054
MAG
01498, 01687
Magnavox
00051, 00054, 00802, 01198,
01254, 01365, 01454, 01856,
01866, 02372
Marantz
00054, 00704, 01454
Mastro
00053
Matsushita
00250, 00650
Maxent
01755
Megatron
00145, 00178
Memorex
00150, 00154, 00178, 00463,
01670, 01892
MGA
00150, 00178
Midland
00017, 00047, 00051
Mitsubishi
00093, 00150, 00154, 00178,
00250, 00836, 01250
Motorola
00093
Mudan
00051
NAD
00156, 00178, 00866, 01156
National
00051
NEC
00051, 00053, 00154, 00156,
00178, 00704, 01704, 01797
NetTV
01755
Newave
00093, 00178
NewSonic
01826
Nexus Electronics
02183
Nikko
00178
Nimbro
02104
Noblex
00154
Norcent
00748, 00824, 01365, 01589,
02110
NuVision
01657, 02158
Olevia
01144, 01240, 01331, 01610
Onida
00053, 01253, 02396
Optimus
00154, 00166, 00250, 00650
Optoma
01348
Optonica
00093
Orion
00463, 01463
Panasonic
00051, 00054, 00250, 00650,
01271, 01457, 01480
Panda
00051
PARK
02104
Penney
00047, 00051, 00156, 00178,
01347
Petters
01523
Philco
00054, 00145, 00171, 00178,
00463, 01029, 01271, 01394,
01661
Philips
00000, 00051, 00054, 00178,
00605, 00639, 00690, 01454,
01744, 01806, 01856, 01866,
01867, 02372, 02374
Pioneer
00166, 00679, 00866, 01260,
01457
Polaroid
00765, 00865, 01276, 01314,
01498, 01523, 01687, 01766,
02002, 02120, 02121, 02425
Polyvision
00889, 01144
Portland
00451, 01661
Prima
00761, 00783, 01785
TV / Téléviseur / TV
Brand
Code No.
Acer
01339
Action
00650
Admiral
00093, 00463
Advent
00761, 00783, 00842
Brand
Code No.
Coby
01634, 02306, 02315, 02344,
02345, 02348
Commercial
Solutions
00047, 01447
Conrowa
00145, 00156, 00753, 01156
JCB
00000
Jean
00051, 00156
Jensen
00761
Jiahua
00051
Jinfeng
00051
Jinxing
00054, 00145, 00156
JVC
00053, 00463, 00650, 00731,
01253, 01601, 01774, 02271
Kangli
00661
KDS
01498, 01687
Ken Brown
01321
Kioto
00054
KLH
00765, 00767
Kolin
00053, 00150, 01240, 01331,
01347
Petters
01523
Philco
00054, 00145, 00171, 00178,
00463, 01029, 01271, 01394,
01661
Philips
00000, 00051, 00054, 00178,
00605, 00639, 00690, 01454,
01744, 01806, 01856, 01866,
01867, 02372, 02374
Pioneer
00166, 00679, 00866, 01260,
01457
Polaroid
00765, 00865, 01276, 01314,
01498, 01523, 01687, 01766,
02002, 02120, 02121, 02425
Polyvision
00889, 01144
If your device is not listed, try the Search function (see “Searching for the correct code”).
2
Press and hold
SET
for more than 3 seconds.
The
SET
indicator lights up.
While keeping
SET
held down, press
the desired
Device Select button
,
then release both buttons.
3
Enter the manufacturer’s code (01454).
The
SET
indicator flashes three times and
turns off.
Operate the device
1
Aim the RM-VZ320 directly at the device.
2
Press the
Device Select button
for the
device you want to operate.
3
Press
POWER
to turn on the device.
4
Press buttons on the RM-VZ320 to check that they function.
See “Remote Button Descriptions” for the functions of buttons for each device.
If the RM-VZ320 does not seem to be working…
Check that you have set the correct manufacturer’s code.
Try repeating the setup procedure using another manufacturer’s code (if listed for your device).
If you still cannot operate the RM-VZ320 after trying all the listed codes, try the Search function (see “Searching
for the correct code”).
Searching for the correct code
You can set the manufacturer’s code using the Search function.
1
Power on the device with its power switch.
2
Aim the RM-VZ320 at the device you want to set.
3
Press and hold
SET
for more than 3 seconds.
The
SET
indicator lights up.
While keeping
SET
held down, press the desired Device Select button,
then release both buttons.
4
Enter
9 - 2 - 2
using the number buttons.
The
SET
indicator flashes three times.
5
Press and hold
to start searching.
When the device turns off, release the button.
If you overshoot the required code, you can search for the next or previous
code using the
or
button.
6
Press
.
The
SET
indicator flashes three times and turns off.
7
Check if the code number works correctly (see “Remote Button
Descriptions”).
If you still cannot operate the device, repeat steps to search for another
code that works for most functions of your device.
Checking the manufacturer’s code you have set
1
Press and hold
SET
for more than 3 seconds.
The
SET
indicator lights up.
While keeping
SET
held down, press the desired Device Select button,
then release both buttons.
2
Enter
9 - 3 - 3
using the number buttons.
The
SET
indicator flashes three times.
3
Press
.
4
When the
SET
indicator starts flashing, count the number of flashes.
Short flash(es) indicate which digit (first, second, etc.), followed by long
flash(es) to indicate the digit number (i.e., 2 long flashes represent the
number 2). “0” is indicated by rapid flashing.
Determine the 5-digit code number this way. To recheck, press
.
5
Press
SET
to finish.
Clearing the automatic power-on control (Sony
devices only)
The Device Select buttons are preset to automatically turn on the device
when pressed.
To cancel the function:
1
Press and hold
SET
for more than 3 seconds.
The
SET
indicator lights up.
While keeping
SET
held down, press
, then release both buttons.
2
Enter
9 - 7 - 7
using the number buttons.
The
SET
indicator flashes three times.
3
Press the desired Device Select button.
The
SET
indicator flashes three times and turns off.
To set the function again, perform the same procedure above.
Adjusting the volume
Press
VOL
+/– to control the volume. Press
MUTING
to mute the sound.
When a TV or other video device is selected, the TV’s volume is controlled.
When an audio device is selected, the amplifier’s volume is controlled. When
a DVD Home Theater is selected, its volume can be independently
controlled.
To change the factory preset of the volume control
Example: When you want to hear the sound of your DVD player (set to the
DVD
button) via the connected amplifier (set to the
AMP
button)
1
Press and hold
SET
for more than 3 seconds.
The
SET
indicator lights up.
When keeping
SET
held down, press
DVD
, then release both buttons.
2
Enter
9
-
5
-
5
using the number buttons.
The
SET
indicator flashes three times.
3
Press
AMP
.
The
SET
indicator flashes three times and turns off.
To reset the setting, press
DVD
again in Step 3.
Assigning a channel to each number button
Channel selecting procedures can be programmed to the
number buttons
(
0
–
9
) for each device mode, which allows you to select any channel
number directly with a single press of a number button.
Example: To assign a channel to number button
9
in
CBL
mode
1
Press and hold
SET
for more than 3 seconds.
The
SET
indicator lights up.
When keeping
SET
held down, press
CBL
, then release both buttons.
2
Enter
9
-
7
-
1
using the number buttons.
The
SET
indicator flashes three times.
3
Press number button
9
.
The
SET
indicator flashes three times.
4
Enter the channel number using the number buttons,
(dot), or
ENTER
.
5
Press
SET
to complete the programming.
The
SET
indicator flashes three times and turns off.
To cancel the process, press and hold
SET
for more than 3 seconds.
To clear the program, press and hold the programmed number button for
more than 3 seconds in Step 3. The
SET
indicator flashes three times and
turns off.
Notes
If you press four buttons in Step 4, the setting mode ends and the channel will be
programmed.
If another channel has already been set on a button, it will be overwritten with the
new one.
Once a number button has been programmed, it cannot function as regular number
button.
Restoring the factory settings
You can clear all the settings and reset the RM-VZ320 to its factory settings.
1
Press and hold
SET
for more than 3 seconds.
The
SET
indicator lights up.
While keeping
SET
held down, press
, then release both buttons.
2
Enter
9 - 0 - 0
using the number buttons.
The
SET
indicator flashes three times.
To cancel, press any button except
.
3
Press
.
The
SET
indicator flashes three times and turns off.
Notes on using the RM-VZ320
The RM-VZ320 will not perform functions that the device is not designed for. For
example, if your TV does not have the muting function,
MUTING
on the RM-VZ320
will not function with your TV.
The function of the buttons varies depending on settings/operating modes. The table
of “Remote Button Descriptions” shows how the RM-VZ320 generally operates for
each device in the preset mode.
If your cable set top box can control volume, be sure to set its volume to a moderate
level. If the volume on the cable set top box is turned down completely, you will not be
able to adjust your TV’s volume with the RM-VZ320.
Notes
If the setting is incomplete,
the
SET
indicator flashes once
and the indicators turn off.
Start again from the
beginning.
If no operations are
performed for 10 seconds
while setting, the setting will
be canceled, and must be
restarted.
To cancel the process, press
SET
any time. The
SET
indicator turns off.
SET
POWER
Device
Select
buttons
Number
buttons
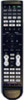
Remote Button Descriptions
General
SET
: Press to set up the RM-VZ320. The indicator lights or flashes while
setting.
Device Select buttons
: Press to select the device to operate.
/
/
/
/
: Moves the cursor to select a menu item/enters the selected item.
VOL +/–
: Turns the volume up/down.
TV
: Turns the TV on and off (does not work for a CD player or cassette deck).
POWER
: Turns the selected device on and off.
MUTING
: Mutes the volume. Press again to turn muting off.
SLEEP
: Enables the Sleep function (when available).
The number
5
,
CH+
, and
buttons each have a tactile dot for ease of use.
TV
: VIDEO 1 input
: VIDEO 2 input
: HDMI input
: RGB input
: (PIP INPUT) Changes the
input mode of the “window”
picture.
: (PIP) Turns the “window”
picture on and off.
: (PIP MOVE) Moves the
location of the “window” picture.
: (PIP STILL) Freezes the
“window” picture.
: (PIP SWAP) Switches between
“main” and “window” picture.
A
: Red button
B
: Green button
C
: Yellow button
D
: Blue button
GUIDE
: Displays the program
guide (EPG).
LIST
: (CAPTION) Displays closed
captioning.
RETURN
: Returns to the previous
display/exits the menu.
MENU
: Calls up the menu display.
INPUT
: Changes the input mode.
1 – 9, 0, ENTER
,
(dot):
Changes the channel. For example,
to change to channel 5, press 0 and
5 (or, press 5 and ENTER).
PAGE +/–
: (PIP CH +/–) Changes
the channel up/down in the
“window” picture.
FAVORITES
: Enables the Favorite
function.
INFO
: Displays program
information.
OPTIONS
: Displays the options
menu.
RECALL
: Selects the channel
previously selected.
CH +/–
: Switches the channel up/
down.
Cable set top box/IPTV
: Proceeds to the previous
location.
: Briefly replays the scene
(Flash –).
: Briefly fast forwards the
scene (Flash +).
: Proceeds to the next location.
: Fast reverses.
: Plays.
: Fast forwards.
: Records.
: Pauses.
: Stops.
A, B, C
buttons
D
: (Live TV) Displays Master
Guide.
GUIDE
: Displays the program
guide (EPG).
LIST
: Displays the title of recorded
program.
RETURN
: Returns to the previous
display/exits the menu.
MENU
: Calls up the menu display.
INPUT
: Changes the input mode.
1 – 9, 0, ENTER
,
(dot):
Changes the channel. For example,
to change to channel 5, press 0 and
5 (or, press 5 and ENTER).
PAGE +/–
: Page up/down
FAVORITES
: Enables the Favorite
function.
INFO
: Displays program
information.
OPTIONS
: Displays the options
menu.
RECALL
: Switches between the
current and previous channel.
CH +/–
: Switches the channel up/
down.
Satellite receiver
: Proceeds to the previous
location.
: Briefly replays the scene
(Flash –).
: Briefly fast forwards the
scene (Flash +).
: Proceeds to the next location.
: Fast reverses.
: Plays.
: Fast forwards.
: Records.
: Pauses.
: Stops.
A
: Red button
B
: Green button
C
: Yellow button
D
: Blue button
GUIDE
: Displays the program
guide (EPG).
LIST
: Displays the title of recorded
program/PVR menu.
RETURN
: Returns to the previous
display/exits the menu.
MENU
: Calls up the menu display.
INPUT
: (TV/SAT) Switches the
output between SAT and TV.
1 – 9, 0, ENTER
,
(dot):
Changes the channel. For example,
to change to channel 5, press 0 and
5 (or, press 5 and ENTER).
PAGE +/–
: Page up/down
FAVORITES
: Enables the Favorite
function.
INFO
: Displays program
information.
OPTIONS
: Displays the Satellite
dish menu/Station Index.
RECALL
: Tunes to the last tuned
station.
CH +/–
: Switches the channel up/
down.
VCR
: Rewinds.
: Plays.
: Fast forwards.
: Records.
: Pauses.
: Stops.
INPUT
: Changes the input mode.
1 – 9, 0
: Number buttons
: Ejects a tape.
INFO
: (DISPLAY) Displays the
playback information.
OPTIONS
: (ANT/SW) Switches
the antenna output.
RECALL
: (DRIVE SELECT) Selects
the deck.
CH +/–
: Switches the channel up/
down.
ENTER
: Enters the selected item.
DVD player/recorder
: Skips to the previous
chapter/track.
: Briefly replays the scene
(Flash –).
: Briefly fast forwards the
scene (Flash +).
: Skips to the next chapter/
track.
: Fast reverses.
: Plays.
: Fast forwards.
: Records (for DVD recorder).
: Pauses.
: Stops.
A
: (SET UP) Calls up the system/
setup menu.
B
: (SUBTITLE) Switches the
subtitle.
C
: (AUDIO) Changes the sound.
D
: (CLEAR) Clears the setting.
GUIDE
: Displays the program
guide (EPG).
LIST
: Displays the Title List.
RETURN
: Returns to the previous
display/exits the menu.
MENU
: Displays the DVD menu.
INPUT
: Changes the input mode.
1 – 9, 0
: Number buttons
(dot): (+10) Selects numbers 10
and above.
: Opens/closes the disc tray.
PAGE +
: (DVD) Selects the DVD
drive.
PAGE –
: (HDD) Selects the
internal HDD (hard disk drive).
FAVORITES
: (TOP MENU)
Displays the Top Menu.
INFO
: (DISPLAY) Displays the
playback information.
OPTIONS
: Displays the options
menu.
RECALL
: (DRIVE SELECT)
Switches between HDD and DVD.
CH +/–
: Switches the channel up/
down (for DVD recorder).
ENTER
: Enters the selected item.
Blu-ray Disc/HD-DVD player
: Skips to the previous
chapter/track.
: Briefly replays the scene
(Flash –).
: Briefly fast forwards the
scene (Flash +).
: Skips to the next chapter/
track.
: Fast reverses.
: Plays.
: Fast forwards.
: Records (for BD recorder).
: Pauses.
: Stops.
A
: (SET UP) Calls up the system/
setup menu.
B
: (SUBTITLE) Switches the
subtitle.
C
: (AUDIO) Changes the sound.
D
: (CLEAR) Clears the setting.
GUIDE
: Displays the program
guide (EPG).
RETURN
: Returns to the previous
display/exits the menu.
MENU
: Displays the Pop-up Menu/
Disc Menu.
INPUT
: Changes the input mode.
1 – 9, 0
: Number buttons
(dot): (+10) Selects numbers 10
and above.
: Opens/closes the disc tray.
PAGE +
: (BD) Selects the BD drive.
PAGE –
: (HDD) Selects the
internal HDD (hard disk drive).
FAVORITES
: (TOP MENU)
Displays the Top Menu.
INFO
: (DISPLAY) Displays the
playback information.
OPTIONS
: Displays the options
menu.
ENTER
: Enters the selected item.
DVR (digital video recorder)/PVR (personal video recorder)
: Proceeds to the previous
location.
: Briefly replays the scene
(Flash –).
: Briefly fast forwards the
scene (Flash +).
: Proceeds to the next location.
: Fast reverses.
: Plays.
: Fast forwards.
: Records.
: Pauses.
: Stops.
A
: (REPLAY
*
) Enables the Replay
function for DVR/Replay TV.
B
: (Live TV
*
) Displays Master
Guide.
GUIDE
: Displays the program
guide (EPG).
LIST
: Displays the title of recorded
program.
RETURN
: Returns to the previous
display/exits the menu.
MENU
: Calls up the menu display.
INPUT
: Changes the input mode.
1 – 9, 0
: Number buttons
(dot): (+10) Selects numbers 10
and above.
: Opens/closes the disc tray.
PAGE +/–
: Page up/down,
Thumbs
*
up/down
INFO
: (DISPLAY) Displays the
playback information.
RECALL
: Selects the channel
previously selected.
CH +/–
: Switches the channel up/
down.
ENTER
: Enters the selected item.
*
These buttons correspond to TiVo
service or the Replay service. Refer to
its instruction manual for details.
DVD Home Theater
: Skips to the previous
chapter/track.
: Briefly replays the scene
(Flash –).
: Briefly fast forwards the
scene (Flash +).
: Skips to the next chapter/
track.
: Fast reverses.
: Plays.
: Fast forwards.
: Records.
: Pauses.
: Stops.
A
: (SET UP) Calls up the system/
setup menu.
B
: (SUBTITLE) Switches the
subtitle.
C
: (AUDIO) Changes the sound.
D
: (CLEAR) Clears the setting.
GUIDE
: Displays the program
guide (EPG).
LIST
: Enables the SOUND FIELD
function.
RETURN
: Returns to the previous
display/exits the menu.
MENU
: Displays the DVD menu.
INPUT
: Changes the input mode.
1 – 9, 0
: Number buttons
(dot): (+10) Selects numbers 10
and above.
: Opens/closes the disc tray.
FAVORITES
: (TOP MENU)
Displays the Top Menu.
INFO
: (DISPLAY) Displays the
playback information.
OPTIONS
: Displays the amplifier
menu.
RECALL
: (BAND) Selects FM/AM.
CH +/–
: Presets or tunes frequency
up/down.
ENTER
: Enters the selected item.
CD player
: Selects the previous track.
: Selects the next track.
: Fast reverses.
: Plays.
: Fast forwards.
: Records.
: Pauses.
: Stops.
INPUT
: (DISC SKIP) Selects the
next disc.
1 – 9, 0
: Selects the track number.
0 selects track 10.
(dot): (+10) Selects numbers 10
and above.
: Opens/closes the disc tray.
INFO
: (DISPLAY) Switches the
display on and off.
Cassette deck
: Rewinds.
: Plays.
: Fast forwards.
: Records.
: Pauses.
: Stops.
A
:
Reverses.
D
:
Reverses
*
.
:
Plays
*
.
:
Pauses
*
.
:
Fast forwards
*
.
:
Rewinds
*
.
LIST
:
Records
*
.
INPUT
: (DECK A/B) Switches
between deck A and deck B (dual
cassette deck only).
INFO
:
Stops
*
.
*
Activated when using a dual cassette
deck (for deck A of Sony device).
Amplifier/receiver
: Fast reverses.
: Plays.
: Fast forwards.
: Records.
: Pauses.
: Stops.
INPUT
: Changes the input mode
cyclically.
1
: VIDEO 1 input
2
: VIDEO 2 input
3
: AUX input
4
: TUNER input
5
: CD input
6
: TAPE input
7
: MD/DAT input
8
: TV input
9
: PHONO input
0
: DVD input
RECALL
: (BAND) Selects FM/AM.
CH +/–
: Presets or tunes frequency
up/down.
The
SET
indicator
lights up.