Sony STR-DA3600ES Operating Instructions (Large File - 16.4 MB)
Sony STR-DA3600ES - Multi Channel Av Receiver Manual
 |
View all Sony STR-DA3600ES manuals
Add to My Manuals
Save this manual to your list of manuals |
Sony STR-DA3600ES manual content summary:
- Sony STR-DA3600ES | Operating Instructions (Large File - 16.4 MB) - Page 1
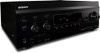
Printed in Malaysia 4-184-698-12(1) Multi Channel AV Receiver Operating Instructions STR-DA3600ES ©2010 Sony Corporation - Sony STR-DA3600ES | Operating Instructions (Large File - 16.4 MB) - Page 2
electric shock to persons. This symbol is intended to alert the user to the presence of important operating and maintenance (servicing) instructions in the literature accompanying the appliance. For customers in the United States Owner's Record The model and serial numbers are located on the rear - Sony STR-DA3600ES | Operating Instructions (Large File - 16.4 MB) - Page 3
speakers. The following FCC statement applies only to the version of this model manufactured for sale in the U.S.A. Other versions may not comply with FCC technical regulations. NOTE: This equipment has been tested and found to comply with the limits for a Class B digital device, pursuant to Part 15 - Sony STR-DA3600ES | Operating Instructions (Large File - 16.4 MB) - Page 4
disposal service or the shop where you purchased the product. About This Manual • The instructions in this manual are for model STR-DA3600ES (the receiver). -HD Master Audio, and the DTS logos are trademarks of DTS, Inc. Product includes software. © DTS, Inc. All Rights Reserved. This receiver - Sony STR-DA3600ES | Operating Instructions (Large File - 16.4 MB) - Page 5
trademarks are of their respective holders. In this manual, ™ and ® marks are not specified. The Sony Corporation is under license. Other trademarks and trade names are those of their respective owners. DLNA and DLNA CERTIFIED are trademarks and/ or service marks of the Digital Living Network - Sony STR-DA3600ES | Operating Instructions (Large File - 16.4 MB) - Page 6
11: Configuring the network settings of the receiver 52 12: Preparing a computer to use as a server 52 Guide to on-screen display operation .........54 Selecting a channel of the satellite radio ... 67 Presetting satellite radio channels 68 Restricting access to specific channels (Parental Lock - Sony STR-DA3600ES | Operating Instructions (Large File - 16.4 MB) - Page 7
remote's memory 146 Additional Information Precautions 147 Troubleshooting 148 Specifications 155 Index 159 For Installation Purposes: Operating Each Component Using an External Control Device (Quick Click) Operating components or lighting connected to the receiver using an external control - Sony STR-DA3600ES | Operating Instructions (Large File - 16.4 MB) - Page 8
zone 2/zone 3 is turned off. If "Control for HDMI" or "Network Standby" is set to "ON," "A.STNDBY" appears in the display window of the receiver while the receiver radio (SIRIUS) (USA/Canadian model only). D Remote sensor Receives signals from remote commander. E Display window (page 10) F MULTI - Sony STR-DA3600ES | Operating Instructions (Large File - 16.4 MB) - Page 9
the display. O 2CH/A.DIRECT, A.F.D., MOVIE/ HD-D.C.S., MUSIC (page 72, 73, 74, 76) P INPUT SELECTOR Turn to select the input source to play back. To select the input source for zone 2 or zone 3, press ZONE SELECT (8) to select zone 2 or zone 3 first ("2.input name" or "3.input name" appears on the - Sony STR-DA3600ES | Operating Instructions (Large File - 16.4 MB) - Page 10
the OPTICAL jack. MULTI The multi-channel input is selected. ARC (page 98) TV input is selected and the Audio Return Channel (ARC) signals are detected. D Dolby Digital Surround indicators Lights up one of the respective indicators when the receiver is decoding the corresponding Dolby Digital format - Sony STR-DA3600ES | Operating Instructions (Large File - 16.4 MB) - Page 11
disc, be sure that you have made digital connections and that INPUT MODE is not set to "Analog." E ;TrueHD Lights up when the receiver is decoding Dolby TrueHD. F ZONE 2 3 Lights up while operation in zone 2/zone 3 is being enabled. G Playback channel indicators The letters (L, C, R, etc.) indicate - Sony STR-DA3600ES | Operating Instructions (Large File - 16.4 MB) - Page 12
Lights up constantly with the one of the following indicators. MSTR DTS-HD Master Audio HI RES DTS-HD High Resolution Audio R DTS(-ES) indicators Light up when DTS or DTS-ES signals are input. DTS Lights up when the receiver is decoding DTS signals. Either 96/24 or NEO:6 also lights up depending on - Sony STR-DA3600ES | Operating Instructions (Large File - 16.4 MB) - Page 13
jack (page 39) SIRIUS jack (USA/ Canadian model only) (page 66) C RS232C port D LAN ports (switching hubs) (page 41) E Control jacks for Sony equipment and other external components IR REMOTE IN/OUT jacks (page 38, 90) TRIGGER OUT jacks (page 115) Connect to interlock on/off of the power supply of - Sony STR-DA3600ES | Operating Instructions (Large File - 16.4 MB) - Page 14
IN/OUT* jacks AUDIO OUT jacks VIDEO OUT jack (page 90) G AUDIO INPUT/OUTPUT section AUDIO IN/OUT jacks (page 37) MULTI CHANNEL INPUT jacks (page 36) Remote commander You can use the supplied remote to operate the receiver and to control the Sony audio/video components that the remote is assigned to - Sony STR-DA3600ES | Operating Instructions (Large File - 16.4 MB) - Page 15
to select the input source to play back. I MASTER VOLUME +/- (page 57) J MUTING (page 57) K RETURN/EXIT O (page 54) L DISPLAY Press repeatedly to select information displayed on the display. M SLEEP (page 101) Multifunction remote commander (RM-AAL035/RM-AAL036) The RM-AAL035 remote is supplied - Sony STR-DA3600ES | Operating Instructions (Large File - 16.4 MB) - Page 16
receiver operation for main zone. E Input buttons Press one of the buttons to select the component you want to use. When you press any of the input buttons, the receiver turns on. The buttons are factory assigned to control Sony components (page 57). You can program the remote to control non-Sony - Sony STR-DA3600ES | Operating Instructions (Large File - 16.4 MB) - Page 17
the remote button input mode when the same components are connected to both digital and analog jacks. wj DIMMER Press repeatedly to adjust brightness of the display window. wk SLEEP (page 101) Press to activate the sleep timer function and the duration which the receiver or onscreen guide of the - Sony STR-DA3600ES | Operating Instructions (Large File - 16.4 MB) - Page 18
MACRO 1 or MACRO 2 to set up the macro function. 1)See the table on page 138 for information on the buttons that you can use to control each component. 2)The tactile dot is attached to these buttons (VIDEO 2/5, N, PRESET +/TV CH + (PROG + for European model), c (European model only)). Use as a mark - Sony STR-DA3600ES | Operating Instructions (Large File - 16.4 MB) - Page 19
Audio Output Format" is set to "Bitstream" (with system software version 3.15). For details, refer to the operating instructions supplied with the connected components. v Preparing the receiver and the remote See "8: Preparing the receiver and the remote speaker connection using "Test Tone" (page 111 - Sony STR-DA3600ES | Operating Instructions (Large File - 16.4 MB) - Page 20
1: Installing speakers This receiver allows you to use a 7.1 channel system (7 speakers and one subwoofer). using surround back speakers You can enjoy high fidelity reproduction of DVD or Blu-ray Disc software recorded sound in 6.1 channel or 7.1 channel format if you connect one additional surround - Sony STR-DA3600ES | Operating Instructions (Large File - 16.4 MB) - Page 21
Getting Started Tips • The angle A should be the same. • When you connect a 6.1 channel speaker system, place the surround back speaker behind the seating position. • Since the subwoofer does not emit highly directional signals, you can place it wherever you want. continued 21GB - Sony STR-DA3600ES | Operating Instructions (Large File - 16.4 MB) - Page 22
A B FRONT B terminals 1) B B B A Monaural audio cord (not supplied) B Speaker cords (not supplied) AFront one surround back speaker, connect it to the SURROUND BACK/FRONT HIGH/ZONE 2 L terminals. 3) When you connect a subwoofer with an input signal to a subwoofer, then sound may not be output. - Sony STR-DA3600ES | Operating Instructions (Large File - 16.4 MB) - Page 23
the front speakers to another amplifier, connect that amplifier to the PRE OUT FRONT L and R jacks. ZONE 2 connection You can assign the SURROUND BACK/ FRONT HIGH/ZONE 2 terminals F and G to the speakers of the zone 2. Set "Sur Back Assign" to "ZONE2" in the Speaker settings menu. See "Using Multi - Sony STR-DA3600ES | Operating Instructions (Large File - 16.4 MB) - Page 24
monitor You can watch the selected input image when you connect the HDMI OUT or MONITOR OUT jacks to a TV. You can operate this receiver using a GUI (Graphical User Interface). Audio signals TV monitor with an HDMI jack Video signals ** A * E A B C D Audio signals Video signals or or - Sony STR-DA3600ES | Operating Instructions (Large File - 16.4 MB) - Page 25
HDMI OUT jack when the image is converted. • This receiver supports High Bitrate Audio (DTS-HD Master Audio, Dolby TrueHD), Deep Color (Deep Colour), x.v.Color (x.v.Colour) and 3D transmission. • The HDMI jacks of this receiver support the Control for HDMI function. continued 25GB Getting Started - Sony STR-DA3600ES | Operating Instructions (Large File - 16.4 MB) - Page 26
tuner/Cable box, Camcorder, etc. Audio/video signals A * A HDMI cable (not supplied) We recommend that you use a Sony HDMI cable. * You can connect any components with HDMI output jacks to the HDMI IN jacks of the receiver. However, HDMI IN 4 is an input which takes sound quality into account - Sony STR-DA3600ES | Operating Instructions (Large File - 16.4 MB) - Page 27
Bitrate Audio (DTS-HD Master Audio, Dolby TrueHD), and multichannel Linear PCM with an HDMI connection only. • To enjoy 3D images, connect 3D-compatible TV and video components (Blu-ray Disc Player, Blu-ray Disc recorder, PlayStation 3, etc.) to the receiver using High Speed HDMI cables, put on 3D - Sony STR-DA3600ES | Operating Instructions (Large File - 16.4 MB) - Page 28
(not supplied) B Coaxial digital cord (not supplied) C Audio cord (not supplied) D Video cord (not supplied) E Component video cord (not supplied) F Monaural audio cord (not supplied) * When you connect a component equipped with an OPTICAL jack, set "Input Assign" in the Input menu (page 99). 28GB - Sony STR-DA3600ES | Operating Instructions (Large File - 16.4 MB) - Page 29
Getting Started Notes • To output multi-channel digital audio, set the digital audio output setting on the DVD player, Blu-ray Disc Player. Refer to the operating instructions supplied with the DVD player, Blu-ray Disc Player. • DVD player and Blu-ray Disc Player may not have the SURROUND BACK - Sony STR-DA3600ES | Operating Instructions (Large File - 16.4 MB) - Page 30
or or A B * C D A Optical digital cord (not supplied) B Audio cord (not supplied) C Video cord (not supplied) D Component video cord (not supplied) * When you connect a component equipped with an OPTICAL jack, set "Input Assign" in the Input menu (page 99). Note Before connecting cords, make - Sony STR-DA3600ES | Operating Instructions (Large File - 16.4 MB) - Page 31
Getting Started To connect a DVD recorder, VCR Audio signals DVD recorder, VCR Video signals A B A Audio cord (not supplied) B Video cord (not supplied) continued 31GB - Sony STR-DA3600ES | Operating Instructions (Large File - 16.4 MB) - Page 32
Audio/video cord (not supplied) Note Before connecting cords, make sure to disconnect the AC power cord (mains lead). Function for conversion of video signals This receiver converting function, see "Video settings" (page 118). INPUT jack OUTPUT jack HDMI IN 1/2/3/4* VIDEO IN COMPONENT VIDEO - Sony STR-DA3600ES | Operating Instructions (Large File - 16.4 MB) - Page 33
connected. To display Closed Caption Set "Resolution" to "DIRECT" in the Video settings menu when receiving a signal that supports Closed Captions. Use the same kind of cords for the input/output signals. To connect a recording component When recording, connect the recording component to the VIDEO - Sony STR-DA3600ES | Operating Instructions (Large File - 16.4 MB) - Page 34
components Connecting components with digital audio input/output jacks The following illustration shows how to connect a Super Audio CD player, CD player, an MD deck and DIGITAL MEDIA PORT adapter. Super Audio CD player, CD player MD/Tape deck DIGITAL MEDIA PORT adapter A B A Coaxial digital - Sony STR-DA3600ES | Operating Instructions (Large File - 16.4 MB) - Page 35
CD player connected to only the COAXIAL SA-CD/ CD IN jack on this receiver. When you play a Super Audio CD, connect the player to the MULTI CHANNEL INPUT or SA-CD/CD IN jacks. Refer to the operating instructions supplied with the Super Audio CD player. • You cannot make digital recordings of a Super - Sony STR-DA3600ES | Operating Instructions (Large File - 16.4 MB) - Page 36
components with multi-channel output jacks If your Super Audio CD player is equipped with multi-channel output jacks, you can connect them to the MULTI CHANNEL INPUT jacks of this receiver to enjoy multi-channel sound. Alternatively, the multi-channel input jacks can be used to connect an external - Sony STR-DA3600ES | Operating Instructions (Large File - 16.4 MB) - Page 37
player, CD player, MD deck, tape deck and turntable, etc. MD/Tape deck A A A Turntable Super Audio CD player, CD player A Audio cord (not supplied) Notes • If your turntable has a ground (earth) wire, connect it to the (U) SIGNAL GND terminal. • Before connecting cords, make sure to disconnect - Sony STR-DA3600ES | Operating Instructions (Large File - 16.4 MB) - Page 38
mm jack extension cable (not supplied). After referring to the operating instructions of the components connected to the receiver, make sure to place the IR Blaster just above or below the remote sensor. Remote sensors on Sony Recorders and other products are identified by the symbol. Note Do not - Sony STR-DA3600ES | Operating Instructions (Large File - 16.4 MB) - Page 39
) * The shape of the connector varies depending on the area. Notes • To prevent noise pickup, keep the AM loop antenna (aerial) away from the receiver and other components. • Be sure to fully extend the FM wire antenna (aerial). • After connecting the FM wire antenna (aerial), keep it as horizontal - Sony STR-DA3600ES | Operating Instructions (Large File - 16.4 MB) - Page 40
system environment is required to use the network function of the receiver. A Broadband line connection A Broadband line connection to the Internet is required in order to listen to Rhapsody® or SHOUTcast and to use the software update function of the receiver. Rhapsody is only available in the US - Sony STR-DA3600ES | Operating Instructions (Large File - 16.4 MB) - Page 41
following illustration is a configuration example of a home network with the receiver, a computer. We recommend that you use a wired connection. LAN cable (not supplied) Internet Modem Computer LAN cable (not supplied) Router Notes • A audio or video playback on the computer may occasionally - Sony STR-DA3600ES | Operating Instructions (Large File - 16.4 MB) - Page 42
about 30 seconds for the memory to be cleared completely. Do not turn the receiver off until "CLEARED !" appears on the display. To reboot the receiver If the buttons on the receiver or the remote do not work due to a malfunction of the receiver, reboot the receiver. 1 Press ?/1 to turn off the - Sony STR-DA3600ES | Operating Instructions (Large File - 16.4 MB) - Page 43
from battery leakage and corrosion. • When you replace the batteries, the programmed remote codes may be cleared. If this happens, program the remote codes again (page 139). Tip When the remote no longer operates the receiver, replace all the batteries with new ones. 9: Setting the speakers Setting - Sony STR-DA3600ES | Operating Instructions (Large File - 16.4 MB) - Page 44
RETURN/EXIT O. To exit the menu Press MENU. Notes • If you are not sure of the impedances of the speakers, refer to the operating instructions supplied with your speakers. (This information is often on the back of the speaker.) Selecting the speaker pattern Select the speaker pattern according to - Sony STR-DA3600ES | Operating Instructions (Large File - 16.4 MB) - Page 45
the usage of the speaker(s) connected to the SURROUND BACK/ FRONT HIGH/ZONE 2 terminals in accordance with the intended use. Be sure to set "Sur terminals (parallel connection). "SPK OFF" appears in the display window. No audio signals are output from any speaker terminals, or the PRE OUT jacks. - Sony STR-DA3600ES | Operating Instructions (Large File - 16.4 MB) - Page 46
such as checking the connection between each speaker and the receiver, adjusting the speaker level, and measuring the distance of each speaker from your seating position automatically. - When using the zone 2/zone 3 function in zone 2/zone 3. • Cancel MUTING if it is set to on. Optimizer microphone - Sony STR-DA3600ES | Operating Instructions (Large File - 16.4 MB) - Page 47
measurement result is not utilized in the following cases. - The multi-channel input is selected. - "2ch Analog Direct" is being used. 3)The measurement result value. However, there will be no problems, even if you continue to use the receiver with that value. Performing auto calibration The - Sony STR-DA3600ES | Operating Instructions (Large File - 16.4 MB) - Page 48
," then press . 6 Press to select "Start." The measurement starts in five seconds. The measurement process will take approximately 30 seconds with a test tone. Wait until the measurement process completes. When the measurement ends, a beep sounds and the screen switches. 4 Press V/v repeatedly to - Sony STR-DA3600ES | Operating Instructions (Large File - 16.4 MB) - Page 49
specifications. In this case, you can continue to use the receiver. Tips • Operations other than turning the receiver that matches that of the Sony listening room standard. Front Reference not utilized in the following cases. - The multi-channel input is selected. - "2ch Analog Direct" is being used - Sony STR-DA3600ES | Operating Instructions (Large File - 16.4 MB) - Page 50
then press . If a warning message appears, check the message and use the receiver without change. Or if necessary, perform auto calibration again. When "Error Code" front high speaker to each of the SURROUND BACK/FRONT HIGH/ZONE 2 terminals. • Front high speakers are connected even though surround - Sony STR-DA3600ES | Operating Instructions (Large File - 16.4 MB) - Page 51
input from the microphone is too big. • It may be too close the distance between the speaker and the microphone. Retry the measurement after setting apart from each other. • When you use the receiver , there will be no problems, even if you continue to use the receiver without changes. Warning 43 - Sony STR-DA3600ES | Operating Instructions (Large File - 16.4 MB) - Page 52
the required network settings for the receiver by following the instructions provided by an initial setup wizard. The procedure used to set up the IP address automatically (DHCP) is explained below. In this case, the router that is connected to the receiver or the Internet provider must support DHCP - Sony STR-DA3600ES | Operating Instructions (Large File - 16.4 MB) - Page 53
latest driver are recommended.) Display 800 × 600 or higher resolution HDD 500 MB or more is recommended. Network 100Base-TX or higher Sound Direct Sound compatible sound card card Note Sony does not guarantee trouble-free operation on all computers that satisfy the system requirements. Other - Sony STR-DA3600ES | Operating Instructions (Large File - 16.4 MB) - Page 54
pressing V/v/B/b and on the remote. To display the menu of the receiver on the TV screen, make sure that the receiver is in "GUI MODE" following the step in "To turn "GUI MODE" on and off" (page 55). 3 Install the VAIO Media plus application software following the instructions given in the message - Sony STR-DA3600ES | Operating Instructions (Large File - 16.4 MB) - Page 55
main menus Menu icon Input Description Selects the input source component connected to the receiver (page 57). Menu icon Music Photo Video Rhapsody SHOUTcast FM/AM/SR Settings Description Selects the music from the server on the home network, "My Library," or the audio component connected to the - Sony STR-DA3600ES | Operating Instructions (Large File - 16.4 MB) - Page 56
select a menu you want, then press or b to enter the menu mode. The menu item list appears on the TV screen. Example: When you select " Input" 3 Press OPTIONS while the menu item list is displayed. The option menu appears. 4 Press V/v repeatedly to select the option menu item you want, then press - Sony STR-DA3600ES | Operating Instructions (Large File - 16.4 MB) - Page 57
to the receiver V/v/B/b, OPTIONS MENU MASTER VOLUME MUTING 1 Select " Input," then press ., connected to the MD/TAPE jack. SA-CD/CD Super Audio CD or CD player, etc., connected to the SA-CD/ press and hold the MASTER VOLUME +/- button on the remote. To turn the volume up or down quickly: press - Sony STR-DA3600ES | Operating Instructions (Large File - 16.4 MB) - Page 58
audio input/output jacks" (page 34). You can use the following Sony DIGITAL MEDIA PORT adapters: • TDM-BT1/BT10 Bluetooth™ Wireless Audio receiver a DIGITAL MEDIA PORT adapter that uses a network function such as TDM-NC1 Wireless Network Audio Client. You can use the network function of the receiver - Sony STR-DA3600ES | Operating Instructions (Large File - 16.4 MB) - Page 59
The Bluetooth drive recognized is connected. Mobile Phone The Mobile Phone recognized is connected. Operating the TDM-iP50 using the GUI menu of the receiver Make sure that "System GUI" is selected in step 4 in "Changing the operation screen using the DIGITAL MEDIA PORT" (page 61). MASTER VOLUME - Sony STR-DA3600ES | Operating Instructions (Large File - 16.4 MB) - Page 60
listen to following the steps outlined in "Operating the TDMiP50 using the GUI menu of the receiver" (page 59). 2 Press OPTIONS. The option menu appears. 3 Select "Shuffle," "Repeat device connected to the adapter. No Audio No audio file was found. Loading The data is being read. No Item - Sony STR-DA3600ES | Operating Instructions (Large File - 16.4 MB) - Page 61
not supported by other adapters. 1 Select the DIGITAL MEDIA PORT adapter you want on the " Music" or " Video" screen, then press or b. 2 Press OPTIONS. The option menu appears. 3 Select "DMPORT Control," then press . If "DMPORT Control" is not displayed, refer to the operating instructions supplied - Sony STR-DA3600ES | Operating Instructions (Large File - 16.4 MB) - Page 62
make sure you have connected the FM and AM antennas (aerials) to the receiver (page 39). Tip The tuning scale for direct tuning is shown below. using the numeric buttons on the multifunction remote. This operation cannot be performed using the simple remote. Tuning into a station automatically (Auto - Sony STR-DA3600ES | Operating Instructions (Large File - 16.4 MB) - Page 63
is not used in your area. Tuning V/v/b, MENU 1 Press AMP. The receiver can be operated using the remote. 2 Press MENU. The menu is displayed on the TV screen. 3 Press .* * Not all FM stations provide RDS service, nor do they provide the same type of services. If you are not familiar with the RDS - Sony STR-DA3600ES | Operating Instructions (Large File - 16.4 MB) - Page 64
Changing the AM tuning scale (USA/Canadian model only) You can change the AM tuning scale to either 9 kHz or 10 kHz on the receiver. ?/1 TUNING MODE Presetting FM/AM radio stations You can preset up to 30 FM and 30 AM stations. Then you can easily tune in the - Sony STR-DA3600ES | Operating Instructions (Large File - 16.4 MB) - Page 65
packages available, including the option of adding "The Best of XM" programming to the SIRIUS service. The "Best of XM" service is not available to SIRIUS Canada subscribers at this time. Please check with SIRIUS Canada for any updates using the numbers and web address below. Family friendly - Sony STR-DA3600ES | Operating Instructions (Large File - 16.4 MB) - Page 66
owners. All rights reserved. SIRIUS subscription sold separately. Taxes and a one-time activation fee may apply. SIRIUS tuner required (sold separately) to receive the SIRIUS service or software incorporated in receivers compatible with the SIRIUS Satellite Radio System. Service not available - Sony STR-DA3600ES | Operating Instructions (Large File - 16.4 MB) - Page 67
direction of the antenna to obtain the best reception. To exit the menu Press MENU press . The selected channel is being received. The channel information is displayed on the by inputting the channel number directly (Direct Tuning remote. This operation cannot be performed using the simple remote - Sony STR-DA3600ES | Operating Instructions (Large File - 16.4 MB) - Page 68
them using the preset numbers. You can preset up to 30 SIRIUS Satellite Radio channels. V/v/b, OPTIONS MENU 1 Press AMP. The receiver can be operated using the remote. 2 Press MENU. The menu is displayed on the TV screen. 3 Press V/v repeatedly to select " SR," then press or b. 4 Press OPTIONS - Sony STR-DA3600ES | Operating Instructions (Large File - 16.4 MB) - Page 69
, then press V/v to select "Preset Mode." Restricting access to specific channels (Parental Lock) You can restrict access to certain channels using as the default. Use the multifunction remote for this operation. This operation cannot be performed using the simple remote. Change the lock code before - Sony STR-DA3600ES | Operating Instructions (Large File - 16.4 MB) - Page 70
using the numeric buttons. "The channel has been unlocked." appears and the channel is unlocked. Notes • You can set only one lock code on the receiver. You cannot set individual lock codes for each channel. • When you select a channel using Category Mode, locked channels are skipped. • When the - Sony STR-DA3600ES | Operating Instructions (Large File - 16.4 MB) - Page 71
change by the broadcast service, or the receiving condition is not good. Locked Channel [LOCKED CH] The selected channel is locked. - Sub Updated [SUB UPDT] The subscription information has been - updated. Updating [UPDATING] Channel information is being updated. - FW Updating [FW UPDT] The - Sony STR-DA3600ES | Operating Instructions (Large File - 16.4 MB) - Page 72
software you are using, the playback component connected, or the sound field settings of the receiver 2ch Analog Direct Effect The receiver outputs the sound from audio of the selected input to 2 channel analog input. input is selected. Outputs the front analog signals from the MULTI CHANNEL INPUT - Sony STR-DA3600ES | Operating Instructions (Large File - 16.4 MB) - Page 73
right signals from all speakers. Notes • This function does not work when the multichannel input is selected. • "Multi Stereo" does not work in the following cases. - The multi-channel audio signals are being received. - Dolby TrueHD, or Linear PCM signals with a sampling frequency of 176.4 kHz and - Sony STR-DA3600ES | Operating Instructions (Large File - 16.4 MB) - Page 74
simply by selecting one of the receiver's preprogrammed sound fields. They bring Jazz Club Live Concert Stadium Sports Portable Audio PLII Music PLIIx Music PLIIz Height Neo:6 to a 7.1 channel system. Its vertical component gives a dimension of presence and depth. "PLIIz Height" is the same sound - Sony STR-DA3600ES | Operating Instructions (Large File - 16.4 MB) - Page 75
The multi-channel input is selected. - Dolby TrueHD, DTS-HD, or Linear PCM signals with a sampling frequency of 88.2 kHz and higher are being received. • "PLII the sound will be output from the subwoofer if the digital input signal contains L.F.E. signals, or if the front or surround speakers are - Sony STR-DA3600ES | Operating Instructions (Large File - 16.4 MB) - Page 76
receiver's preprogrammed sound fields. They bring the exciting and powerful sound of movie theaters into your home. MOVIE Press MOVIE. Sound field HD-D.C.S. PLII Movie PLIIx Movie PLIIz Height Neo:6 Cinema Effect HD Digital Cinema Sound (HD-D.C.S.) is Sony gives a dimension of presence and - Sony STR-DA3600ES | Operating Instructions (Large File - 16.4 MB) - Page 77
sound fields for movie do not work in the following cases. - The multi-channel input is selected. - Dolby TrueHD, DTS-HD, or Linear PCM signals with a sampling frequency of 88.2 kHz and higher are being received • "PLII Movie," "PLIIx Movie," "PLIIz Height," and "Neo:6 Cinema" also do not work when - Sony STR-DA3600ES | Operating Instructions (Large File - 16.4 MB) - Page 78
Digital audio formats supported by the receiver Digital audio formats that this receiver can decode depend on digital audio input jacks for the components connected. This receiver supports the following audio formats. Audio format Dolby Digital Connection of the playback component and Maximum - Sony STR-DA3600ES | Operating Instructions (Large File - 16.4 MB) - Page 79
Rhapsody and SHOUTcast (page 84, 87) and upgrade the software of the receiver. Rhapsody is only available in the US. • You can change the settings of the receiver using a computer on your home network (page 88). About DLNA DLNA (Digital Living Network Alliance) is a standards organization made up of - Sony STR-DA3600ES | Operating Instructions (Large File - 16.4 MB) - Page 80
is a device which delivers content (music, photos, and videos) to a DLNA device on a home network. You can play back music, photos, and videos stored on the server using the receiver. Computer STR-DA3600ES V/v/B/b, OPTIONS MENU 1 Select " Music," " Photo," or " Video" from the menu, then press or - Sony STR-DA3600ES | Operating Instructions (Large File - 16.4 MB) - Page 81
content on the server by using the following buttons on the multifunction remote. Press AMP to operate the receiver using the remote. Type of content Remote N button x Music z z Photo z z Video z z X z >z z** mode. • On Activates the shuffle play mode. continued 81GB Using Network Features - Sony STR-DA3600ES | Operating Instructions (Large File - 16.4 MB) - Page 82
To play back a photo together with background music (BGM) You can enjoy photos with music registered in "My Library" as background music. 1 Play back a photo from "Server" (page 80) or "My Library" (page 81). If you select a photo from "Server," you will be offered a choice of displaying a single - Sony STR-DA3600ES | Operating Instructions (Large File - 16.4 MB) - Page 83
as a server using a controller on the home network. 2 Select the content you want to play back using a controller on the home network. STR-DA3600ES 3 Select the receiver to be used to play back the content using a controller on the home network. Refer to the operating instructions of each device - Sony STR-DA3600ES | Operating Instructions (Large File - 16.4 MB) - Page 84
Setting an account Before using the Rhapsody Digital Music Service, it is necessary to register an account using receiver. 1 Select " Settings" from the menu, then press or b. 2 Select "Network," then press or b. 3 Select "Rhapsody Account," then press . The confirmation screen for account input - Sony STR-DA3600ES | Operating Instructions (Large File - 16.4 MB) - Page 85
support ID appear on the TV screen. To delete an account 1 Select " Settings" from the menu, then press or b. 2 Select "Network received. Note You can only listen to the same station when listening in the main zone, zone 2, and zone zones. Selecting the track using Music Guide The Music Guide - Sony STR-DA3600ES | Operating Instructions (Large File - 16.4 MB) - Page 86
can only listen to the same track when listening in the main zone, zone 2, and zone 3 simultaneously. Priority is given to the track which has most recently selected, even if other track has already been selected in one of zones. Registering your favorite track, album, or station You can register - Sony STR-DA3600ES | Operating Instructions (Large File - 16.4 MB) - Page 87
is large, up to 100 stations can be displayed (in order) on this receiver. • The audio supplied in a format that is not supported by this receiver does not appear on the list. • You can only listen to the same station when listening in the main zone, zone 2, and zone 3 simultaneously. continued 87GB - Sony STR-DA3600ES | Operating Instructions (Large File - 16.4 MB) - Page 88
receiver. The following settings cannot be set using the computer with the Setup Manager application software. • Auto Calibration • Speaker - Test Tone • Multi Zone - Zone Power ON/OFF - Zone Input Change - Zone .) Monitor: 1024 × 768, High Color (65536 colors) Network: 100Base-TX or higher 88GB - Sony STR-DA3600ES | Operating Instructions (Large File - 16.4 MB) - Page 89
(supplied) 3 Install the Setup Manager application software following the instructions given in the message on the screen. Updating the receiver software using the Setup Manager You can update the receiver software using the Setup Manager application software provided on the CD-ROM supplied with the - Sony STR-DA3600ES | Operating Instructions (Large File - 16.4 MB) - Page 90
place where signals from the remote cannot reach. Making a multi-zone connection 1:Zone 2 connections 1 Outputs sound from speakers in zone 2 using the SURROUND BACK/FRONT HIGH/ZONE 2 terminals of the receiver. Main zone Zone 2 IR REMOTE IN STR-DA3600ES ZONE 2 VIDEO OUT* SURROUND BACK/ FRONT - Sony STR-DA3600ES | Operating Instructions (Large File - 16.4 MB) - Page 91
converter. Connect the input and the output jacks using the same kind of cords. 2:Zone 3 connections Main zone IR REMOTE IN STR-DA3600ES Zone 3 B B C A Using Multi-zone Features ZONE 3 AUDIO OUT A IR repeater (not supplied) B Speakers C Sony Amplifier/Receiver Multifunction remote 91GB - Sony STR-DA3600ES | Operating Instructions (Large File - 16.4 MB) - Page 92
Press AMP. The receiver can be operated using the remote. 2 Press MENU. The menu is displayed on the TV screen. 3 Select " Settings" from the menu, then press or b. 4 Select "Speaker," then press or b. Set the volume control for zone 2 You can set the volume control for the ZONE 2 AUDIO OUT jacks - Sony STR-DA3600ES | Operating Instructions (Large File - 16.4 MB) - Page 93
other. Switching the zone setting of the remote The remote commander is initially set to be used in zone 2. If you want to use it in zone 3, switch the zone setting of the remote. RM SET UP ?/1 AMP SHIFT ZONE 2, 3 ENTER Operating the receiver from another zone (ZONE 2/ZONE 3 operations) The - Sony STR-DA3600ES | Operating Instructions (Large File - 16.4 MB) - Page 94
off this receiver), the receiver in zone 2 or zone 3 remains turned on. To turn off all receivers, press ?/1 and AV ?/1 on the multifunction remote at the same time (SYSTEM STANDBY). • Only signals from components connected to the analog input jacks are output through the ZONE 2 OUT/ZONE 3 OUT jacks - Sony STR-DA3600ES | Operating Instructions (Large File - 16.4 MB) - Page 95
and the connected component. Turn the Control for HDMI function of the receiver and the connected component on individually. Use the multifunction remote for this operation. This operation cannot be performed using the simple remote. ?/1 AMP HDMI input buttons GUI MODE V/v/b, MENU 1 Press AMP - Sony STR-DA3600ES | Operating Instructions (Large File - 16.4 MB) - Page 96
the TV speaker. • You can adjust the receiver's volume when you adjust the TV volume. You can also operate this function using the TV menu. For details, refer to the operating instructions of the TV. Notes • When "Control for HDMI" is set to "ON," the "Audio Out" settings in the HDMI settings menu - Sony STR-DA3600ES | Operating Instructions (Large File - 16.4 MB) - Page 97
the multifunction remote to turn off the TV. AV ?/1 TV Press TV, then press AV ?/1. The TV, receiver and connected components are turned off. Notes • Set the TV power supply interlock function to on before using the System Power Off function. For details, refer to the operating instructions of the - Sony STR-DA3600ES | Operating Instructions (Large File - 16.4 MB) - Page 98
standby mode, compared with the "ON" setting. Note This function does not work when "Control for HDMI" is set to "OFF." Switching between digital and analog audio When you connect components to both digital and analog audio input jacks on the receiver, you can fix the audio input mode to either - Sony STR-DA3600ES | Operating Instructions (Large File - 16.4 MB) - Page 99
. - Your TV is not compatible with the Audio Return Channel (ARC) function. - "Control for HDMI" is set to "OFF." - When you do not connect the receiver to the ARC compatible TV's HDMI jack via an HDMI cable. Enjoying the sound/ images from other inputs (Input Assign) You can reassign video and/or - Sony STR-DA3600ES | Operating Instructions (Large File - 16.4 MB) - Page 100
reassign more than one HDMI input to the same input. • You cannot reassign more than one digital audio input to the same input. • You cannot reassign more than one component video input to the same input. • When you assign a component video input to the HDMI input, set "Control for HDMI" to "OFF - Sony STR-DA3600ES | Operating Instructions (Large File - 16.4 MB) - Page 101
Select "ON," then press . Notes • This function does not work when the multichannel input is selected. • This function does not work when "2ch Analog Direct" is being using the receiver You can record from a video/audio component using the receiver. Refer to the operating instructions supplied with - Sony STR-DA3600ES | Operating Instructions (Large File - 16.4 MB) - Page 102
component to the OPTICAL MD/TAPE OUT jack. Recording with an audio component You can record with an audio component using the receiver. Refer to the operating instructions supplied with your MD deck or tape deck. 1 Select " Input" from the menu, then press or b. 2 Select the playback component - Sony STR-DA3600ES | Operating Instructions (Large File - 16.4 MB) - Page 103
, if other Sony component is operated accidentally by the same remote, when you are operating the receiver using the remote supplied with the receiver. The command modes of both the receiver and the remote are those of the initial setting (COMMAND MODE AV 2). The receiver and the remote, on the - Sony STR-DA3600ES | Operating Instructions (Large File - 16.4 MB) - Page 104
ZONE button goes off, the AMP button keeps flashing and the SHIFT button lights up. 3 Press the numeric button 1 or 2 while the AMP button is flashing. When you press 1, the command mode is set to AV SYSTEM 1. When you press 2, the command mode is set to AV a malfunction of the receiver. To set up - Sony STR-DA3600ES | Operating Instructions (Large File - 16.4 MB) - Page 105
press . 7 Select "BI-AMP," then press . The same signals output from the FRONT A terminals can be output from the SURROUND BACK/FRONT HIGH/ ZONE 2 terminals. Notes • You cannot use the FRONT B terminals for a biamplifier connection. • When you use the auto calibration function, make the bi-amplifier - Sony STR-DA3600ES | Operating Instructions (Large File - 16.4 MB) - Page 106
surround effects, multi zone, etc., using the setting menu. To display the menu of the receiver on the TV screen, make sure that the receiver is in "GUI measurement automatically (page 107). Sets the speaker position and impedance manually (page 109). Adjusts the sound field (surround effect) you - Sony STR-DA3600ES | Operating Instructions (Large File - 16.4 MB) - Page 107
Multi Zone (page 114). Sets various sound items (page 116). Adjusts the resolution of analog video signals (page 118). Makes settings for sound/ images from components connected to the HDMI jacks (page 119). Makes the settings for the network (page 121). Controls components connected to the receiver - Sony STR-DA3600ES | Operating Instructions (Large File - 16.4 MB) - Page 108
position (Pos. 1, 2, 3) you want, then press . 2 Press OPTIONS. 3 Select "Name Input," then press . 4 Press V/v to select a character, then press b. You can shift input position backward and forward by pressing B/b. 5 Repeat steps 4 to input a character one by one, then press . The name you entered - Sony STR-DA3600ES | Operating Instructions (Large File - 16.4 MB) - Page 109
the surround back speakers to this receiver when you want to change the connection from a bi-amplifier connection or a zone 2 connection to a surround back the sound will be output from the subwoofer if the digital input signal contains L.F.E. signals, or if the front or surround speakers are set - Sony STR-DA3600ES | Operating Instructions (Large File - 16.4 MB) - Page 110
circuitry sends the corresponding bass frequencies to the subwoofer or other "Large" speakers. However, since bass sound has a certain amount of directionality, it is best not to cut it, if possible. Therefore, even when using small speakers, you can set them to "Large" if you want to output the - Sony STR-DA3600ES | Operating Instructions (Large File - 16.4 MB) - Page 111
that you can adjust the balance between the speakers. 1 Select "Phase Audio," then press . The Phase Audio screen appears. 2 Adjust the parameter, then press . • OFF .4 kHz and higher are being received, sound is output only from the front left/right speakers. When a test tone is not output from the - Sony STR-DA3600ES | Operating Instructions (Large File - 16.4 MB) - Page 112
When a test tone is output from a different speaker than the speaker displayed on the screen The speaker pattern to the connected speaker is not set up correctly. - Sony STR-DA3600ES | Operating Instructions (Large File - 16.4 MB) - Page 113
to enjoy the sound effects to the full extent, just like at the movie theaters? Dynamic type emphasizes on the reflection sound. Without HD-D.C.S., many rooms are often somewhat reverberant but lack a spacious feeling. This type acoustically opens up those types of rooms and provides a spacious and - Sony STR-DA3600ES | Operating Instructions (Large File - 16.4 MB) - Page 114
the source that is output to the zone. Audio and video signals are output to zone 2, while only audio signals are output to zone 3. 1 Select the zone to which you want to output audio/video signals, then press . 2 Select "Input," then press . 3 Select the input, then press . To adjust the volume for - Sony STR-DA3600ES | Operating Instructions (Large File - 16.4 MB) - Page 115
?/1 on the remote to turned off this receiver), the receiver in zone 2 or zone 3 remains turned on. To turn off all receivers, press ?/1 and AV ?/1 on the multifunction remote at the same time (SYSTEM STANDBY). Zone2 Line Out Level Lets you set the volume control for the ZONE 2 AUDIO OUT jacks to - Sony STR-DA3600ES | Operating Instructions (Large File - 16.4 MB) - Page 116
Digital EX, Dolby TrueHD, DTS 96/24, DTS-ES Matrix 6.1, DTSHD Master Audio, or DTS-HD High Resolution Audio signals are being received. A/V Sync (Synchronizes audio and video output) Lets you delay the output of audio to minimize the time gap between audio output and visual display. x 0 ms - 300 ms - Sony STR-DA3600ES | Operating Instructions (Large File - 16.4 MB) - Page 117
x AUTO Automatically switches the input mode between Dolby Digital, DTS, or PCM. Notes • Even when "Decode Priority" is set to "PCM," the sound may be interrupted at the very beginning - Sony STR-DA3600ES | Operating Instructions (Large File - 16.4 MB) - Page 118
setting DIRECT AUTO (initial setting) 480i/576i 480p/576p 720p, 1080i 1080p Output from HDMI OUT jack MONITOR MONITOR VIDEO COMPONENT OUT jack Input from VIDEO OUT jacks COMPONENT VIDEO - a - IN jacks VIDEO IN jacks - - a COMPONENT VIDEO zb) zb) IN jacks za) VIDEO IN jacks zb - Sony STR-DA3600ES | Operating Instructions (Large File - 16.4 MB) - Page 119
in standby mode (Pass Through)" (page 97). x OFF x ON Note When "Control for HDMI" is set to "OFF," you cannot set "Pass Through." Audio Out Lets you set the HDMI audio signals output from the playback component connected to the receiver via an HDMI connection. x TV+AMP The sound is output from the - Sony STR-DA3600ES | Operating Instructions (Large File - 16.4 MB) - Page 120
video component (projector, etc.), sound may not be output from the receiver. In this case, select "AMP." • When you select the input that you have assigned the HDMI input, sound is not output from the TV. x AMP The HDMI audio signals from the playback component is only output to speakers connected - Sony STR-DA3600ES | Operating Instructions (Large File - 16.4 MB) - Page 121
, Gateway address, DNS1 address, and DNS2 address. 9 Select "Test Connection," then press . "Success! The receiver is now connected to network." appears on the TV screen. 10Press to select "Finish." To set the Proxy server manually 1 Select "Network Setup" then press . 2 Select "Proxy Setup," then - Sony STR-DA3600ES | Operating Instructions (Large File - 16.4 MB) - Page 122
the receiver, the receiver will restart automatically. Tip The default device name is "STR-DA3600ES." Rhapsody Account Lets you enter the Rhapsody Account to listen to the Rhapsody Internet radio service. For details, see "Setting an account" (page 84). Rhapsody is only available in the US. Network - Sony STR-DA3600ES | Operating Instructions (Large File - 16.4 MB) - Page 123
mode. In addition, the start-up time of the network function is reduced after the receiver is turned on. Quick Click settings You can make settings to control components connected to the receiver using an external control device. See "For Installation Purposes: Operating Each Component Using - Sony STR-DA3600ES | Operating Instructions (Large File - 16.4 MB) - Page 124
?/1 MUSIC RS232C Control Let you turn the control mode for maintenance and service on or off. x OFF x ON Auto Standby Lets you turn the function that switches the main zone to standby mode automatically when you do not operate the receiver or when there is no signal input to the receiver on or off - Sony STR-DA3600ES | Operating Instructions (Large File - 16.4 MB) - Page 125
. - When all versions are the latest one. - When the receiver cannot retrieve the data, such as when the network has not been set up, or when the server is down, etc. • Do not turn the receiver off or disconnect the network cable during software updating. It may cause a malfunction. • It may take 50 - Sony STR-DA3600ES | Operating Instructions (Large File - 16.4 MB) - Page 126
4 Press V/v repeatedly to select the menu item, then press . The parameter appears in brackets. 5 Press V/v repeatedly to select the parameter you want, then press . The parameter is entered and the brackets disappear from the display. Tip To return to the previous step, press RETURN/EXIT O. 126GB - Sony STR-DA3600ES | Operating Instructions (Large File - 16.4 MB) - Page 127
) xxx: xxx (Distance Information) xxx: xxxx (Level Information) E-xx :3Y (Error code) RETRY? xxx CANCEL CAL TYPE (Calibration Type) A.P.M. POSITION NAME IN (Naming Input) RETRY, SAVE EXIT, WRN CHECK, SAVE EXIT PHASE INFO, DIST. INFO, LEVEL INFO, EXIT FL, FR, CNT, SL, SR, SBR, SBL, SW, LH, RH - Sony STR-DA3600ES | Operating Instructions (Large File - 16.4 MB) - Page 128
Initial setting TEST TONE OFF, FL to RH (AUTO), FL to RH OFF (FIX) P. NOISE (Phase noise) OFF, FL/CNT, CNT/FR, FR/SL, FR/ OFF SR, SR/SL, SR/SBR, SR/SB, SBR/ SBL, SB/SL, SBL/SL, SL/FL, FL/SR, FL/RH, LH/RH, LH/FR P. AUDIO (Phase audio) OFF - Sony STR-DA3600ES | Operating Instructions (Large File - 16.4 MB) - Page 129
Menu Item Parameter Initial setting Speaker settings SP PATTERN (Speaker pattern) 5/2.1 to 2/0 (20 patterns) 3/4.1 FRT SIZE (Front speakers size) LARGE, SMALL LARGE CNT SIZE (Center speaker size) LARGE, SMALL LARGE SUR SIZE (Surround speakers size) LARGE, SMALL LARGE FH - Sony STR-DA3600ES | Operating Instructions (Large File - 16.4 MB) - Page 130
Surround settings EFFECT (HD-D.C.S. effect type) DYNAMIC, THEATER, STUDIO THEATER H. GAIN HIGH, MID, LOW MID (PLIIz Height Gain Control) EQ settings FRT (12V Trigger) OFF, CTRL, ZONE, INPUT OFF * You cannot select this setting when the speaker is set to "LARGE." 130GB - Sony STR-DA3600ES | Operating Instructions (Large File - 16.4 MB) - Page 131
selection) DEC. PRIO (Digital audio input decoding priority) NIGHT MODE A. ASSIGN (Audio input assignment) Video settings RESOLUTION V. ASSIGN (Video input assignment) HDMI settings CTRL: HDMI (Control for HDMI) PASS THRU (Pass Through) AUDIO OUT SW LEVEL (Subwoofer level - Sony STR-DA3600ES | Operating Instructions (Large File - 16.4 MB) - Page 132
> (Naming inputs) RS232C AUTO STBY VER x.xxx UPDATE(PC) Parameter For reference on this function, see"Naming the input (Name Input)" (page 58 Sound field type t Volume level ... When receiving RDS broadcasts (European model only) PS (Program Service name)1), Preset name, Band, or Preset number - Sony STR-DA3600ES | Operating Instructions (Large File - 16.4 MB) - Page 133
components or lighting connected to the receiver using an external control device (Quick Click) You can control components connected to the receiver, a projector, and the light control unit. IR Blaster Common Components External control device Projector TV Source Components Light 133GB - Sony STR-DA3600ES | Operating Instructions (Large File - 16.4 MB) - Page 134
Using Quick Click You can control components connected to the receiver, a TV, projector, or lighting using an external control device. Note You may not be able to operate some functions for the components you are using. Table of functions which can control each component (Quick Click) Category TV - Sony STR-DA3600ES | Operating Instructions (Large File - 16.4 MB) - Page 135
are operated by an external control device V/v/B/b, MENU 3 . 8 Select the code, then press . If you want to have a test, select "Menu" or "Power" on the TV screen. If you selected " . 3 Select "Source Component," then press . 4 Select the input (including a TV) for the component you want to set up - Sony STR-DA3600ES | Operating Instructions (Large File - 16.4 MB) - Page 136
, then press . 6 Select "-" as a component name, then press . 7 Repeat steps 5 and 6 to clear the stored macro. Setting remote control codes that are not stored in Quick Click To input a macro name 1 Select " Settings" from the menu, then press or b. 2 Select "Quick Click," then press . 3 Select - Sony STR-DA3600ES | Operating Instructions (Large File - 16.4 MB) - Page 137
remote of the component to be programmed while pointing the remote toward the receiver's remote sensor until "Complete" is displayed on the TV screen. Remote sensor About 5 cm - 10 cm (2" - 4") "Test then press . All the contents of the selected input (e.g., all the programmed data) are cleared. 7 - Sony STR-DA3600ES | Operating Instructions (Large File - 16.4 MB) - Page 138
control non-Sony and other Sony components that the remote is initially unable control (page 139). Operating the components connected to the receiver 1 Press the input MD deck PORT device AV ?/1 zz z z z z z zz z zz Numeric buttons z z z z zzz z z z zz z z TV INPUT z GUIDE z zc) z zz - Sony STR-DA3600ES | Operating Instructions (Large File - 16.4 MB) - Page 139
components and also Sony components that the remote is normally unable to control. The procedure below uses as an example a case in which a VCR made by a company other than Sony is connected to the VIDEO 2 IN jacks on the receiver. RM SET UP SHIFT Numeric buttons AV ?/1 TV Input buttons ENTER - Sony STR-DA3600ES | Operating Instructions (Large File - 16.4 MB) - Page 140
component will not respond to some or all of the codes. • All of the input buttons on this remote may not be available when used with your particular component. To control a CD player Maker SONY DENON JVC KENWOOD MAGNAVOX MARANTZ ONKYO PANASONIC PHILIPS PIONEER TECHNICS YAMAHA Code(s) 101, 102 - Sony STR-DA3600ES | Operating Instructions (Large File - 16.4 MB) - Page 141
control a DVD/VCR COMBO (recorder) Maker SONY Code(s) 411 To control a HDD/DVD COMBO (recorder) Maker SONY Code(s) 401, 402, 403 To control a TV Maker SONY , 556 To control an LD player Maker SONY PIONEER Code(s) 601, 602, 603 606 To control a video CD player Maker SONY Code(s) 605 - Sony STR-DA3600ES | Operating Instructions (Large File - 16.4 MB) - Page 142
NOKIA RCA/PROSCAN HITACHI/BITA HUGHES JVC/Echostar/Dish Network MITSUBISHI SAMSUNG TOSHIBA Code(s) 856, 857, 858, 859, 860, 864, 874 851, 853, 854, 864 866, 871 868 867 873 872 875 869, 870 To control a cable box Maker SONY HAMLIN/REGAL JERROLD/G.I./ MOTOROLA JERROLD OAK PANASONIC PHILIPS PIONEER - Sony STR-DA3600ES | Operating Instructions (Large File - 16.4 MB) - Page 143
link several commands in a sequential order as a single command. The remote provides 2 macro lists (MACRO 1 and MACRO 2). You can specify setting up Macro Play, replace the batteries with new ones. RM SET UP AMP Input buttons MACRO 1 MACRO 2 Program the sequence of the operation 1 Press MACRO 1 - Sony STR-DA3600ES | Operating Instructions (Large File - 16.4 MB) - Page 144
to learn the code using the learning function. Note When setting up the receiver to learn the remote command modes, replace the batteries with new ones. THEATER RM SET UP ?/1 TV SHIFT Input buttons Buttons used to learn code* Buttons used to learn code 144GB * To store a new command on - Sony STR-DA3600ES | Operating Instructions (Large File - 16.4 MB) - Page 145
commander to be learned from. About 5 cm - 10 cm (2" - 4") 5 Press the button on the remote commander to be learned from to transmit the remote code. While the remote of the receiver is receiving the signal, the input button selected in step 2 turns off. The RM SET UP button flashes twice, then the - Sony STR-DA3600ES | Operating Instructions (Large File - 16.4 MB) - Page 146
Clearing all the contents of the remote's memory AV ?/1 ?/1 MASTER VOL 1 Hold down ?/1 while pressing MASTER VOL -, then press AV ?/1, all at the same time. The RM SET UP button flashes three times. 2 Release all buttons. All the contents of the remote's memory (e.g., all the programmed data) are - Sony STR-DA3600ES | Operating Instructions (Large File - 16.4 MB) - Page 147
, panel, and controls with a soft cloth slightly moistened with a mild detergent solution. Do not use any type of abrasive pad, scouring powder, or solvent, such as alcohol or benzine. If you have any questions or problems concerning your receiver, please consult your nearest Sony dealer. 147GB - Sony STR-DA3600ES | Operating Instructions (Large File - 16.4 MB) - Page 148
If you experience any of the following difficulties while using the receiver, use this troubleshooting guide to help you remedy the problem. Should any problem persist, consult your nearest Sony dealer. General The receiver is turned off automatically. • "Auto Standby" is set to "ON" (page - Sony STR-DA3600ES | Operating Instructions (Large File - 16.4 MB) - Page 149
to the operating instructions supplied with the each component. • Be sure to use a connecting cable for the HDMI jack corresponding to High Speed HDMI cable when you view images or listen to sound during a 1080p, Deep Color, or 3D transmission. • Sound may not be output from the receiver while the - Sony STR-DA3600ES | Operating Instructions (Large File - 16.4 MB) - Page 150
supports this receiver. Video There is no picture or an unclear picture appears on the TV screen or monitor. • Select the appropriate input on the receiver (page 57). • Set your TV to the appropriate input mode. • Move your TV away from the audio to the operating instructions supplied with the - Sony STR-DA3600ES | Operating Instructions (Large File - 16.4 MB) - Page 151
(page 25). • Make sure "Control for HDMI" is set to "ON" in HDMI settings menu. • Make sure the connected component is compatible with the Control for HDMI function. • Check the Control for HDMI settings on the connected component. Refer to the operating instructions of the connected component - Sony STR-DA3600ES | Operating Instructions (Large File - 16.4 MB) - Page 152
, you cannot control the connected component using TV's remote. - Depending on the connected component and TV, you may need to set up the component and TV. Refer to the operation instructions supplied with each component and TV. - Change the input of the receiver to the HDMI input connected to the - Sony STR-DA3600ES | Operating Instructions (Large File - 16.4 MB) - Page 153
uncheck the box for "Auto Permission." • If the network controller is a computer software controller, is the software filtered by antivirus software or firewall software? Permit UPnP communications between the software and the receiver. If the trouble is other than one of the cases described above - Sony STR-DA3600ES | Operating Instructions (Large File - 16.4 MB) - Page 154
panel of the receiver and turn on the power again. For other messages, see "Message list after auto calibration measurement" (page 50), "DIGITAL MEDIA PORT message list" (page 60) and "Message list" (page 71). For the customers in Europe: http://support.sony-europe.com/quickjump/ STR Clearing the - Sony STR-DA3600ES | Operating Instructions (Large File - 16.4 MB) - Page 155
Specifications AUDIO POWER SPECIFICATIONS Canada), 230 V AC, 50/60 Hz (in Europe and general area) 3)In USA and Canada 4)In Europe and general area Frequency response PHONO MULTI CHANNEL INPUT OUT), Voltage:150 mV VIDEO 1, ZONE 2, Impedance: 1 kohm ZONE 3 (AUDIO OUT) FRONT L/R, CENTER, Voltage: - Sony STR-DA3600ES | Operating Instructions (Large File - 16.4 MB) - Page 156
ohms 80 MHz HD Pass Through HDMI Video Input/Output (HDMI 1080p@24 Hz HDMI Video (3D) Input/Output (HDMI Repeater block) network needs to support the following formats for you to play back content on this receiver. Type of content Music Format Linear PCM MPEG-1 Layer3 (MP3) Windows Media Audio - Sony STR-DA3600ES | Operating Instructions (Large File - 16.4 MB) - Page 157
9.80 Mbps * Bitrate is mixed with MPEG-1 Layer 1/2/3, PCM, or AC3 audio format. MPEG_PS_PAL defined in DLNA guidelines 1.0 Maximum Resolution: 720 × 576 Maximum Mbps * Bitrate is mixed with MPEG-1 Layer 1/2/3, PCM, or AC3 audio format. Maximum Resolution: 720 × 480 Maximum Bitrate: 2 Mbps Windows - Sony STR-DA3600ES | Operating Instructions (Large File - 16.4 MB) - Page 158
Canada Europe 350 W 360 W Power consumption (during standby mode) 0.5 W (When "Control for HDMI," "Network Standby," and "RS232C Control" are set to "OFF," and the power for zone 2/ zone 3 is turned off.) Dimensions Instructions (this manual) Quick Setup Guide (1) GUI Menu List (1) Software - Sony STR-DA3600ES | Operating Instructions (Large File - 16.4 MB) - Page 159
67 CD player 34, 37 Changing the display 132 Clear memory 42 remote 146 Connections antennas 39 audio components 34 monitor 24 Network 40 speakers 22 video components 25 Control for HDMI 119 Controller 83 Controllers 122 Crossover Freq 110, 130 D D. Range Comp (Dynamic range compressor) 112, 128 - Sony STR-DA3600ES | Operating Instructions (Large File - 16.4 MB) - Page 160
M Manual Setup 109 MASTER VOLUME 9 Menu 54, 106 Messages Auto Calibration 50 DIGITAL MEDIA PORT 60 Error 154 SIRIUS 71 Movie 76 Multi Zone 90, 114 Music 59, 74 Music Guide 85 Muting 57 My Library 80 My Library (Rhapsody) 86 N Name Input 58, 65, 108 Neo:6 (Cinema) 76 Neo:6 (Music) 74 Network settings - Sony STR-DA3600ES | Operating Instructions (Large File - 16.4 MB) - Page 161
Small 110 Software Version 124 Audio CD player 34, 36, 37 Sur Back Assign 109 Sur Settings 130 Surround 113 System 124 T Test Tone 111, 128 TONE 8 TONE MODE 8, 42 Treble 8, 114, 130 Tuner 62 Tuning 62, 64 U Up converting 32 V VCR 31 Video 59, 118 VIDEO 2 IN jacks 32 Z Zone 12V Trigger 130 ZONE - Sony STR-DA3600ES | Operating Instructions (Large File - 16.4 MB) - Page 162
162GB
-
 1
1 -
 2
2 -
 3
3 -
 4
4 -
 5
5 -
 6
6 -
 7
7 -
8
-
9
-
10
-
11
-
12
-
13
-
14
-
15
-
16
-
17
-
18
-
19
-
20
-
21
-
22
-
23
-
24
-
25
-
26
-
27
-
28
-
29
-
30
-
31
-
32
-
33
-
34
-
35
-
36
-
37
-
38
-
39
-
40
-
41
-
42
-
43
-
44
-
45
-
46
-
47
-
48
-
49
-
50
-
51
-
52
-
53
-
54
-
55
-
56
-
57
-
58
-
59
-
60
-
61
-
62
-
63
-
64
-
65
-
66
-
67
-
68
-
69
-
70
-
71
-
72
-
73
-
74
-
75
-
76
-
77
-
78
-
79
-
80
-
81
-
82
-
83
-
84
-
85
-
86
-
87
-
88
-
89
-
90
-
91
-
92
-
93
-
94
-
95
-
96
-
97
-
98
-
99
-
100
-
101
-
102
-
103
-
104
-
105
-
106
-
107
-
108
-
109
-
110
-
111
-
112
-
113
-
114
-
115
-
116
-
117
-
118
-
119
-
120
-
121
-
122
-
123
-
124
-
125
-
126
-
127
-
128
-
129
-
130
-
131
-
132
-
133
-
134
-
135
-
136
-
137
-
138
-
139
-
140
-
141
-
142
-
143
-
144
-
145
-
146
-
147
-
148
-
149
-
150
-
151
-
152
-
153
-
154
-
155
-
156
-
157
-
158
-
159
-
160
-
161
-
162
 |
 |

Printed in Malaysia
©2010 Sony Corporation
STR-DA3600ES
4-184-698-
12
(1)
Operating Instructions
Multi Channel
AV Receiver