Sony STR-DA7100ES Operating Instructions
Sony STR-DA7100ES - Fm Stereo/fm-am Receiver Manual
 |
View all Sony STR-DA7100ES manuals
Add to My Manuals
Save this manual to your list of manuals |
Sony STR-DA7100ES manual content summary:
- Sony STR-DA7100ES | Operating Instructions - Page 1
/ FM-AM Receiver Operating Instructions Owner's Record The model and serial numbers are located on the rear of the unit. Record the serial number in the space provided below. Refer to them whenever you call upon your Sony dealer regarding this product. Model No. Serial No. STR-DA7100ES ©2005 - Sony STR-DA7100ES | Operating Instructions - Page 2
magnitude to constitute a risk of electric shock to persons. This symbol is intended to alert the user to the presence of important operating and maintenance (servicing) instructions in the literature accompanying the appliance. 2GB WARNING This equipment has been tested and found to comply - Sony STR-DA7100ES | Operating Instructions - Page 3
14 Refer all servicing to qualified service personnel. Servicing is required when the apparatus has been damaged in any way, such as power-supply cord or ® is a U.S. registered mark. As an ENERGY STAR® partner, Sony Corporation has determined that this product meets the ENERGY STAR® guidelines for - Sony STR-DA7100ES | Operating Instructions - Page 4
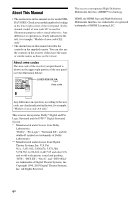
• The instructions in this manual describe the controls on the supplied remote. You can also use the controls on the receiver if they have 487,535 and other U.S. and world-wide patents issued and pending. "DTS", "DTS-ES", "Neo:6", and "DTS 96/24" are trademarks of Digital Theater Systems, Inc. - Sony STR-DA7100ES | Operating Instructions - Page 5
5GB - Sony STR-DA7100ES | Operating Instructions - Page 6
Installing speakers 20 2: Connecting speakers 22 3a: Connecting the audio components ........24 3b: Connecting the video components .......32 4: Connecting the antennas 43 5: Connecting the AC power cord 44 6: Preparing the remote 45 7: Setting up the speakers 47 Selecting the speaker system - Sony STR-DA7100ES | Operating Instructions - Page 7
Menu list of the remote (Operating the receiver 106 Selecting a component 108 Operate each component using the remote 109 Programming the remote 113 Performing several commands in sequence automatically (Macro Play 115 Setting remote control codes that are not stored in the commander 116 - Sony STR-DA7100ES | Operating Instructions - Page 8
Getting Started Description and location of parts Front panel Open the front cover. 8GB - Sony STR-DA7100ES | Operating Instructions - Page 9
select input of the component connected to HDMI jack (page 39). Lights up when multi channel audio is decoded (page 55). The lamp of the input source chosen lights up (page 58). Name Function L Remote receiver Receives signals from remote commander. M PHONES jack Connects to a headphone (page - Sony STR-DA7100ES | Operating Instructions - Page 10
Name Function X i.LINK Press to select input of the component connected to the i.LINK jack (page 29, 58). Y VIDEO 3 INPUT To connect a video camera or TV game (page 42, 56). Z +/-, MENU, MAIN MENU Adjust to select and enter menu and parameter settings (page 62, 65, 80, 97, 98, - Sony STR-DA7100ES | Operating Instructions - Page 11
being played back. The boxes around the letters vary to show how the receiver downmixes the source sound (based on the speaker settings). " " lights up when the 9.1 channel speaker system is activated. Front Left Front Right Center (monaural) Surround Left Surround Right Surround (monaural or - Sony STR-DA7100ES | Operating Instructions - Page 12
2 Lights up when a playback component or a playback component and TV monitor is connected this receiver using an HDMI jack (page 39). G DTS (-ES) Lights up when DTS signals are input. "-ES" lights up when DTS-ES signals are input. When playing a DTS format disc, be sure that you have made digital - Sony STR-DA7100ES | Operating Instructions - Page 13
jack (page 69). Lights up when DTS-ES Discrete decoding is activated (page 96). Lights up when DTS-ES Matrix decoding is activated (page 96). Lights up when the receiver applies Pro Logic processing to 2 channel signals in order to output the center and surround channel signals. This indicator also - Sony STR-DA7100ES | Operating Instructions - Page 14
or a projector (page 39). Connects to Sony Super Audio CD player: SCDXA9000ES (page 29). B AUDIO INPUT/OUTPUT section AUDIO IN/ W(L)/R(R) OUT jack Connects to a tape deck or MD/DAT player, etc (page 25, 31). W/R/B MULTI CHANNEL INPUT jack Connects to a Super Audio CD player or DVD player which - Sony STR-DA7100ES | Operating Instructions - Page 15
88). TRIGGER OUT Connects to interlock ON/OFF of the power supply of other 12V TRIGGER compliant components, or the amplifier/receiver of the 2nd/3rd zone (page 82). IR REMOTE Connects to an IR repeater (page 84, 85). F COMPONENT VIDEO INPUT/ OUTPUT section G/B/R COMPONENT Connects to a DVD - Sony STR-DA7100ES | Operating Instructions - Page 16
remote is programmed to operate on or off (page 113). If you press the ?/1 switch (A) at the same time, it will turn off the main component and other Sony audio/video components (SYSTEM STANDBY). Note The function of the AV < button repeatedly to display the RECEIVER menu, press the > button - Sony STR-DA7100ES | Operating Instructions - Page 17
receiver on the TV screen. L TV VOL +**/-, Press to operate the TV. TV CH +**/-, TV/VIDEO, WIDE M RETURN/ EXIT O Press to return to the previous menu or exit the menu while the menu or on-screen guide pressing MAIN MENU (J), TOP MENU/GUIDE (P), or AV MENU (Q), move the control key up, down, - Sony STR-DA7100ES | Operating Instructions - Page 18
Press to select the command mode of the remote. Name C Input buttons Function Press one of the buttons to select the component you want to use. When you press any of the input buttons, the receiver turns on. The buttons are factory assigned to control Sony components as follows. You can change the - Sony STR-DA7100ES | Operating Instructions - Page 19
Getting Started Operating the components connected to the main receiver from the 2nd (or 3rd) zone Name I Operation Skips tracks. J CH/ PRESET/ D.SKIP +/-* Press repeatedly to select a preset station or channel. When using a multi-disc changer, press to skip a disc. * The function of these - Sony STR-DA7100ES | Operating Instructions - Page 20
1: Installing speakers This receiver allows you to use a 9.1 channel system (9 speakers and one sub woofer). Refer to "Quick Setup Guide" supplied with this operating instruction for speaker systems other than 5.1/7.1/9.1 channel systems. Enjoying a 5.1/7.1/9.1 channel system To fully enjoy theater- - Sony STR-DA7100ES | Operating Instructions - Page 21
a 9.1 channel system This receiver allows you to enjoy a 9.1 channel system. Example of a 9.1 channel speaker system configuration to the pure audio of a Super Audio CD Please note that in most cases you can use the 9.1 channel setting for a Super Audio CD and other pure audio sources without - Sony STR-DA7100ES | Operating Instructions - Page 22
(R) FSurround back speaker (L)c) GSurround back speaker (R)c) HSub wooferd) 22GB a) • Be sure to turn the power off before adjusting the IMPEDANCE SELECTOR. • To enjoy the best possible multi channel surround sound, connect speakers with a nominal impedance of 8 ohms or higher to the FRONT, CENTER - Sony STR-DA7100ES | Operating Instructions - Page 23
then sound may stop coming out. Tip To connect certain speakers to another power amplifier, use the PRE OUT jacks. The same signal is output from 9.1 CH SP SYSTEM to "YES" in the CUSTOMIZE menu when you use 9.1 channel system (page 68). Note When the IMPEDANCE SELECTOR is set to "8Ω," connect the - Sony STR-DA7100ES | Operating Instructions - Page 24
, etc. b)Model with MULTI CH OUTPUT jacks, etc. This connection is used to output audio decoded by the component's internal multi-channel decoder through this receiver. c)Model equipped only with AUDIO OUT L/R jacks, etc. If you have Sony components with CONTROL A1II/CONTROL S jacks See "Operating - Sony STR-DA7100ES | Operating Instructions - Page 25
Getting Started Audio input/output jack to be connected The sound quality depends on the connecting jack. Refer to the illustration that follows. Select the connection according to the jacks of your components. Digital Analog High quality sound 25GB - Sony STR-DA7100ES | Operating Instructions - Page 26
The following illustration shows how to connect a Super Audio CD player/CD player and an MD/DAT deck. Super Audio CD player/CD player MD/DAT deck A A B C D A Optical digital cord (not supplied) B Audio cord (not supplied) C Coaxial digital cord (not supplied) D Audio cord (not supplied) 26GB - Sony STR-DA7100ES | Operating Instructions - Page 27
the SA-CD/CD OPTICAL or SA-CD/CD COAXIAL IN jack on this receiver. When you play a Super Audio CD disc, connect the player to the MULTI CHANNEL INPUT or SA-CD/CD IN jack. Refer to the operating instructions supplied with the Super Audio CD player. • You cannot make digital recordings of a Super - Sony STR-DA7100ES | Operating Instructions - Page 28
it to the MULTI CHANNEL INPUT jacks of this receiver to enjoy multi channel sound. Alternatively, the multi channel input jacks can be used to connect an external multi channel decoder. DVD player, Super Audio CD player, etc. A B A Audio cord (not supplied) B Monaural audio cord (not supplied - Sony STR-DA7100ES | Operating Instructions - Page 29
. As of the date when this manual was published, this receiver is only compatible with i.LINK connections to the SCDXA9000ES. For details on i.LINK connections for future Sony components with i.LINK jacks, please refer to the Operating Instructions supplied with each component. 1 Connecting one - Sony STR-DA7100ES | Operating Instructions - Page 30
Error message on page 135. • Only component which outputs an audio signal using an i.LINK jack can be connected. Components using a video signal, PC component, and other AV amplifier cannot be connected to this receiver. • An audio signal of IEEE1394 components without the i.LINK mark cannot be used - Sony STR-DA7100ES | Operating Instructions - Page 31
jacks The following illustration shows how to connect a component such as tape deck, turntable, etc., with analog jacks. Super Audio CD player/ CD player A Tape deck A A Turntable A Audio cord (not supplied) Note If your turntable has a ground wire, connect it to the (U) SIGNAL GND terminal. A MD - Sony STR-DA7100ES | Operating Instructions - Page 32
the video components How to hook up your components This section describes how to hook up your components to this receiver. Before Satellite tuner With HDMI jack VCR Video camera, TV game, etc. If you have Sony components with CONTROL A1II/CONTROL S jacks See "Operating Sony components" on - Sony STR-DA7100ES | Operating Instructions - Page 33
the power supply of the receiver is not on, neither video nor audio is transmitted. the MONITOR OUT jack as shown in the illustration. • Video signals can be output as HDMI video, component video and S-video signals. • S-video signals can be output as HDMI video, component video and video signals - Sony STR-DA7100ES | Operating Instructions - Page 34
receiving a signal that supports Closed Captions. If VIDEO CONVERT is set to "ON," you cannot display Closed Captions. • Only component video input signals of 480i are accepted when "PROGRESSIVE OUT" is set to "ON." Assigning video input signals to other input Component video input signals and HDMI - Sony STR-DA7100ES | Operating Instructions - Page 35
Getting Started Hooking up a TV monitor The image from a visual component connected to this receiver and the menu of this receiver can be displayed on a TV screen. It is not necessary to connect all the cables. Connect audio and video cords according to the jacks of your components. TV monitor A - Sony STR-DA7100ES | Operating Instructions - Page 36
or you cannot play back multi channel software with HDMI connected (page 70). • Turn on the receiver when the video and audio of a playback component are being output to a TV via the receiver. If the power supply of the receiver is not turned on, neither video nor audio is transmitted. Tip You can - Sony STR-DA7100ES | Operating Instructions - Page 37
necessary to connect all the cables. Connect audio and video cords according to the jacks of your components. 1 Connecting audio To output multi channel digital audio, set the digital audio output setting on the DVD player. Refer to the operating instructions supplied with the DVD player. DVD player - Sony STR-DA7100ES | Operating Instructions - Page 38
2 Connecting video DVD player B C A A Component video cord (not supplied) B S-video cord (not supplied) C Video cord (not supplied) 38GB - Sony STR-DA7100ES | Operating Instructions - Page 39
) We recommend that you use a Sony HDMI cable. Note Check the HDMI AUDIO setting in the menu, if the sound is not output from the TV speaker or you cannot play back multi channel software with HDMI connected (page 70). To listen from the TV speaker, set "HDMI AUDIO" to "TV+AMP" in the CUSTOMIZE - Sony STR-DA7100ES | Operating Instructions - Page 40
the speakers and the PRE OUT jack on this receiver. This signal supports Dolby Digital, DTS, and linear PCM. • Analog video signals input to the video jack, S-video jack, or component video jack can be output as HDMI signals. Audio signals are not output from an HDMI jack when the image is converted - Sony STR-DA7100ES | Operating Instructions - Page 41
how to connect a satellite tuner. It is not necessary to connect all the cables. Connect audio and video cords according to the jacks of your components. Satellite tuner A BC D EF A Audio cord (not supplied) B Optical digital cord (not supplied) C Coaxial digital cord (not supplied) D Component - Sony STR-DA7100ES | Operating Instructions - Page 42
Components with analog video and audio jack The following illustration shows how to connect a component which has analog jacks such as a VCR, etc. VCR A B To the VIDEO 3 INPUT jacks (Front panel) Camcorder/TV game B A A Audio/video cord (not supplied) B S-video cord (not supplied) 42GB - Sony STR-DA7100ES | Operating Instructions - Page 43
the connector varies depending on the area code of this receiver. Notes • To prevent noise pickup, keep the AM loop antenna away from the receiver and other components. • Be sure to fully extend the FM wire antenna. • After connecting the FM wire antenna, keep it as horizontal as possible. • Do not - Sony STR-DA7100ES | Operating Instructions - Page 44
supposed be connected this way. This is not malfunction. AC IN terminal AC OUTLET** • Make sure that the total power consumption of the component(s) connected to the receiver's AC OUTLET(s) does not exceed the wattage stated on the rear panel. Do not connect high-wattage electrical home appliances - Sony STR-DA7100ES | Operating Instructions - Page 45
or humid place. • Do not use a new battery with old ones. • Do not mix alkaline batteries and other kinds of batteries. • Do not expose the remote sensor of the receiver to direct sunlight or lighting apparatuses. Doing so may cause a malfunction. • If you do not intend to use the - Sony STR-DA7100ES | Operating Instructions - Page 46
SYSTEM2. If you repeat the same operation again, the setting will change to AV SYSTEM1 from AV SYSTEM2. When the Sony equipments are operated by remote of the receiver Change the setting of the receiver and remote to AV SYSTEM1. 1 Press RM SET UP. The set up list appears. 2 Move the easy scroll key - Sony STR-DA7100ES | Operating Instructions - Page 47
select "SPEAKER SET UP," then press the control key. You can also use MAIN MENU on the receiver. 3 Move the control key V/v to select the menu item. You can also use MENU on the receiver. For more information, see "SPEAKER SET UP parameters" (page 48). Note Certain setup parameters may be dimmed - Sony STR-DA7100ES | Operating Instructions - Page 48
receiver. You can set up menus easily. 1 4,5, 6 3 2,7 1 Turn on the receiver TV screen connected to this receiver. 3 Press MAIN MENU receiver. 6 Move the control key B/b to select the parameter. You can also use +/- on the receiver Guide"). • NO Select to adjust the settings of each speaker - Sony STR-DA7100ES | Operating Instructions - Page 49
also use +/- and MEMORY/ENTER on the receiver). Check your speaker pattern using the supplied "Quick Setup Guide." x SUB WOOFER (Sub woofer) • not connected a center speaker, select "NO," the sound of the center channel will be output from the front speakers. x SURROUND SP (Surround speaker) The - Sony STR-DA7100ES | Operating Instructions - Page 50
surround back speaker in the 2nd zone, select "2ND ZONE." When you select "2ND ZONE," the input to the SURR BACK jacks of the MULTI CHANNEL INPUT is invalid (page 28). Tip The "LARGE" and "SMALL" settings for each speaker determine whether or not the internal sound processor will cut the - Sony STR-DA7100ES | Operating Instructions - Page 51
Getting Started x SURR BACK xx meter (Surround back speaker distance) Initial setting: 3.0 meter (10 feet) Lets you set the distance from your listening position to the surround back speaker. You can adjust this distance from 1.0 meter to 7.0 meters (3 to 23 feet) in 0.1 meter (1 foot) steps. If - Sony STR-DA7100ES | Operating Instructions - Page 52
levels and balance (TEST TONE) Adjust the speaker levels and balance while listening the test tone from your listening position. Use the remote for the operation. Tip The receiver employs a test tone with a frequency centered at 800 Hz. 1 SPEAKERS switch 52GB 3,4, 6,7 3 2,8 1 Turn on the - Sony STR-DA7100ES | Operating Instructions - Page 53
+/- on the remote or turn MASTER VOLUME on the receiver. • You can also use +/- on the receiver for the adjustment. AUDIO" on the LEVEL menu (page 100). To operate on the receiver When you operate using the receiver, be sure to perform the following procedure. 1 3,5,7 2 4,6,8 1 Turn on this receiver - Sony STR-DA7100ES | Operating Instructions - Page 54
described for a Sony Super Audio CD. • Refer to the operating instructions supplied with the Super Audio CD player or channel format from all speakers (multi channel). Refer to page 90 for details. 1 Turn on the Super Audio CD player /CD player, then set the disc in the tray. 2 Turn on the receiver - Sony STR-DA7100ES | Operating Instructions - Page 55
7 7 3 MULTI CHANNEL DECODING lamp • Refer to the operating instructions supplied with the TV channel format (the MULTI CHANNEL DECODING lamp on the front panel lights up during playback). • Be sure this receiver is connected to the DVD player via a digital connection. • Be sure the digital audio - Sony STR-DA7100ES | Operating Instructions - Page 56
TV games 2 3 7 7 3 VIDEO 3 INPUT • Refer to the operating instructions supplied with the TV and TV game. z You can select the sound field to suit the music. Refer to page 91 for details. Recommend sound field: GAME 1 Turn on the TV and TV game. 2 Turn on the receiver. 3 Press INPUT SELECTOR - Sony STR-DA7100ES | Operating Instructions - Page 57
Playback Watching video 2 3 6 6 3 • Refer to the operating instructions supplied with the TV and VCR. z You can listen to sound recorded in the 2 channel format from all speakers (multi channel). Refer to page 90 for details. 1 Turn on the VCR. 2 Turn on the receiver. 3 Press INPUT SELECTOR, - Sony STR-DA7100ES | Operating Instructions - Page 58
i.LINK components connected to the i.LINK jack HDMI 1, 2 HDMI components connected to the HDMI jack MULTI CH IN Component connected to the MULTI CHANNEL INPUT jack *When you select i.LINK, the connected component name displayed (ex:SCDXA9000ES). The power supply is turned on and the completion - Sony STR-DA7100ES | Operating Instructions - Page 59
select "i.LINK" as the input, the power of the i.LINK circuits turns on. "i. remote. To cancel, press MUTING on the remote again or turn MASTER VOLUME clockwise to raise the volume. Even if you turn off the receiver, the muting function works when you turn the receiver on again. Switching the audio - Sony STR-DA7100ES | Operating Instructions - Page 60
function (page 61). • Some audio input modes may not be set up depending on the input. • A INPUT MODE button does not work when i.LINK or HDMI input are selected. Naming inputs You can enter a name of up to 8 characters for inputs and display it on the receiver's display. This is convenient for - Sony STR-DA7100ES | Operating Instructions - Page 61
inputting a character. You can also turn +/ - on the receiver until a blank space appears on the display. If you made Service (PS) name.) Listening to digital sound from other inputs (DIGITAL ASSIGN) You can assign digital audio input to other input which can be heard only analog sound (VIDEO - Sony STR-DA7100ES | Operating Instructions - Page 62
control key. You can also use MEMORY/ENTER on the receiver. 4 Move the control key V/v to select a vacant digital audio input (DVD COAX in the example). You can also use MENU on the receiver. 5 Move the control key B/b to select the input (VIDEO 1 in the example) you want to assign to the digital - Sony STR-DA7100ES | Operating Instructions - Page 63
example). You can also use MENU on the receiver. 5 Move the control key B/b to select the input (VIDEO 1 in the example) you want to assign as the component video input selected in step 4. You can also use +/- on the receiver. If an input is switched to "VIDEO 1," the image from the DVD player will - Sony STR-DA7100ES | Operating Instructions - Page 64
on the receiver. The input you can assign varies for each component video input. For details, see "Assignable inputs for an HDMI video input." Assignable inputs for an HDMI video input The initial setting is marked with an underscore. HDMI video Assignable inputs input HDMI 1 HDMI 2 NONE, VIDEO - Sony STR-DA7100ES | Operating Instructions - Page 65
the number in which you want to store the settings. You can also use +/- on the receiver. 5 Press the control key. 6 To store other settings, repeat steps 1 to 5. To use the USER PRESET Setting the USER PRESET 1 Adjust the menu you want to store, for example, sound field, etc. Settings that can - Sony STR-DA7100ES | Operating Instructions - Page 66
then store this in the USER PRESET. 3) Use the DIGITAL ASSIGN function to assign "DVD OPT" to "DVD." 4) Select the USER PRESET stored in example 2). The ," then press the control key. You can also use MAIN MENU on the receiver to select "CUSTOMIZE." 2 Move the control key V/v to select the menu item - Sony STR-DA7100ES | Operating Instructions - Page 67
input mode for the digital signal input to the DIGITAL IN and HDMI IN jacks. Automatically switches the input mode between DTS, Dolby Digital, when playback starts). When set to "AUTO" and the sound from the digital audio jacks (for a CD, etc.) is interrupted when playback starts, set to " - Sony STR-DA7100ES | Operating Instructions - Page 68
IN5.1 t 7.1 YES (Multi channel input 5.1ch t 7.1ch) NO DC PHASE L. (DC Phase Linearizer) i POWER (i.LINK power management) OFF LOW-A, STD-A, HIGH-A, LOW-B, STD-B, HIGH-B AUTO EVER ON Explanation Lets you delay the output of audio to adjust the gap between video and audio. You can adjust this - Sony STR-DA7100ES | Operating Instructions - Page 69
output signal has not sended from this receiver when the i.LINK input is selected. VIDEO 1, VIDEO 2, VIDEO 3, DVD, TV/SAT, HDMI 1, HDMI 2 An image of the selected input is on the monitor when the i.LINK input is selected. DIGITAL ASSIGN ? (Digital audio input assignment) Lets you assign the - Sony STR-DA7100ES | Operating Instructions - Page 70
, see "Watching HDMI image from other inputs (HDMI VIDEO ASSIGN)" on page 64. Let you set the audio output place of the playback component made HDMI connection with this receiver. The sound of the playback component is only output to speakers connected to this receiver. Multi channel content can be - Sony STR-DA7100ES | Operating Instructions - Page 71
Menu item HDMI POWER Parameter AUTO EVER ON VIDEO CONVERT* ** ON OFF PROGRESSIVE ON OUT* ** Explanation Lets you turn off the power of unnecessary HDMI circuits automatically. You can enjoy high quality digital or analog audio without the influence of the HDMI circuits. When set to "AUTO," - Sony STR-DA7100ES | Operating Instructions - Page 72
circuit is not compatible with component video signals of more than 480i/576i. ** Each video input can be adjusted independently for every INPUT SELECTOR. The adjusted value is held until the memory of this receiver is cleared. The adjusted value is retained, even if the power is turned off or the - Sony STR-DA7100ES | Operating Instructions - Page 73
(a format, channel, etc.) of digital input signals. The input stream information also appears for 4 seconds when the receiver detects any will change as follows. All inputs except "FM" and "AM" Index name and sound field name* y Input name and sound field name "FM" and "AM" Preset station name and - Sony STR-DA7100ES | Operating Instructions - Page 74
to turn off automatically at a specified time by using the remote. 1 2 Recording with other components Recording on an audio tape or MiniDisc You can record on a MiniDisc or cassette tape using the receiver. See the operating instructions supplied with your cassette deck or MD deck. 1 Press the - Sony STR-DA7100ES | Operating Instructions - Page 75
audio input (OPTICAL IN) jack, and connect the recording component to the OPTICAL MD/DAT jack. Recording on recording media You can record from a video component using the receiver. See the operating instructions sources component. • The audio signals input to the MULTI CHANNEL INPUT jacks are output - Sony STR-DA7100ES | Operating Instructions - Page 76
to high; press TUNING - to scan from high to low. The receiver stops scanning whenever a station is received. In case of poor FM stereo reception If the FM stereo reception is poor and "STEREO" flashes on the display, select monaural audio so that the sound will be less distorted. 1 Turn MAIN MENU - Sony STR-DA7100ES | Operating Instructions - Page 77
AM. You can also use FM/AM on the receiver. 4 Move the easy scroll key to select "DIRECT TUNING" from the SUB menu, then press the key. "0" flashes on the display window. 5 Press > on the remote repeatedly until the NUM menu appears, then select the numbers for the frequency, then press the key - Sony STR-DA7100ES | Operating Instructions - Page 78
the receiver scans and stores all the FM and FM RDS stations in the broadcast area. For RDS stations, the tuner first checks for stations broadcasting the same program, then stores only the ones with the clearest signal. The selected RDS stations are sorted alphabetically by their Program Service - Sony STR-DA7100ES | Operating Instructions - Page 79
the button, you can select a preset station as follows: tA1yA2y...yA0yB1yB2y...yB0T tC0y...yC2yC1T Using the remote 1 Press INPUT SELECTOR, then move the easy scroll key to select "TUNER" from the input "TUNER" from the input list. You can also use INPUT SELECTOR on the receiver. continued 79GB - Sony STR-DA7100ES | Operating Instructions - Page 80
RDS information. Receiving RDS broadcasts Simply select a station on the FM band using direct tuning (page 76), automatic tuning (page 76), or preset tuning (page 78). When you tune in a station that provides RDS services, the RDS indicator lights up and the program service - Sony STR-DA7100ES | Operating Instructions - Page 81
Amplifier Operation a)This information also appears for non-RDS FM stations. b)Appears only when the preset station is , "Alarm-Alarm!" flashes in the display. • If a station does not provide a particular RDS service, "No XX" (such as "No Clock Time") appears on the display. • When a station - Sony STR-DA7100ES | Operating Instructions - Page 82
CH IN function is used. The 2 channel analog audio signals of the current input are output. x INSTALLER MODE (RS232C control) • ON The receiver can receive commands from the RS232C port even when the power is off (standby mode). • OFF The receiver does not receive commands from the RS232C port when - Sony STR-DA7100ES | Operating Instructions - Page 83
video screen when you turn on the receiver. • OFF Lets you turn off output of 12V triggers even when the main receiver is turned on. • CTRL Lets you turn the output of 12V triggers on or off manually using the CIS command of the IR remote initial setting of VIDEO 1-3, DVD, TV/ SAT, and HDMI 1 and 2 - Sony STR-DA7100ES | Operating Instructions - Page 84
or 3RD) ZONE OUT jacks. • Switching the Sony receiver's power on or off in the 2nd (or 3rd) zone. • Adjusting the volume of the Sony receiver in the 2nd (or 3rd) zone. 1:2nd zone connections 1 2ND ZONE VIDEO/AUDIO OUT jack Main room STR-DA7100ES A B VIDEO OUT AUDIO OUT 2nd zone E TV E monitor - Sony STR-DA7100ES | Operating Instructions - Page 85
BACK SPEAKERS D D VIDEO OUT Amplifier Operation C A Audio component B Video component C IR repeater (not supplied) D Speaker 2:3rd zone connections Main room STR-DA7100ES A B AUDIO OUT C A Audio component B Video component C IR repeater (not supplied) D Sony's Amplifier/Receiver E Speaker RM - Sony STR-DA7100ES | Operating Instructions - Page 86
or 3rd zone mode. 2 Turn on the main receiver (this receiver). 3 Turn on the amplifier in the 2nd or 3rd zone. 4 Press one of the input buttons on the remote to select the source signals you want to output. For the 2nd zone, analog video and audio signals are output. For the 3rd zone, only - Sony STR-DA7100ES | Operating Instructions - Page 87
audio systems composed of separate Sony operating instructions supplied with the component(s). If you have a Sony CD changer receiver). If, however, you have a Sony CD changer with VIDEO OUT jacks, set the command mode to "CD 2" and connect the changer to the VIDEO 2 jacks on the amplifier (receiver - Sony STR-DA7100ES | Operating Instructions - Page 88
Sony instructions supplied with your TV, satellite tuner, monitor, VCR, etc., for details. If you connect the CTRL S OUT jack on another component to the CTRL S IN jack on this unit Example OUT TV, VCR, tuner, monitor, etc. IN Receiver I i .> mM H X x + - O + + - - Remote The remote - Sony STR-DA7100ES | Operating Instructions - Page 89
select the decoding mode for listening to a 2 channel stereo sound as multi channel sound. Enjoying higher fidelity sound In this mode, the receiver automatically detects the type of audio signal being input (Dolby Digital, DTS, standard 2 channel stereo, etc.) and performs the proper decoding, if - Sony STR-DA7100ES | Operating Instructions - Page 90
sound in multi channel This mode lets you specify the type of decoding for 2 channel audio sources. 1 2 1 Press SOUND FIELD. The sound field list appears. 2 Move the easy scroll key to select an A.F.D. mode, then press the key to enter the selection. You can also use A.F.D. on the receiver. 90GB - Sony STR-DA7100ES | Operating Instructions - Page 91
channel audio after decoding (Detecting automatically) 4 channel Dolby Pro Logic A.F.D. PRO LOGIC II 5 channel II MOVIE [PRO LOGIC II MOVIE] A.F.D. PRO LOGIC II 5 channel Addition, this mode can reproduce sound in 5.1 channel for watching videos of overdubbed or old movies. Performs Dolby Pro - Sony STR-DA7100ES | Operating Instructions - Page 92
selected - The DSD signal is received via i.LINK • DTS Neo:6 does not work for DTS 2CH audio, the sound is played as 2 channel. • If you set up the x CINEMA STUDIO EX A DCS Reproduces the sound characteristics of the Sony Pictures Entertainment "Cary Grant Theater" cinema production studio. This is - Sony STR-DA7100ES | Operating Instructions - Page 93
surround speakers. Notes • This function does not work in following cases. - MULTI CH IN is selected - The DSD signal is received via i.LINK - The sampling frequency has received the signal at a frequency higher than 48kHz. • If you set up the sound field during DTS 96/24 signal reception, it - Sony STR-DA7100ES | Operating Instructions - Page 94
. Outputs the analog signals input to the MULTI CHANNEL INPUT jacks that are downmixed to 2 channels. Note Headphone (2ch) mode is selected when the sound field does not work. • The DSD signal is received via i.LINK. • The sampling frequency has received a signal higher than 48kHz. To turn off the - Sony STR-DA7100ES | Operating Instructions - Page 95
decoding is performed on the surround back signal. Input stream Dolby Digital 5.1 Dolby Digital Surround EXb) DTS 5.1 DTS-ES Matrix 6.1c) DTS-ES Discrete 6.1d) Output Surround back channel decoding 5.1e) - 6.1e) Decoding for the decoding mode set up by SB DEC MODE (page 96) 5.1e) - 6.1e - Sony STR-DA7100ES | Operating Instructions - Page 96
is received via i.LINK - The sound mode for music is selected - A DTS 96/24 signal is received and channel and Movie decoding conforming to Pro Logic IIx is applied if the speaker setting is 7.1 channel k DTS [3/2.1] + DOLBY EX DTS-ES Matrix [3/2.1] DTS-ES Discrete [3/3.1] k DTS [3/2.1] + DOLBY EX - Sony STR-DA7100ES | Operating Instructions - Page 97
, if you decode a DTS-ES Discrete [3/3.1] signal, this unit also decodes a DTS-ES Discrete [3/2.1] signal. Customizing sound fields channel surround effects (DVD, etc.). 2 Press MAIN MENU repeatedly to select "SURR SET UP," then press the control key. You can also use MAIN MENU on the receiver - Sony STR-DA7100ES | Operating Instructions - Page 98
A.F.D. mode is set to "PRO LOGIC II MUSIC" or "PRO LOGIC IIx MUSIC" (page 91). You can adjust the difference between the front channels and the surround channels. x PANORAMA MODE (Panorama mode) Lets you perform further adjustments for Dolby Pro Logic II and IIx Music mode decoding. You can set this - Sony STR-DA7100ES | Operating Instructions - Page 99
all sound fields. 2,3, 4 2 1 Start playing a source encoded with multi channel surround effects (DVD, etc.). 2 Press MAIN MENU repeatedly to select "LEVEL," to select the parameter you want. You can also use MENU on the receiver. For details, see "LEVEL menu parameters." 4 While monitoring the sound - Sony STR-DA7100ES | Operating Instructions - Page 100
initial setting is marked with an underscore. x PHASE AUDIO (Phase audio) • ON Lets you output front 2 channel source sound (instead of the test tone) sequentially from adjacent speakers. • OFF Note The HDMI sound is not output when you display the receiver's menu on the TV monitor. x PHASE NOISE - Sony STR-DA7100ES | Operating Instructions - Page 101
, the levels are predetermined and provide a very natural compression. Resetting sound fields to the initial settings 1,2 2 1 Press ?/1 to turn off the power. 2 While holding down MUSIC, press ?/1. "S.F. Initialize" appears on the display and all sound fields are reset to their initial setting - Sony STR-DA7100ES | Operating Instructions - Page 102
displayed in meters. 1,2, 3 1 1 Press MAIN MENU repeatedly to select "SPEAKER SET UP," then press the control key. You can also use MAIN MENU on the receiver to select "SPEAKER SET UP." 2 Move the control key V/v to select the menu item you want. You can also use MENU on the - Sony STR-DA7100ES | Operating Instructions - Page 103
left and right. Therefore, although it may result in a setting contrary to the above explanation, we recommend that you playback multi channel surround encoded software and select the setting that provides a good sense of spaciousness and that best succeeds in forming a cohesive space between - Sony STR-DA7100ES | Operating Instructions - Page 104
(Hz) 2,3, 4,5, 6 2 1 Start playing a source encoded with multi channel surround effects (DVD, etc.). 2 Press MAIN MENU repeatedly to select "EQUALIZER also use +/- on the receiver. 5 Move the control key V/v to select the parameter. You can also use MENU on the receiver. For details, see " - Sony STR-DA7100ES | Operating Instructions - Page 105
of the selected equalizer bank. 4 Move the control key B/b to select "YES," then press the key. You can also use +/- and MEMORY/ ENTER on the receiver. "Are you sure?" appears on the display. 5 Move the control key B/b to select "YES," then press the key. You can also use +/- and MEMORY/ ENTER - Sony STR-DA7100ES | Operating Instructions - Page 106
Menu list of the remote (Operating the receiver) See the treelike chart below for the list hierarchy. Details on how to access each list are given from page 58. Some items have sublists that appear when you press > (page 110). Press (page 58) Press (RECEIVER menu) 106GB Deck A/B status information - Sony STR-DA7100ES | Operating Instructions - Page 107
Press (page 92) Press Sound field list IR SET list CATEGORY list MAKER list MACRO 1/2 list PROGRAM list CATEGORY list LEARNING list BUTTON list TV INPUT list COMMON list BUTTON list MAKER list FUNCTION list Using the Remote 107GB - Sony STR-DA7100ES | Operating Instructions - Page 108
list appears. The items in the list correspond with the jacks on the receiver. 2 Move the easy scroll key to select a component from the power function" on page 119. • You can customize the input list. If you selected the tape deck Move the easy scroll key to select deck A or B. Note When the remote - Sony STR-DA7100ES | Operating Instructions - Page 109
remote to control the following Sony or non-Sony components, you can use the buttons on the remote that are marked with circles. Note, however, that some buttons may not operate your component. Table of buttons used to control each component Component VCR TV LD DVD Video z GUIDE z z z AV MENU - Sony STR-DA7100ES | Operating Instructions - Page 110
SUB menu) for which the corresponding buttons are not found on the remote. The contents of the lists will vary according to the currently selected + CH - Selects preset channels. INPUT SELECT Changes the input mode of the VCR. AUDIO Changes the sounds. ANT TV/ VIDEO Selects the signal to be - Sony STR-DA7100ES | Operating Instructions - Page 111
Remote Component Item(s) Function DVD player AUDIO Selects a disc. DISC SKIP - SET UP Displays the Set up menu. Video CD player DISC SKIP + Selects an disc. DISC SKIP - TIME Changes the Enters Direct Tuning mode. FM/AM Selects the FM or AM band. SHIFT Switches the memory page. - Sony STR-DA7100ES | Operating Instructions - Page 112
focus of the picture. a) Only with Sony TVs that supports the wide-picture mode. b)Only with Sony TVs with the picture-in-picture function. c)"DISC A/B" appears for non-Sony LD players. d)Only with the Sony CD changer. Note If you have programmed the remote to control nonSony components, note the - Sony STR-DA7100ES | Operating Instructions - Page 113
display the DVD menu, use the AV MENU button (page 17). Programming the remote You can customize the remote to match the components connected to your receiver. You can even program the remote to control nonSony components and also Sony components that the remote is normally unable to control. The - Sony STR-DA7100ES | Operating Instructions - Page 114
select the maker of the component ("Aiwa," for example), then press the key to enter the selection. When programming the remote to control a Sony component, select "Sony." Programming is now completed. Programming the TV operation buttons 1 2,3, 4,5 1 Press RM SET UP. The set up list appears. 2 Move - Sony STR-DA7100ES | Operating Instructions - Page 115
order as a single command. For example, after putting on a light of the room and turning on an air-conditioner then, the receiver plays a number of CDs in a series. The remote provides 2 macro lists (MACRO1 and MACRO2). You can specify up to 16 IR codes for each macro list. Program the sequence of - Sony STR-DA7100ES | Operating Instructions - Page 116
play operation will cancel the macro play sequence before it is complete. - AV ?/1 - ?/1 - SYSTEM STANDBY - SOUND FIELD - INPUT SELECTOR - RM "WAIT TIME" between each operation. Setting remote control codes that are not stored in the commander When a remote control code is not one of the presets - Sony STR-DA7100ES | Operating Instructions - Page 117
Using the Remote 5 Point the remote code receiver section of the commander toward the receiver/transmitter on the remote control to be learned from. About 5 cm - 10 cm (2" - 4") 6 Move the easy scroll key to select "Learning Start," then press the key to enter the - Sony STR-DA7100ES | Operating Instructions - Page 118
the easy scroll key to select "Yes" again, then press the key. All the contents of the remote's memory (i.e., all the programmed data) are cleared. Other operations Customizing the input list You can set the remote to display only the inputs you use in the input list. 1 2,3 1 Press RM SET UP. The - Sony STR-DA7100ES | Operating Instructions - Page 119
the key to enter the selection. When you want to select component video input, select TV-COMPO1 or 2. Notes • Switching to VIDEO1-6 input may not be automatic on all Sony TVs. This is because some TVs cannot receive remote control codes immediately after being turned on. • If you select "(Off)" in - Sony STR-DA7100ES | Operating Instructions - Page 120
of the input buttons to suit the components in your system. For example, if you connect an LD player to the VIDEO 2 jacks on the receiver, you can set the VIDEO 2 button on this remote to control the LD player. Note, however, that the settings of the TUNER button cannot be changed. 1 2,3 4 120GB - Sony STR-DA7100ES | Operating Instructions - Page 121
MD/DAT twice CD player-1 SA-CD/CD once CD player-2 SA-CD/CD twice CD player-3 SA-CD/CD three times VIDEO CD player VIDEO 1, then SA-CD/ CD To clear all remote button assignments Hold down RM SET UP, then press ?/1. The remote is reset to its factory-settings. 121GB Using the - Sony STR-DA7100ES | Operating Instructions - Page 122
MENU. Menu Item Parameter LEVEL TEST TONE [xxx] OFF, AUTO, FIX *PHASE NOISE [xxx] OFF, L/C, C/R, R/SL, R/SR, SR/SL, SL/L, SR/L *PHASE AUDIO OFF, L/C, C/R, R/SL, R/SR, SR/SL, SL/L, SR/L FRONT L--- ---R 8.0dB (0.5dB step) CENTER [xxx.x dB] -20.0dB to +10.0dB (0.5dB step) SURROUND - Sony STR-DA7100ES | Operating Instructions - Page 123
.0dB (1dB step) 0dB dB] SURR/SB TRE. [xxx.x dB] -10.0dB to +10.0dB (1dB step) 0dB PRESET x CLEAR [xxx] YES, NO NO TUNER FM MODE NAME IN? [xxx] MONO, STEREO STEREO page 76 - 80 SPEAKER SET UP SP EASY SET UP [xxx] YES, NO YES SPEAKER PATTERN [xxx] 2-0, 2-1, 3-0, 3-1, 4-0, 4-1, 5C0 - Sony STR-DA7100ES | Operating Instructions - Page 124
MD/DAT, SA-CD/CD HDMI VIDEO ASSIGN? HDMI 1 NONE, VIDEO1, VIDEO2, VIDEO3, NONE DVD, TV/SAT, TAPE, MD/DAT, SA-CD/CD HDMI 2 NONE, VIDEO1, VIDEO2, VIDEO3, NONE DVD, TV/SAT, TAPE, MD/DAT, SA-CD/CD HDMI AUDIO AMP, TV+AMP AMP HDMI POWER AUTO, EVER ON AUTO VIDEO CONVERT ON, OFF ON PROGRESSIVE - Sony STR-DA7100ES | Operating Instructions - Page 125
Menu Item Parameter NAME IN? [xxx] CIS 2ND ZONE 3RD ZONE INSTALLER MODE 12V TRIG. MAIN 12V TRIG. 2ND 12V TRIG. 3RD STREAM INFO STREAM=xxxxxx SOURCE, VIDEO1, VIDEO2, VIDEO3, DVD, TV/SAT, TAPE, MD/DAT, SA-CD/CD, TUNER SOURCE, VIDEO1, VIDEO2, VIDEO3, DVD, TV/SAT, TAPE, MD/DAT, SA-CD/CD, TUNER - Sony STR-DA7100ES | Operating Instructions - Page 126
in 4ch surround sound. This is the most common audio processing method for DVD-video. x Downmix A method to output multi-channel audio such as 5.1ch, encoded into two channels. x DSD (Direct Stream Digital) Audio format used for a Super Audio CD. DSD converts analog signals to digital and records - Sony STR-DA7100ES | Operating Instructions - Page 127
of quietness or loudness can be reproduced. x HDMI (High-Definition Multimedia Interface) Technology developed by modifying the display connecting technology, DVI (Digital Visual Interface), for AV equipment. This interface can transmit video, audio, and control signals in digital format. x i.LINK - Sony STR-DA7100ES | Operating Instructions - Page 128
A format for transmitting video signal information. S-video uses a single cable and two channels, one for the Luminance signal Y including Sony Pictures Entertainment's dubbing studios. There are three modes, A/B/ C, available according to the studio type. x DC Phase Linearizer With analog power - Sony STR-DA7100ES | Operating Instructions - Page 129
the exciting and powerful sound of movie This receiver is equipped with an "S-Master" full digital amplifier - a unique digital amplifier developed by Sony with fidelity sound even with vast information signals, like Super Audio CDs. 2:Low heat emission Another advantage to S-Master technology - Sony STR-DA7100ES | Operating Instructions - Page 130
• The AC power cord must be changed only at a qualified service shop. On receiver near equipment such as a television, video deck, or cassette deck. (If the receiver is being used in combination with a television, video problems concerning your receiver, please consult your nearest Sony dealer. 130GB - Sony STR-DA7100ES | Operating Instructions - Page 131
the following difficulties while using the receiver, use this troubleshooting guide to help you remedy the problem. Should any problem persist, consult your nearest Sony dealer. There is no sound, no matter which component is selected. • Check that both the receiver and all components are turned on - Sony STR-DA7100ES | Operating Instructions - Page 132
when you display the receiver's menu on the TV monitor. Press ON SCREEN to turn off the display. • You cannot listen to the Super Audio CD by connecting HDMI. • Depending on the playback component, component side may need to be set up. Refer to the operating instructions supplied with the each - Sony STR-DA7100ES | Operating Instructions - Page 133
, the service may be temporarily out of order. There is no picture or an unclear picture appears on the TV screen or monitor. • Select the appropriate input on the receiver. • Set your TV to the appropriate input mode. • Move your TV away from the audio components. • Assign the component video input - Sony STR-DA7100ES | Operating Instructions - Page 134
on the playback component is set to multi channel sound. Remote control The remote does not function. • Point the remote at the remote sensor on the receiver. • Remove any obstacles in the path between the remote and the receiver. • Replace all the batteries in the remote with new ones, if they are - Sony STR-DA7100ES | Operating Instructions - Page 135
sound fields See page 44 page 101 Specifications AUDIO POWER SPECIFICATIONS POWER OUTPUT AND TOTAL HARMONIC DISTORTION: (Models of area code UC only) With 8 ohm loads, both channels driven, from 20 - 20,000 Hz; rated 170 watts per channel minimum RMS power, with no more than 0.15% total harmonic - Sony STR-DA7100ES | Operating Instructions - Page 136
under the following conditions: Area code Power requirements UC 120 V AC, 60 86dB (A, 20 kHz LPF) MULTI CHANNEL INPUT1/2, SA-CD/CD, TAPE, DVD, TV/SAT, MD/DAT, VIDEO 3 (Optical) Impedance: 75ohms 1kohms VIDEO1/2 (AUDIO OUT) FRONT FM tuner section Tuning range 87.5 - 108.0 MHz Antenna FM - Sony STR-DA7100ES | Operating Instructions - Page 137
turn off the receiver. While holding Audio CD* (DSD PLAIN) 2 channel Hz Power consumption Area code UC, CEL, TW, KR, CN UC Power consumption 250 W 300 VA Power consumption ( FM wire antenna (1) AM loop antenna (1) AC power cord (1) Remote commander RM-AAE003 (1) LR6 (size-AA) batteries (3) Remote - Sony STR-DA7100ES | Operating Instructions - Page 138
Numerics 2 channel 89 2CH STEREO 89 2nd (3rd) zone operations 84 5.1 channel 20 7.1 channel 20 9.1 channel 21 A A.F.D. 91 AC power cord 44 38 Playback 55 E Error messages 134 H HDMI connecting 39 HDMI AUDIO 70 HDMI POWER 71 HDMI VIDEO ASSIGN? 70 HDMI VIDEO ASSIGN 64 I i.LINK 29 IMPEDANCE SELECTOR - Sony STR-DA7100ES | Operating Instructions - Page 139
O ON SCREEN 48, 52 R RDS 80 Recording on a video tape 75 on an audio tape or MiniDisc 74 Remote all clear 118 Before Use 45 learning 116 Lists 106 Macro Play 52 Storing the adjusted settings 65 STREAM INFO 73 Super Audio CD 27 Connecting 28 Playback 54 SURR BACK DECODING 95 Surround Sound 89 T
-
 1
1 -
 2
2 -
 3
3 -
 4
4 -
 5
5 -
 6
6 -
 7
7 -
8
-
9
-
10
-
11
-
12
-
13
-
14
-
15
-
16
-
17
-
18
-
19
-
20
-
21
-
22
-
23
-
24
-
25
-
26
-
27
-
28
-
29
-
30
-
31
-
32
-
33
-
34
-
35
-
36
-
37
-
38
-
39
-
40
-
41
-
42
-
43
-
44
-
45
-
46
-
47
-
48
-
49
-
50
-
51
-
52
-
53
-
54
-
55
-
56
-
57
-
58
-
59
-
60
-
61
-
62
-
63
-
64
-
65
-
66
-
67
-
68
-
69
-
70
-
71
-
72
-
73
-
74
-
75
-
76
-
77
-
78
-
79
-
80
-
81
-
82
-
83
-
84
-
85
-
86
-
87
-
88
-
89
-
90
-
91
-
92
-
93
-
94
-
95
-
96
-
97
-
98
-
99
-
100
-
101
-
102
-
103
-
104
-
105
-
106
-
107
-
108
-
109
-
110
-
111
-
112
-
113
-
114
-
115
-
116
-
117
-
118
-
119
-
120
-
121
-
122
-
123
-
124
-
125
-
126
-
127
-
128
-
129
-
130
-
131
-
132
-
133
-
134
-
135
-
136
-
137
-
138
-
139
 |
 |

©2005 Sony Corporation
Sony Corporation
Printed in Malaysia
2-320-745-
14
(3)
FM Stereo/
FM-AM Receiver
Operating Instructions
Owner’s Record
The model and serial numbers are located on the rear of the unit. Record the
serial number in the space provided below. Refer to them whenever you call
upon your Sony dealer regarding this product.
Model No.
Serial No.
STR-DA7100ES