Sony STR-DA7100ES Operating Instructions - Page 66
Changing the menu setting
 |
View all Sony STR-DA7100ES manuals
Add to My Manuals
Save this manual to your list of manuals |
Page 66 highlights
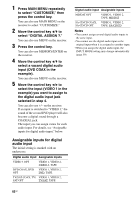
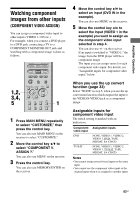
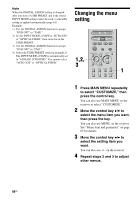
Note When the DIGITAL ASSIGN setting is changed after you store a USER PRESET and if the stored INPUT MODE setting cannot be used, a selectable setting is applied automatically (page 61). Example: 1) Use the DIGITAL ASSIGN function to assign "DVD OPT" to "TAPE." 2) Set the INPUT MODE of TAPE to "AUTO 2CH" or "OPTICAL FIXED," then store this in the USER PRESET. 3) Use the DIGITAL ASSIGN function to assign "DVD OPT" to "DVD." 4) Select the USER PRESET stored in example 2). The INPUT MODE of TAPE is automatically set to "ANALOG 2CH FIXED." You cannot select "AUTO 2CH" or "OPTICAL FIXED." Changing the menu setting 1,2, 3 1 1 Press MAIN MENU repeatedly to select "CUSTOMIZE," then press the control key. You can also use MAIN MENU on the receiver to select "CUSTOMIZE." 2 Move the control key V/v to select the menu item you want, then press the key. You can also use MENU on the receiver. See "Menu item and parameter" on page 67 for details. 3 Move the control key B/b to select the setting item you want. You can also use +/- on the receiver. 4 Repeat steps 2 and 3 to adjust other menus. 66GB
-
 1
1 -
2
-
3
-
4
-
5
-
6
-
7
-
8
-
9
-
10
-
11
-
12
-
13
-
14
-
15
-
16
-
17
-
18
-
19
-
20
-
21
-
22
-
23
-
24
-
25
-
26
-
27
-
28
-
29
-
30
-
31
-
32
-
33
-
34
-
35
-
36
-
37
-
38
-
39
-
40
-
41
-
42
-
43
-
44
-
45
-
46
-
47
-
48
-
49
-
50
-
51
-
52
-
53
-
54
-
55
-
56
-
57
-
58
-
59
-
60
-
 61
61 -
 62
62 -
 63
63 -
 64
64 -
 65
65 -
 66
66 -
 67
67 -
 68
68 -
 69
69 -
 70
70 -
 71
71 -
72
-
73
-
74
-
75
-
76
-
77
-
78
-
79
-
80
-
81
-
82
-
83
-
84
-
85
-
86
-
87
-
88
-
89
-
90
-
91
-
92
-
93
-
94
-
95
-
96
-
97
-
98
-
99
-
100
-
101
-
102
-
103
-
104
-
105
-
106
-
107
-
108
-
109
-
110
-
111
-
112
-
113
-
114
-
115
-
116
-
117
-
118
-
119
-
120
-
121
-
122
-
123
-
124
-
125
-
126
-
127
-
128
-
129
-
130
-
131
-
132
-
133
-
134
-
135
-
136
-
137
-
138
-
139
 |
 |
