Sony STR-DG500 Operating Instructions
Sony STR-DG500 - Multi Channel Av Receiver Manual
 |
View all Sony STR-DG500 manuals
Add to My Manuals
Save this manual to your list of manuals |
Sony STR-DG500 manual content summary:
- Sony STR-DG500 | Operating Instructions - Page 1
Multi Channel AV Receiver Operating Instructions Owner's Record The model and serial numbers are located on the rear of the unit. Record the serial number in the space provided below. Refer to them whenever you call upon your Sony dealer regarding this product. Model No. Serial No. STR-DG500 - Sony STR-DG500 | Operating Instructions - Page 2
to alert the user to the presence of important operating and maintenance (servicing) instructions in the receiver is connected. - Consult the dealer or an experienced radio/TV technician for help. CAUTION You are cautioned that any changes or modification not expressly approved in this manual - Sony STR-DG500 | Operating Instructions - Page 3
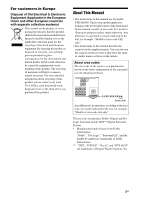
Office, your household waste disposal service or the shop where you purchased the product. About This Manual • The instructions in this manual are for model STR-DG500. Check your model number by looking at the lower right corner of the front panel. In this manual, models of area code U is used for - Sony STR-DG500 | Operating Instructions - Page 4
(Models of area code CEL, CEK only) Other Operations Switching the audio input mode (INPUT MODE 60 Watching component images from other inputs (COMPONENT VIDEO ASSIGN) ....... 61 Naming inputs 62 Changing the display 62 Using the Sleep Timer 63 Recording using the receiver 63 Using the Remote - Sony STR-DG500 | Operating Instructions - Page 5
the front speakers (page 26). C Display The current status of the selected component or a list of selectable items appears here (page 7). D MULTI CHANNEL Lights up when multi DECODING lamp channel audio is decoded (page 33). E Remote sensor Receives signals from remote commander. continued 5GB - Sony STR-DG500 | Operating Instructions - Page 6
select the input mode when the same components are connected to both digital and analog jacks (page 60). H MASTER VOLUME Turn to adjust the volume level of all speakers at the same time (page 30, 31, 32, 33). I DIRECT Press to listen to high quality analog sound (page 52). J MULTI CH IN Press - Sony STR-DG500 | Operating Instructions - Page 7
the display Getting MODE is not set to "ANALOG" (page 60). Name E ;PRO LOGIC (II)/ (IIx) F DTS (-ES)/ (96/24) G NEO:6 Function Lights up when the receiver applies Pro Logic processing to 2 channel set to "NO" (page 37) and you select a sound field using the A.F.D. button. Note Dolby Pro Logic IIx - Sony STR-DG500 | Operating Instructions - Page 8
Lights up when using the receiver to tune in radio stations (page 53), etc. Note "RDS" appears for models of area code CEL, CEK only. through the OPTICAL jack, or when INPUT MODE is set to "OPT IN" (page 60). Lights up when the sleep timer is activated (page 63). Name P Playback channel indicators - Sony STR-DG500 | Operating Instructions - Page 9
receiver (page 24). C AUDIO INPUT/OUTPUT section AUDIO IN/ White (L) OUT jack Red (R) Connects to an MD deck or CD player, etc. (page 17). White (L) Red (R) MULTI CHANNEL INPUT jack Black Connects to a Super Audio CD player or DVD player which has an analog audio jack for 5.1 channel sound - Sony STR-DG500 | Operating Instructions - Page 10
OUT jack to a TV monitor (page 19). Remote commander You can use the supplied remote RM-AAU005 to operate the receiver and to control the Sony audio/video components that the remote is assigned to operate (page 64). wg 1 AV ?/1 TV/VIDEO AUTO SLEEP CAL AV ?/1 TV ?/1 ?/1 (on/standby) switch wf - Sony STR-DG500 | Operating Instructions - Page 11
AV ?/1 (A) at the same time (SYSTEM STANDBY). C AMP MENU Press to display the menu of the receiver. Then, use the control buttons to perform menu operations. D MOVIE, MUSIC Press to select sound preset TV channels. PRESET +/- Press to select - preset stations. - preset channels of the VCR - Sony STR-DG500 | Operating Instructions - Page 12
TV channels. Press to select A.F.D. mode. Press to select 2CH STEREO mode. Name Function W Input buttons Press one of the buttons to select the component you want to use. When you press any of the input buttons, the receiver turns on. The buttons are factory assigned to control Sony components - Sony STR-DG500 | Operating Instructions - Page 13
Getting Started 1: Installing speakers This receiver allows you to use a 6.1 channel system (6 speakers and one sub woofer). Enjoying a 5.1/6.1 channel system To fully enjoy theater-like multi channel surround sound requires five speakers (two front speakers, a center speaker, and two surround - Sony STR-DG500 | Operating Instructions - Page 14
AUDIO IN AUDIO OUT AUDIO IN DVD VIDEO 2 VIDEO 1 L AUDIO CENTER OUT R SUB FRONT SURROUND WOOFER SUB MULTI CH IN WOOFER + - + - R SURROUND SPEAKERS R FRONT A RL RL FRONT B SPEAKERS B D E ON, it turns to standby mode automatically based on the level of the input signal to a sub woofer, then - Sony STR-DG500 | Operating Instructions - Page 15
connection is used to output audio decoded by the component's internal multi-channel decoder through this receiver. b)Model equipped only with AUDIO OUT L/R jacks, etc. Audio input/output jack to be connected The sound quality depends on the connecting jack. Refer to the illustration that follows - Sony STR-DG500 | Operating Instructions - Page 16
or Super Audio CD player is equipped with multi channel output jacks, you can connect it to the MULTI CH IN jacks of this receiver to enjoy multi channel sound. Alternatively, the multi channel input jacks can be used to connect an external multi channel decoder. Note When you make connections to - Sony STR-DG500 | Operating Instructions - Page 17
Super Audio CD player/ CD player MD deck/ Tape deck A A DIGITAL OPTICAL VIDEO 1 IN VIDEO 2 IN ANTENNA AM COMPONENT VIDEO ASSIGNABLE Y MONITOR 2 VIDEO 1 L AUDIO CENTER OUT R SUB FRONT SURROUND WOOFER SUB MULTI CH IN WOOFER CENTER + - SURROUND BACK L L + - + - R SURROUND SPEAKERS - Sony STR-DG500 | Operating Instructions - Page 18
the connection according to the jacks on your components. High quality image Notes • Connect image display components such as a TV monitor or a projector to the MONITOR OUT jack on the receiver. • Turn on the receiver when the video and audio of a playback component are being output to a TV through - Sony STR-DG500 | Operating Instructions - Page 19
Connect image display components such as a TV monitor or a projector to the MONITOR OUT jack on the receiver. • Turn on the receiver when the IN DVD VIDEO 2 VIDEO 1 L AUDIO CENTER OUT R SUB FRONT SURROUND WOOFER SUB MULTI CH IN WOOFER CENTER + - SURROUND BACK L L + - + - R SURROUND - Sony STR-DG500 | Operating Instructions - Page 20
your components. 1 Connecting audio Notes • To input multi channel digital audio from the DVD player, set the digital audio output setting on the DVD player. Refer to the operating instructions supplied with the DVD player. • When connecting optical digital cords, insert the plugs straight in until - Sony STR-DG500 | Operating Instructions - Page 21
B DIGITAL OPTICAL VIDEO 1 factory setting of the VIDEO 1 input button on the remote so that you can use the button to control your DVD recorder. For details, see "Changing button assignments" (page 64). • You can also rename the VIDEO 1 input so that it can be displayed on the receiver's display - Sony STR-DG500 | Operating Instructions - Page 22
IN DVD VIDEO 2 VIDEO 1 L AUDIO CENTER OUT R SUB FRONT SURROUND WOOFER SUB MULTI CH IN WOOFER CENTER + - SURROUND BACK L L + - + - R SURROUND SPEAKERS R FRONT A A Audio cord (not supplied) B Optical digital cord (not supplied) C Video cord (not supplied) D Component video cord (not - Sony STR-DG500 | Operating Instructions - Page 23
has analog jacks such as a VCR, etc. VCR A DIGITAL OPTICAL VIDEO 1 IN VIDEO 2 IN ANTENNA AM COMPONENT VIDEO ASSIGNABLE Y MULTI CH IN WOOFER CENTER + - SURROUND BACK L L + - + - R SURROUND SPEAKERS R FRONT A To the VIDEO 3 IN/PORTABLE AV IN jacks (Front panel) VIDEO 3 IN/PORTABLE AV - Sony STR-DG500 | Operating Instructions - Page 24
FM wire antenna (supplied) AM loop antenna (supplied) DIGITAL OPTICAL VIDEO 1 IN VIDEO 2 IN ANTENNA AM COMPONENT VIDEO ASSIGNABLE Y R SUB FRONT SURROUND WOOFER SUB MULTI CH IN WOOFER * The shape of the connector varies depending on the area code of this receiver. Notes • To prevent noise pickup - Sony STR-DG500 | Operating Instructions - Page 25
return settings you have made to their factory defaults. Be sure to use the buttons on the receiver for this operation. 1,2 ?/1 SPEAKERS (OFF/A/B /A+B) AUTO CAL MIC PHONES VIDEO 3 IN/PORTABLE AV IN VIDEO L AUDIO R MULTI CHANNEL DECODING DISPLAY INPUT MODE INPUT SELECTOR MASTER VOLUME MEMORY - Sony STR-DG500 | Operating Instructions - Page 26
the buttons on the receiver for this operation. ?/1 SPEAKERS (OFF/A/B /A+B) AUTO CAL MIC PHONES VIDEO 3 IN/PORTABLE AV IN VIDEO L AUDIO R MULTI CHANNEL DECODING DISPLAY INPUT MODE INPUT SELECTOR MASTER VOLUME MEMORY/ TUNING ENTER MODE TUNING 2CH A.F.D. MOVIE MUSIC MULTI CH IN DIRECT - Sony STR-DG500 | Operating Instructions - Page 27
and the receiver. • Adjust manually. For details, see "8: Adjusting the speaker levels and balance (TEST TONE)" (page 30). Before you perform Auto Calibration ?/1 SPEAKERS (OFF/A/B /A+B) AUTO CAL MIC PHONES VIDEO 3 IN/PORTABLE AV IN VIDEO L AUDIO R MULTI CHANNEL DECODING DISPLAY INPUT MODE - Sony STR-DG500 | Operating Instructions - Page 28
blank display t (error code t blank display)a) t PUSH t blank display t ENTER a)Appears when there are more than one error code. To rectify the error 1 Record down the error code. 2 Press the control button. 3 Press ?/1 to turn off the receiver. 4 Rectify the error. For details, see "Error code and - Sony STR-DG500 | Operating Instructions - Page 29
code t blank display t (warning code t blank display)b) t PUSH t blank display t ENTER b)Appears when there are more than one warning code. You can choose to ignore the warning code as the Auto Calibration function will automatically adjust the settings. You can also change the settings manually - Sony STR-DG500 | Operating Instructions - Page 30
time, press MASTER VOL +/-. You can also use MASTER VOLUME on the receiver. • The adjusted value are shown on the display during adjustment. 7 Repeat steps 1 to 5 to select "T. TONE N". The test tone turns off. Note The test tone does not work when MULTI CH IN or ANALOG DIRECT is selected. 30GB - Sony STR-DG500 | Operating Instructions - Page 31
CLEAR DISPLAY G DUAL MONO 23 FM MODE 56 MULTI" appears on the display. Note The surround effect does not work when MULTI CH IN is selected. 2 Turn on the component and start playback. 3 Press MASTER VOL +/- to adjust the volume. You can also use MASTER VOLUME on the receiver. To mute the sound - Sony STR-DG500 | Operating Instructions - Page 32
PORTABLE AV IN VIDEO L AUDIO R MULTI CHANNEL DECODING DISPLAY INPUT MODE INPUT SELECTOR MASTER VOLUME MEMORY/ TUNING ENTER MODE TUNING 2CH A.F.D. MOVIE MUSIC MULTI CH IN DIRECT 5 3 Notes • The operation is described for a Sony Super Audio CD player. • Refer to the operating instructions - Sony STR-DG500 | Operating Instructions - Page 33
DECODING DISPLAY INPUT MODE INPUT SELECTOR MASTER VOLUME MEMORY/ TUNING ENTER MODE TUNING 2CH A.F.D. MOVIE MUSIC MULTI CH IN DIRECT 7 3 Notes • Refer to the operating instructions supplied with the TV and DVD player. • Check the following if you cannot listen to multi channel sound. - Be - Sony STR-DG500 | Operating Instructions - Page 34
using the amplifier menus, you can make various adjustments to customize the receiver. 2-6 VIDEO 1 VIDEO 2 VIDEO 3 DVD MD/TAPE SA-CD/CD TUNER AMP MENU 1 2CH A.F.D. MOVIE MUSIC DUAL MONO 123 FM MODE 456 7 >10/ - CLEAR DISPLAY D.TUNING 89 D.SKIP MEMORY DVD MENU 0/10 ENTER TOOLS MUTING F TV - Sony STR-DG500 | Operating Instructions - Page 35
Display] LEVEL (38) [1-LEVEL] TONE (39) [2-TONE] SUR (39) [3-SUR] Parameters [Display ] Front speaker treble level [TRE LVL] Sound field selectiona) [S.F. SELCT] Surround back decoding MV, PLIIX MS, PLIIX GM, NEO6 SA-CD/CD, CIN, NEO6 MUS, MULTI ST., MD/TAPE; C.ST.EX A, C.ST.EX B, C.ST.EX C, A.F.D. - Sony STR-DG500 | Operating Instructions - Page 36
] TUNER (41) [4-TUNER] AUDIO (41) [5-AUDIO] VIDEO (42) [6-VIDEO] Parameters [Display] FM station receiving modea) [FM MODE] Naming preset stationsa) [NAME IN] Digital audio input decoding prioritya) [DEC. PRI.] Settings FM AUTO, FM MONO DEC. AUTO, DEC. PCM Digital broadcast language selectiona - Sony STR-DG500 | Operating Instructions - Page 37
Menu [Display] SYSTEM (43) [7-SYSTEM] Parameters [Display] Sub woofera positiona) [SUR POS.] Speaker crossover frequencya) [CRS. FREQ] Brightness of the displaya) [DIMMER] Auto Calibrationa) [AUTO CAL.] DIST models of area code U, CA is "ft." and for models of other area code is "m". 37GB - Sony STR-DG500 | Operating Instructions - Page 38
the level (LEVEL menu) You can use the LEVEL menu to adjust the balance and level of each speaker. These settings are applied to all sound fields. Select "1-LEVEL" in the amplifier menus. For details on adjusting the parameters, see "Navigating through menus" (page 34) and "Overview of the menus - Sony STR-DG500 | Operating Instructions - Page 39
Sound field selection) Lets you select the sound field you want. For details, see "Enjoying Surround Sound" (page 47). Note The receiver lets you apply the last selected sound decoding mode) Lets you select the surround back decoding mode. For details, see "Using the surround back decoding mode" ( - Sony STR-DG500 | Operating Instructions - Page 40
extension stream designed for returning those signals to 6.1 discrete channels. Discrete 6.1 channel signals are DVD specific signals not used in movie theaters. Notes • There may be no sound from the surround back speaker in Dolby Digital EX mode. Some discs have no Dolby Digital Surround EX flag - Sony STR-DG500 | Operating Instructions - Page 41
menus" (page 35). TUNER menu parameters x FM MODE (FM station receiving mode) • FM AUTO This receiver will decode the signal as stereo signal when the there may be no sound depending on the format. In this case, set to "DEC. AUTO". Note When set to "DEC. AUTO" and the sound from the digital audio - Sony STR-DG500 | Operating Instructions - Page 42
This parameter is valid only when you use a sound field selected with the 2CH or A.F.D. buttons. • This parameter is not valid when - PCM 96 kHz, DTS 96/24 or DTS 2048 signals are input. - the receiver performing DTS-ES Matrix 6.1 decoding. - MULTI CH IN or ANALOG DIRECT function is selected. x NAME - Sony STR-DG500 | Operating Instructions - Page 43
(page 35). SYSTEM menu parameters The default setting for models of area code U, CA is "ft." and for models of other area code is "m". x SW SPK (Sub woofer) • YES ". • SMALL If the sound is distorted, or you feel a lack of surround effects when using multi channel surround sound, select "SMALL" to - Sony STR-DG500 | Operating Instructions - Page 44
". However, if the front speakers are set to "SMALL", you cannot set the surround speakers to "LARGE". • SMALL If the sound is distorted, or you feel a lack of surround effects when using multi channel surround sound, select "SMALL" to activate the bass redirection circuitry and output the surround - Sony STR-DG500 | Operating Instructions - Page 45
to your listening position (E). Tip The receiver lets you to input the speaker sound. Give it a try! x SUR POS. (Surround speaker position) Lets you specify the location of your surround speakers for proper implementation of the surround effects in the Cinema Studio EX modes (page 50). This setup - Sony STR-DG500 | Operating Instructions - Page 46
modes. For other sound fields, speaker position is not so critical. Those sound multi channel setup item is only available when at least one speaker is set to "SMALL" and the corresponding speaker indicator flashes on the display. x DIMMER (Brightness of the display) Lets you adjust the brightness - Sony STR-DG500 | Operating Instructions - Page 47
)" (page 27). Enjoying Surround Sound Enjoying Dolby Digital and DTS Surround sound (AUTO FORMAT DIRECT) The Auto Format Direct (A.F.D.) mode allows you to listen to higher fidelity sound and select the decoding mode for listening to a 2 channel stereo sound as multi channel sound. MD/TAPE SA-CD - Sony STR-DG500 | Operating Instructions - Page 48
mode Decoding mode A.F.D. mode [Display] (Detecting A.F.D. AUTO automatically) [A.F.D. AUTO] Multi channel audio after decoding (Detecting automatically) Dolby Pro Logic PRO LOGIC [DOLBY PL] 4 channel Dolby Pro Logic PRO LOGIC II MOVIE 5 channel II [PLII MV] PRO LOGIC II MUSIC 5 channel - Sony STR-DG500 | Operating Instructions - Page 49
, multi channel sound (being encoded) is output. Selecting a preprogrammed sound field You can take advantage of surround sound simply by selecting one of the receiver's preprogrammed sound fields. They bring the exciting and powerful sound of movie theaters and concert halls into your home. 2CH - Sony STR-DG500 | Operating Instructions - Page 50
Types of sound field available Sound field Sound field for [Display] Effect Movie CINEMA STUDIO EX A DCS [C.ST.EX A] Reproduces the sound characteristics of the Sony Pictures Entertainment "Cary Grant Theater" cinema production studio. This is a standard mode, great for watching almost any - Sony STR-DG500 | Operating Instructions - Page 51
About CINEMA STUDIO EX modes CINEMA STUDIO EX modes are suitable for watching motion picture DVDs (etc.), with multi channel surround effects. You can reproduce the sound characteristics of Sony Pictures Entertainment's dubbing studio in your home. The CINEMA STUDIO EX modes consist of the following - Sony STR-DG500 | Operating Instructions - Page 52
AUTO CAL MIC PHONES VIDEO 3 IN/PORTABLE AV IN VIDEO L AUDIO R MULTI CHANNEL DECODING DISPLAY INPUT MODE INPUT SELECTOR MASTER VOLUME MEMORY/ TUNING ENTER MODE TUNING 2CH A.F.D. MOVIE MUSIC MULTI CH IN DIRECT 12 1 Turn INPUT SELECTOR on the receiver to select the input you want to listen - Sony STR-DG500 | Operating Instructions - Page 53
sound fields to the initial settings Be sure to use the buttons on the receiver for this operation. 1,2 ?/1 SPEAKERS (OFF/A/B /A+B) AUTO CAL MIC PHONES VIDEO 3 IN/PORTABLE AV IN VIDEO L AUDIO R MULTI CHANNEL DECODING DISPLAY INPUT MODE INPUT SELECTOR MASTER VOLUME MEMORY/ TUNING ENTER MODE - Sony STR-DG500 | Operating Instructions - Page 54
the receiver 1 Turn INPUT SELECTOR to select the FM or AM band. 2 Press TUNING MODE repeatedly to select "AUTO T.". 3 Press TUNING + or TUNING -. In case of poor FM stereo reception If the FM stereo reception is poor and "STEREO" flashes on the display, select monaural audio so that the sound will - Sony STR-DG500 | Operating Instructions - Page 55
/A+B) AUTO CAL MIC PHONES VIDEO 3 IN/PORTABLE AV IN VIDEO L AUDIO R MULTI CHANNEL DECODING DISPLAY INPUT MODE INPUT SELECTOR MASTER VOLUME MEMORY/ TUNING ENTER MODE TUNING 2CH A.F.D. MOVIE MUSIC MULTI CH IN DIRECT 2 1 Press ?/1 to turn off the receiver. Tuner Operations continued 55GB - Sony STR-DG500 | Operating Instructions - Page 56
codes and stored after the RDS stations. When this process is finished, "FINISH" appears on the display momentarily and the receiver returns to normal operation. Notes • Do not press any button on the receiver or supplied remote MONO 123 4 FM MODE 456 7 >10/ - CLEAR DISPLAY D.TUNING 89 D.SKIP - Sony STR-DG500 | Operating Instructions - Page 57
from step 3. 5 Press ENTER. You can also use MEMORY/ENTER on the receiver. The station is stored as the selected preset number. If "MEMORY" goes out AMP MENU 2CH A.F.D. MOVIE MUSIC 1 4 7 >10/ - CLEAR DISPLAY G DUAL MONO 23 FM MODE 56 D.TUNING 89 D.SKIP MEMORY DVD MENU 0/10 ENTER TOOLS MUTING - Sony STR-DG500 | Operating Instructions - Page 58
123 FM MODE 456 7 >10/ - CLEAR DISPLAY D.TUNING 89 receiver. 2 Tune in the preset station you want to create an index name for (page 57). 3 Press AMP MENU. "1-LEVEL" appears on the display Models of area code CEL, CEK only) When you name an RDS station and tune in that station, the Program Service - Sony STR-DG500 | Operating Instructions - Page 59
, press DISPLAY repeatedly on the receiver. Each time you press the button, RDS information on the display changes cyclically as follows: Program Service name t Frequency t Program Type indicationa) t Radio Text indicationb) t Current Time indication (in 24-hour system mode) t Sound field currently - Sony STR-DG500 | Operating Instructions - Page 60
the remote. 2 Press INPUT MODE repeatedly on the receiver to select the audio input mode. The selected audio input mode appears on the display. Audio input modes • Specifies the digital audio signals input to the DIGITAL OPTICAL jack. • ANALOG Specifies the analog audio signals input to the AUDIO - Sony STR-DG500 | Operating Instructions - Page 61
inputs for component video input" below. To return to the previous display Press control button B. Assignable inputs for component video input Component Assignable SA-CD/CD VIDEO 2 VIDEO 1 VIDEO 2 VIDEO 3 MD/TAPE SA-CD/CD Display DVD-VD1 DVD-VD3 DVD-DVD DVD-MD DVD-CD VD2-VD1 VD2-VD2 VD2-VD3 - Sony STR-DG500 | Operating Instructions - Page 62
buttons on the receiver for this operation. Press DISPLAY repeatedly. Each time you press the button, the display changes cyclically as follows. All inputs except the FM and AM band Index name of the inputa) t Selected input t Sound field currently applied FM and AM band Program Service nameb) or - Sony STR-DG500 | Operating Instructions - Page 63
. The remaining time appears on the display. If you press SLEEP again, the sleep timer will be canceled. Recording using the receiver Recording onto a MiniDisc or audio tape You can record onto a MiniDisc or audio tape using the receiver. See the operating instructions supplied with your MD deck or - Sony STR-DG500 | Operating Instructions - Page 64
jacks are not output from the analog AUDIO OUT jacks even when MULTI CH IN is selected. The analog audio signals of the current or previously used input are output. Using the Remote Changing button assignments You can change the factory settings of the input buttons to suit the components in your - Sony STR-DG500 | Operating Instructions - Page 65
Satellite Receiver) 0/10 a)Sony VCRs are operated with a VTR 2 or VTR 3 setting which correspond to 8 mm and VHS respectively. b)Sony DVD recorders are operated with a DVD1 or DVD3 setting. For details, refer to the operating instructions supplied with the DVD recorders. To clear all remote button - Sony STR-DG500 | Operating Instructions - Page 66
for theaters developed by Digital Theater Systems, Inc. It compresses audio less than Dolby Digital, delivering a higher quality sound reproduction. x DTS-ES Format for 6.1ch playback with surround back information. There are two modes, "Discrete 6.1" which records all channels independently - Sony STR-DG500 | Operating Instructions - Page 67
receiver for a long time, be sure to disconnect the receiver from the wall outlet. To disconnect the AC power cord, grasp the plug itself; never pull the cord. • (Models of area code questions or problems concerning your receiver, please consult your nearest Sony dealer. Additional Information 67GB - Sony STR-DG500 | Operating Instructions - Page 68
If you experience any of the following difficulties while using the receiver, use this troubleshooting guide to help you remedy the problem. There is no sound, no matter which component is selected, or only a very low-level sound is heard. • Check that the speakers and components are connected - Sony STR-DG500 | Operating Instructions - Page 69
of more than 48 kHz. Dolby Digital or DTS multi channel sound is not reproduced. • Check that the DVD, etc. you are playing is recorded in Dolby Digital or DTS format. • When connecting the DVD player, etc., to the digital input jacks of this receiver, check the audio setting (the settings for the - Sony STR-DG500 | Operating Instructions - Page 70
input on the remote. * Models of area code CEL, CEK only. Error messages If there is a malfunction, the display shows a message. You can check the condition of the system by the message. Refer to the following table to solve the problem. If any problem persists, consult your nearest Sony dealer. If - Sony STR-DG500 | Operating Instructions - Page 71
using the troubleshooting guide Clearing the receiver's memory may remedy the problem (page 25). However, note that all memorized settings will be reset to their factory settings and you will have to readjust all settings on the receiver. If the problem persist Consult your nearest Sony dealer - Sony STR-DG500 | Operating Instructions - Page 72
10% 125 W + 125 W1), 110 W + 110 W3), 150 W/ch Models of area code TH6 Stereo Power Output1), Reference Power Optical) S/N: 100 dB (A, 20 kHz LPF) Outputs (Analog) AUDIO OUT Voltage: 500 mV/10 kohms SUB WOOFER Voltage: 2 V/1 kohm Tone Gain levels ±6 dB, 1 dB step 4)INPUT SHORT (with sound - Sony STR-DG500 | Operating Instructions - Page 73
station, turn off the receiver. While holding down TUNING MODE, press ?/1. All preset Hz TW 110 V AC, 50/60 Hz SP 230 - 240 V AC, 50/60 Hz Power consumption Area code Power Remote commander RM-AAU005 (1) R6 (size-AA) batteries (2) Optimizer microphone ECM-AC2 (1) For details on the area code - Sony STR-DG500 | Operating Instructions - Page 74
55 C CD player connecting 15 playback 32 COMPONENT VIDEO ASSIGN 61 D Digital Cinema Sound (DCS) 51 Dolby Digital 65 DTS 66 DVD player hooking up 18 playback 33 DVD recorder hooking up 18 E Error messages 70 I Initial setup 25 INPUT MODE 60 M MD deck connecting 15 Menu A. CAL 47 AUDIO 41 LEVEL 38 - Sony STR-DG500 | Operating Instructions - Page 75
- Sony STR-DG500 | Operating Instructions - Page 76
Sony Corporation Printed in Malaysia
-
 1
1 -
 2
2 -
 3
3 -
 4
4 -
 5
5 -
 6
6 -
 7
7 -
8
-
9
-
10
-
11
-
12
-
13
-
14
-
15
-
16
-
17
-
18
-
19
-
20
-
21
-
22
-
23
-
24
-
25
-
26
-
27
-
28
-
29
-
30
-
31
-
32
-
33
-
34
-
35
-
36
-
37
-
38
-
39
-
40
-
41
-
42
-
43
-
44
-
45
-
46
-
47
-
48
-
49
-
50
-
51
-
52
-
53
-
54
-
55
-
56
-
57
-
58
-
59
-
60
-
61
-
62
-
63
-
64
-
65
-
66
-
67
-
68
-
69
-
70
-
71
-
72
-
73
-
74
-
75
-
76
 |
 |

©2006 Sony Corporation
2-662-258-
12
(2)
Multi Channel AV
Receiver
Operating Instructions
Owner’s Record
The model and serial numbers are located on the rear of the unit. Record the
serial number in the space provided below. Refer to them whenever you call
upon your Sony dealer regarding this product.
Model No.
Serial No.
STR-DG500