Sony SW11 Service Manual - Page 5
DIAL POINTER SETTING, Move only the dial pointer in the arrow
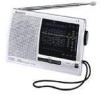 |
UPC - 027242560413
View all Sony SW11 manuals
Add to My Manuals
Save this manual to your list of manuals |
Page 5 highlights
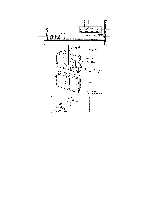
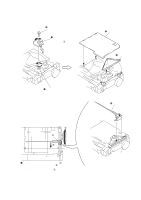
2-3. DIAL POINTER SETTING 3 Screw (1.7 × 3) Flat (+) special 2 Mach the hole with setting the variable capacitor gear gap in the arrow A direction. A 5 Scale, dial 4 Belt (Tun) 1 Turn the variable capacitor fully counterclockwise. A C Center of B scratched line 7 First, turn the tuning shaft fully in the arrow A direction. Move only the dial pointer in the arrow B direction and set it on the center of the scratched lines on the dial scale plate. Apply suitable locking compound to C portion. - 5 - 6 Pointer Knob (Tun)
-
 1
1 -
 2
2 -
 3
3 -
 4
4 -
 5
5 -
 6
6 -
 7
7 -
 8
8 -
 9
9 -
 10
10 -
 11
11 -
12
 |
 |

— 5 —
2-3. DIAL POINTER SETTING
3
Screw
(1.7
×
3) Flat (+) special
2
Mach the hole with setting
the variable capacitor gear gap
in the arrow
A
direction.
1
Turn the variable capacitor
fully counterclockwise.
5
Scale, dial
4
Belt (Tun)
A
7
First, turn the tuning shaft fully in the arrow
A
direction.
Move only the dial pointer in the arrow
B
direction and
set it on the center of the scratched lines on the dial scale plate.
Apply suitable locking compound to
C
portion.
6
Pointer
Knob (Tun)
Center of
scratched line
A
C
B