Sony UP-27MD Operating Instructions
Sony UP-27MD Manual
 |
View all Sony UP-27MD manuals
Add to My Manuals
Save this manual to your list of manuals |
Sony UP-27MD manual content summary:
- Sony UP-27MD | Operating Instructions - Page 1
5-029-577-12 (1) 2022-03 Color Video Printer Instructions for Use Before operating the unit, please read this manual thoroughly and retain it for future reference. UP-27MD © 2021 Sony Corporation - Sony UP-27MD | Operating Instructions - Page 2
devices 76 Cleaning the cabinet 76 Cleaning the thermal head 76 Automatic paper feed roller cleaning .........77 Manual paper feed roller cleaning 77 Specifications 78 Troubleshooting 82 Error/Warning Messages 84 Error messages 84 Warning and other messages 85 Clearing a paper jam 86 - Sony UP-27MD | Operating Instructions - Page 3
Use The Sony UP-27MD printer is To avoid electrical shock, do not open the cabinet. Refer servicing to qualified personnel only. No modification of this equipment is allowed. Symbols on the product Consult the instructions for use Follow the directions in the instructions for use for parts of the - Sony UP-27MD | Operating Instructions - Page 4
Sony Customer Information Service Center 1-800222-7669 or http://www.sony.com/ Supplier's Declaration of Conformity Trade Name : SONY Model : UP-27MD Responsible party : Sony is not installed and used in accordance with the instruction manual, it may cause interference on other devices. If the - Sony UP-27MD | Operating Instructions - Page 5
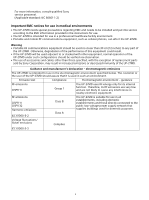
consult qualified Sony service personnel. (Applicable standard: IEC 60601-1-2) Important EMC notices for use in medical environments • The UP-27MD needs special precautions regarding EMC and needs to be installed and put into service according to the EMC information provided in the instructions for - Sony UP-27MD | Operating Instructions - Page 6
mains interruptions, it is variations on power supply input lines f7(3o00r%%25Ud/T3ip0incyUclTe) s a 7(f3o00r%%25Ud/T3ip0incyUclTe) s a recommended that the UP-27MD be powered from an uninterruptible power supply or a battery. (for 0.5 sec) (for 0.5 sec) IEC 61000-4-11 0(1%00U%T dip in for - Sony UP-27MD | Operating Instructions - Page 7
Electromagnetic environment - guidance Portable and mobile RF communications equipment should be used no closer to any part of the UP-27MD, including cables, than the recommended separation distance calculated from the equation appliance to the frequency of the transmitter. Recommended separation - Sony UP-27MD | Operating Instructions - Page 8
to 27.283 MHz; and 40.66 MHz to 40.70 MHz. Recommended separation distances between portable and mobile RF communications equipment and the UP-27MD The UP-27MD is intended for use in an electromagnetic environment in which radiated RF disturbances are controlled. The customer or the user of the UP - Sony UP-27MD | Operating Instructions - Page 9
equipment should be used no closer than 30 cm (12 inches) to any part of the UP-27MD. Otherwise, degradation of the performance of this equipment could result. Immunity test Band a Service a Modulation IEC 60601 test level Compliance level 380 - 390 MHz TETRA 400 Pulse modulation 18 Hz 27 - Sony UP-27MD | Operating Instructions - Page 10
Professional Solutions Europe - Standard Warranty and Exceptions on Standard Warranty. Please visit https://pro.sony/support-services/ primesupport/support-professional-solutionseurope-standard-product-warranty for important information and complete terms and conditions. For the customers in Korea - Sony UP-27MD | Operating Instructions - Page 11
sublimation ink, transferring the ink onto special thermal printing paper. The UP-27MD has the following features: • High picture quality and high print resolution (SD/HD/3G) signal input/output support SD, 1080i, and 1080p signal formats are supported. Signal formats are automatically detected via - Sony UP-27MD | Operating Instructions - Page 12
ribbon door panel is open. Ribbon tray (page 18) Load the ink ribbon in this tray. Dial (page 86) Use this dial to clear paper manually when an internal paper jam occurs. 12 - Sony UP-27MD | Operating Instructions - Page 13
SDI signal output connectors. Both SD and HD signals are supported. For details, see "Supported signal formats" (page 23). Caution Do not come into information on the menu, see "Menu Configuration" (page 48). This manual mainly uses screen displays for explanations. Caution Do not come into - Sony UP-27MD | Operating Instructions - Page 14
). Messages are also displayed on the printer window display. English or Japanese can be selected for the message display language. For setting instructions, see "Setting the Message Display Language" (page 24). Ink ribbon type and remaining ink ribbon display The ink ribbon type is displayed - Sony UP-27MD | Operating Instructions - Page 15
the printer, and how to connect a foot switch. Connect the video equipment which will be used in actual printing, using the following diagram as a guide. Notes • Turn off the power of each device before attempting to make any connections. • Connect the power cord last. Warning Using this unit for - Sony UP-27MD | Operating Instructions - Page 16
Connecting a video monitor Connect a video monitor as follows to view captured images and to check those to be printed. To AC power source Power cord Connecting a foot switch The printer can be controlled remotely by connecting the FS-24 Foot Switch (not supplied), or a computer. Computer a) To AC - Sony UP-27MD | Operating Instructions - Page 17
against any color change. • Do not replace the ink ribbon and paper roll when they are only partially used. Doing so can cause problems. The number of printouts indicated above is not guaranteed. Storing paper • Avoid storing paper in a location subject to high temperatures and humidity, excessive - Sony UP-27MD | Operating Instructions - Page 18
Loading the Ink Ribbon Note When using the printer for the first time, the thermal head may be set to its transport position. Be sure to turn on the printer and release the thermal head from its transport position before removing the ribbon tray. Do not open the ribbon door panel if "Please Wait" - Sony UP-27MD | Operating Instructions - Page 19
Note Do not touch the white tabs on the sides of the ribbon tray. Doing so may result in improper loading of the ink ribbon. If the ink ribbon tears during use Cellophane tape, etc., can be used to repair a torn ink ribbon so that the remainder of the ribbon can be used. Wind the ink ribbon until - Sony UP-27MD | Operating Instructions - Page 20
Loading the Paper Follow the steps below to load paper into the paper feed tray and to insert the tray into the printer. When using the printer for the first time, begin with step 2. Notes • Be careful not to touch the print side of the paper. • Use only the recommended paper for this printer. Other - Sony UP-27MD | Operating Instructions - Page 21
Neatly stack and load the paper in the paper feed tray, aligning the mark on the protective sheet with the mark inside the tray. 4 Insert the paper feed tray into the printer until it clicks into place. Notes • When handling the paper, do not touch the print side. Fingerprints and dust may - Sony UP-27MD | Operating Instructions - Page 22
Note Do not pull on the metallic portion of the stopper. Selecting the Input Signal Select the appropriate input signal format according to the signal from the video equipment connected to the input connectors on the rear of the printer. Note When settings are changed, it may take several seconds - Sony UP-27MD | Operating Instructions - Page 23
switching the input signal then capture a new image, the old image will be overwritten. 5 Press the MENU button. The [System Setup] screen is closed. Supported signal formats Supported signal formats 480/59.94i 576/50i 720/59.94p 720/60p 720/50p 1080/59.94i 1080/60i 1080/50i 1080/59.94p - Sony UP-27MD | Operating Instructions - Page 24
Setting the Message Display Language You can select either English or Japanese for the message language displayed on the video monitor. 1, 4 1, 2, 3 2 Use the or buttons to select the [Machine Setup] tab (), then the and buttons to select [Message Language] (). ͦ System Setup Machine - Sony UP-27MD | Operating Instructions - Page 25
Operation Making Full-Size Image Printouts Print a full-size image on a single piece of paper. (This is known as "full-size image.") The operations described here constitute the basic procedure for making a printout. Check Make sure to complete the following before performing operations. If you have - Sony UP-27MD | Operating Instructions - Page 26
On a video monitor Page A Printing 1/1 : Feeding paper : Printing yellow : Printing magenta (pink) : Printing cyan (light blue) paper ejection complete On the printer window display 1 HM Page H 1 / 1 Printing : Feeding paper : Printing yellow : Printing magenta (pink) : Printing cyan (light - Sony UP-27MD | Operating Instructions - Page 27
• Be sure not to spill alcohol or other volatile organic solvents onto the printouts. Making printouts with a user registered settings You can register the printer menu settings and adjustments as user settings, saving up to ten profiles. ("Registering a user settings" (page 69)) By selecting a - Sony UP-27MD | Operating Instructions - Page 28
To set the printout quantity by using the PRINT QTY button 2 1, 2 1 Press the PRINT QTY button. The [Print Quantity] screen appears for several seconds. Print Quantity 1 Currently selected number of copies 2 While the [Print Quantity] screen is displayed, press the PRINT QTY button or the button - Sony UP-27MD | Operating Instructions - Page 29
Note When making multiple copies, the printer may stop printing due to printout conditions, and "Remove Printed Paper" appears. In such a case, remove printouts accumulated on the paper tray. The printer will resume printing the remaining copies automatically. If the paper runs out during printing - Sony UP-27MD | Operating Instructions - Page 30
-size image Four reduced images Selecting a memory page Memory page A memory area in which an image is captured is called a memory page in this manual. The number of usable memory pages depends on the type of the reduced images selected and on the connected equipment. Number of reduced images - Sony UP-27MD | Operating Instructions - Page 31
Press the MEMORY PAGE button repeatedly until the desired memory page appears. 1 BS 4 2ı 50 Currently selected memory page Making a Printout of Reduced Images - Multi Print You can make a printout of different types of images (reduced images). This section explains how to make a printout of - Sony UP-27MD | Operating Instructions - Page 32
or button to select the type of reduced images. Type 1 (default value) 2 4 Number of reduced images (names in parentheses are used in this manual) One (Full-size image) Two (Two reduced images) Four (Four reduced images) The [Multi Picture] screen is closed several seconds later. To select - Sony UP-27MD | Operating Instructions - Page 33
2 Use the or button to select the [Function Setup] tab (), then the or button to select [Auto Live] (). ͦ User Setup Load Function User Setup Setup Clear Button Clear Function Auto Live Output Setup Print Setup All Images Normal 2ı End : MENU ͧ 3 Use the or button to - Sony UP-27MD | Operating Instructions - Page 34
1 Output images from the video device (source images) onto the monitor. This operation is done using the controls of the connected equipment. Displayed in blue: Indicates that an image will be captured here. When white frames have been set, they appear on the screen. 1 AS 4 2ı 50 The memory - Sony UP-27MD | Operating Instructions - Page 35
1 Display the [User Setup] screen according to the operations of step 1 described in "Making printouts with a user registered settings" (page 27). 2 Use the or button to select the [Print Setup] tab (), then the or button to select [White Frames] (). ͦ User Setup Load Function User - Sony UP-27MD | Operating Instructions - Page 36
Making Printouts with a Caption On-screen keyboard A caption, such as comments, can be added to a printout below the image (up to 58 characters). Captions are entered using the on-screen keyboard in the [Caption Edit] screen on the [Print Setup] tab of the [User Setup] menu. This section explains - Sony UP-27MD | Operating Instructions - Page 37
2 Use the or button to select the [Print Setup] tab (), then the or button to select [Caption Edit] (). ͦ User Setup Load Function User Setup Setup Multi Picture White Frames Caption Caption Edit Color Tone Print Quantity Print Speed Output Setup Print Setup 1 On 2ı 1 High - Sony UP-27MD | Operating Instructions - Page 38
To enter a space Move the cursor to the position where you want to enter a space, press the or button to select [Space], then press the EXEC button. Each the EXEC button is pressed, a single space is inserted. To add characters midway To add characters, move the cursor to the desired position, - Sony UP-27MD | Operating Instructions - Page 39
[Zoom Mode]: [All] Zooms and prints the image area of all four screens. Image area 123456789 ABCDEFGH abcdefghij 123456789 ABCDEFGH abcdefghij 123456789 ABCDEFGH abcdefghij 123456789 ABCDEFGH abcdefghij Notes • Images are zoomed to a 4:3 aspect ratio regardless of the [HD Aspect Ratio] settings in - Sony UP-27MD | Operating Instructions - Page 40
Option All Description Zooms and prints image area images in all screens. 4 Press the MENU button. The [User Setup] screen is closed. 5 Press the CAPTURE button to capture an image. Follow steps 1 to 4 in "Making a printout with reduced images" (page 33) to capture images four times, then create - Sony UP-27MD | Operating Instructions - Page 41
To set the image zoom area In the [Print Area Setup] tab of the [User Setup] screen, select [Zoom Area], then use the or button to select the zoom area. User Setup Print Area Save Initialize Setup User Setup User Setup General Range Zoom Mode Zoom Area Part Small Zoom Position Upper Left - Sony UP-27MD | Operating Instructions - Page 42
Setting item V Start (4:3/5:4) Setting range (default value) 0 to 200 (96) H Width (S) 600 to 1400 (1228) V Width (S) 600 to 1000 (921) Description Sets the image capture position (top edge) in the vertical direction for an aspect ratio of 4:3 or 5:4. Sets the image capture width in the - Sony UP-27MD | Operating Instructions - Page 43
Note The zooming size of the fixed area cannot be changed. The zoom size for 1920 × 1080 HD images is 832 × 624 (fixed). Deleting Images Stored in Memory You can use the STOP/CLEAR button to delete individual reduced images captured to a memory page, or to delete all of the images from one or all - Sony UP-27MD | Operating Instructions - Page 44
2 Use the or button to select [Clear Button], then the or button to select the STOP/ CLEAR button function. User Setup Load Function User Setup Setup Clear Button Clear Function Auto Live Output Setup Print Setup All Images Normal 2ı User Setup Load Function User Setup Setup - Sony UP-27MD | Operating Instructions - Page 45
Using [Clear Button] in the [Function Setup] tab of the [User Setup] menu, set the STOP/CLEAR button function to [Selected Part]. For setting instructions, see "Setting the function of the STOP/CLEAR button" (page 43). 3 21 4 1 Press the SOURCE/MEMORY button when an image from the video equipment - Sony UP-27MD | Operating Instructions - Page 46
Hiding the Screen Display on the Video Monitor You can hide the screen display in order to see images hidden underneath setting information displayed on the video monitor. The printer operation is the same even when the display is hidden. In this case, check and perform operations using the printer - Sony UP-27MD | Operating Instructions - Page 47
Locking Controls You can lock printer controls to prevent unintentional button presses and setting changes. Tip This setting has no effect on control from the REMOTE connectors. 1, 3 1, 2 3 Press the MENU button. The [Printer Menu] screen is closed. When turned [On], only the [Lock] menu is enabled - Sony UP-27MD | Operating Instructions - Page 48
Adjustment Menu Configuration The menu configuration on the printer is as follows. Bold text is the factory default setting. For further details, see the page indicated inside parentheses ( ). For details on the [User Setup] menu and [System Setup] items, see "Items That Can be Set on Menus" (page - Sony UP-27MD | Operating Instructions - Page 49
Ȏ User Setup Load User Setup (page 27) Function Setup Output Setup Print Setup Clear Button Clear Function Auto Live Information Display Messages Display Source Image Multi Picture White Frames Caption Caption Edit Color Tone Print Area Setup Print Quantity Print Speed General Range Zoom Mode - Sony UP-27MD | Operating Instructions - Page 50
When [Aspect Ratio] is set to [SD (480i)] H Start V Start H Width V Width 0 - 72 0 - 48 560 - 720 400 - 480 When [Aspect Ratio] is set to [SD (576i)] H Start V Start H Width V Width 0 - 72 0 - 48 560 - 720 496 - 576 When [Aspect Ratio] is set to [4:3] H Start V Start H Width V Width 0 - Sony UP-27MD | Operating Instructions - Page 51
Items That Can be Set on Menus You can use the menu screen to set up the print to meet various specifications. If you store the adjustments to memory, they are retained even after the printer is turned off, and will continue functioning at these settings until new adjustments are stored to memory. - Sony UP-27MD | Operating Instructions - Page 52
menu. Example: Selecting the [User Setup] menu Use the or button to highlight [User Setup]. Printer Menu Lock User Setup System Setup Maintenance Service 2ı End : MENU Printer Menu User Setup System Setup Use the or button to move the cursor box to [User Setup]. 3 Press the button - Sony UP-27MD | Operating Instructions - Page 53
4 Press the or button to select the desired tab. Example: Selecting the [Print Setup] tab Use the or button to highlight the [Print Setup] tab. User Setup Load Function User Setup Setup Multi Picture White Frames Caption Caption Edit Color Tone Print Quantity Print Speed Output - Sony UP-27MD | Operating Instructions - Page 54
6 Use the or button to change the setting. To change the selection: Press the or button to select the desired option. Example: Selecting [Normal] speed Use the or button to display [Normal]. User Setup Load Function User Setup Setup Multi Picture White Frames Caption Caption Edit - Sony UP-27MD | Operating Instructions - Page 55
To return from the sub menu: Select [ Back] on the top, then press the button. Use the or button to highlight [ Back], then press the button. Color Tone Back Cyan-Red Magenta-Green Yellow-Blue Dark Light Sharpness Gamma 0 0 0 0 0 8 Normal End : MENU Color Tone Back Cyn-Red 0 Press - Sony UP-27MD | Operating Instructions - Page 56
2 Adjust the source image saturation, brightness, and contrast. Select the desired item, then perform the adjustment. Video Adjustment Back Chroma 0 Contrast 0 Brightness 0 End : MENU Setting item Chroma Setting range (default value) Off, -13 to +14 (0) Contrast -14 to 14 (0) Brightness - Sony UP-27MD | Operating Instructions - Page 57
1 Display the [Output Setup] tab of the [User Setup] screen and use the or button to select [Source Image]. User Setup Load Function User Setup Setup Information Display Messages Display Source Image Output Setup Print Setup All On General 5 Display the [Monitor Color Tone] tab of the - Sony UP-27MD | Operating Instructions - Page 58
Adjusting the printout sharpness You can adjust the printout color, contrast, sharpness, and tone (gamma). Adjusting the color, contrast and sharpness Perform the adjustments while viewing the images captured in memory. 1 Display the [Print Setup] tab of the [User Setup] screen, use the or - Sony UP-27MD | Operating Instructions - Page 59
To adjust the tone of the printout You can adjust the tone so that the details in the white or black areas of the source image are sharply defined in the print. Display the [Print Setup] tab of [User Setup] screen, use the or button to select [Color Tone], then adjust the intermediate colors - Sony UP-27MD | Operating Instructions - Page 60
Aspect ratio SD (576i) 4:3 5:4 16:9 16:10 Setting item H Start V Start H Width V Width H Start V Start H Width V Width H Start V Start H Width V Width H Start V Start H Width V Width H Start V Start H Width V Width Setting range 0 to 72 0 to 48 560 to 720 496 to 576 0 to 960 0 to 540 720 to 1440 - Sony UP-27MD | Operating Instructions - Page 61
2 Use the or button to select [Resize To Fit], then the or button to select [On]. General Range Back Aspect Ratio H Start V Start H Width V Width Resize To Fit 16:9 0 0 1920 1080 On 1 Display the [Color Correction] tab of the [System Setup] screen, use the or button to select [Color - Sony UP-27MD | Operating Instructions - Page 62
If you have already adjusted the color balance, the previously adjusted values are displayed. Currently setting values of X and Y axes and the amount of change between color balance items ([Bal Step]) (example is factory default settings) Color Balance Back Bal X Bal Y Bal Step Test Print 50 50 5 - Sony UP-27MD | Operating Instructions - Page 63
6 Display the values of [Bal X] and [Bal Y] corresponding to the position selected in step 5 by using the or button. Example: When color balance 55 & 45 of the image printed on the top right is the best Use the or button to display "55" in [Bal X] and "45" in [Bal Y]. Color Balance Back Bal - Sony UP-27MD | Operating Instructions - Page 64
To make coarse adjustments To coarsely adjust the color balance beyond the current range, increase the current [Bal Step] value. If you change it from 5 to 10, the test print color balances are changed as follows. Color Balance Back Bal X Bal Y Bal Step Test Print 50 50 10 [EXEC] End : MENU - Sony UP-27MD | Operating Instructions - Page 65
HSV Back Color Sel Intensity Saturation Value Hue Split9 Step Test Print Red [R-Y] 0 0 0 0 I 2 [EXEC] End : MENU 1 AS 4 2ı 50 2 Press and hold the DISPLAY button and use the or button to decide the area where you want to adjust HSV. (The [HSV] screen disappears temporarily.) 3 Press the - Sony UP-27MD | Operating Instructions - Page 66
5 Specify the parameter to adjust in [Split9]. HSV Back Color Sel Intensity Saturation Value Hue Split9 Step Test Print Red [R-Y] 0 0 0 0 I 2 [EXEC] End : MENU Use the or button to select [Split9], then use the or button to specify the parameter. Option Description I (Intensity) - Sony UP-27MD | Operating Instructions - Page 67
The changes in the parameter specified with [Split9] that appear in the test print are as follows. 8 Select the image that has the best adjustments from among the printed results. If you want to change the adjustment values, refer to "To readjust parameter values" (page 68). To change the parameter - Sony UP-27MD | Operating Instructions - Page 68
To readjust parameter values If the desired parameter values were not obtained in step 8 of "Specifying colors for adjustment" readjust the parameters. You can also fine tune adjustment following the same procedures. 1 Display the parameter values that are most appropriate from the printed images - Sony UP-27MD | Operating Instructions - Page 69
Setting the HD signal aspect ratio Set the aspect ratio for the HD image signal input. 1 Display the [Input Setup] tab of the [System Setup] screen and use the or button to select [HD Aspect Ratio]. System Setup Remote Color Setup Correction HD Aspect Ratio Video Adjustment Input Signal - Sony UP-27MD | Operating Instructions - Page 70
To activate the user setting and print Display the [Load User Setup] tab of the [User Setup] screen, select the desired user setting, and press the EXEC button. The printer operates according to the activated user setting. To retain the original adjustment values Example: Adjust the setting values - Sony UP-27MD | Operating Instructions - Page 71
2 Select [All Reset], then press the EXEC button. Maintenance Backup All Reset Initialize Cleaning [EXEC] Ink ribbon type and remaining prints End : MENU "All Reset" appears and all setting values on the printer are returned to factory defaults. Displaying the ink ribbon or printer setting - Sony UP-27MD | Operating Instructions - Page 72
Note Although the REMOTE connector is compatible with the conventional REMOTE2 connector, RM-5500 Remote Control Unit cannot be used when connected. 1 Display the [Remote Setup] tab of the [System Setup] screen. 2 Select [Remote Function], then select the function to assign. System Setup Remote - Sony UP-27MD | Operating Instructions - Page 73
If not, press the SOURCE/MEMORY button to display the source image. When multiple reduced images are being captured, after the last image is captured, the printer starts printing (or queues printing), then switches to the next memory page. b) When multiple reduced images are being captured, after - Sony UP-27MD | Operating Instructions - Page 74
• Correctly load the ink ribbon and paper, and ensure no error message is displayed. 1 Display the [Backup] tab of the [Maintenance] screen. 2 Select [Print Parameters] and press the EXEC button. Maintenance Backup Initialize Cleaning Print Parameters [EXEC] 2 Select [Head Cleaning Notify], then - Sony UP-27MD | Operating Instructions - Page 75
Printer Functionality In addition to the following precautions, be sure to refer to the safety warnings and notices at the beginning of this manual. When "Clean Thermal Head" appears on the video monitor or printer window display When the printer reaches a total of 1000 prints, "Clean Thermal - Sony UP-27MD | Operating Instructions - Page 76
physical characteristics of LCD panels, there may be a decrease in brightness or change in color temperature over a long period of use. These problems are not a malfunction. In addition, these occurrences will not affect recorded data. • The printer window display is made using advanced technologies - Sony UP-27MD | Operating Instructions - Page 77
the printer while "Cleaning in Progress. Please Wait." appears. Manual paper feed roller cleaning If "Clean Paper Feed Roller" appears on the monitor or printer window display, execute manual paper feed roller cleaning. 1 Eject the paper feed tray (page - Sony UP-27MD | Operating Instructions - Page 78
RS-232C (D-sub 9 pin) (1) Supplied Accessories Paper feed tray (1) Stopper (1) Before Using This Printer (1) CD-ROM (instructions for use) (1) Cleaning cartridge (1) Service Contact List (1) Information for Customers in Europe (1) Optional Accessories Color Printing Pack UPC-21S: 240 sheets (80 - Sony UP-27MD | Operating Instructions - Page 79
DUE TO FAILURE OF THIS UNIT OR ITS PRINTING MEDIA. • SONY WILL NOT BE LIABLE FOR DAMAGES OF ANY KIND INCLUDING, BUT SONY WILL NOT BE LIABLE FOR CLAIMS OF ANY KIND MADE BY USERS OF THIS UNIT OR MADE BY THIRD PARTIES. • SONY WILL NOT BE LIABLE FOR THE TERMINATION OR DISCONTINUATION OF ANY SERVICES - Sony UP-27MD | Operating Instructions - Page 80
settings. For information on the input signal format selection method, see "Selecting the Input Signal" (page 22). For output signal setting instructions, see "Matching the video monitor and printout color" (page 56). Input signal selection [Input Signal] setting [Auto] [SD] [1080i] Input signal - Sony UP-27MD | Operating Instructions - Page 81
Input signal selection [Input Signal] setting [1080p] Input signal 480i 1080/59.94i 1080/59.94p 1080/60i 1080/60p 576i 1080/50i 1080/50p No signal Unsupported signal Output signal Source image ([Source Image] settings) EE image Through image [General] setting [Through] setting 1080/59.94p - Sony UP-27MD | Operating Instructions - Page 82
Troubleshooting Before requesting printer repairs, please check the following. If the printer still does not function normally, please contact your Sony dealer or local authorized Sony service . • The paper feed rollers are dirty. Perform manual paper feed roller cleaning. (page 77) The paper - Sony UP-27MD | Operating Instructions - Page 83
Symptom Causes and remedies The printer ejects a The ink ribbon has been used up. blank sheet of Replace the ink ribbon. (page 18) paper, the ALARM Do not reuse the ejected paper. indicator lights and the message "Change Ribbon". appears on the printer window display and the video - Sony UP-27MD | Operating Instructions - Page 84
and act accordingly. Error messages If a problem occurs, the ALARM lamp lights in orange and Paper Mismatch Mech. Trouble: Head Pos Mech. Trouble: Temp Mech. Trouble: Fan Possible causes and ribbon is not torn, contact your Sony service facility or your Sony dealer. The maximum number of printouts - Sony UP-27MD | Operating Instructions - Page 85
be displayed and the ALARM indicator will remain off. Follow the instructions in the message. Message Causes and remedies Check Input Signal • cleaning is finished. Clean Paper Feed Roller Perform manual paper feed roller cleaning. Follow "Manual paper feed roller cleaning" (page 77), and - Sony UP-27MD | Operating Instructions - Page 86
Clearing a paper jam If the ALARM indicator on the ribbon door panel lights after printing starts, or if "Remove Paper" or "Check Paper" appears on the printer window display, a paper jam may have occurred inside the printer. If the message does not disappear after removing the paper feed tray and - Sony UP-27MD | Operating Instructions - Page 87
Be sure to reattach the base plate. The printer cannot print with the base plate removed. If a paper jam still cannot be cleared Consult your Sony dealer or your Sony service facility. Do not attempt to remove the paper by force. 87 - Sony UP-27MD | Operating Instructions - Page 88
.org Discusses general use and applications of FreeType, as well as future and wanted additions to the library and distribution. If you are looking for support, start in this list if you 88 - Sony UP-27MD | Operating Instructions - Page 89
.org Discusses general use and applications of FreeType, as well as future and wanted additions to the library and distribution. If you are looking for support, start in this list if you haven't found anything to help you in the documentation. o [email protected] Discusses bugs, as well as - Sony UP-27MD | Operating Instructions - Page 90
-
 1
1 -
 2
2 -
 3
3 -
 4
4 -
 5
5 -
 6
6 -
 7
7 -
8
-
9
-
10
-
11
-
12
-
13
-
14
-
15
-
16
-
17
-
18
-
19
-
20
-
21
-
22
-
23
-
24
-
25
-
26
-
27
-
28
-
29
-
30
-
31
-
32
-
33
-
34
-
35
-
36
-
37
-
38
-
39
-
40
-
41
-
42
-
43
-
44
-
45
-
46
-
47
-
48
-
49
-
50
-
51
-
52
-
53
-
54
-
55
-
56
-
57
-
58
-
59
-
60
-
61
-
62
-
63
-
64
-
65
-
66
-
67
-
68
-
69
-
70
-
71
-
72
-
73
-
74
-
75
-
76
-
77
-
78
-
79
-
80
-
81
-
82
-
83
-
84
-
85
-
86
-
87
-
88
-
89
-
90
 |
 |

Color Video
Printer
Instructions for Use
Before operating the unit, please read this manual thoroughly
and retain it for future reference.
UP-27MD
5-029-577-
12
(1)
2022-03
© 2021 Sony Corporation