TEAC LP-P1000 Owner's Mamual - Page 25
Setting the clock, Press the TIME
 |
View all TEAC LP-P1000 manuals
Add to My Manuals
Save this manual to your list of manuals |
Page 25 highlights
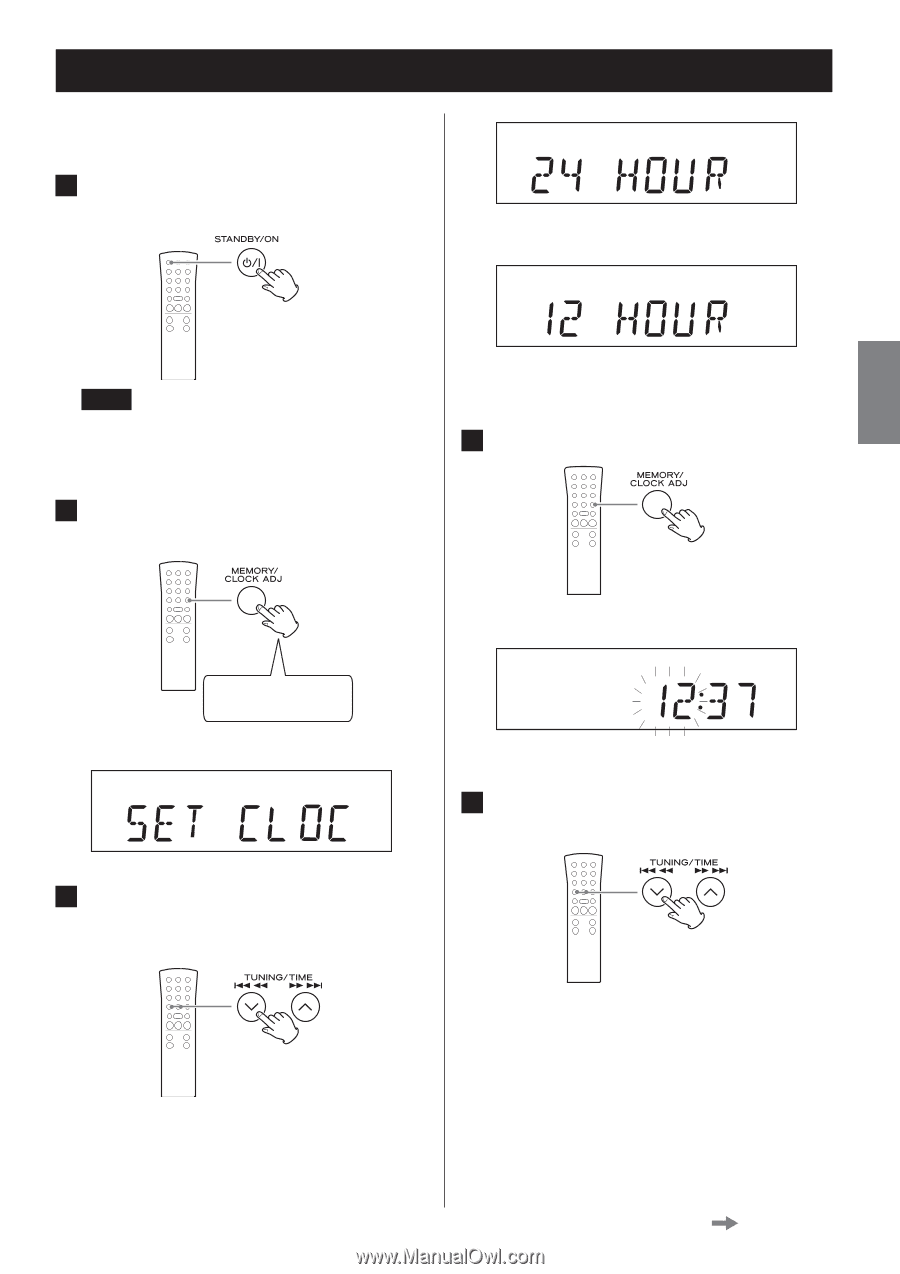
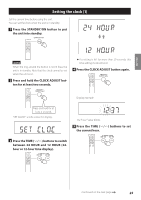
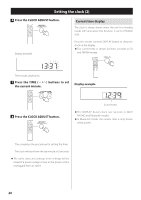
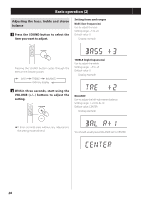
ENGLISH Setting the clock (1) Set the current time before using the unit. You can set the clock when the unit is in standby. 1 Press the STANDBY/ON button to put the unit into standby. c3 NOTE When the ring around the button is not lit blue, the unit is in standby. Note that the clock cannot be set when the unit is on. 2 Press and hold the CLOCK ADJUST button for at least two seconds. ooIf a setting is left for more than 20 seconds, this time setting mode will end. 4 Press the CLOCK ADJUST button again. Display example Press and hold for at least 2 seconds "SET CLOCK" scrolls across the display. The "hour" value blinks. 5 Press the TIME (j/k) buttons to set the current hour. 3 Press the TIME (j/k) buttons to switch between 24 HOUR and 12 HOUR (24hour or 12-hour time display). Continued on the next page 25
-
 1
1 -
2
-
3
-
4
-
5
-
6
-
7
-
8
-
9
-
10
-
11
-
12
-
13
-
14
-
15
-
16
-
17
-
18
-
19
-
 20
20 -
 21
21 -
 22
22 -
 23
23 -
 24
24 -
 25
25 -
 26
26 -
 27
27 -
 28
28 -
 29
29 -
 30
30 -
31
-
32
-
33
-
34
-
35
-
36
-
37
-
38
-
39
-
40
-
41
-
42
-
43
-
44
-
45
-
46
-
47
-
48
-
49
-
50
-
51
-
52
-
53
-
54
-
55
-
56
-
57
-
58
-
59
-
60
-
61
-
62
-
63
-
64
-
65
-
66
-
67
-
68
-
69
-
70
-
71
-
72
-
73
-
74
-
75
-
76
-
77
-
78
-
79
-
80
-
81
-
82
-
83
-
84
-
85
-
86
-
87
-
88
-
89
-
90
-
91
-
92
-
93
-
94
-
95
-
96
-
97
-
98
-
99
-
100
-
101
-
102
-
103
-
104
-
105
-
106
-
107
-
108
-
109
-
110
-
111
-
112
-
113
-
114
-
115
-
116
 |
 |