TP-Link TL-SL3428 User Guide - Page 26
Mounting Device in a Rack, Attaching the Mounting Brackets - reset
 |
UPC - 845973020491
View all TP-Link TL-SL3428 manuals
Add to My Manuals
Save this manual to your list of manuals |
Page 26 highlights
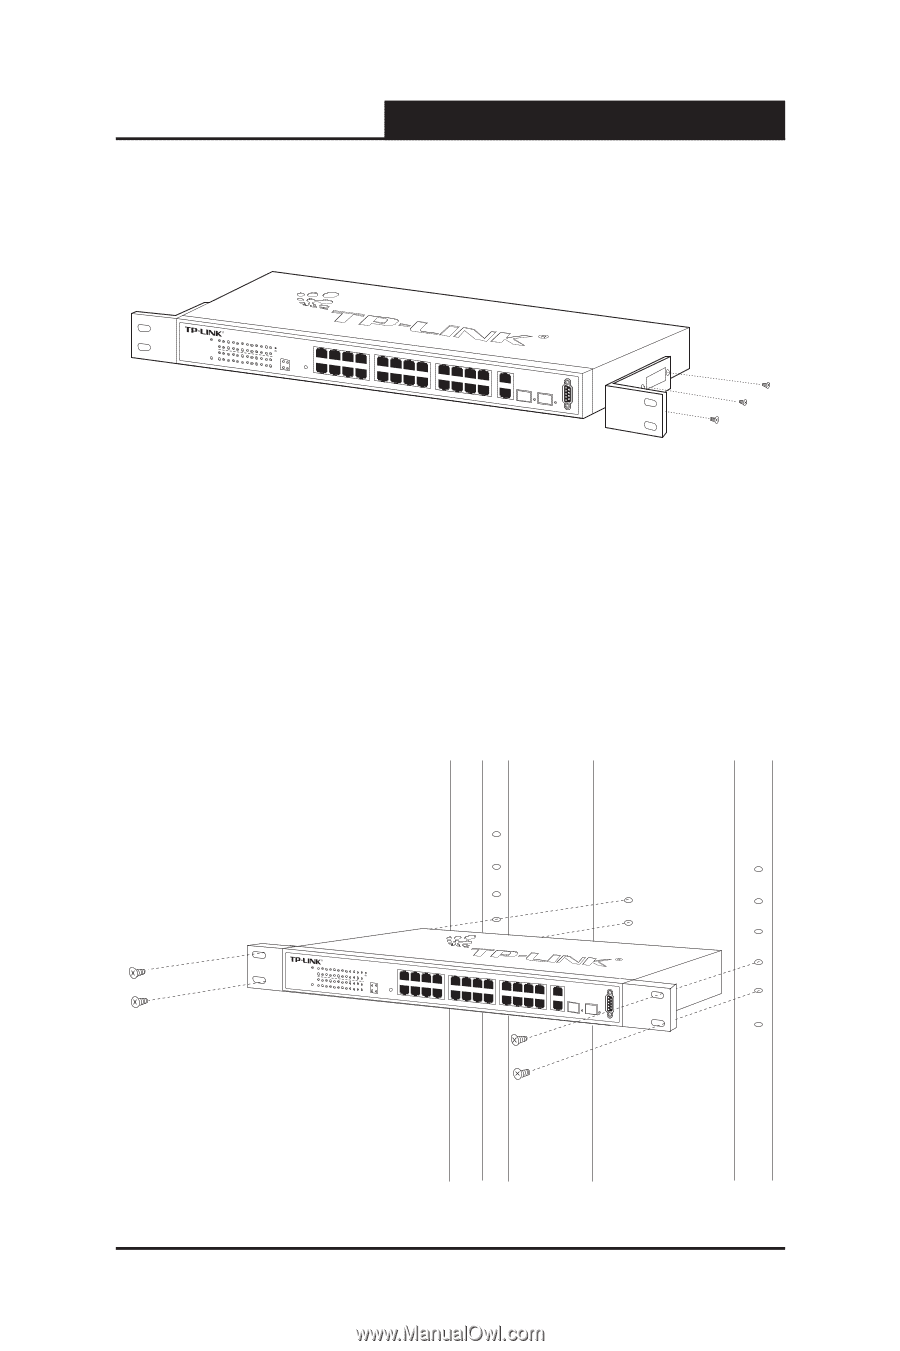
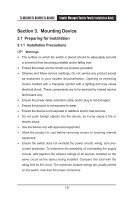
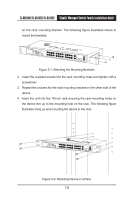
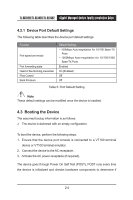
TL-SG3109/TL-SL3428/TL-SL3452 Gigabit Managed Switch Family Installation Guide on the rack mounting bracket. The following figure illustrates where to mount the brackets. Pow er 1 3 TL-SL3428 5 7 9 11 13 15 17 24+4G Gigabit Managed 19 21 23 Link Act Switch 1 3 5 7 System 2 4 6 100Mbps 8 10 12 14 16 18 20 22 24 GIGA1 GIGA2 Link/Act RESET 1000Mbps 2 4 6 8 9 11 13 15 10 12 14 16 17 19 21 23 18 20 22 24 GIGA 1 GIGA 2 SFP 1 SFP 2 Link/Act Link/Act Console Figure 3-1: Attaching the Mounting Brackets 2. Insert the supplied screws into the rack mounting holes and tighten with a screwdriver. 3. Repeat the process for the rack-mounting bracket on the other side of the device. 4. Insert the unit into the 19-inch rack ensuring the rack-mounting holes on the device line up to the mounting hole on the rack. The following figure illustrates lining up and mounting the device in the rack. Power 1 3 TL-SL3428 5 7 9 11 13 15 24+4G Gigabit Managed Switch 17 19 21 23 Link Act 1 3 5 7 100Mbps System 2 4 6 8 10 12 14 16 18 20 22 24 GIGA1 GIGA2 Link/Act RESET 1000Mbps 2 4 6 8 9 11 13 15 10 12 14 16 17 19 21 23 GIGA 1 18 20 22 24 SFP 1 SFP 2 GIGA 2 Link/Act Link/Act Cons ole Figure 3-2: Mounting Device in a Rack 19
-
 1
1 -
2
-
3
-
4
-
5
-
6
-
7
-
8
-
9
-
10
-
11
-
12
-
13
-
14
-
15
-
16
-
17
-
18
-
19
-
20
-
 21
21 -
 22
22 -
 23
23 -
 24
24 -
 25
25 -
 26
26 -
 27
27 -
 28
28 -
 29
29 -
 30
30 -
 31
31 -
32
-
33
-
34
-
35
-
36
-
37
-
38
-
39
-
40
-
41
-
42
-
43
-
44
-
45
-
46
-
47
-
48
-
49
-
50
-
51
-
52
-
53
-
54
 |
 |