Toshiba 62HM94 Owner's Manual - English
Toshiba 62HM94 - 62" Rear Projection TV Manual
 |
UPC - 022265262191
View all Toshiba 62HM94 manuals
Add to My Manuals
Save this manual to your list of manuals |
Toshiba 62HM94 manual content summary:
- Toshiba 62HM94 | Owner's Manual - English - Page 1
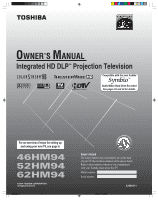
OWNER'S MANUAL Integrated HD DLP™ Projection Television HIGH-DEFINITION TELEVISION Compatible with the new Toshiba Symbio™ Audio/Video Hard Drive Recorder! See pages 23 and 49 for details. For an overview of steps for setting up and using your new TV, see page 8. 46HM94 52HM94 62HM94 © 2004 - Toshiba 62HM94 | Owner's Manual - English - Page 2
If you use the lamp beyond its service life: • you may notice a reduction in the colors and/or brightness of the picture, at which time you should replace the lamp unit; and • the strength of the quartz glass in the lamp will be reduced and the lamp may rupture. If the lamp ruptures, the TV will not - Toshiba 62HM94 | Owner's Manual - English - Page 3
project the picture, and requires special safety precautions: • See pages 98-100 for instructions on lamp unit replacement and care. • DO NOT attempt to service this product except as specified on pages 98-100. The only user-serviceable item in this product is the lamp unit. 20) Always place the TV - Toshiba 62HM94 | Owner's Manual - English - Page 4
you use the lamp beyond its service life: - you may notice a reduction in the colors and/or brightness of the picture, at which time you should replace the lamp unit; and - the strength of the quartz glass in the lamp will be reduced and the lamp may rupture. If the lamp ruptures, the TV will not - Toshiba 62HM94 | Owner's Manual - English - Page 5
The light source for this TV is a projection lamp unit with a limited service life. When the lamp wears out, the picture may become dark or black, or the lamp may fail, at which time you must replace the lamp unit. See "Lamp unit replacement and care" on pages 98-100. 2) Each time you turn on the TV - Toshiba 62HM94 | Owner's Manual - English - Page 6
92 General troubleshooting 92 LED indications 94 TV Guide On Screen FAQs 95-97 Chapter 11: Appendix 98 Lamp unit replacement 98-100 Specifications 101 Limited United States Warranty 102 Limited Canada Warranty 103 Index 106 6 Copyright © 2004 TOSHIBA CORPORATION. All rights - Toshiba 62HM94 | Owner's Manual - English - Page 7
as possible. • This manual applies to models 46HM94, 52HM94, and 62HM94. Before you See "Important notes about your start reading, check the model number on the back of your TV. DLP™ projection TV" on page 5. • Instructions in this manual are based on using the remote control. You also can use - Toshiba 62HM94 | Owner's Manual - English - Page 8
green LED lights continuously and then press POWER on the TV front touchpad or remote control. See "LED indications" on page 94. 12. See "Menu layout and navigation" for a quick overview of navigating the TV's menu structure (pages 34-35). 13. See Chapter 5 for details on setting up the TV Guide On - Toshiba 62HM94 | Owner's Manual - English - Page 9
2 Connecting your TV TV front touchpad and side panel controls and connections Front of TV Side panel Reset button 0 TV/VIDEO EXIT CHANNEL VOLUME MENU POWER Remote sensor 1 Front touchpad* EXIT TV/VIDEO 3 2 zyx • 4 MENU 5 POWER 6 TV/VIDEO EXIT CHANNEL VOLUME MENU POWER Channel zy - Toshiba 62HM94 | Owner's Manual - English - Page 10
theater system with optical audio input. See page 20. 7 G-LINK™ - For use with one of the enclosed IR blaster/ G-LINK cables to enable the TV Guide On Screen® recording features. See page 25. 8 TheaterNet™ (IR) OUT - For controlling infrared remote-controlled devices through the TV. You can connect - Toshiba 62HM94 | Owner's Manual - English - Page 11
your TV) are typically color-coded according to use: yellow for video, red for stereo right audio, and white for stereo left (or mono) audio. IR (infrared) remote control. Two of these cables are included with your TV. One is for connection to the G-LINK jack (page 25) to enable TV Guide On Screen - Toshiba 62HM94 | Owner's Manual - English - Page 12
each device's owner's manual. Connecting a digital Cable service (connect to ANT 1 only) TV back panel IN AUDIO TheaterNet IEEE1394 AUDIO R VIDEO 1 AUDIO AUDIO AUDIO RR R COLOR COLOR VIDEO 2 STREAM STREAM HD-1 IN HD-2 AUDIO R VAR AUDIO L R OUT ANT2 ANT (75 ) G-LINK DIGITAL AUDIO - Toshiba 62HM94 | Owner's Manual - English - Page 13
appropriate line input (refer to your VCR owner's manual for details), and then turn OFF the VCR. 4. See Chapter 5 for details on setting up the TV Guide On Screen system. 5. See Chapter 7 for details on using the TV Guide On Screen system. Stereo VCR IN from ANT OUT to TV CH 3 CH 4 VIDEO AUDIO - Toshiba 62HM94 | Owner's Manual - English - Page 14
to the instructions on page 25. 2. Make sure the VCR is connected to the A/V OUT jacks on the TV (see illustration). 3. Set the VCR to the appropriate line input (refer to your VCR owner's manual for details), and then turn OFF the VCR. 4. See Chapter 5 for details on setting up the TV Guide On - Toshiba 62HM94 | Owner's Manual - English - Page 15
to the instructions on page 25. 2. Make sure the VCR is connected to the A/V OUT jacks on the TV (see illustration). 3. Set the VCR to the appropriate line input (refer to your VCR owner's manual for details), and then turn OFF the VCR. 4. See Chapter 5 for details on setting up the TV Guide On - Toshiba 62HM94 | Owner's Manual - English - Page 16
to the instructions on page 25. 2. Make sure the VCR is connected to the A/V OUT jacks on the TV (see illustration). 3. Set the VCR to the appropriate line input (refer to your VCR owner's manual for details), and then turn OFF the VCR. 4. See Chapter 5 for details on setting up the TV Guide On - Toshiba 62HM94 | Owner's Manual - English - Page 17
to the instructions on page 25. 2. Make sure the VCR is connected to the A/V OUT jacks on the TV (see illustration). 3. Set the VCR to the appropriate line input (refer to your VCR owner's manual for details), and then turn OFF the VCR. 4. See Chapter 5 for details on setting up the TV Guide On - Toshiba 62HM94 | Owner's Manual - English - Page 18
to the instructions on page 25. 2. Make sure the VCR2 is connected to the A/V OUT jacks on the TV (see illustration). 3. Set the VCR to the appropriate line input (refer to your VCR owner's manual for details), and then turn OFF the VCR. 4. See Chapter 5 for details on setting up the TV Guide On - Toshiba 62HM94 | Owner's Manual - English - Page 19
HDMI OUT L R OUT TV IN AUDIO ANT1 (CABLE) TheaterNet IEEE1394 CableCARD™ EJECT 1 2 HDMI IN OUT 1 S-VIDEO S-VIDEO Y R L Y OUT 2 TheaterNet VIDEO L/ MONO PB VIDEO PR L/ MONO L PB VIDEO PR L/ L MONO AUDIO R VIDEO 1 AUDIO AUDIO AUDIO RR R COLOR COLOR VIDEO 2 STREAM STREAM - Toshiba 62HM94 | Owner's Manual - English - Page 20
Dolby Digital decoder or other external audio system with optical audio input. You will need: one optical audio cable To control the audio: Turn on the TV and the digital audio device. Press MENU on the TV's remote control and open the AUDIO menu. Highlight AUDIO SETUP and press ENTER. In the - Toshiba 62HM94 | Owner's Manual - English - Page 21
does not turn on, move the remote control slightly to the right and press POWER again. 5. Repeat step 4 until you locate the device's infrared sensor. TERK UDIO TERK UDIO Front of IR-controlled DVD player (for example) Front of IR-controlled audio device (for example) Infrared sensor IR blaster - Toshiba 62HM94 | Owner's Manual - English - Page 22
IEEE-1394 ports support the signals listed below only. Although incompatible video, audio, and digital control signals cannot be decoded by the TV, these signals may be passed through the IEEE-1394 cable to other compatible devices. Incompatible devices may not appear in the TheaterNet™ menu. • MPEG - Toshiba 62HM94 | Owner's Manual - English - Page 23
restrictions. This TV is compatible with the new Toshiba Symbio™ Audio/Video Hard Drive Recorder! Toshiba's Symbio model 160HD4 is an audio/video hard drive (AVHD) recorder designed specifically for high definition television (HDTV). The Symbio AVHD recorder offers control over digital video - Toshiba 62HM94 | Owner's Manual - English - Page 24
the "S" number, the faster the device. If your device is not marked with an "S" number, look in the device's user manual or call the device manufacturer's technical support number. • If your IEEE-1394 device has a two-position power switch, place the device at the end of the chain or leave the - Toshiba 62HM94 | Owner's Manual - English - Page 25
. 4. If the device does not turn on, move the remote control slightly to the right and press POWER again. 5. Repeat step 4 until you locate the device's infrared sensor. G-LINK (IR blaster) cable wand (approx. 1 inch from device) Back of TV IN AUDIO ANT1 (CABLE) TheaterNet IEEE1394 1 CableCARD - Toshiba 62HM94 | Owner's Manual - English - Page 26
7). Point remote control toward remote sensor on front of TV. LIST displays the Toshiba Symbio™ AVHD recorder play list (if available) (page 23). FAV CH yz tunes to the next higher/lower favorite channel (page 43). VCR+ accesses the TV Guide On Screen manual recording function. SPLIT turns the - Toshiba 62HM94 | Owner's Manual - English - Page 27
remote control. See "Programming the remote control to operate your other devices" on page 30. MODE Default device mode control (before programming) 1) TV Toshiba TV 2) CBL/SAT Toshiba Satellite receiver 3) VCR/PVR Toshiba VCR 4) DVD Toshiba DVD 5) AUDIO 1 Pioneer Audio receiver 6) AUDIO - Toshiba 62HM94 | Owner's Manual - English - Page 28
Chapter 3: Using the remote control Remote Control functional key chart Key Label Toshiba TV Cable Satellite (TV) (CBL/SAT) (CBL/SAT) VCR DVD/LD Receiver CD (AUDIO) (AUDIO) PVR (VCR) MODE Remote control device mode selection LIGHT Lights the remote key, and toggles between enabled and - Toshiba 62HM94 | Owner's Manual - English - Page 29
Chapter 3: Using the remote control Remote Control functional key chart (continued) Key Label Toshiba TV Cable Satellite (TV) (CBL/SAT) (CBL/SAT) VCR DVD/LD Receiver CD (AUDIO) (AUDIO) PVR (VCR) MUTE Sound mute*2 Sound mute*2 Sound mute*2 Sound mute*2 Sound mute*2 Sound mute*2 Sound mute - Toshiba 62HM94 | Owner's Manual - English - Page 30
is pressed within 10 seconds while programming, the remote control will exit the program mode and return to the previous code. ACTION MENU +10 - 100 POWER Numbers MODE y ENTER VOL y/z RECALL 30 HM94(E)026-33(3-RC) 30 Copyright © 2004 TOSHIBA CORPORATION. All rights reserved. 8/31/04, 1:08 PM - Toshiba 62HM94 | Owner's Manual - English - Page 31
control Programming the remote control to operate your other devices (continued) Using the volume lock feature (8000) For the TV, CABLE/SAT, VCR, and DVD modes, the volume controls (VOL y/z and MUTE) can be locked to the selected device mode. This feature does not apply to the AUDIO 1 and AUDIO - Toshiba 62HM94 | Owner's Manual - English - Page 32
remote control Multi-brand remote control device codes VCRs/PVRs Brand ADMIRAL AIWA AKAI AUDIO , 0102, 0170, 0172, 0174, 0176, 0183 Replay TV 7102 REALISTIC 0124, 0105, 0136, 0109, 0140, 0127 0112 THOMSON 0179, 0183 Tivo 7100, 7101 TOSHIBA 0101, 0146, 0166, 0160 VECTOR RESEARCH 0111 - Toshiba 62HM94 | Owner's Manual - English - Page 33
Chapter 3: Using the remote control Multi-brand remote control device codes (continued) CD players Brand MAGNAVOX MARANTZ MITSUBISHI NEC PANASONIC PHILIPS PIONEER PROSCAN QUASAR RCA SAMSUNG SANYO SHARP SONY TEAC TOSHIBA YAMAHA Code 5114 5100 5102, 5103 5101 5114 5114, 5118, 5119 5114 5104, 5105 - Toshiba 62HM94 | Owner's Manual - English - Page 34
overview of your TV's menu system. Main menu layout To open the main menus (illustrated below), press MENU on the remote control or TV front panel. Applications ➞ TV Guide On Screen™ ➞ Audio Player ➞ Digital CC/Audio Selector ➞ Picture Viewer ➞ CableCARD ➞ [ CableCARD™ options window (available - Toshiba 62HM94 | Owner's Manual - English - Page 35
on the remote control or TV front touchpad to access and navigate your TV's on-screen menu system. TV front touchpad • Press MENU to open the menu system. TV/VIDEO EXIT CHANNEL VOLUME MENU POWER • Use the up/down/left/right arrow buttons (yzx •) on the remote control or TV front panel - Toshiba 62HM94 | Owner's Manual - English - Page 36
the Number buttons on the remote control for numbers and the yz buttons for letters), and then press ENTER. Screen 3 appears. 3. A new set of INSTALLATION menu icons appears on-screen (see TV Guide On Screen Setup Start illustration at right). Open the TV GUIDE Navigate Select DVD RTN CH - Toshiba 62HM94 | Owner's Manual - English - Page 37
7 appears. Screen 10: The TV Guide On Screen system will test the code for the brand of Cable box you selected. Do not press any keys on the TV, remote control, or Cable box until the ) HM94(E)036-39(5-TVGsetup) 37 Copyright © 2004 TOSHIBA CORPORATION. All rights reserved. 8/31/04, 1:28 PM 37 - Toshiba 62HM94 | Owner's Manual - English - Page 38
information to download from the TV Guide On Screen service. Press ENTER to display screen 15. Screen 18: Turn on your VCR TV, remote control, or VCR until the testing process is completed. When testing is completed, screen 20 appears. 38 HM94(E)036-39(5-TVGsetup) 38 Copyright © 2004 TOSHIBA - Toshiba 62HM94 | Owner's Manual - English - Page 39
power cord.) See page 13 for VCR connection instructions. 4. If you have more than one Cable system in your area, you may be prompted to select which Cable system's program data to download. If so prompted, follow the on-screen instructions. HM94(E)036-39(5-TVGsetup) 39 Copyright © 2004 TOSHIBA - Toshiba 62HM94 | Owner's Manual - English - Page 40
TV For menu navigation instructions, see Chapter 4. Selecting the menu language You can choose from three different languages (English, French and Spanish) for the on-screen display of adjustment menus and messages. (The TV Guide © 2004 TOSHIBA CORPORATION. All rights reserved. HM94(E)040-43(6a-Setup) - Toshiba 62HM94 | Owner's Manual - English - Page 41
the programmed channels. (Continued on next page) ACTION MENU +10 - 100 ENTER Channel Numbers CHANNEL y z TV front touchpad TV/VIDEO EXIT CHANNEL CHANNEL z / y VOLUME MENU POWER HM94(E)040-43(6a-Setup) 41 Copyright © 2004 TOSHIBA CORPORATION. All rights reserved. 8/31/04, 2:03 PM - Toshiba 62HM94 | Owner's Manual - English - Page 42
TV Guide On Screen setup, the TERRESTRIAL menu will not be accessible and you must then use the TV Guide manually add digital subchannels on a physical channel: Use the Channel Numbers and the Dash (-/100) on the remote control Copyright © 2004 TOSHIBA CORPORATION. All rights reserved. 8/31/04, 2:03 - Toshiba 62HM94 | Owner's Manual - English - Page 43
favorite channel settings in the selected input. (This will not change the TV's current input.) Or... Press INPUT to select ANT 1 or ANT2, ANT mode first. ACTION MENU +10 - 100 ENTER Channel Numbers Dash (-) y x • z FAV CH yz FAV SCAN CT-90216 Copyright © 2004 TOSHIBA CORPORATION. All rights - Toshiba 62HM94 | Owner's Manual - English - Page 44
Setting up and using TheaterNet™ on-screen device control The TheaterNet feature allows you to control many brands of IEEE-1394 and/or infrared remote-controlled A/V devices through your TV using on-screen control icons and the TV's remote control. Note: • Although the TheaterNet on-screen device - Toshiba 62HM94 | Owner's Manual - English - Page 45
the device control selection screen. ACTION MENU +10 - 100 ENTER DEVICE CTRL The following are examples of the TheaterNet on-screen control icons for various devices. Toshiba Symbio™ AVHD recorder control* *If you connected a Toshiba Symbio™ AVHD recorder, you must set up the TV Guide On Screen - Toshiba 62HM94 | Owner's Manual - English - Page 46
0204 Theta Digital 0194 Yamaha 0217 Miscellaneous audio devices Brand Code Aiwa 0010, 0159, 0404 Fisher 0052 JVC 0073 Jerrold 0520, 0459 Scientific Atlanta 0460 Sony 0010, 0159, 0576 Starcom 0459 46 Copyright © 2004 TOSHIBA CORPORATION. All rights reserved. HM94(E)044-51 - Toshiba 62HM94 | Owner's Manual - English - Page 47
TV TheaterNet™ IR device codes (continued) Video accessory (HDTV , 0080, 0150, 0244, 0531, 0630, 1384 Polk Audio 0189 Receivers (cont.) Brand Code Proscan 1254 Quasar 0039 0869 SKY 0856 Samsung 1109 Sony 0639 Star Choice 0869 Toshiba 0749, 0790, 1052, 1053, 1054, 1285, 1286, - Toshiba 62HM94 | Owner's Manual - English - Page 48
TV TheaterNet™ IR device codes (continued) VCRs (cont.) Brand Magnavox Magnin Marantz Marta Matsushita Memorex Minolta Mitsubishi Motorola Multitech NEC Nikko Noblex Olympus Optimus Orion Panasonic Penney Pentax Philco Philips Pilot Pioneer Polk Audio Toshiba 0149, 0760 White Westinghouse 0209, - Toshiba 62HM94 | Owner's Manual - English - Page 49
/etc.). When the AVHD recorder is connected to the TV, the remote control keys (LIVE, STOP, REW, PAUSE, PLAY, etc.) are automatically activated to allow pausing of live TV. If you connect a Toshiba Symbio™ AVHD recorder, you must set up the TV Guide On Screen system in order to use the Symbio's full - Toshiba 62HM94 | Owner's Manual - English - Page 50
seconds for the picture to appear when you turn on the TV again. If Quick Restart is set to ON and you turn off the TV, the following will occur for a few minutes: • The screen (lamp) lights dimly. • The fans continue to run. This is a function of the Quick Restart Low Power Shutdown mode and - Toshiba 62HM94 | Owner's Manual - English - Page 51
the menu bar TV will turn off automatically after a few seconds. After the TV turns off, unplug the TV power TV turns off, unplug it and plug it Type in youbracPkINinntoowco(morp"le0t0e0t0h"e irfensoetP. IN hfaacstobreyednesfaeut)lttovarleusetsYo.reessettingNs oto their OK Copyright © 2004 TOSHIBA - Toshiba 62HM94 | Owner's Manual - English - Page 52
On Screen system: • While watching TV, press the TV GUIDE button on the remote control; -or- • Press MENU, open the APPLICATIONS menu, highlight TV GUIDE ON SCREEN, and press ENTER. Setting up the TV Guide On Screen system Follow these instructions to set up the TV Guide On Screen system so it can - Toshiba 62HM94 | Owner's Manual - English - Page 53
are downloaded from the TV Guide On Screen service to your TV. • The TV Guide On Screen interactive program guide supports cable-ready, cable box, and digital cable services, as well as over-the-air broadcasts. It does not provide listings for satellite services. TV Guide On Screen remote control - Toshiba 62HM94 | Owner's Manual - English - Page 54
lock/unlock the Video Window: Press the SPLIT button on the remote control to toggle between locking and unlocking the Video Window. -or- Highlight a channel logo or the LISTINGS Service Bar Label and press MENU to display the option to lock/unlock the Video Window. Info Box Panel Menus • A panel - Toshiba 62HM94 | Owner's Manual - English - Page 55
• An Info Box contains information about a show, Service, or Panel Ad, or provides general help (for example, for a panel menu). • An Info Box for a program in the LISTINGS screen can have up to three sizes: Small, Large, or "No." - Press INFO on the remote control to cycle among the sizes. - The - Toshiba 62HM94 | Owner's Manual - English - Page 56
TV Guide On Screen system, LISTINGS is always the first service displayed. • Use the Number keys on the remote control to jump to a specific channel's listings. • To watch a show (if on now), highlight the show and press ENTER. • To display the Episode Options panel menu power ON, auto-tune TV) - Toshiba 62HM94 | Owner's Manual - English - Page 57
Chapter 7: Using the TV Guide On Screen interactive program guide TV Guide On Screen Services (continued) SEARCH screen • SEARCH allows you to find shows by keyword or category (alphabetical, HDTV, movies, sports, children, educational, news, variety, series). Example: Category search 1. From the - Toshiba 62HM94 | Owner's Manual - English - Page 58
TV Guide On Screen system stores all the keywords you create. To edit or delete a keyword: From the SEARCH/KEYWORD screen, highlight the keyword you want to edit or delete, and then press MENU to display the Search Options panel menu, with the following options: - GO TO SERVICE BAR: Closes the menu - Toshiba 62HM94 | Owner's Manual - English - Page 59
Chapter 7: Using the TV Guide On Screen interactive program guide TV Guide On Screen Services (continued) RECORDINGS screen The RECORDINGS service screen displays a list of previously recorded or currently recording shows on an IEEE-1394 recording device connected to the TV (see Chapter 2). Note: - Toshiba 62HM94 | Owner's Manual - English - Page 60
to display the Record Options panel menu. • Highlight an event and press MENU to display the Schedule Options panel menu, with the following options: - GO TO SERVICE BAR: Closes the menu, changes no information, and returns to the Service Bar. - WATCH NOW: Exits the TV Guide On Screen system and - Toshiba 62HM94 | Owner's Manual - English - Page 61
the TV Guide On Screen interactive program guide TV Guide On Screen Services (continued) Record features (continued) 3) Manually set a show to Record 1. Highlight SCHEDULE in the Service Bar, and press MENU to display the Schedule Options panel menu. Press yzx • to move through the options. Press - Toshiba 62HM94 | Owner's Manual - English - Page 62
Chapter 7: Using the TV Guide On Screen interactive program guide TV Guide On Screen Services (continued) Remind features You can set a Reminder to perform the following functions: • Automatically turn on the TV (if off ) at the scheduled reminder time, and tune the TV to the channel of the show - Toshiba 62HM94 | Owner's Manual - English - Page 63
TV Guide On Screen interactive program guide TV Guide On Screen Services (continued) Remind features (continued) Reminder notification banner Based on your option settings, a notification banner will appear on-screen, if your TV manual TOSHIBA CORPORATION. All rights reserved. 8/31/04, 2:32 PM 63 - Toshiba 62HM94 | Owner's Manual - English - Page 64
the initial TV Guide On Screen setup (as described in Chapter 5), you can change the following settings: • Change system settings • Change channel display • Change default options Highlight a choice, press ENTER, and follow the on-screen instructions. With SETUP highlighted in the Service Bar, press - Toshiba 62HM94 | Owner's Manual - English - Page 65
you press INFO on the remote control when the TV Guide On Screen system is open. Choices are No Only, Small Only, Large Only, No & Small, No & Large, Small & Large, and All (default). • AUTO GUIDE: Automatic entry into the TV Guide On Screen system when the TV is powered on. Choices are On (default - Toshiba 62HM94 | Owner's Manual - English - Page 66
use a device other than the TV's remote control to start recording and then change inputs, the recorded audio and video may be affected. TV/VIDEO EXIT TV front touchpad CHANNEL VOLUME MENU POWER 66 HM94(E)066-75(8a-UseTV) 66 Copyright © 2004 TOSHIBA CORPORATION. All rights reserved. 8/31 - Toshiba 62HM94 | Owner's Manual - English - Page 67
automatically be labeled and cannot be relabeled until you remove the device from the TV Guide On Screen setup. • You cannot select IEEE-1394 devices through the INPUT SELECTION window; however, you can select and control IEEE-1394 devices through TheaterNet (see page 44). To label the video input - Toshiba 62HM94 | Owner's Manual - English - Page 68
device other than the TV's remote control to start recording and then change the channel, the recorded audio and video will be Number and Dash buttons on the remote control. ACTION MENU +10 - 100 ENTER CH RTN 68 Copyright © 2004 TOSHIBA CORPORATION. All rights reserved. Channel Numbers - Toshiba 62HM94 | Owner's Manual - English - Page 69
program the way that looks best to you. See "Notice of possible adverse effects on TV picture tube," below right. To select the picture size: 1. Press PIC SIZE on the remote control. 2. While the Picture Size menu is on-screen, press the corresponding number button (0-4) to select the desired - Toshiba 62HM94 | Owner's Manual - English - Page 70
picture size, press PIC SIZE on the remote control. You also can select the picture size using the menu system. Select PICTURE SIZE in the VIDEO / THEATER SETTINGS menu. Theater Wide 1 picture size example TheaterWide® 2 picture TV picture tube" below. Using these functions to change the picture - Toshiba 62HM94 | Owner's Manual - English - Page 71
, the FREEZE mode is active, or the TV Guide On Screen system is open. To turn on the AUTO ASPECT feature: 1. Press MENU and open the VIDEO menu. 2. Highlight THEATER SETTINGS and press ENTER. Video Picture Settings Theater Settings Advanced Picture Settings Navigate Select DVD RTN CH RTN Ba - Toshiba 62HM94 | Owner's Manual - English - Page 72
mode is useful when additional picture brightness is desired (such as in a bright room). • The LOW POWER mode reduces wear on the projection lamp. Using this mode should result in longer lamp life. See "Lamp unit replacement" on page 98-100. To select the lamp mode: 1. Press MENU and open the VIDEO - Toshiba 62HM94 | Owner's Manual - English - Page 73
Input Selection window. ACTION MENU +10 - 100 Numbers TV's remote control to start recording. If you use a device other than the TV's remote control to start recording, you may be able to open the POP window during the recording process. If this happens, the recorded audio will reflect the audio - Toshiba 62HM94 | Owner's Manual - English - Page 74
to switch the sound (main or POP) that is output from the TV speakers (and from the VARIABLE AUDIO OUT and AUDIO OUT jacks). The window with the active sound is outlined with a EXIT. Still picture 74 HM94(E)066-75(8a-UseTV) 74 Copyright © 2004 TOSHIBA CORPORATION. All rights reserved. 8/31/04, 2:38 - Toshiba 62HM94 | Owner's Manual - English - Page 75
-picture TV's remote control to start recording, you may be able to open the FAV SCAN multi-window during the recording process. If this happens, the recorded audio and video will reflect the audio and video of the active window, which may not be what you intended to record. Copyright © 2004 TOSHIBA - Toshiba 62HM94 | Owner's Manual - English - Page 76
) Lower contrast for darkened room (factory setting) Your personal preferences To select the picture mode: ENTER Press PIC MODE on the remote control. The following popup menu appears on-screen. Picture Settings Mode Mode:Sports Sports Repeatedly press PIC MODE to cycle among the modes - Toshiba 62HM94 | Owner's Manual - English - Page 77
noise reduction feature allows you to reduce visible interference in your TV picture. This may be useful when receiving a broadcast with a 1394, and digital Cable modes. To turn on CableClear DNR: 1. Press MENU and open the VIDEO menu. 2. Highlight ADVANCED PICTURE SETTINGS and press ENTER. 3. Press - Toshiba 62HM94 | Owner's Manual - English - Page 78
will be used instead. 1. Press MENU and open the APPLICATIONS menu. 2. Highlight DIGITAL CC/AUDIO SELECTOR and press ENTER. 3. Press • or x to highlight the desired service, and then press ENTER. 78 HM94(E)076-81(8b-UseTV) 78 Copyright © 2004 TOSHIBA CORPORATION. All rights reserved. 9/1/04 - Toshiba 62HM94 | Owner's Manual - English - Page 79
that have multiple audio tracks). This temporarily overrides the audio track chosen by the language option under Audio Setup. 1. Press MENU and open the APPLICATIONS menu. 2. Highlight DIGITAL CC/AUDIO SELECTOR and press ENTER. 3. Press • or x to highlight the desired service, and then press - Toshiba 62HM94 | Owner's Manual - English - Page 80
(for example, to prevent the sudden increase in volume that often happens when a TV program switches to a commercial). To turn on the StableSound® feature: 1. Press MENU and open the AUDIO menu. 2. Highlight AUDIO SETTINGS and press ENTER. 3. Press z to highlight STABLE SOUND, and then press • to - Toshiba 62HM94 | Owner's Manual - English - Page 81
an audio system to your TV (see "Connecting a digital audio system" and "Connecting an analog audio system" on page 20). To turn off the built-in speakers: 1. Press MENU and open the AUDIO menu. 2. Highlight AUDIO SETUP and press ENTER. Audio Audio Settings Advanced Audio Settings Audio Setup - Toshiba 62HM94 | Owner's Manual - English - Page 82
For instructions on using your memory card, refer to the owner's manual for your memory card. • Failure to take proper care of a memory card may prevent display of pictures or playback of MP3 files from the card or result in damage to the memory card or TV. SUCH DAMAGE IS NOT COVERED BY YOUR TOSHIBA - Toshiba 62HM94 | Owner's Manual - English - Page 83
picture viewer will start automatically when you insert the memory card in the TV. To start the audio player, you must first press EXIT to close the picture viewer and then start the audio picture 90° counterclockwise. Picture picture picture as the large picture. 6. Press ENTER to view your pictures - Toshiba 62HM94 | Owner's Manual - English - Page 84
be made before starting the MP3 audio player. • Permission is required in order to download MP3 files and music from the Internet. Toshiba has no right to grant such permission. Permission should always be sought from the copyright owner. To start the MP3 audio player when a memory card is not - Toshiba 62HM94 | Owner's Manual - English - Page 85
channel using the Numbers or CH y/z, CH RTN, or FAV y/z buttons; • pressing TheaterNet DEVICE on the remote control (page 44); or • pressing TV GUIDE on the remote control (page chapter 7). Copyright © 2004 TOSHIBA CORPORATION. All rights reserved. 85 HM94(E)082-87(8c-UseTV) 85 8/31/04, 3:25 PM - Toshiba 62HM94 | Owner's Manual - English - Page 86
time (maximum of 3 hours). The sleep timer turns off the TV one time only, as opposed to the ON/OFF timer, which turns off the TV on a recurring basis. To set the sleep timer: Press SLEEP on the remote control to set the length of time until the TV turns off. Each time you press SLEEP, the time - Toshiba 62HM94 | Owner's Manual - English - Page 87
(if set) • Remaining time on game timer (if set) • Stereo or SAP audio status Sample RECALL screen • V-Chip rating status • Picture size • Lamp mode Understanding the auto power off feature The TV will automatically turn itself off after approximately 15 minutes if it is tuned to a vacant - Toshiba 62HM94 | Owner's Manual - English - Page 88
code will be reset and you can enter a new PIN code. Changing your PIN code 1. Press MENU and highlight the LOCKS menu icon. 2. Press z to display the PIN code entering screen. 3. Enter your four-digit PIN -91(9-Locks) 88 Copyright © 2004 TOSHIBA CORPORATION. All rights reserved. 8/31/04, 3:32 PM - Toshiba 62HM94 | Owner's Manual - English - Page 89
TV, which supports the U.S. V-Chip system only. To block and unblock TV programs and movies: 1. Press MENU and highlight the LOCKS menu the program you are watching, press RECALL on the remote control. If it is not rated, the word "NONE" appears. STEREO TV - PG L V On Timer: Every Day 6:00am - Toshiba 62HM94 | Owner's Manual - English - Page 90
the setting first. To block channels: 1. Press MENU and highlight the LOCKS menu icon. 2. Press z, which displays the PIN normal picture appears. All locking is disabled until the TV is turned off, and will be enabled when the TV is turned on TOSHIBA CORPORATION. All rights reserved. 8/31/04, 3:32 PM - Toshiba 62HM94 | Owner's Manual - English - Page 91
(by children, for example). When the front panel lock is ON, none of the controls on the TV front touchpad will operate except POWER. To lock the front panel: 1. Press MENU and highlight the LOCKS menu icon. 2. Press z to display the PIN code entering screen. 3. Enter your four-digit PIN - Toshiba 62HM94 | Owner's Manual - English - Page 92
Troubleshooting Before calling a service technician, please check the following table for a possible cause of the problem and some solutions. Problem Solution TV will not turn on • Make sure the power cord is plugged in, and then press POWER. • The remote control batteries may be dead. Replace - Toshiba 62HM94 | Owner's Manual - English - Page 93
remote control and the TV. • The remote control batteries may be dead. Replace the batteries (page 27). • Your TV remote control may not operate certain features on your external device. Refer to the owner's manual for your other device to determine its available features. If your TV remote control - Toshiba 62HM94 | Owner's Manual - English - Page 94
not seated properly. Turn OFF the TV and unplug the power cord. Review "How to replace the lamp unit" on pages 99-100 to ensure that the lamp unit door is installed securely. If the problem persists, contact a Toshiba Authorized Service Center. 3) Green blinks continuously The lamp is not working - Toshiba 62HM94 | Owner's Manual - English - Page 95
10: Troubleshooting TV Guide On Screen® FAQs The following are frequently asked questions about the TV Guide On Screen system. The answers represent the most likely solutions to the problem. SETUP 1. Q: What if I move and my ZIP code or postal code changes? A: Highlight SETUP in the Service Bar - Toshiba 62HM94 | Owner's Manual - English - Page 96
SETUP in the Service Bar. Press z to select CHANGE CHANNEL DISPLAY. Follow the on-screen instructions. 16. Q: Why do all my channels display "No Listing?" A: The TV Guide On Screen system has not yet received its data download. The phrase "No Listings" will be replaced with program information - Toshiba 62HM94 | Owner's Manual - English - Page 97
VCR owner's manual or contact your Cable TV company for proper wiring procedures. 32. Q: Is Help available in the TV Guide On Screen system? If so, how do I find it? A: Yes. Highlight any of the five main Services (Listings, Schedule, Recordings, Setup, Search) and press the INFO key on the remote - Toshiba 62HM94 | Owner's Manual - English - Page 98
by directing your web browser to www.toshiba.ca. Click "Home Entertainment," and then click "Support." Use the replacement lamp unit model listed below only. Using any other lamp may cause damage to the TV and/or lamp. CAUTION: Always replace with same type lamp unit: Model No. TB25-LMP (Stock no - Toshiba 62HM94 | Owner's Manual - English - Page 99
cord. WARNING: Eye damage may result from directly viewing the light produced by this lamp. Always turn off the TV and unplug the power cord before opening the lamp unit door. 2. STOP! Allow the lamp to cool for at least one (1) hour before replacing it. CAUTION: HOT SURFACE! The temperature of the - Toshiba 62HM94 | Owner's Manual - English - Page 100
ensure that the lamp unit and lamp unit door are installed correctly: • No picture • Dark picture • TV will not turn on If, after repeating steps 1-9, the problem still exists: • In the U.S., call Customer Service at 1-800-631-3811. • In Canada, locate the nearest Toshiba authorized service depot by - Toshiba 62HM94 | Owner's Manual - English - Page 101
) 62HM94: 99 lbs (44.90 kg) Supplied Accessories • Two dual-wand IR blaster cables • Remote control with two size "AA" alkaline batteries Optional Stands: 46HM94: ST4694 or ST4684 52HM94: ST5294 or ST5284 62HM94: ST6294 or ST6284 Copyright © 2004 TOSHIBA CORPORATION. All rights reserved. 101 HM94 - Toshiba 62HM94 | Owner's Manual - English - Page 102
purchase. DURING THIS PERIOD, TACP WILL, AT TACP'S OPTION, REPAIR OR REPLACE A DEFECTIVE PART WITH A NEW OR REFURBISHED PART WITHOUT CHARGE TO YOU. Owner's Manual and Product Registration Read this owner's manual thoroughly before operating this DLP television. Complete and mail the enclosed product - Toshiba 62HM94 | Owner's Manual - English - Page 103
'S OPTION, REPAIR OR REPLACE A DEFECTIVE PART WITH A NEW OR REFURBISHED PART WITHOUT CHARGE TO YOU. ON-SITE SERVICE ONLY APPLIES WITHIN 100 KILOMETERS OF AN AUTHORIZED TCL SERVICE DEPOT. Owner's Manual and Product Registration Read this owner's manual thoroughly before operating this DLP television - Toshiba 62HM94 | Owner's Manual - English - Page 104
Notes Chapter 11: Appendix 104 HM94(E)098-105(11-App) 104 Copyright © 2004 TOSHIBA CORPORATION. All rights reserved. 8/31/04, 12:00 PM - Toshiba 62HM94 | Owner's Manual - English - Page 105
Notes Chapter 11: Appendix HM94(E)098-105(11-App) 105 Copyright © 2004 TOSHIBA CORPORATION. All rights reserved. 8/31/04, 12:00 PM 105 - Toshiba 62HM94 | Owner's Manual - English - Page 106
mode 72 Lamp unit replacement 98-100 Language selection 40 Last mode memory feature 87 LED indications 8, 9, 94 Lights on front panel 8, 9, 94 Locking video inputs 90 LOCKS menu 88 Channels, blocking 90 Enable rating blocking 89 GameTimer 91 MPAA rating 89 New PIN code 88 TV rating 89 - Toshiba 62HM94 | Owner's Manual - English - Page 107
: Color temperature 77 Picture mode 76 Picture quality 76 Picture-out-picture (POP): FAV SCAN button 75 FREEZE button 74 SPLIT button 73 Picture scroll 71 Picture size selection 69 Picture viewer 82 Problems with TV 92-97 Quick Restart 51 R RECALL button 87 Remote control: Battery - Toshiba 62HM94 | Owner's Manual - English - Page 108
OFFICE: 82 TOTOWA ROAD, WAYNE, NJ 07470, U.S.A. NATIONAL SERVICE DIVISION:1420-B TOSHIBA DRIVE, LEBANON, TN 37087, U.S.A. TOSHIBA OF CANADA LTD. HEAD OFFICE: 191 McNABB STREET, MARKHAM, ONTARIO, L3R 8H2, CANADA - TEL: (905) 470-5400 SERVICE CENTERS: TORONTO: 191 McNABB STREET, MARKHAM, ONTARIO L3R
-
 1
1 -
 2
2 -
 3
3 -
 4
4 -
 5
5 -
 6
6 -
 7
7 -
8
-
9
-
10
-
11
-
12
-
13
-
14
-
15
-
16
-
17
-
18
-
19
-
20
-
21
-
22
-
23
-
24
-
25
-
26
-
27
-
28
-
29
-
30
-
31
-
32
-
33
-
34
-
35
-
36
-
37
-
38
-
39
-
40
-
41
-
42
-
43
-
44
-
45
-
46
-
47
-
48
-
49
-
50
-
51
-
52
-
53
-
54
-
55
-
56
-
57
-
58
-
59
-
60
-
61
-
62
-
63
-
64
-
65
-
66
-
67
-
68
-
69
-
70
-
71
-
72
-
73
-
74
-
75
-
76
-
77
-
78
-
79
-
80
-
81
-
82
-
83
-
84
-
85
-
86
-
87
-
88
-
89
-
90
-
91
-
92
-
93
-
94
-
95
-
96
-
97
-
98
-
99
-
100
-
101
-
102
-
103
-
104
-
105
-
106
-
107
-
108
 |
 |
46HM94
52HM94
62HM94
23566511
Integrated HD DLP
™
Projection Television
O
WNER’S
M
ANUAL
© 2004 TOSHIBA CORPORATION
All Rights Reserved
Owner’s Record
The model number and serial number are on the back
of your TV. Record these numbers in the spaces below.
Refer to these numbers whenever you communicate
with your Toshiba dealer about this TV.
Model number:
Serial number:
HIGH
-DEFINITION TELEVISION
For an overview of steps for setting up
and using your new TV, see page 8.
I
S
O
1
4
0
0
1
F
I
L
E
N
o
.
A
9
6
4
5
T
O
S
H
I
B
A
A
M
E
R
I
C
A
C
O
N
S
U
M
E
R
P
R
O
D
U
C
T
S
,
L
.
L
.
C
.
Compatible with the new Toshiba
Symbio
™
Audio/Video Hard Drive Recorder!
See pages 23 and 49 for details.
HM94(E)001
8/30/04, 10:03 AM
1