Toshiba 65HM167 Owners Manual
Toshiba 65HM167 - 65" Rear Projection TV Manual
 |
UPC - 022265000496
View all Toshiba 65HM167 manuals
Add to My Manuals
Save this manual to your list of manuals |
Toshiba 65HM167 manual content summary:
- Toshiba 65HM167 | Owners Manual - Page 1
picture to appear on-screen. This is a property of DLP® TV lamp technology and is NOT a sign of malfunction. For details, see "IMPORTANT NOTICE ABOUT HOT LAMP RESTART" on page 6. © 2007 TOSHIBA CORPORATION All Rights Reserved Owner's Record The model number and serial number are on the back of your - Toshiba 65HM167 | Owners Manual - Page 2
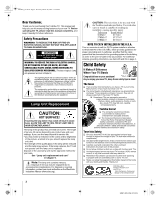
instructions in the literature accompanying the appliance. Lamp Unit Replacement The lamp in this product has a limited service life. The length of service life varies depending on product use and user settings. If you use the lamp beyond its service life: • you may notice a reduction in the colors - Toshiba 65HM167 | Owners Manual - Page 3
safety precautions: • See Chapter 9 for instructions on lamp unit replacement and care. • DO NOT attempt to service this product except as specified in the "Lamp unit replacement and care" section in Chapter 9. The only user-serviceable item in this product is the lamp unit. 17) WARNING: To prevent - Toshiba 65HM167 | Owners Manual - Page 4
Special care for DLP® (Digital Light Processing) units: • The lamp unit in this product has a limited service life. The length of service life varies depending on product use or user settings. If you use the lamp beyond its service life: • you may notice a reduction in the colors and/or brightness - Toshiba 65HM167 | Owners Manual - Page 5
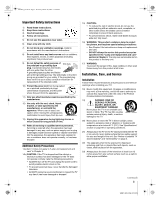
TV reaches the end of its useful life, ask a qualified service technician to properly dispose of the TV. Note: The lamp Statement (Part 15): The Toshiba 50HM67, 57HM167, and 65HM167 Televisions comply with Part 15 of and used in accordance with the instructions, may cause harmful interference to radio - Toshiba 65HM167 | Owners Manual - Page 6
The light source for this TV is a projection lamp unit with a limited service life. When the lamp wears out, the picture may become dark or black or the lamp may fail, at which time you must replace the lamp unit (- "Lamp unit replacement and care" on pages 63-65). 2) When the lamp mode is set to - Toshiba 65HM167 | Owners Manual - Page 7
last mode memory feature 55 Chapter 7: Using the TV's advanced features 56 Using the advanced picture settings features 56 Using dynamic contrast 56 Using the static gamma feature 56 Selecting the color temperature 57 Selecting the lamp mode 57 Using CableClear® digital noise reduction 58 - Toshiba 65HM167 | Owners Manual - Page 8
Replacing the lamp unit (User-replaceable component 63 When to replace the lamp unit 63 How to replace the lamp unit 64 Disposing of the used lamp unit 65 Specifications 66 Limited United States Warranty for DLP® Television Models 67 Limited Canadian Warranty for Toshiba Brand DLP® Television - Toshiba 65HM167 | Owners Manual - Page 9
new Toshiba widescreen, integrated HD, DLP® projection TV: • Integrated digital tuning (8VSB ATSC and QAM) eliminates the need for a separate digital converter set-top box (in most cases). • Three HDMI™ digital, high-definition multimedia interfaces 1080p input support (- page 19). • Two sets of - Toshiba 65HM167 | Owners Manual - Page 10
memory (- page 32). 13 For details on using the TV's features, see Chapters 6 and 7. 14 For help, refer to the Troubleshooting Guide, Chapter 8. 15 For lamp unit replacement instructions, see Chapter 9. 16 For technical specifications and warranty information, see Chapter 9. 17 Enjoy your new - Toshiba 65HM167 | Owners Manual - Page 11
control toward this area of the TV screen (- "Remote control effective range" on page 22). 2 Blue, Yellow, and Green/Red See "LED indications" on you are viewing (ANT, VIDEO 1, VIDEO 2, ColorStream HD1, ColorStream HD2, HDMI 1, HDMI 2, HDMI 3, PC). 7 MENU (ENTER) - Press to access the menu system - Toshiba 65HM167 | Owners Manual - Page 12
or PCM (pulse-code modulation) format for connecting an external Dolby Digital decoder, amplifier, A/V receiver, or home theater system with optical audio input. 9 Service port (behind the cover) - For service use only. Used for updating the television's firmware. HDMI, the HDMI logo and High - Toshiba 65HM167 | Owners Manual - Page 13
video) usually come in sets of three, and are for use with video devices with analog audio and composite video output. These cables (and the related inputs on your TV) are typically color-coded according to use: yellow for video, red for stereo right audio, and white for stereo left (or mono - Toshiba 65HM167 | Owners Manual - Page 14
video cable to VIDEO 2 at the same time or the picture performance will be unacceptable. - If you have a mono VCR, connect L/MONO on the TV to your VCR's audio out terminal using the white audio cable only. To view the antenna or Cable signal: Select the ANT video input source on the - Toshiba 65HM167 | Owners Manual - Page 15
- If you have a mono VCR, connect L/MONO on the TV to your VCR's audio out terminal using the white audio cable only. Note: When you use a Cable box, the ANT video input source on the TV.* Tune the TV to channel 3 or 4 (whichever channel the Cable box output is set to). Use the Cable box controls to - Toshiba 65HM167 | Owners Manual - Page 16
VCR's audio out terminal using the white audio cable only. • standard audio cables • component video cables - You can connect the component video cables (plus audio cables) from the DVD player or satellite receiver to either set of ColorStream terminals on the TV (HD-1 or HD-2). The ColorStream HD - Toshiba 65HM167 | Owners Manual - Page 17
control to operate the TV. • The IR pass-through feature does not support all IR-controlled devices; satisfactory performance may not be attainable with certain devices. *If you cannot locate the device's infrared sensor: 1 Turn OFF the device. 2 Starting at the lower left corner of the device - Toshiba 65HM167 | Owners Manual - Page 18
S-video, connect an S-video cable (plus the audio cables). Camcorder VIDEO AUDIO OUT L R VIDEO 2 inputs on TV right side panel To view the camcorder video: Select the VIDEO 2 video input source on the TV.* * To select the video input source, press INPUT on the remote control (- page 23). To program - Toshiba 65HM167 | Owners Manual - Page 19
electronic devices (such as a set-top box or DVD player with HDMI or DVI output). The HDMI input will accept and display 480i Setting the HDMI™ audio mode" (- page 34). TV back panel DVI device VIDEO AUDIO L R IN IN DVI / HDCP OUT OUT L R Note: To ensure that the HDMI or DVI device is reset - Toshiba 65HM167 | Owners Manual - Page 20
LR To control the audio: 1 Turn on the TV and the digital audio device. 2 Press Y on the TV's remote control and open the Audio menu. 3 Highlight Audio Setup and press T. TV back panel Audio Digital Audio Selector Audio Settings Advanced Audio Settings Audio Setup 4 In the Optical Output Format - Toshiba 65HM167 | Owners Manual - Page 21
and the specifications of the PC on which you are playing the DVD-Video, some scenes may be skipped or you may not be able to pause during multi-angle scenes. To connect a PC to the HDMI terminal on the TV: When connecting a PC to the HDMI terminal on the TV, use an HDMI-to DVI - Toshiba 65HM167 | Owners Manual - Page 22
Toshiba device: Your TV remote control is preprogrammed to operate most Toshiba devices (- page 26). If you have a non-Toshiba device or a Toshiba device becomes reduced, replace batteries with new ones. • When necessary to replace batteries in the remote control, always replace both batteries with - Toshiba 65HM167 | Owners Manual - Page 23
INFO displays TV status information as well as program details, when available (- page 55). 14 3 C / # c While watching TV, these buttons open the 19 MODE SELECT switch switches between TV, CABLE/SAT, AUX 1, and AUX 2 modes (- page 24). Set to "TV" to control the TV. Note: The error message "Not - Toshiba 65HM167 | Owners Manual - Page 24
To view one program while recording another, press to select TV mode. SEARCH selects a specific DVD chapter, title or time. 19 REC Starts tape recording. 20 MODE SELECT switch Set to "TV" to control the TV; "CABLE/SAT" to control a cable converter box or satellite receiver; "AUX 1" to control a VCR - Toshiba 65HM167 | Owners Manual - Page 25
• * Not available for your TV. REMOTE CONTROL KEY Toshiba TV CABLE SAT (satellite) POWER SLEEP PIC SIZE PIC MODE Power Sleep timer Picture size PIC MODE Power s TV s TV s TV Power s TV s TV s TV 1-9 0 100/-/+10 INPUT FAV BROWSER/ TOP MENU MUTE SET UP/GUIDE VOL + - Digit 1-9 Digit 0 - (sub - Toshiba 65HM167 | Owners Manual - Page 26
. If more than one code is listed, try each one separately until you find one that works. 2 Set the MODE SELECT switch to the type of device you are programming the remote control to operate - CABLE/SAT (for a cable converter box or satellite receiver), AUX 1 (for a VCR or TV/VCR combo), or AUX - Toshiba 65HM167 | Owners Manual - Page 27
your device with the TV remote control. Your other device may use a code that is not recognized by the TV remote control. If 032, 035, 039, 043, 045, 047, 058 027 TV/VCR Combo Action GE Goldstar Panasonic Precision Quasar Realistic Sony Toshiba Zenith Totevision 078 059, 062 065 065 078 065 079 - Toshiba 65HM167 | Owners Manual - Page 28
Sony STS Sylvania Symphonic Tandy Tashiko Tatung Teac Technics Teknika Toshiba Totevision Unitec Unitech Vector Research 054, 057, 062, , 010, 065 073 009 005, 006, 011, 012, 053 Video Concepts Wards White Westinghouse XR-1000 Yamaha Zenith HTIB Lasonic Panasonic Venturer 005, 006, 011, 012, 039 - Toshiba 65HM167 | Owners Manual - Page 29
Channel Browser Setup menu] S Off/On S [Opens the Edit Rating Limits menu] S [Opens the Channels block menu] S Off/Video/Video+ S Off/On S [Opens the New PIN Code entry screen] S [Opens the Installation menu] S [Opens the Sleep Timer menu] S [Opens the PC Settings menu] S Power-Saving/Fast Page 44 - Toshiba 65HM167 | Owners Manual - Page 30
ENTER Select CH RTN Back EXIT Exit • The Video sub-menu appears with a black background, which looks different from other menus. Picture Settings Contrast 100 Brightness 50 Color 50 Tint 0 Sharpness 50 Advanced Picture Settings Reset Mode: Sports Done 30 HM67 (E/F) Web 213:276 - Toshiba 65HM167 | Owners Manual - Page 31
PC Settings Power-On Mode Fast 3 (A new set of Installation menu icons will appear, as shown below.) Open the ANT input on the TV. Input Configuration Antenna In Cancel Cable Done 5 To save your new settings, highlight Done and press T. To revert to your original settings, highlight Cancel and - Toshiba 65HM167 | Owners Manual - Page 32
set of programmed channels (and does NOT erase channels that were previously programmed into the TV's memory.) To remove an Antenna source channel from the memory, you must manually delete it. • To tune the TV to a channel not programmed in the channel memory, you must use the Channel Number - Toshiba 65HM167 | Owners Manual - Page 33
Page 33 Thursday, March 29, 2007 11:28 AM Chapter 5: Setting up your TV To add a channel to the channel memory: Highlight the unchecked box next to the channel number you want to add, and then press T to check the box. To manually add digital subchannels on a physical channel: Use the Channel - Toshiba 65HM167 | Owners Manual - Page 34
to change channels. No Yes Custom Clear All Done 4 Highlight Done and press T to save changes, and go back to the Channel Labeling window. Setting the HDMI™ audio mode To set the HDMI audio mode: 1 Press Y and open the Audio menu. 2 Highlight Audio Setup and press T. 3 Press B or b to select - Toshiba 65HM167 | Owners Manual - Page 35
surge, or other similar power failure occurs, such that the TV loses and regains power within a few minutes. This is a property of DLP® TV lamp technology and is NOT a sign of malfunction. If this occurs, the yellow LED on the TV front panel will blink (and the blue LED will be lit solid) until the - Toshiba 65HM167 | Owners Manual - Page 36
window provides the ability to reset the TV settings.Type in your PIN now (or "0000" if no PIN has been set) to restore settings to their factory default values. Done 5 Enter your PIN code (or 0000 if no PIN code has been set). 6 Highlight Yes and press T. The TV will turn off automatically after - Toshiba 65HM167 | Owners Manual - Page 37
ANT 1 Video 1 2 Video 2 3 ColorStream HD1 4 ColorStream HD2 5 HDMI 1 6 HDMI 2 7 HDMI 3 8 PC ANT 0 - 8 / INPUT to Select Navigate Note: • You can label the video input sources according to the specific devices you have connected to the TV (- "Labeling the video input sources" at right). • Sources - Toshiba 65HM167 | Owners Manual - Page 38
labeled as a specific device). The screen below right is an example of how you could label the inputs if you connected a VCR to VIDEO 1, Cable TV to VIDEO 2, a video recorder to ColorStream HD1, a DTV settop box to HDMI 1, a satellite/DSS set-top box to HDMI 2, and a DVD player to HDMI 3. Also note - Toshiba 65HM167 | Owners Manual - Page 39
TV's features 4 Press b to highlight History List, and then press C or c to select the setting you prefer: either Power Off Clear (On), On, or Off. Note: When History List is set and press T. To return to factory defaults, highlight Reset and press T. To open the Channel Browser™: • Press 3 C or # - Toshiba 65HM167 | Owners Manual - Page 40
Setup is set to "Power Off Clear (On)," turning off the TV will clear the TV control panel. Note:This feature will not work unless you program channels into the TV's channel memory (- page 32). Tuning to a specific channel (programmed or unprogrammed) Tuning analog channels: Press the Channel Number - Toshiba 65HM167 | Owners Manual - Page 41
Number button (0-5) while the Picture Size screen is open. • Press B or b while the Picture Size screen is open. Settings menu. 2 Press C or c to select the desired picture size setting. 3 Highlight Done and press T. Theater Settings Picture Size Picture Scroll Cinema Mode Auto Aspect Ratio Reset - Toshiba 65HM167 | Owners Manual - Page 42
C or c to scroll the picture up and down as needed, from -10 to +20. Theater Settings Picture Size Picture Scroll Cinema Mode Auto Aspect Ratio Mode: Sports TheaterWide 2 -5 Film On Reset Done 6 To save the new settings, highlight Done and press T. To revert to the factory defaults, highlight - Toshiba 65HM167 | Owners Manual - Page 43
turn on the auto aspect ratio feature: 1 Press Y and open the Video menu. 2 Highlight Theater Settings and press T. 3 In the Auto Aspect Ratio field, select On. Theater Settings Picture Size Picture Scroll Cinema Mode Auto Aspect Ratio Mode: Sports Natural -- Film On Reset Done 4 To save the - Toshiba 65HM167 | Owners Manual - Page 44
50 Color 50 Tint 0 Sharpness 50 Advanced Picture Settings Reset Mode: Sports Done Picture Settings Mode: Preference Contrast 70 4 To save the new settings, highlight Done and press T. You can use any of the picture modes (- "Selecting the picture mode," above left) as a starting point - Toshiba 65HM167 | Owners Manual - Page 45
of TV programs and videos that are closed captioned (usually marked "CC" in program guides). • Color Auto, Black, White, Red, Green, Blue, Yellow, Magenta, Cyan Text Foreground Auto, Transparent, Translucent Opacity Flashing, Solid Background Color Auto, Black, White, Red, Green, Blue, Yellow - Toshiba 65HM167 | Owners Manual - Page 46
audio selector: 1 Press Y and open the Audio menu. 2 Highlight Digital Audio Selector and press T. Audio Digital Audio Selector Audio Settings Advanced Audio Settings Audio Setup 3 Press B or b to select Audio, and then press C or c to select the desired service. 4 Press O. Closed Caption Audio - Toshiba 65HM167 | Owners Manual - Page 47
Range Control No Auto Stereo English Dolby Digital Compressed Reset Done 4 To save the new settings, highlight Done and press T. To reset the settings to the factory defaults, highlight Reset and press T. Note: • You can typically leave the TV in Stereo mode because it will automatically output - Toshiba 65HM167 | Owners Manual - Page 48
in volume that often happens when a TV program switches to a commercial). To turn on the StableSound® feature: 1 Press Y and open the Audio menu. 2 Highlight Audio Settings and press T. 3 In the StableSound field, select On. Audio Settings Bass Treble Balance StableSound Reset 100 100 0 On Done - Toshiba 65HM167 | Owners Manual - Page 49
Lock Front Panel Lock New PIN Code Off Off On Off Off 5 Press the Number buttons to enter a new four-digit code. Reenter the PIN code to confirm it. 6 Press T. The new PIN code is now active. New PIN Code Please enter a 4 digit PIN code **** Confirm PIN code **** Cancel Done 49 HM67 (E/F) Web - Toshiba 65HM167 | Owners Manual - Page 50
additional rating system can only be downloaded one time. You will not be able to download any updates to the rating system should such updates become available. • The additional rating system is not designed, transmitted, or controlled by the TV or Toshiba, nor is the availability of an additional - Toshiba 65HM167 | Owners Manual - Page 51
appear in the RECALL screen. TV - PG L V NONE Blocking channels With the Channels Block feature, you can block specific channels. You will not be Blocking Edit Rating Limits Channels Block Input Lock Front Panel Lock New PIN Code Off Off On Off Off 5 Press Bb to highlight the channel you - Toshiba 65HM167 | Owners Manual - Page 52
be enabled when the TV is turned on again. Locks Active Enter PIN code to temporarily unblock. **** Cancel Done Using the input lock feature You can use the Input Lock feature to lock the video inputs (VIDEO 1, VIDEO 2, ColorStream HD-1, ColorStream HD-2, HDMI 1, HDMI 2, HDMI 3 and PC) and - Toshiba 65HM167 | Owners Manual - Page 53
Selecting the video input source to view" page 37). 2 Press Y and open the Setup menu. 3 Highlight PC Settings and press T. Locks Enable Rating Blocking Edit Rating Limits Channels Block Input Lock Front Panel Lock New PIN Code Off Off Off Off On To unlock the control panel: Highlight Off in step - Toshiba 65HM167 | Owners Manual - Page 54
Chapter 6: Using the TV's features Setting the PC Audio This function allows you to output the sound from your PC (if connected) or mute the sound from your PC and output the sound from your HDMI (DVI) connection. (- page 21) To set the PC Audio: 1 Press Y and open the Audio menu. 2 Highlight - Toshiba 65HM167 | Owners Manual - Page 55
• Stereo, Mono or SAP audio status (when HDMI input mode, Dolby Digital or PCM) • Video resolution • Aspect ratio of incoming video signal (4:3 or 16:9) • V-Chip rating status • Lamp Mode ( : High Bright) ANT 123-456 ABCHD Stereo SAP 1080i 16:9 TV-PG L V 9:00pm . Understanding the auto power off - Toshiba 65HM167 | Owners Manual - Page 56
C or c to adjust the static gamma. The adjustment range is within ±5 from center. Advanced Picture Settings Dynamic Contrast Static Gamma 0 Color Temperature Lamp Mode Reset Mode: Preference High Cool High Bright Done • If the setting is moved in the minus direction, the detail of black - Toshiba 65HM167 | Owners Manual - Page 57
Color Temperature Lamp Mode Mode: Preference High Cool High Bright Reset Done 5 To save the new settings, highlight Done and press T. To revert to the factory defaults, highlight Reset and press T. Note: If you set the lamp mode to Low Power, each time you turn on the TV, the lamp will start - Toshiba 65HM167 | Owners Manual - Page 58
in your TV picture. settings: 1 Press Y and open the Video menu. 2 Highlight Noise Reduction and press T. Video Mode Picture Settings Noise Reduction Game Mode Theater Settings Sports Off 3 In the CableClear field, select your desired setting. Noise Reduction CableClear MPEG Noise Reduction Reset - Toshiba 65HM167 | Owners Manual - Page 59
audio will sound fuller, richer, and wider. To adjust the WOW™ settings: 1 Put the TV in STEREO mode (- "Selecting stereo/SAP broadcasts" on page 47). 2 Press Y and open the Audio menu. 3 Highlight Advanced Audio Settings and press T. 4 Press b or B to highlight the WOW feature you want to adjust - Toshiba 65HM167 | Owners Manual - Page 60
and you cannot turn off the TV, press and hold the POWER button on the TV control panel for 5 or more seconds to reset the TV. Other problems • If your TV's problem is not addressed in this Troubleshooting section or the recommended solution has not worked, use the Restore Factory Defaults procedure - Toshiba 65HM167 | Owners Manual - Page 61
may be dead. Replace the batteries (- page 22). • Your TV remote control may not operate certain features on your external device. Refer to the owner's manual for your other device to determine its available features. If your TV remote control does not operate a specific feature on another device - Toshiba 65HM167 | Owners Manual - Page 62
. Yellow blinks. Red blinks. Fan stopped. Abnormal operation of BUS line. (light engine). Abnormal operation of BUS line. Power Protect Detection. The color wheel has stopped. An abnormal temperature increase has occurred. Solution - See "Setting the Power-On Mode feature" (- page 35). The TV will - Toshiba 65HM167 | Owners Manual - Page 63
.com/service or call toll-free 1-800-631-3811. Out of Visit www.ceaccessories.toshiba.com or warranty: consult your consumer electronics dealer. In Canada Locate a Toshiba parts distributor by visiting www.toshiba.ca. Click "Home Entertainment" and then click "Support." Always replace the lamp - Toshiba 65HM167 | Owners Manual - Page 64
used lamp unit" on page 65). 50HM67 3 On the lamp unit door on the back of the TV, loosen the screw using a manual screwdriver, and then remove the lamp unit door. TV back Lamp unit door detail Loosen screw using manual screwdriver NOTE: Wear soft, lint-free gloves when replacing the lamp unit - Toshiba 65HM167 | Owners Manual - Page 65
side of the lamp unit door inside the opening in the TV cabinet. Insert the hooks inside the TV cabinet opening. Lamp unit door 9 Replace the screw and tighten using a manual screwdriver. Hand-tighten using a manual screwdriver Lamp unit door NOTE: Make sure the lamp unit door is installed securely - Toshiba 65HM167 | Owners Manual - Page 66
specifications TV: Mid band (A-8 through A-1, A through I) Super band (J through W) Hyper band (AA through ZZ, AAA, BBB) Ultra band (65 HDMI™ INPUT: HDMI Ground 15 NC 8 Ground Dimensions 50HM67: Width: 47-3/16 Owner's manual (this book) Optional Stands 50HM67: ST 5067 57HM167:ST 57167 65HM167 - Toshiba 65HM167 | Owners Manual - Page 67
the operating instructions in this manual and reviewing the section entitled "Troubleshooting," you find that service is needed: (1) To find the nearest TACP Authorized Service Station, visit TACP's website at www.tacp.toshiba.com/service or contact TACP's Consumer Solution Center toll free at 1-800 - Toshiba 65HM167 | Owners Manual - Page 68
a Television on which the TOSHIBA label or logo, rating label or serial number have been defaced or removed; i) On-site service and repair of the Television; and j) Damage to the Television caused by failure to follow the specifications, User manuals or guides as to usage and/or storage. Disclaimer - Toshiba 65HM167 | Owners Manual - Page 69
after following all of the operating instructions in this manual and checking the "Troubleshooting" section, you find that service is needed: (1) To find the nearest ASP, visit TCL's web site at www.toshiba.ca, or call toll free 1-800-268-3404 (2) Present your bill of sale or other proof of purchase - Toshiba 65HM167 | Owners Manual - Page 70
GOODS OR SERVICES; LOSS OF and "Open SSL Project free for commercial and noncommercial use so long as the following conditions are adhered to. The following conditions apply to all code author of the parts of the library specific code (or derivative thereof) from the apps directory (application code - Toshiba 65HM167 | Owners Manual - Page 71
16 Scroll settings 42 Selecting Menu Language 31 Service 4 Side panel control 11 Sleep timer 54 Specifications 66 StableSound 48 Stereo sound 47 SurfLock 40 S-video cable 13 System status 36 T TheaterWide® picture size 41 Troubleshooting 60 TV status information 55 V V-Chip blocking - Toshiba 65HM167 | Owners Manual - Page 72
50HM67_EN.book Page 72 Thursday, March 29, 2007 11:28 AM Notes 72 HM67 (E/F) Web 213:276 - Toshiba 65HM167 | Owners Manual - Page 73
50HM67_EN.book Page 73 Thursday, March 29, 2007 11:28 AM Notes 73 HM67 (E/F) Web 213:276 - Toshiba 65HM167 | Owners Manual - Page 74
AM Corporate Headquarters: 82 TOTOWA ROAD, WAYNE, NJ 07470, U.S.A. NATIONAL SERVICE DIVISION: 1420-B TOSHIBA DRIVE, LEBANON, TN 37087, U.S.A. HEAD OFFICE: 191 McNABB STREET, MARKHAM, ONTARIO, L3R 8H2, CANADA - TEL: (905) 470-5400 SERVICE CENTERS: TORONTO: 191 McNABB STREET, MARKHAM, ONTARIO L3R 8H2
-
 1
1 -
 2
2 -
 3
3 -
 4
4 -
 5
5 -
 6
6 -
 7
7 -
8
-
9
-
10
-
11
-
12
-
13
-
14
-
15
-
16
-
17
-
18
-
19
-
20
-
21
-
22
-
23
-
24
-
25
-
26
-
27
-
28
-
29
-
30
-
31
-
32
-
33
-
34
-
35
-
36
-
37
-
38
-
39
-
40
-
41
-
42
-
43
-
44
-
45
-
46
-
47
-
48
-
49
-
50
-
51
-
52
-
53
-
54
-
55
-
56
-
57
-
58
-
59
-
60
-
61
-
62
-
63
-
64
-
65
-
66
-
67
-
68
-
69
-
70
-
71
-
72
-
73
-
74
 |
 |
HIGH
-DEFINITION TELEVISION
50HM67
57HM167
65HM167
YC/N
VX1A000391A0
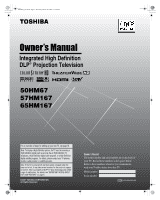
Integrated High Definition
DLP
®
Projection Television
© 2007 TOSHIBA CORPORATION
All Rights Reserved
Owner’s Record
The model number and serial number are on the back of
your TV. Record these numbers in the spaces below.
Refer to these numbers whenever you communicate
with your Toshiba dealer about this TV.
Model number:
Serial number:
For an overview of steps for setting up your new TV, see page 10.
Note: If the TV is powered off and then quickly on again when the
lamp unit is hot, it may take several minutes for the picture to appear
on-screen. This is a property of DLP
®
TV lamp technology and is NOT
a sign of malfunction. For details, see "IMPORTANT NOTICE ABOUT
HOT LAMP RESTART" on page 6.
Note: To display a High Definition picture, the TV must be receiving a
High Definition signal (such as an over-the-air High Definition TV
broadcast, a High Definition digital cable program, or a High Definition
digital satellite program). For details, please contact your TV antenna
installer, cable provider, or satellite provider.
50HM67_EN.book
Page 1
Thursday, March 29, 2007
11:28 AM