Toshiba D-VR4SU Owners Manual
Toshiba D-VR4SU Manual
 |
View all Toshiba D-VR4SU manuals
Add to My Manuals
Save this manual to your list of manuals |
Toshiba D-VR4SU manual content summary:
- Toshiba D-VR4SU | Owners Manual - Page 1
Various settings 23 Hi-Fi VCR & DVD VIDEO RECORDER D-VR4XSU OWNER'S MANUAL Disc playback 31 Tape playback 46 Recording 50 Editing the disc 60 Dubbing 79 Additional information 82 ©2005 Toshiba Corporation This device does not tape-record copy protected DVD Video Discs. 2H5-01 Cover 1 7/23 - Toshiba D-VR4SU | Owners Manual - Page 2
in accordance with the instructions, may cause harmful VIDEO PLAYER EMPLOYS A LASER SYSTEM. TO ENSURE PROPER USE OF THIS PRODUCT, PLEASE READ THIS USER'S GUIDE CAREFULLY AND RETAIN FOR FUTURE REFERENCE. SHOULD THE UNIT REQUIRE MAINTENANCE, CONTACT AN AUTHORIZED SERVICE LOCATION. USE OF CONTROLS - Toshiba D-VR4SU | Owners Manual - Page 3
be placed in a built-in installation such as a bookcase or rack unless proper ventilation is provided and/or the manufacturer's instructions have been adhered to. 10. POWER SOURCE This unit should be operated only from the type of power source indicated on the rating plate. If you are not sure - Toshiba D-VR4SU | Owners Manual - Page 4
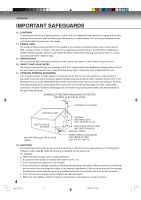
CLAMP ELECTRIC SERVICE EQUIPMENT NEC-NATIONAL ELECTRICAL CODE S2898A ANTENNA DISCHARGE UNIT (NEC SECTION 810-20) GROUNDING CONDUCTORS (NEC SECTION 810-21) GROUND CLAMPS POWER SERVICE GROUNDING ELECTRODE SYSTEM (NEC ART 250, PART H) 18. SERVICING Do not attempt to service this unit yourself as - Toshiba D-VR4SU | Owners Manual - Page 5
of 525 progressive scan picture problems, it is recommended that the user switch the connection to the "STANDARD DEFINITION" output. If there are questions regarding our TV set compatibility with this model 525p DVD player, please contact our customer service center. * Manufactured under license - Toshiba D-VR4SU | Owners Manual - Page 6
can be played back 9 Discs on which video can be recorded 10 DVD-RAM 10 DVD-RW 10 DVD-R 10 Recording format 10 Disc playback in other players 11 • On Video CDs 11 Parts and functions 12 Front 12 Rear 12 Display window 13 Remote control 14 ••• Power Source 15 Antenna connections 16 - Toshiba D-VR4SU | Owners Manual - Page 7
Glossary 82 Language code list 84 Problems and troubleshooting 85 Video head cleaning 86 Error/Warning message list 87 Specifications 88 Limited Warranty 89 2H5-01 P02-07 Media mark Each applicable media are indicated using the symbol shown below. : DVD-Video : DVD-R : DVD-RW in VR - Toshiba D-VR4SU | Owners Manual - Page 8
do not have to wait for the end of recording to start playback. Dubbing function Dubbing a video tape onto a disc or a disc onto a video tape With this unit, you can dub whatever you like, from video tape to disc or from disc to video tape. • Dubbing cannot be carried out when attempting to copy - Toshiba D-VR4SU | Owners Manual - Page 9
playing a DVD or a CD on DVD/VCR, please feel free to contact us via the method listed in the "How to Obtain Warranty Services" section on page 90. Region management information This unit is designed and manufactured to support the region management information that is recorded on a DVD disc. If - Toshiba D-VR4SU | Owners Manual - Page 10
Discs on which video can be recorded To record video with this unit, use the discs below: Media type Logo mark DVD-RAM Ver.2.0 Ver.2.1 DVD-RW Ver.1.0 Ver.1.1 Ver.1.2 Ver.1.1CPRM support DVD-R Ver.2.0 (Ver.2.0/4x/8x) DVD-RAM • Use only DVD-RAM discs that comply with DVD- RAM standard Version - Toshiba D-VR4SU | Owners Manual - Page 11
new standard approved at the 2000 DVD forum. Conformity to this standard varies with each DVD player manufacturer. Some models of DVD player or DVDROM drive, therefore, will not playback recorded videos. Disc playback in other players DVD-RW/R recorded in this unit can be finalized. The disc can be - Toshiba D-VR4SU | Owners Manual - Page 12
button Disc tray F.FWD (Fast Forward) button REC/OTR button S-VIDEO IN VCR button/ DVD button/ VCR indicator DVD indicator (INPUT 2) jack AUDIO (L/R) IN DUBBING button (INPUT 2)jacks VIDEO IN (INPUT 2) jack EJECT button Remote sensor OPEN/CLOSE button Rear AC power cord COMPONENT RF OUT - Toshiba D-VR4SU | Owners Manual - Page 13
Parts and functions Display window 2 4 P 1 3 No. Display Description 1 Lights during video tape playback. Video tape is temporarily stopped. Lights during video tape recording. P Progressive scanning mode. Timer recording display. XP/SP/LP/SLP 4 DVD recording modes. XP, SP, LP or SLP - Toshiba D-VR4SU | Owners Manual - Page 14
Introduction Parts and functions Remote control Page OPEN/CLOSE Opens or Closes the tray 31 EJECT Ejects the cassette tape 46 PROGRESSIVE Activates the progressive scanning mode 45 TV/VIDEO Select to operate TV/VIDEO 22, 53 ON/STANDBY Turns power on/off 22 0-9 Direct channel - Toshiba D-VR4SU | Owners Manual - Page 15
directly access specific channels using numeric keys. • Each press of DVD or VCR, switches the screen between the DVD screen (DVD mode) and the VCR screen (VCR mode). Operation • Aim the remote control at the remote sensor and press control buttons to operate. • Operate the remote control within 30 - Toshiba D-VR4SU | Owners Manual - Page 16
good. Connect the antenna to the DVD/VCR properly. • For better quality recording, an indoor antenna or a telescopic antenna is not recommended. The use of an outdoor type antenna is required. • If you are not sure about the connection, please refer to qualified service personnel. 16 2H5-01 P12-21 - Toshiba D-VR4SU | Owners Manual - Page 17
inputs (numbers 2 and 3 below), use a splitter to connect the DVD/VCR to the TV for UHF and VHF reception. Introduction 75 ohm coaxial cable recording, use, distribution, or revision of television programs, videotapes, DVDs and other materials, is prohibited under the Copyright Laws of the United - Toshiba D-VR4SU | Owners Manual - Page 18
another. • Using the DVD/VCR tuner to select channels. NOTE: To record from converter/descrambler, DVD/VCR tuner must be tuned to the converter output channel, usually channel 3 or 4. 3 Converter/ descrambler Incoming cable DVD/VCR Audio/Video IN ALLOWS: • Recording of channels through the - Toshiba D-VR4SU | Owners Manual - Page 19
at the converter box. PREVENTS: Using the DVD/VCR tuner to select channels. The unauthorized recording, use, distribution, or revision of television programs, videotapes, DVDs and other materials, is prohibited under the Copyright Laws of the United States and other countries, and may subject you - Toshiba D-VR4SU | Owners Manual - Page 20
arrangement you use to interconnect various video The unauthorized recording, use, distribution, and audio components to the DVD/VCR is dependent on the or revision of television programs, videotapes, model and features of each component. Check the Owner's DVDs and other materials, is prohibited - Toshiba D-VR4SU | Owners Manual - Page 21
video cable (not supplied) or S-Video cable (not supplied) instead of a video cable. Audio/Video cable (supplied) To Audio/Video input TV Optical digital audio output DVD/VCR Some DTS decoders which do not support DVD-DTS interface may not work properly with the unit. • The optical or coaxial - Toshiba D-VR4SU | Owners Manual - Page 22
channel To view playback of a recorded tape or DVD disc, or to watch a program selected by the VCR's channel selector, the TV must be set to channel 3 or 4 (video channel). When a TV is connected with the 75 ohm coaxial cable only: 1 Press and hold 3 or 4 on the remote control for 3 seconds in the - Toshiba D-VR4SU | Owners Manual - Page 23
and press ENTER. The screen for that item will appear. LANGUAGE OSD Language DVD Menu Audio Subtitle English Français Español SETUP Select End ENTER Enter The Setup Menu screen will appear. GENERAL VIDEO AUDIO LANGUAGE RECORD DISC SETUP Select End ENTER Enter RETURN Back 2H5-01 P22- - Toshiba D-VR4SU | Owners Manual - Page 24
with specific rating level information though its disc jacket says "adult". Parental control will not work with those discs. • If you forget your password, open the disc tray; if there is a disc inside then remove it and close the tray. To reset the code press and hold number 7 on the remote control - Toshiba D-VR4SU | Owners Manual - Page 25
disc is ejected, the original rating level will be set again automatically. This DVD/VCR is equipped with a channel memory feature that allows you to skip channels ". When you want to set the auto clock function to off, select "Manual". (See page 26.) Standard Time (Time zone) In the rare event that - Toshiba D-VR4SU | Owners Manual - Page 26
Manual You can manually set the date, year and present time with the remote control. 1 Press or to select "Manual picture is displayed in full size. NOTE: If the DVD disc is not formatted in the Pan&Scan format, it that is output to the TV screen by this unit. Select "Display" and select "On" or "Off - Toshiba D-VR4SU | Owners Manual - Page 27
is not recorded in the surround mode will be changed to artificial surround sound output. Select "Surround" and select "On" to activate the surround function. Select "Off" to cancel the surround function. NOTE: This function does not work with a video tape. SAP (Second Audio Program) This unit is - Toshiba D-VR4SU | Owners Manual - Page 28
the menu screen, DVD menu, DVD audio and subtitles. Preparation: • Turn ON the TV and set it to the video input mode. • code by using the numeric keys (See the Language code list on page 84). • If you input a wrong number, press CANCEL. Audio When several audio languages are recorded on a DVD - Toshiba D-VR4SU | Owners Manual - Page 29
the proce- dure, see steps 1 to 3 in "Using the Setup Menu" on page 23. RECORD Auto Chapter Black Level(REC) Off 10min 15min 30min DISC Initialize Finalize Protect Disc Rename Disc DVD-RAM Physical Format Video VR SETUP Select End ENTER Enter RETURN Back Auto Chapter You can automatically - Toshiba D-VR4SU | Owners Manual - Page 30
can record or edit a finalized DVD-RW (in VR mode) by cancelling the finalizing, but you cannot do these operations with a DVD-RW (Video mode), or with a DVD-R. • You cannot playback a disc recorded on VR mode on a unit that does not support DVD-RW. • Even if you finalize a disc in the Video mode - Toshiba D-VR4SU | Owners Manual - Page 31
the screen. This symbol means either the feature you tried is not available on the disc, or the DVD/VCR can not access the feature at this time. This does not indicate a problem with the DVD/VCR. • When you set a single-faced disc label downwards (ie. the wrong way up) and press PLAY or OPEN - Toshiba D-VR4SU | Owners Manual - Page 32
0:05:09 05/15/2005 11:105/15 0:05:09 NOTE: When a disc that has been recorded in the Video mode is finalized, the title menu is automatically changed that can be played back even with other DVD players. 07/21/2005 06:106/12 0:15:09 07/21/2005 07:307/21 0:08 - Toshiba D-VR4SU | Owners Manual - Page 33
video input mode. • Load the disc. • Press DVD to select the DVD mode. (The DVD indicator will light.) 1 Press DISPLAY. Media information will appear. DVD- shows the current position of playback and the position of recording. Normally the recording position is shown as being at 100%. Items other - Toshiba D-VR4SU | Owners Manual - Page 34
sound may be lost at times. • To resume normal playback, press PLAY. Review playback Press SEARCH during normal playback. Each press of SEARCH will increase the speed twice in quick successions. NOTES: • The unit is capable of holding a still video image or On screen display image on your television screen - Toshiba D-VR4SU | Owners Manual - Page 35
playback. The time forwards to a point approx. 30 seconds later and playback resumes. NOTE: With some DVD-Video, the Commercial skip operation may not work. Locating a specific scene Specify the time recorded on the disc, chapter or title to playback. 1 Press PLAY MODE. The play mode screen will - Toshiba D-VR4SU | Owners Manual - Page 36
from the beginning when INSTANT REPLAY is pressed if the current title elasped time is less than 10 seconds. • With some DVD-Video, instant replay operation may not work. A-B repeat playback A-B repeat playback allows you to repeat material between two selected points. 1 Press A-B REPEAT - Toshiba D-VR4SU | Owners Manual - Page 37
Title selection / DVD menu Title selection Two or more titles are recorded on some discs. If the title menu is recorded on the disc, : Depending on the DVD, you may be unable to select the title, and a "title menu" may simply be called a "menu" or "title" in the instructions supplied with the disc - Toshiba D-VR4SU | Owners Manual - Page 38
the DVD, you may not be able to change the angles even if multi-angles are recorded on the disc. • You can use the Pause, Slow, Search or Skip feature in the zoom mode. Zooming This unit Video CD discs may not have the zoom ZOOM "x4" function. x 2 2 Press / / / to view a different part - Toshiba D-VR4SU | Owners Manual - Page 39
on, turn off, or change the subtitles even if they are recorded on the disc. While playing the DVD, the subtitles may change while opening or closing the disc tray, after a few seconds. 1/32 ENG To turn off the PBC (VIDEO CD version 2.0) 39 Press PLAY MODE in the stop mode, select the title then press - Toshiba D-VR4SU | Owners Manual - Page 40
ON the TV and set to the video input mode. • Load the music CD. • Press DVD to select the DVD mode. (The DVD indicator will light.) The Music list screen Select End ENTER Enter RETURN Back Current playback mode The music data recorded on the CD The elapsed time/total time of the whole CD - Toshiba D-VR4SU | Owners Manual - Page 41
playback, select "Delete" from the menu list and press ENTER. Locating a specific track 1 Press PLAY MODE. The play mode screen will appear. 1 / . NOTE: Both Program playback and Random playback are not possible with a Video CD or SVCD. Playing back track by specifying the time 1 Press PLAY - Toshiba D-VR4SU | Owners Manual - Page 42
recording. Preparation: • Turn ON the TV and set to the video input mode. • Load the disc storing MP3, WMA or JPEG. • Press DVD to select the DVD mode. (The DVD minute for this unit to read MP3/WMA/ JPEG files depending on its structure. • Music recorded by "Joliet Recording Specification" can be - Toshiba D-VR4SU | Owners Manual - Page 43
playback. Because this area of technology is still evolving, Toshiba cannot guarantee that all recordable discs will produce optimal playback quality. The technical criteria set forth in this owner's manual are meant only as a guide. Please be advised that you must obtain permission from the - Toshiba D-VR4SU | Owners Manual - Page 44
list. 2 Press / / / to select JPEG file. Photos Data CD j08_8.JPG 1/6 JPEG CD JPEG files must have the extension letters ".jpe", ".jpeg" or ".jpg". DVD MENU Select Music ENTER TITLE MENU Enter End RETURN Back 3 Carry out either of the item a or b below. a: Press ENTER, then press or to - Toshiba D-VR4SU | Owners Manual - Page 45
" " on the display window will light. P • The unit recognizes the picture source (film or video) of the current disc according to the disc information. • Progressive scanning not only works for DVD playback, but also video signals from the VCR, built-in tuner and external input terminals. • To make - Toshiba D-VR4SU | Owners Manual - Page 46
prevention tab, playback will start automatically. Unloading You can eject the video tape while the unit is turned off. 1 Press EJECT on the unit or the remote control. 2 Remove the cassette tape. Automatic tape eject This VCR will automatically rewind the tape when the tape has ended. And when - Toshiba D-VR4SU | Owners Manual - Page 47
video input mode. • Press VCR to select the VCR mode. (The VCR indicator will light.) 1 Load a pre-recorded This VCR selects the playback tape speed SP, LP or SLP automatically. • A video cassette tape and DVD disc cannot F.FWD and hold it down. The unit will resume the tape winding as soon as the button - Toshiba D-VR4SU | Owners Manual - Page 48
REPEAT to select "REPEAT OFF". Instant skip Press INSTANT SKIP during playback. The video is rapidly forwarded for approx. 30 seconds and playback resumes. You may press six times in a row to move 180 seconds ahead. To display VCR operation status Press DISPLAY. The clock and day of the week and - Toshiba D-VR4SU | Owners Manual - Page 49
reset to "00:00:00". • The counter does not function on non-recorded recording, if you stop recording temporarily, the INDEX mark is not recorded on the tape. 2H5-01 P45-52 49 Video index search system This function enables you to locate the beginning of any recording made on the VCR. Recording - Toshiba D-VR4SU | Owners Manual - Page 50
, finalizing or any other function. Manufacturer cannot guarantee the loss of program or disc occurrence. To start recording again, re-format the disc or use a new disc and follow the instruction on recording. Types of disc You can use DVD-RAM, DVD-RW and DVD-R discs to record video. DVD-RAM - Toshiba D-VR4SU | Owners Manual - Page 51
and other materials, is prohibited under the Copyright Laws of the United States and other countries, and may subject you to civil and/or criminal liability. Images that cannot be recorded Some DVD-Video and broadcasts contain copy-restriction signals to protect copyrights. There are 3 types of - Toshiba D-VR4SU | Owners Manual - Page 52
• Turn ON the TV and set it to the video input mode. • Load a recordable DVD or video tape into the unit. • Press DVD or VCR to select the appropriate mode. 1 Press REC MODE/SPEED to select the recording mode. VCR mode 00 : 00 : 00 SP The recording mode will appear on the TV monitor and change - Toshiba D-VR4SU | Owners Manual - Page 53
Press REC/OTR to resume recording. VCR mode DVD mode NOTES: • In DVD recording, the pause function will be released after 5 min- utes to prevent damage. The unit will change to the STOP mode. • When recording onto a video tape, you can select a recording chan- nel in the recording pause mode. (You - Toshiba D-VR4SU | Owners Manual - Page 54
ON the TV and set to the video input mode. • Load a recordable DVD or video tape into the unit. • Press DVD or VCR to select the appropriate mode. Example: One-touch Timer Recording for 30 minutes. 1 Press REC MODE/SPEED to select the recording mode. For the recording mode, see step 1 on page 52 - Toshiba D-VR4SU | Owners Manual - Page 55
programs. Up to 12 timer programs within a month can be stored in this unit. Setting timer recording Preparation: • Turn ON the TV and set to the video input mode. • Load a recordable DVD or video tape. • Press DVD or VCR to select the appropriate mode. • Confirm that the clock is indicating the - Toshiba D-VR4SU | Owners Manual - Page 56
are listed up. Select the recording mode. For the recording modes in VCR, see page 46. For the recording modes in DVD, see page 50. Timer Rec recording, use, distribution, or revision of television programs, videotapes, DVDs and other materials, is prohibited under the Copyright Laws of the United - Toshiba D-VR4SU | Owners Manual - Page 57
cannot record the DVD during the VCR timer recording. You also cannot record the VCR during the DVD timer recording. The unauthorized recording, use, distribution, or revision of television programs, videotapes, DVDs and other materials, is prohibited under the Copyright Laws of the United States - Toshiba D-VR4SU | Owners Manual - Page 58
lastest chapter, it starts playing back from about 15 seconds before the recording position. Locating a specific scene: Press PLAY MODE enables you to do a Time Search. (See page 35.) 3 Press STOP to stop playback. The DVD/VCR memorizes the stopped point, depending on the disc. " " appears on the - Toshiba D-VR4SU | Owners Manual - Page 59
RIGHT CHANNEL AUDIO MONO Output selection for DVD It is not possible to switch recorded (see page 27). NOTE: When a stereo or monaural broadcast is recorded, either stereo or monaural is played back respectively. Recording NOTES: • When playing back a video tape or disc that is not recorded - Toshiba D-VR4SU | Owners Manual - Page 60
formats. In VR mode, you can edit various title menus, whereas in Video mode, you can edit only a few items. NOTES: • This unit cannot record or edit a disc which was recorded or edited using another DVD recorder. • You cannot edit or record the disc on which disc protection is set. In such a case - Toshiba D-VR4SU | Owners Manual - Page 61
and edit the playlist based on the original title. Preparation: • Turn ON the TV and set to the video input mode. • Load the recorded DVD-RAM/RW (VR). • Press DVD to select the DVD mode. (The DVD indicator will light.) Creating a playlist 1 Press TITLE MENU. ORG(Original) Title List will appear - Toshiba D-VR4SU | Owners Manual - Page 62
to change the title name. • Press / / / to select the playlist. • Press ENTER to display the editing menu of the playlist. • Press or to select "Rename". DVD-RW VR Disc Name:050823 PL Title List 1/ 2 PL Title 01 01/31 0:11:09 Play Chapter List Rename Delete Combine TITLE MENU Select End - Toshiba D-VR4SU | Owners Manual - Page 63
to display the editing menu of the playlist. • Press or to select "Play". DVD-RW VR Disc Name:050823 PL Title List 1/ 2 PL Title 01 01/31 0: back. Editing the disc NOTE: You can automatically add a chapter mark in recording. For more information, see page 29. 4 Press SETUP to display Easy - Toshiba D-VR4SU | Owners Manual - Page 64
Editing the disc Editing a playlist 6 When the scene you want to add a chapter mark, press ENTER. The position of the added chapter mark is appeared. 7% The added chapter mark 7 If you want to continue to add chapter mark, repeat step 6. 8 The chapter marks are finished adding. • To return to the - Toshiba D-VR4SU | Owners Manual - Page 65
want to combine the chapters. • Press / / / to select the playlist. • Press ENTER to display the editing menu of playlist. • Press or to select "Chapter List". DVD-RW VR Disc Name:050823 PL Title List 1/ 2 PL Title 01 01/31 0:11:09 Play Chapter List Rename Delete Combine TITLE MENU Select End - Toshiba D-VR4SU | Owners Manual - Page 66
you want to erase. • Press / / / to select the playlist. • Press ENTER to display the editing menu of the playlist. • Press or to select "Chapter List". DVD-RW VR Disc Name:050823 PL Title List 1/ 2 PL Title 01 01/31 0:11:09 Play Chapter List Rename Delete Combine PL Title 02 02 - Toshiba D-VR4SU | Owners Manual - Page 67
to display the editing menu of the playlist. • Press or to select "Combine". DVD-RW VR Disc Name:050823 PL Title List 1/ 2 PL Title 01 01/31 0: is combined. The several playlist were combined so that the total recording time is displayed. DVD-RW VR Disc Name:050823 PL Title List 1/ 2 PL Title - Toshiba D-VR4SU | Owners Manual - Page 68
that you want to erase. • Press / / / to select the playlist. • Press ENTER to display the editing menu of the playlist. • Press or to select "Delete". DVD-RW VR Disc Name:050823 PL Title List 1/ 2 PL Title 01 01/31 0:11:09 Play Chapter List Rename Delete Combine TITLE MENU Select End - Toshiba D-VR4SU | Owners Manual - Page 69
set the time that the thumbnail image is registered in the title menu of DVD-RAM/RW (VR mode). 1 Press TITLE MENU to display the PL Title Press ENTER to display the editing menu of the playlist. • Press or to select "Play". DVD-RW VR Disc Name:050823 PL Title List 1/ 2 PL Title 01 01/31 0:11:09 - Toshiba D-VR4SU | Owners Manual - Page 70
TV and set to the video input mode. • Load the recorded disc. • Press DVD to select the DVD mode. (The DVD indicator will light.) Changing an ENTER to display the editing menu of original title. • Press or to select "Rename". DVD-RW VR Disc Name:050823 ORG Title List 1/ 5 01/31/2005 02:501/31 - Toshiba D-VR4SU | Owners Manual - Page 71
various items, whereas in Video mode, you can edit editing menu of the original title. • Press or to select "Play". DVD-RW VR Disc Name:050823 ORG Title List 2/ 5 01/31/2005 the disc NOTE: You can automatically add a chapter mark in recording. For more information, see page 29. 4 Press SETUP to - Toshiba D-VR4SU | Owners Manual - Page 72
Editing the disc Editing an original title 6 When the scene you want to add a chapter mark, press ENTER. The position of the added chapter mark is appeared. 7% The added chapter mark 7 If you want to continue to add chapter mark, repeat step 6. 8 The chapter marks are finished adding. • To return to - Toshiba D-VR4SU | Owners Manual - Page 73
combine the chapters. • Press / / / to select the original title. • Press ENTER to display the editing menu of original title. • Press or to select "Chapter List". DVD-RW VR Disc Name:050823 ORG Title List 2/ 5 01/31/2005 02:501/31 0:11:09 02/21/2005 10:002/21 0:05:09 05 - Toshiba D-VR4SU | Owners Manual - Page 74
want to erase. • Press / / / to select the original title. • Press ENTER to display the editing menu of original title. • Press or to select "Chapter List". DVD-RW VR Disc Name:050823 ORG Title List 1/ 5 01/31/2005 02:501/31 0:11:09 Play Chapter List Rename Delete New Playlist TITLE MENU - Toshiba D-VR4SU | Owners Manual - Page 75
original title. Erasing the title deletes both the title and the recording saved under that title name. Erase the original title after checking ENTER to display the editing menu of original title. • Press or to select "Delete". DVD-RW VR Disc Name:050823 ORG Title List 1/ 5 01/31/2005 02:501/31 - Toshiba D-VR4SU | Owners Manual - Page 76
mode, you can edit the title names only. Preparation: • Turn ON the TV and set to the video input mode. • Load the recorded disc. • Press DVD to select the DVD mode. (The DVD indicator will light.) Set Index Picture You can set the time that the thumbnail image is registered in the title menu of - Toshiba D-VR4SU | Owners Manual - Page 77
the TV and set to the video input mode. • Load the recorded DVD disc. • Press DVD to select the DVD mode. (The DVD indicator will light.) Changing a see "Using the keyboard screen" (page 78). • A DVD-R disc cannot be named after it is finalized. Space Delete OK Cancel 5 Select "OK", then press - Toshiba D-VR4SU | Owners Manual - Page 78
Editing the disc Changing a disc name Using the keyboard screen This section explains the function of the keyboard screen and how to input characters. The disc name and the title name can be changed using the keyboard screen. ---- Selecting between uppercase and lowercase letters You can select - Toshiba D-VR4SU | Owners Manual - Page 79
the end and stops. - recording space becomes full. • The videos recorded from TV programs or movies can be used only for your personal enjoyment without permission of the copyright holder. 2H5-01 P74-81 79 In dubbing, during VCR playback, DVD recording and "dub" (dubbing) indicator appear on the - Toshiba D-VR4SU | Owners Manual - Page 80
dubbing from DVD to VCR. Yes No In dubbing, during DVD playback, VCR recording and "dub" (dubbing) indicator appear on the display window. Video recording 6 Press STOP to stop dubbing. DVD playback Dubbing only the specified titles or the playlist When you want to dub only specific titles - Toshiba D-VR4SU | Owners Manual - Page 81
• To record onto a video tape, set the unit to VCR mode, whereas to record onto a disc, set it to DVD mode. 1 Press INPUT SELECT and set the channel to L2 (or L1). L1 (LINE 1): on the rear panel L2 (LINE 2): on the front panel Confirm that L2 (or L1) appears on the display window. Dubbing 2 Press - Toshiba D-VR4SU | Owners Manual - Page 82
can also listen to DTS Digital Surround sound.) DVD menu Menu recorded on a DVD-Video that enables the user to select subtitles language, audio, etc. finalize Operation that enables discs recorded or edited with this unit to be played back on other DVD players. Instant replay If INSTANT REPLAY is - Toshiba D-VR4SU | Owners Manual - Page 83
list Screen that appears when JPEG CD is inserted. playlist User-created titles based on each original title. Progressive scan "track". Video mode This recording format is compatible with commercially available DVD players. VR mode This recording format is the basic DVD-RW recording format, and - Toshiba D-VR4SU | Owners Manual - Page 84
Additional information Language code list Enter the appropriate code number for the initial settings "DVD Menu", "Audio" and/or "Subtitle" (see page 28). Language Name Code Language Name Code Language Name Code Language Name Code Abkhazian 1112 Fiji 1620 Lingala 2224 Singhalese 2919 Afar - Toshiba D-VR4SU | Owners Manual - Page 85
when you have problems with your unit. Consult your local dealer or service outlet if problems persist. Be sure all connections are properly made when using with other units. SYMPTOMS POSSIBLE SOLUTIONS PAGE DVD/VCR DVD/VCR does not operate. No picture. No sound. The remote control does not - Toshiba D-VR4SU | Owners Manual - Page 86
Additional information Problems and troubleshooting / Video head cleaning SYMPTOMS POSSIBLE SOLUTIONS PAGE VCR TV recording does not work. Timer recording does not work. Noise bars on screen. • The erase prevention tab of the video cassette is broken off. • The unit is in the external input - Toshiba D-VR4SU | Owners Manual - Page 87
code error. Recording Cannot record. Cannot record. Disc protected. Cannot record. Disc finalized. Data is being written to the disc. No space on the disc. Dubbing Cannot record, exceeds limited number of titles. Cannot record Recording was tried onto the disc which does not support recording. - Toshiba D-VR4SU | Owners Manual - Page 88
nm Maximum output power: 8.5 mW DVD : Wavelength: 660 nm Maximum output power: 120 mW ACCESSORIES: Remote control (SE-R0180) x 1 75 ohm Coaxial Cable x 1 AUDIO/VIDEO Cable x 1 Battery AAA x 2 • This model complies with the above specifications. • Designs and specifications are subject to change - Toshiba D-VR4SU | Owners Manual - Page 89
owner's manual thoroughly before operating this DAV Product. Complete and mail the enclosed product registration card or register your DAV Product on-line at www.tacp.toshiba.com/service as soon as possible. By registering your DAV Product you will enable TACP to bring you new products specifically - Toshiba D-VR4SU | Owners Manual - Page 90
Services If, after following all of the operating instructions in this manual and checking the section "Troubleshooting," you find that service is needed: (1) For instructions on how to obtain warranty service YOU SPECIFIC LEGAL RIGHTS toshiba. ANY PARTS. OF RECORDED DATA of the United States or any - Toshiba D-VR4SU | Owners Manual - Page 91
2H5-01 P91-BACK 91 7/23/05, 1:32 PM 91 - Toshiba D-VR4SU | Owners Manual - Page 92
92J2H50101A SH 05/08 K 2H5-01 P91-BACK 92 Printed in Thailand 7/23/05, 1:32 PM
-
 1
1 -
 2
2 -
 3
3 -
 4
4 -
 5
5 -
 6
6 -
 7
7 -
8
-
9
-
10
-
11
-
12
-
13
-
14
-
15
-
16
-
17
-
18
-
19
-
20
-
21
-
22
-
23
-
24
-
25
-
26
-
27
-
28
-
29
-
30
-
31
-
32
-
33
-
34
-
35
-
36
-
37
-
38
-
39
-
40
-
41
-
42
-
43
-
44
-
45
-
46
-
47
-
48
-
49
-
50
-
51
-
52
-
53
-
54
-
55
-
56
-
57
-
58
-
59
-
60
-
61
-
62
-
63
-
64
-
65
-
66
-
67
-
68
-
69
-
70
-
71
-
72
-
73
-
74
-
75
-
76
-
77
-
78
-
79
-
80
-
81
-
82
-
83
-
84
-
85
-
86
-
87
-
88
-
89
-
90
-
91
-
92
 |
 |
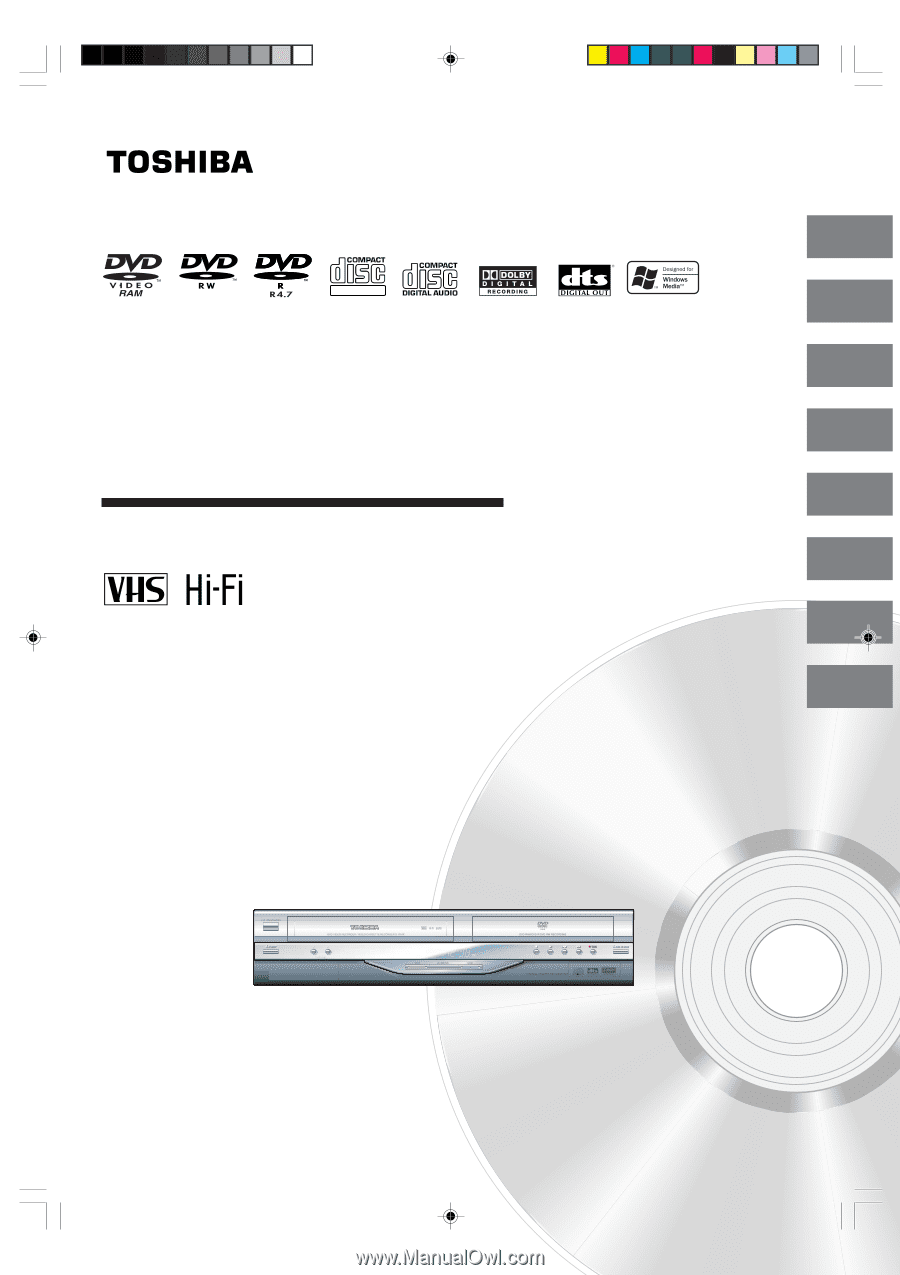
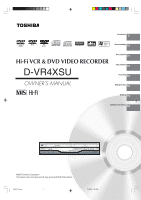
Hi-Fi VCR & DVD VIDEO RECORDER
D-VR4XSU
OWNER’S MANUAL
2
23
31
46
50
60
Introduction
Various settings
Disc playback
Tape playback
Recording
Editing the disc
DIGITAL VIDEO
©2005 Toshiba Corporation
79
82
Dubbing
Additional information
This device does not tape-record copy protected DVD Video Discs.
2H5-01 Cover
7/23/05, 1:20 PM
1