Toshiba PDR-3300 User Guide
Toshiba PDR-3300 - 3.2MP Digital Camera Manual
 |
UPC - 032017134393
View all Toshiba PDR-3300 manuals
Add to My Manuals
Save this manual to your list of manuals |
Toshiba PDR-3300 manual content summary:
- Toshiba PDR-3300 | User Guide - Page 1
, pursuant to Part 15 of the FCC Rules. These limits are designed to provide reasonable protection against harmful interference in a residential installation. This equipment generates, uses and can radiate radio frequency energy and, if not installed and used in accordance with the instructions, may - Toshiba PDR-3300 | User Guide - Page 2
may violate FCC regulations. Violation of FCC regulations may cause the FCC to void your right to use the modified camera. TOSHIBA AMERICA INFORMATION SYSTEMS, INC. Imaging Systems Division 9740 Irvine Boulevard, Irvine, California 92618-1697 Phone Number: (800)288-1354 For customers in Canada - Toshiba PDR-3300 | User Guide - Page 3
the Toshiba PDR-3300 Digital Still Camera. To ensure that you use this camera safely and correctly, read this Instruction Manual carefully before you start using the camera. Once you have finished reading this Instruction Manual, keep it handy at all times. Trademark Information ¥Macintosh - Toshiba PDR-3300 | User Guide - Page 4
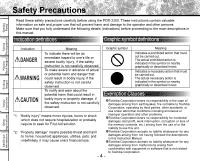
the PDR-3300. These instructions contain valuable information on safe and proper use that will prevent harm and damage to the operator and other persons. Make sure that you fully understand the following details (indications) before proceeding to the main descriptions in this manual. Indication - Toshiba PDR-3300 | User Guide - Page 5
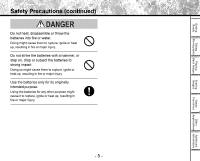
to strong impact. Doing so might cause them to rupture, ignite or heat up, resulting in fire or major injury. Use the batteries only for its originally intended purpose. Using the batteries for any other purpose might cause it to rupture, ignite or heat up, resulting in fire or major injury - Toshiba PDR-3300 | User Guide - Page 6
. Do not allow metallic objects or other flammable foreign matter inside the camera. This might cause a fire or electric shock. Do not open the SD Memory Card cover, and insert or allow such objects to fall inside. Erasing Images Information Applications Functions Handy Other Additional - 6 - - Toshiba PDR-3300 | User Guide - Page 7
fire or electric shock. For details on repair and internal inspection, consult the store of purchase, or please contact the technical support number. Do not touch power or TV antenna cords during a thunderstorm. This might cause electric shock. Do not use the camera while you are walking, driving or - Toshiba PDR-3300 | User Guide - Page 8
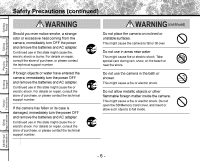
case or the parts inside, resulting in fire. Do not wrap the camera or place it in cloth or blankets. This might cause heat to build up and deform the case, resulting in fire. Use the camera in a wellventilated place. (continued) Before you move the camera, disconnect cords and cables. Failure to - Toshiba PDR-3300 | User Guide - Page 9
damaging the camera. Do not use different types camera. Do not walk around with the camera swinging from the shoulder strap. If you walk around with the camera hanging from your hand through the shoulder strap, the camera camera once every two years. If dust is allowed to accumulate inside the camera - Toshiba PDR-3300 | User Guide - Page 10
this occurs, switch the camera OFF, and wait an hour before using the camera. Condensation may also form on the SD Memory Card. If this happens, remove the SD Memory Card, wipe off any condensation and wait a short time before using it again. - 10 - Information Applications Functions Handy Other - Toshiba PDR-3300 | User Guide - Page 11
the LCD monitor or viewfinder from being scratched, blow off any dust from these parts with a blower brush and lightly wipe with a soft dry cloth. ¥ Clean the body of the camera with a soft dry cloth. Do not use volatile liquids such as paint thinner, benzene or insecticide, as these may react with - Toshiba PDR-3300 | User Guide - Page 12
(especially Alkaline) may vary depending on individual brand, length of storage since manufacture, temperature, and operating mode of the digital camera, such as play back using LCD and strobe. Low temperatures (50 degrees Fahrenheit/10 degrees Celsius or below) can also affect the performance of - Toshiba PDR-3300 | User Guide - Page 13
not charge the supplied batteries. ¥ When using rechargeable batteries, follow the instructions for the batteries and the charger for safe handling. (This camera can not charge the rechargeable batteries.) ¥ consult your doctor. - 13 - Handy Other Functions Applications Information Additional - Toshiba PDR-3300 | User Guide - Page 14
a malfunction. ¥ Do not use the AC adapter near a radio as it could interfere with radio signal reception. ¥ If you remove the battery or AC adapter while the camera is in operation, the date may be lost from memory. If this happens, reset the date. - 14 - Information Applications Functions Handy - Toshiba PDR-3300 | User Guide - Page 15
can take photographs on the PDR-3300, by using the settings provided by the camera itself or by adjusting the Information of Images Erasing images STEP 1 – Erasing Images STEP 2 – Other ways to erase images ¥Erasing All Images in a Folder ¥Erasing All Images Folders ¥Formatting SD Memory Card - Toshiba PDR-3300 | User Guide - Page 16
Erasing Images Setting the basic camera settings • Setting the Date and Time • Formatting SD Memory Card • Adjusting the LCD Monitor PDR-3300 also has lots of other features• Protecting Images • Changing the size of Images • Compressing Images • Print Information • Displaying Detailed Information - Toshiba PDR-3300 | User Guide - Page 17
Getting Ready Taking Playing Photographs Back Images Erasing Images Handy Functions Other Additional Applications Information - 17 - - Toshiba PDR-3300 | User Guide - Page 18
¥Accessories 21 ¥Names of Parts 22 ¥Attaching the Shoulder Strap 25 ¥Installing the Batteries 26 Loading the Batteries 26 Removing the Batteries 27 Battery Wear 28 ¥Using the Power Outlet 29 ¥About SD Memory Card 31 Notes on SD Memory Card 31 Loading SD Memory Card 32 Removing SD Memory - Toshiba PDR-3300 | User Guide - Page 19
a Folder/All Folders) 97 ¥Formatting the SD Memory Card 99 Playing ¥Photography in the Full Manual Mode 73 Handy Functions ¥Extended Exposure Handy Functions Other Applications Information PREVIEW 84 COLOR 84 ISO 85 SHARPNESS 86 CONTRAST 86 DIGITAL ZOOM 86 LCD 86 QUALITY - Toshiba PDR-3300 | User Guide - Page 20
the Viewfinder LED ........ 123 ¥Self-timer LED 124 ¥IR Remote Controller 124 Erasing Images ¥Specifications 125 ¥Warnings and Messages Displayed on LCD Monitor 129 ¥Troubleshooting 131 ¥Glossary 132 Playing Erasing Images Handy Functions Information Applications Other Additional - 20 - - Toshiba PDR-3300 | User Guide - Page 21
AA) Video cable (1) USB cable (1) Shoulder strap (1) Camera case (1) Software application (1) (CD-ROM) Playing Erasing Images Handy Functions Other Applications Information ¥ SD Memory Card (8MB) (1) ¥ SD Memory Card case (1) ¥ Instruction Manual (this manual) ¥ Software Manual - 21 - Toshiba PDR-3300 | User Guide - Page 22
- 22 - Additional Other Information Applications Handy Functions Flash Viewfinder Lens Lens cover switch Self-timer lamp Names of Parts Mode dial POWER switch Shutter button Erasing Images Playing Taking Back Images Photographs Getting Ready - Toshiba PDR-3300 | User Guide - Page 23
Names of Parts (continued) - 23 - Getting Ready Taking Playing Photographs Back Images Erasing Images Handy Functions Other Additional Applications Information - Toshiba PDR-3300 | User Guide - Page 24
Movies for playback on camera or computer. PC mode Transfers images to a PC. For details, refer to the Software Manual. Playback mode In this mode, you can select image playback, size change, compression, protect mode, and writing of development (printing) information. Auto Photography mode This - Toshiba PDR-3300 | User Guide - Page 25
the shoulder strap through the loop and pull. ¥When the camera is not in use, be sure to close the lens by sliding the lens cover switch to close position. Turn off the power to retract the lens unit before closing the lens cover. - 25 - Handy Functions Other Applications Information Additional - Toshiba PDR-3300 | User Guide - Page 26
camera uses four size AA batteries. For details on handling batteries, be sure to read page 12 . Loading the Batteries ¥Before you load or remove the batteries, be sure to turn the camera as shown inside the battery compartment. - 26 - Handy Functions Information Applications Other Additional - Toshiba PDR-3300 | User Guide - Page 27
the battery cover is firmly closed. Battery cover lock 1 2 Note: If “ CARD COVER LOCK IS RELEASED” message popped out on the LCD monitor, please check the Handy Functions Other Applications Information Additional When removing the batteries, take care not to drop the camera of the batteries - Toshiba PDR-3300 | User Guide - Page 28
(using strobe every time in a normal temperature) When LCD monitor is ON ......... approx(WAIT FOR TOSHIBA)frames When LCD monitor is OFF ....... approx. (WAIT FOR TOSHIBA)frames In playback mode (slideshow continuous playback time)….approx. 110 min. - 28 - Handy Functions Information Applications - Toshiba PDR-3300 | User Guide - Page 29
Using the Power Outlet If you use to turn the camera off. If the AC adapter is connected or disconnected with the power ON, the camera may malfunction or are loaded. - The camera may not start normally if IN 5V terminal on the camera. DC IN 5V terminal Insert the AC adapter power - Toshiba PDR-3300 | User Guide - Page 30
Images Using the Power Outlet (continued) • When the AC adapter is connected after the batteries have been installed, the camera lens if the AC adapter is disconnected after the batteries have been loaded, the camera power is automatically turned off but the lens will remain extended. If this - Toshiba PDR-3300 | User Guide - Page 31
SD Memory Card or switch the camera OFF during data recording or during data erasing (SD Memory Card formatting). These actions might damage the SD Memory Card. • Use only the SD Memory Card specified for use with the camera. The use of other SD Memory Card could damage the camera. • SD Memory Card - Toshiba PDR-3300 | User Guide - Page 32
again. • The SD Memory Card may feel warm when it is removed from the camera after the camera is used for a long time. This is normal and not a malfunction. • The SD Memory Card has a limited service life. If images can no longer be written or erased, buy a new SD Memory Card. • Use the index labels - Toshiba PDR-3300 | User Guide - Page 33
arrow. ¥Before you use the new SD Memory Card for the first time, be sure to format the SD Memory Card. Battery cover lock 1 2 Removing SD Memory Card Never open the battery cover door or remove the SD Memory Card while data is being recorded to the SD Memory Card (viewfinder LED flashes). This - Toshiba PDR-3300 | User Guide - Page 34
push SD Memory Card once in as far as it can go, it will protrude slightly. Pull it out with your fingers. Close the battery door and move the battery cover lock switch in the direction of the Lock arrow. Make sure that the battery cover is firmly closed. - 34 - Battery cover lock 1 2 Information - Toshiba PDR-3300 | User Guide - Page 35
SD Memory Card. To write or erase data from SD Memory Card, unlock the write-protect knob to unlock direction. Write-protect area The write protection may not function if the write-protect lock is malfunction. Playing Erasing Images Handy Functions Other Applications Information Additional - Toshiba PDR-3300 | User Guide - Page 36
is called “Auto Power OFF” Turning the Power ON Make sure that the SD Memory Card is correctly loaded. Slide the lens cover switch toward open direction . Slide the POWER switch to ON position, to turn on the power. When the camera is turned on, set the mode dial to the desired mode. In - Toshiba PDR-3300 | User Guide - Page 37
OFF. In [ ] Mode Mode dial setting Zoom state Possible number of shots Photography mode Flash state Size Quality Playing Erasing Images Handy Functions Other Applications Information Additional Battery condition Date Time AE(automatic exposure setting) - 37 - - Toshiba PDR-3300 | User Guide - Page 38
the histogram shows the brightness (increasing brightness from left to right) and the vertical axis shows the number of pixels at each brightness level. - 38 - Information Applications Other Additional - Toshiba PDR-3300 | User Guide - Page 39
setting Photography mode Zoom state Possible photographic time 1:15 Flash state Size Quality Self-timer Playing Erasing Images Handy Functions Other Applications Information Battery condition Date Time • The size of the data to be recorded varies according to the amount of detail in the - Toshiba PDR-3300 | User Guide - Page 40
- 40 - Date Time Additional Other Information Applications Handy Functions Photography number 102-0001 Erasing Images Playing Taking Back Images Photographs Getting Ready In [ ] Mode Mode dial setting - Toshiba PDR-3300 | User Guide - Page 41
firmly and prevent your finger or shoulder strap from covering the lens, flash or flash sensor. Right Camera held with both hands with your arms firmly held against the sides of your chest Wrong Fingers held over the lens Taking Photographs Back Images - Toshiba PDR-3300 | User Guide - Page 42
still held halfway down, you can turn the direction of the camera and frame your image with the focus and exposure locked. Press the shutter button down fully to complete capturing of the image. • Moving the camera as you press the shutter button will result in a blurred image. • The PDR-3300 uses - Toshiba PDR-3300 | User Guide - Page 43
simultaneously fixed to illuminate objects 1.5 meters (five feet) away. During macro photography, the flash is aligned with the wide position.) - 43 - Handy Functions Other Applications Information Additional - Toshiba PDR-3300 | User Guide - Page 44
using the viewfinder and using the LCD monitor. Using the Viewfinder Get ready to take the photograph. Load the batteries and the SD Memory Card into the camera using the viewfinder to take photographs. Look through the viewfinder to compose the picture. - 44 - Handy Functions Information - Toshiba PDR-3300 | User Guide - Page 45
viewfinder LED flashes while image data is being recorded onto the SD Memory Card. 1 Press down halfway. 2 Press down fully. POWER Using the LCD Monitor Get ready to take the photograph. Load the batteries and the SD Memory Card into the camera. Slide the power switch to ON position, to turn on - Toshiba PDR-3300 | User Guide - Page 46
for about two seconds. • The viewfinder LED flashes while image data is being recorded onto the SD Memory Card. 1 Press down halfway. 2 Press down fully. POWER • The LCD monitor sometimes displays down fully Erasing Images Handy Functions Information Applications Other Additional - 46 - - Toshiba PDR-3300 | User Guide - Page 47
(compression ratio) of the image to be photographed. Change the setting according to how the image is to be used and the remaining amount of space in the SD Memory Card. In [ ],[ ],or [ ] Mode Press the Menu button. Select Quality Menu, keep pressing or button until the QUALITY is highlighted - Toshiba PDR-3300 | User Guide - Page 48
button while still/movie/ok/ cancel is fully highlighted. After pressing ENTER button while OK is highlighted, these combinations are set and the LCD monitor display returns to previous SETUP MENU. Set the mode dial to [ ], [ ], or [ ] mode. Erasing Images Handy Functions Information Applications - Toshiba PDR-3300 | User Guide - Page 49
image quality. • After you have taken a photograph, you can reduce its size and quality. • The memory size of the image varies according to the subject. • The compression ratio is given for reference only. the image quality setting. - 49 - Handy Functions Other Applications Information Additional - Toshiba PDR-3300 | User Guide - Page 50
to the photographic conditions. Photographs can be taken easily in this mode as the camera automatically makes the setting suitable to the conditions. The Auto Select mode has the photography is not possible. Erasing Images Handy Functions Information Applications Other Additional - 50 - - Toshiba PDR-3300 | User Guide - Page 51
, [ ] night, [ ] multi photography mode options. Set the mode dial to [ ]. Press ENTER. [ ] is displayed on the LCD monitor. Playing Erasing Images Handy Functions Other Applications Information Additional - 51 - - Toshiba PDR-3300 | User Guide - Page 52
the picture, press the shutter button down halfway, and press it down fully. The camera takes the picture. Optimum print effect for a selected scene is available by using a PRINT Image Matching compatible printer. Erasing Images Handy Functions Information Applications Other Additional - 52 - - Toshiba PDR-3300 | User Guide - Page 53
( Mode) (continued) [ ] Automatically adjusts the focus and exposure settings The camera automatically adjusts the focus and exposure settings to take photographs. [ ] Portrait Select or landscapes. Playing Erasing Images Handy Functions Other Applications Information Additional - 53 - - Toshiba PDR-3300 | User Guide - Page 54
) Getting Ready Back Images Photographs Taking Playing Erasing Images Handy Functions Information Applications [ ] Night Select this option to take photographs of people monitor.) To prevent distorted image, we recommend using a tripod to keep the camera stable. - 54 - Other Additional - Toshiba PDR-3300 | User Guide - Page 55
. Memo ¥Though zoom playback is not possible, playback of multi image pictures is possible. ¥Digital zoom photography is not possible. ¥Photographs cannot be taken at HALF size or SMALL size. SMALL size. Playing Erasing Images Handy Functions Other Applications Information Additional - 55 - - Toshiba PDR-3300 | User Guide - Page 56
key setting. Back Images Photographs Taking Playing Erasing Images Handy Functions Information Applications Other Digital Zoom Photography To set the digital zoom: 1 Press the MENU button. 2 Use or to select [DIGITAL ZOOM] and press . 3 Use or to select [ON] and press ENTER. 4 Press the MENU - Toshiba PDR-3300 | User Guide - Page 57
setting is automatically canceled by either turning the camera OFF or by activation of the Auto Power OFF function. ¥You can check the zoom status in the LCD monitor. Optical zoom 1X to 2.8X Digital zoom Playing Erasing Images Handy Functions Other Applications Information Additional - 57 - - Toshiba PDR-3300 | User Guide - Page 58
Taking Playing Macro Photography The macro photography mode is used when the distance to the subject is between 10 cm down fully. Erasing Images Handy Functions Information Applications Other Additional ¥Macro photography is not canceled even if the camera is turned off or the Auto - Toshiba PDR-3300 | User Guide - Page 59
Back Images Self-timer Photography When the self-timer is used, the camera automatically takes a picture after the preset time (2 or using the LCD monitor, the count down is displayed. To cancel photography midway, press . Playing Erasing Images Handy Functions Other Applications Information - Toshiba PDR-3300 | User Guide - Page 60
Photography Using the mode can be set to suit the conditions where the flash is to be used. The effective firing distance of the flash is approximately 0.8 m (2.62 ft) button down halfway, and press it down fully. When you are using the flash, the flash icons on the LCD monitor are displayed in - Toshiba PDR-3300 | User Guide - Page 61
Manual photography mode. [ ] Red-Eye Reduction The camera fires pre-flash lighting once before the main flash in order to reduce the red eye problem flash never fires regardless of the brightness of subjects. Use the Suppressed Flash mode when you are taking pictures Information Additional - 61 - - Toshiba PDR-3300 | User Guide - Page 62
. These are called “Manual settings”, which are saved even if the camera is turned off. IMPORTANT manual setting values are displayed on the left of the LCD monitor screen. Press ENTER. The manual setting items are displayed. Playing Erasing Images Handy Functions Setting items Information - Toshiba PDR-3300 | User Guide - Page 63
Getting Ready Taking Photographs Back Images Manual Settings (continued) Press or to select the setting system [S/C] Single, continuous or AEB mode [Focus] Focus mode setting Press ENTER. The camera is ready to take photographs. Set values Compose the picture, press the shutter button down - Toshiba PDR-3300 | User Guide - Page 64
speed-priority mode : full manual mode White Balance (W.B.) The camera determines the white balance by averaging the various kinds of light that actually enters the lens. A user can set in advance the white balance when taking photographs under specific lighting conditions. [ AW : Automatic - Toshiba PDR-3300 | User Guide - Page 65
Getting Ready Taking Photographs Back Images Playing Manual Settings (continued) Metering system (A.E.) The camera calculates the exposure level before a photograph is be set : Automatic Exposure Bracketing Erasing Images Handy Functions Other Applications Information Additional - 65 - - Toshiba PDR-3300 | User Guide - Page 66
Automatic Exposure Bracketing (AEB) In this mode, the camera takes three consecutive pictures in the order of standard recorded directly to storage media but are stored temporarily within the buffer memory. After photography is finished, check the images and record the selected ones - Toshiba PDR-3300 | User Guide - Page 67
. A user can select in the following order. Also the camera makes the camera will focus on subjects in a distance of to take photo. Once focus mode is chosen as selected photography mode,it will remain the same mode either in [ ] , [ ] or [ ]. - 67 - Handy Functions Other Applications Information - Toshiba PDR-3300 | User Guide - Page 68
to [ ]. The manual setting values are displayed on the left of the LCD monitor screen. Press ENTER. The manual setting items are displayed. halfway, and press it down fully. The camera takes the picture. Handy Functions Information Applications Other Additional ¥Difference between [PRG] and - Toshiba PDR-3300 | User Guide - Page 69
given to aperture. The camera automatically sets the shutter speed manual setting items are displayed. Taking Photographs Back Images Playing Press or to select [ EXP. ]. Erasing Images Handy Functions Other Applications Information using or to change exposure value. - 69 - Additional - Toshiba PDR-3300 | User Guide - Page 70
Images Compose the picture, press the shutter button down halfway, and press it down fully. The camera takes the picture. • If the aperture value is set to F2.9 (maximum aperture size), according to the position of the zoom lens. - 70 - Handy Functions Information Applications Other Additional - Toshiba PDR-3300 | User Guide - Page 71
taken with the priority given to shutter speed. The camera automatically sets the aperture value according to the shutter speed is still. A slow shutter speed produces as photograph that makes you feel that it is flowing. Set the mode dial to [ ]. The manual setting values Information Additional - Toshiba PDR-3300 | User Guide - Page 72
, and manual setting or film speed setting using ENTER are also possible. Compose the picture, press the shutter button down halfway, and press it down fully. The camera takes the picture. • When is limited to between F8 and F3.4. - 72 - Handy Functions Information Applications Other Additional - Toshiba PDR-3300 | User Guide - Page 73
shutter button down halfway, and press it down fully. The camera takes the picture. • When pressing sort in the full manual mode, the shutter speed is adjusted, but the exposure compensation setting 1/1000 second is not available. - 73 - Handy Functions Other Applications Information Additional - Toshiba PDR-3300 | User Guide - Page 74
When using this mode, be sure to use a tripod to keep the camera stable and prevent distortion of images. Set the mode dial to [ ]. The manual the captured image. 8.0 0"7 Erasing Images Handy Functions Information Applications Other Additional • Flash photography and burst photography are - Toshiba PDR-3300 | User Guide - Page 75
or darken the entire image. Use this setting when the optimum brightness balanced or when the subject to photograph occupies only an extremely small part of the screen. Set the mode dial to [ ]. Press still image). Erasing Images Handy Functions Other Applications Information Additional - 75 - - Toshiba PDR-3300 | User Guide - Page 76
shutter speed setting possible, but does not make the exposure compensation possible. However the exposure value is displayed on the LCD monitor. - 76 - Handy Functions Information Applications Other Additional - Toshiba PDR-3300 | User Guide - Page 77
camera to photograph three consecutive pictures in -0.5, 0, and +0.5 compensation. Set the mode dial to [ ]. The manual setting values are displayed on the left of the LCD monitor screen. Press ENTER. The manual it down fully. The camera will automatically take a • The camera takes three - Toshiba PDR-3300 | User Guide - Page 78
SD Memory Card but are stored temporarily within the buffer memory. After photography is finished, check the images and record the selected ones to SD Memory Card. Set the mode dial to [ ]. The manual the shutter button before the camera captures three images, the camera will stop taking pictures at - Toshiba PDR-3300 | User Guide - Page 79
is not enough space on the SD Memory Card. This setting is for erasing all images. Press ENTER. 1 to 3 can be combined regardless of their order to set saving and erasing of images. Use to select [ ] and press ENTER. The image is saved or erased, and the camera is then ready to take photographs - Toshiba PDR-3300 | User Guide - Page 80
. • The length of time to capture images varies according to the photographic conditions. • Self-timer photography and flash photography are not possible. - 80 - Handy Functions Information Applications Other Additional - Toshiba PDR-3300 | User Guide - Page 81
free space on the SD Memory Card, or when the maximum size that a single movie can be recorded is reached. To press the shutter button down fully again can stop making movies. When making a movie, flash photography is not possible. - 81 - Handy Functions Other Applications Information Additional - Toshiba PDR-3300 | User Guide - Page 82
Ready Back Images Photographs Taking Playing Erasing Images Self Timer button In “ ” mode, the camera can select self timer mode among “off (default)”, “10-second” and “2-second” in is displayed in the center of the screen. - 82 - Handy Functions Information Applications Other Additional - Toshiba PDR-3300 | User Guide - Page 83
1 Item 2 Options Erasing Images Handy Functions Other Applications Information Use or to select the desired item 1 and press . ]. PREVIEW COLOR ISO SHARPNESS CONTRAST DIGITAL ZOOM LCD QUALITY * The above menu is the RECORDING MENU in the [ ] mode. Use or to select the desired setting - Toshiba PDR-3300 | User Guide - Page 84
MENU) (continued) To quit the RECORDING MENU, press the MENU button. The camera is now ready to take photographs. PREVIEW Set to display a photographed image on (default) : Vivid color : Black and white : Sepia Erasing Images Handy Functions Information Applications Other Additional - 84 - - Toshiba PDR-3300 | User Guide - Page 85
During [2X], the ISO will be automatically set to ISO200. During [4X], ISO will be automatically set to ISO400. Erasing Images Handy Functions Other Applications Information Additional ¥In movie mode, ISO will be automatically set between ISO100 and ISO400 regardless of its setting. - 85 - - Toshiba PDR-3300 | User Guide - Page 86
) [OFF] : Disables digital zoom photography. LCD Adjusts the brightness of the LCD monitor. This adjustment does not adjust the brightness of the image to be recorded. [-5] to [+5] ¥ To adjust the brightness of the LCD monitor. Erasing Images Handy Functions Information Applications Other - Toshiba PDR-3300 | User Guide - Page 87
quality (compression ratio) of the image to be photographed. Change the setting according to how the image is to be used and the remaining amount of space in the SD Memory Card. Press the Menu button. Select Quality Menu, keep pressing or button until the QUALITY is highlighted. After pressing the - Toshiba PDR-3300 | User Guide - Page 88
Photographs Taking Playing Erasing Images Playing Back Photographed Images (Single-Frame Playback) Play back photographed still images one image at a time. Set the mode dial to [ ]. The last mode to change picture to next one. - 88 - Handy Functions Information Applications Other Additional - Toshiba PDR-3300 | User Guide - Page 89
last recorded image appears on the LCD monitor. Press or to select the movie to play back. Press . Playback of the selected movie begins. The user can control playback as shown on the table of the next page by pressing various buttons during playback, a pause or stopping. - 89 - Handy Functions - Toshiba PDR-3300 | User Guide - Page 90
Taking Playing Back Movies (continued) A user can control playback movie file as the returns to thumbnail playback. During stopping Play back Playing Erasing Images Handy Functions Information Applications Other Additional ¥The image size displayed on the LCD monitor becomes FULL - Toshiba PDR-3300 | User Guide - Page 91
Display) Nine reduced images are simultaneously displayed on the LCD monitor. This manual calls this display “thumbnail display.” This feature is useful, for example, when there are many images recorded in the SD Memory Card. After you have displayed the thumbnail display, you can select the desired - Toshiba PDR-3300 | User Guide - Page 92
indicates the entire image, while the green frame shows the location of the currently enlarged area. Use , , or to select the area to enlarge. Adjust the display area to enlarge while viewing of enlargement Erasing Images Handy Functions Information Applications Other Additional - 92 - - Toshiba PDR-3300 | User Guide - Page 93
back one image at a time in order. This feature is not supported in the movie mode. Set the mode dial to [ ]. The on the LCD monitor. Press the MENU button. The PLAYBACK MENU is displayed. Use or to select [SLIDE SHOW] and press . The slideshow begins and [ ] Applications Information Additional - Toshiba PDR-3300 | User Guide - Page 94
16 images photographed in the multi photography mode in quick succession. Set the mode dial to [ ]. The last image frame appears on the LCD monitor. Use or to select the images photographed in the multi photography mode. You can also select the image by the same operation as for thumbnail display - Toshiba PDR-3300 | User Guide - Page 95
they are protected or the SD Memory Card is write-protected. Set the mode dial to [ ], [ ], [ ] or [ ]. When [ ] is selected, the last image frame or the thumbnail display appears on the LCD monitor. When [ ] is selected, use Images Handy Functions Use or to - Toshiba PDR-3300 | User Guide - Page 96
continuing from the last photographed image is assigned as the image number. ¥Images can also be erased in the thumbnail mode. In this case, the camera enters the single frame playback (frame playback) mode, and enters the thumbnail playback mode after the image is erased. - 96 - Handy Functions - Toshiba PDR-3300 | User Guide - Page 97
a Folder/All Folders) Erases selected folders and all contents currently recorded to the SD Memory Card loaded on your camera. There are two ways of erasing images, by individual folders or by all screen. Playing Erasing Images Handy Functions Other Applications Information Additional - 97 - - Toshiba PDR-3300 | User Guide - Page 98
(All Images in a Folder/All Folders) (continued) Use or to select [ ] or [ ] and press ENTER. [ ] : Erases images in the currently selected folder and folders. [ ] : Erases all folders recorded on the SD Memory Card. The images or folders are erased, and the camera returns to the respective mode. To - Toshiba PDR-3300 | User Guide - Page 99
Other Applications Information Use or to select [ ], and press ENTER. To cancel formatting, select [ ] and press ENTER. To reset the image number, use or to select [EXECUTE], and press ENTER. To cancel resetting of image numbers, select [CANCEL]. ¥ SD Memory Card must be formatted before using for - Toshiba PDR-3300 | User Guide - Page 100
manual. Resizing a previously saved image when the SD Memory Card has run out of storage space during photography increases space on SD Memory Card so that you can continue taking photographs. The following images cannot be resized: ¥ SMALL size images ¥ Images taken with another camera ¥ Images - Toshiba PDR-3300 | User Guide - Page 101
to fit the entire screen. To redisplay the original image, move the Zoom key towards the “W”. Use or to select [EXECUTE], and press ENTER. The screen indicating that the image is being resized during playback. Erasing Images Handy Functions Other Applications Information Additional - 101 - Toshiba PDR-3300 | User Guide - Page 102
has run out of storage space during photography increases space on SD Memory Card so that you can continue taking photographs. The following images cannot be compressed: * ¥ (BASIC) image quality images ¥ Images taken with another camera ¥ Protected images ¥ Movies Set the mode dial to [ ]. The last - Toshiba PDR-3300 | User Guide - Page 103
to fit the entire screen. To redisplay the original image, move the Zoom switch towards the “W”. Use or to select [EXECUTE], and press ENTER. The screen indicating that the image is being compressed pressing or during playback. - 103 Handy Functions Other Applications Information Additional - Toshiba PDR-3300 | User Guide - Page 104
Erasing Images Print Information The number of prints or the image date can be set in a DPOF (Digital Print Order Format) file for images to be printed (developed). This feature applies to still images only. Printing can be done easily if you just take the SD Memory Card containing the images - Toshiba PDR-3300 | User Guide - Page 105
Getting Ready Taking Photographs Back Images Playing Erasing Images Print Information (continued) Press or to select [SELECT] or [ALL], and press ENTER. [SELECT] will depend on the date set into the camera. For the correct date to be printed onto the picture, please check the date set into your - Toshiba PDR-3300 | User Guide - Page 106
Getting Ready Back Images Photographs Taking Playing Erasing Images Print Information (continued) Press or to select [EXECUTE], and press ENTER. The DPOF information file is created, and the screen returns to the initial display when the operation ends. To continue setting, select [CHANGE - Toshiba PDR-3300 | User Guide - Page 107
information file is overwritten on a personal computer and values not supported by this camera were set. ¥Images set in the DPOF format are automatically protected. Write-protection cannot be removed by regular methods. ¥You can specify up to 99 prints or up to 999 frames in a single SD Memory Card - Toshiba PDR-3300 | User Guide - Page 108
¥Formatting erases all the images on a SD Memory Card, regardless of whether they are protected or not. ¥To protect the entire SD Memory Card, MENU is displayed. Use or to select [PROTECT] and press . The PROTECT menu is displayed. - 108 Handy Functions Information Applications Other Additional - Toshiba PDR-3300 | User Guide - Page 109
towards the “W”. ¥It is possible to play back any images in any folders by pressing or during playback. Use or to select [EXECUTE], and press ENTER. To quit write-protection, select [CANCEL] and press ENTER. if set at step 4. - 109 Handy Functions Other Applications Information Additional - Toshiba PDR-3300 | User Guide - Page 110
the Protection Carry out steps 1 to 3 in “Protecting An Image”. Use or to select the image to unprotect, and press ENTER. This fixes the DPOF format, and write-protection cannot be removed. To remove write-protection, cancel the DPOF format setting . - 110 Handy Functions Information Applications - Toshiba PDR-3300 | User Guide - Page 111
/ SYSTEM INFO. The details set here are held in memory even if the camera is turned OFF. Set the mode dial to [ ]. The SETUP MENU appears. Taking Photographs Back Images Playing Erasing Images Handy Functions Other Applications Information Use or to select the item you want to set. AUTO - Toshiba PDR-3300 | User Guide - Page 112
mode) (continued) Press . The tab menu is displayed. Use or to change the setting in the tab menu, and press Power OFF. This setting allows you to set the time when the camera turns off automatically. This function is not activated during automatic playback Information Applications Other Additional - Toshiba PDR-3300 | User Guide - Page 113
/Day/Hour/Minute on the screen. Using or button to select the item to set, and use or button to set the value for updated and return to the previous main menu. To quit setting, select the [CANCEL] button and press ENTER. Playing Erasing Images Handy Functions Other Applications Information - Toshiba PDR-3300 | User Guide - Page 114
your camera used. [ used and the remaining amount of space in the SD Memory Card still/movie/ok/cancel is fully highlighted. After pressing ENTER button while OK is highlighted, these combinations are set and the LCD monitor display returns to previous SETUP MENU. - 114 Handy Functions Information - Toshiba PDR-3300 | User Guide - Page 115
number is 100 and file number is 0001). Resetting of images is supported only for the still image mode. To reset movie images numbers, you must delete the press ENTER. [FIRMWARE VER.]:Displays the firmware version of this camera. [CARD INFO.]:Displays the SD Memory Card information [RESET]:Returns - Toshiba PDR-3300 | User Guide - Page 116
. Use or to adjust the brightness. Press to darken (-) the LCD monitor, or to lighten (+) the LCD monitor. The LCD monitor can be adjusted within the range [-5] to [+5]. (Default is 0.) Press ENTER. This returns the camera to the previous mode. - 116 Handy Functions Information Applications - Toshiba PDR-3300 | User Guide - Page 117
or to select the image. Press the DISP button. Each press of the DISP button switches the display format as follows: Standard Detailed information Histogram Image only Playing Erasing Images Handy Functions Other Applications - Toshiba PDR-3300 | User Guide - Page 118
DISP button. Each press of the DISP button switches the display format as follows: OSD full display OSD display off LCD monitor off Back Images Photographs Taking Playing Erasing Images Handy Functions Information Applications Other Additional ¥When any button is pressed while OSD display - Toshiba PDR-3300 | User Guide - Page 119
still ON, the screen may flicker or the image may not be displayed normally. Connect the plug of the AV cable (provided) to the PC/ VIDEO terminal on the camera. DC IN 5V terminal Taking Photographs Back Images Playing Erasing Images Handy Functions Other Applications Information Connect - Toshiba PDR-3300 | User Guide - Page 120
User’s Guides for your PC and the Software Manual. Using SD Memory Card on a PC ¥ When you use SD Memory Card, do not change or erase folders or file names (image data) on the SD Memory Card. Doing so might prevent the SD Memory Card from being used on the camera. ¥ Format the SD Memory Card only - Toshiba PDR-3300 | User Guide - Page 121
Getting Ready Separately Sold Accessories The following items are also available as separately sold items. l SD Memory Card (3.3 V) 32MB (SD-M3201M)/64MB (SD-M6401M)/128M (SD-M1280M) l AC Adapter For the US/Canada: PDR-AC20A For Europe: PDR-AC20E For the UK: PDR-AC20U Taking Photographs Back - Toshiba PDR-3300 | User Guide - Page 122
Erasing Images Handy Functions SD Memory Card PC card adapter USB cable (provided) PDR-3300 (PC/AV) (DC IN 5V) VIDEO cable (provided) AC adapter (sold separately) Plug socket - 122 Printer PC Software application (CD-ROM) (provided) TV monitor Information Applications Other Additional - Toshiba PDR-3300 | User Guide - Page 123
the state of the camera. The meaning of SD Memory Card in progress Flashing Hardware malfunction - 123 PC mode In communication to PC. (SD Memory Card is in.) In connecting to PC (SD Memory Card is in.) Disconnect. (SD Memory Card is in.) SD Memory Card is not in. Other Applications Information - Toshiba PDR-3300 | User Guide - Page 124
after 3seconds / Getting IR controller signal IR Remote Controller The camera provides IR Remote Controller, which works as the function of shutter getting IR Remote controller signal. It will remain the same mode until you manually press Self-Timer button once again to exit from the mode. (Burst - Toshiba PDR-3300 | User Guide - Page 125
Specifications Camera body - 125 Getting Ready Taking Playing Photographs Back Images Erasing Images Handy Functions Other Additional Applications Information - Toshiba PDR-3300 | User Guide - Page 126
Specifications (continued) - 126 Additional Other Information Applications Handy Functions Erasing Images Playing Taking Back Images Photographs Getting Ready - Toshiba PDR-3300 | User Guide - Page 127
Getting Ready Taking Photographs Back Images Playing Erasing Images Handy Functions Other Applications Information Additional * The LCD monitor on your digital camera is manufactured using advanced high-precision technology. Though fine spots may appear on the LCD monitor, this is not a - Toshiba PDR-3300 | User Guide - Page 128
Weight Connector Cable Length AC230V 50Hz 120 mA DC5.0V 1.5A 0°C ~ +40°C -10°C ~ +70°C 49.5 mm (1.9”) (W) x 60.5 mm (2.4”) (H) x 76 mm (3.0”) (D) Approx. 130 g (4.5 oz) Approx. 2 m (6.6 ft) These specifications are subject to change without notice. - 128 Handy Functions Information Applications - Toshiba PDR-3300 | User Guide - Page 129
monitor CARD ERROR CARD LID OPEN CARD FULL NO CARD CARD ISNíT FORMATTED FORMAT CARD? FRAME NUMBER FULL PROTECTED NO IMAGE CARD FULL FORMAT ERROR Meaning Batteries are partially used. Battery power is nearly exhaustion. Batteries are completely exhausted. Camera will not turn on. The SD Memory Card - Toshiba PDR-3300 | User Guide - Page 130
image not supported on this camera. A camera problem has occurred. Contact a Support Center. Poor lighting conditions. Image will be vulnerable to vibrations. Image files is over 16348 pieces. Existing SD Memory Card capacity is over 256 MB. Erasing Images Handy Functions Information Applications - Toshiba PDR-3300 | User Guide - Page 131
replace is write-protected. with a new SD Memory Card. The SD Memory Card is not formatted. Format the SD Memory Card. The SD Memory Card is damaged. Load a new SD Memory Card. The Auto Power OFF function is Turn the power on again activated. I cannot use the flash to take pictures The mode - Toshiba PDR-3300 | User Guide - Page 132
and exposure settings. lDPOF (Digital Print Order Format) A standard for directly writing print information to the SD Memory Card. Files in this format can be printed easily by printers or photo print service bureaus that support this format. lDCF (Design rule for Camera File System) A file system - Toshiba PDR-3300 | User Guide - Page 133
such as digital still cameras see a white subject as white by first adjusting the balance to suit the color of the ambient light around the subject. This adjustment process is referred to as matching the white balance. lSD Memory Card The Secure Digital (SD) Memory Card is a flash memory storage - Toshiba PDR-3300 | User Guide - Page 134
States Toshiba America Information Systems, Inc. 800) 8298318 [email protected] Website www.toshiba.com/taisisd www.toshiba.com.hk www.toshiba.fr/produits/video/index.htm www.toshiba.de/consumer www.toshiba.it/ www.cp.toshiba.com.sg www.toshiba.ch/ www.toshiba.co.uk www.toshiba.com - Toshiba PDR-3300 | User Guide - Page 135
digital cameras: www.toshiba.co.uk Technical support is available on-line, or by calling (0115) 9766958. 9.00am to 5.00pm Monday to Friday except bank holidays, or e-mail us at: [email protected] Toshiba European Service at: [email protected] Toshiba America Information Systems,
-
 1
1 -
 2
2 -
 3
3 -
 4
4 -
 5
5 -
 6
6 -
 7
7 -
8
-
9
-
10
-
11
-
12
-
13
-
14
-
15
-
16
-
17
-
18
-
19
-
20
-
21
-
22
-
23
-
24
-
25
-
26
-
27
-
28
-
29
-
30
-
31
-
32
-
33
-
34
-
35
-
36
-
37
-
38
-
39
-
40
-
41
-
42
-
43
-
44
-
45
-
46
-
47
-
48
-
49
-
50
-
51
-
52
-
53
-
54
-
55
-
56
-
57
-
58
-
59
-
60
-
61
-
62
-
63
-
64
-
65
-
66
-
67
-
68
-
69
-
70
-
71
-
72
-
73
-
74
-
75
-
76
-
77
-
78
-
79
-
80
-
81
-
82
-
83
-
84
-
85
-
86
-
87
-
88
-
89
-
90
-
91
-
92
-
93
-
94
-
95
-
96
-
97
-
98
-
99
-
100
-
101
-
102
-
103
-
104
-
105
-
106
-
107
-
108
-
109
-
110
-
111
-
112
-
113
-
114
-
115
-
116
-
117
-
118
-
119
-
120
-
121
-
122
-
123
-
124
-
125
-
126
-
127
-
128
-
129
-
130
-
131
-
132
-
133
-
134
-
135
 |
 |
- 1 -
Getting
Ready
Taking
Photographs
Playing
Back Images
Other
Applications
Additional
Information
Erasing
Images
Handy
Functions
For customers in the U±S±A±
FCC Statement
This device complies with Part 15 of the FCC Rules± Operation is subject to the following two conditions:
(1) This device may not cause harmful interference, and
(2) this device must accept any interference received, including interference that may cause undesired operation±
NOTE
This equipment has been tested and found to comply with the limits for a Class B digital device, pursuant to Part 15
of the FCC Rules± These limits are designed to provide reasonable protection against harmful interference in a
residential installation±
This equipment generates, uses and can radiate radio frequency energy and, if not installed and used in
accordance with the instructions, may cause harmful interference to radio communications± However, there is no
guarantee that interference will not occur in a particular installation± If this equipment does cause harmful
interference to radio or television reception, which can be determined by turning the equipment off and on, the user
is encouraged to try to correct the interference by one or more of the following measures:
¥
Change the direction of the radio or TV antenna±
Move the equipment or the radio or TV± For example, if the equipment is to the right of the TV, move it to the left
of the TV±
Or, move the equipment farther away from the radio or TV±
¥
Plug the equipment into a different outlet± Don²t plug your radio or TV into the same circuit as your equipment±
¥
Ensure that all expansion slots (on the back or side of the equipment) are covered±
Also, ensure that all metal retaining brackets are tightly attached to the equipment±
¥
If these suggestions don²t help, consult your equipment dealer or experienced radio/TV technician for help±
Attention