Toshiba TDP-ET20U User Manual - Page 19
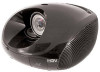
Control panel and remote control parts for TDP-ET10
 |
View all Toshiba TDP-ET20U manuals
Add to My Manuals
Save this manual to your list of manuals |
Page 19 highlights
Control panel and remote control parts for TDP-ET10 SCRESEIZNE PMICOTOUERE 8 7 6 5 4 3 [TDP-ET10 control panel] 2 1 [TDP-ET10 Remote] For more information, see the pages in parentheses. (1) ON/STANDBY: Switch projector between ON and STANDBY. (2) MENU (INPUT) p.24 p.41 : 1 Access the main programming menu or select input source. 9 (3) ENTER : Activate highlighted item in the on screen menu. (4) DOWN: Move down and highlight the item. 8 (5) UP: Move up and highlight the item. (6) + - : Increase / decrease the volume. (7) PICTURE p.42 : Select picture mode. (8) SCREEN SIZE p.43 : 10 Select screen size: Full , 4:3 , Zoom , Theater Wide . (9) INPUT SELECT p.24 : Select Video, S-Video, YPBPR, Com- 3 puter, or HDMI. 11 (10) : Select or adjust on screen programming menus. 7 (11) MENU p.41 : Access the main programming menu. (12) Vol +-: Increase / decrease the volume 12 (13) AUDIO MUTE: Cut off the sound temporarily. 13 14 VIDEO MUTE: Black out the projected image. (14) FREEZE: Freeze the screen. 18
-
 1
1 -
2
-
3
-
4
-
5
-
6
-
7
-
8
-
9
-
10
-
11
-
12
-
13
-
 14
14 -
 15
15 -
 16
16 -
 17
17 -
 18
18 -
 19
19 -
 20
20 -
 21
21 -
 22
22 -
 23
23 -
 24
24 -
25
-
26
-
27
-
28
-
29
-
30
-
31
-
32
-
33
-
34
-
35
-
36
-
37
-
38
-
39
-
40
-
41
-
42
-
43
-
44
-
45
-
46
-
47
-
48
-
49
-
50
-
51
-
52
-
53
-
54
-
55
-
56
-
57
-
58
-
59
 |
 |
