Toshiba TDP-F10U Owners Manual
Toshiba TDP-F10U Manual
 |
View all Toshiba TDP-F10U manuals
Add to My Manuals
Save this manual to your list of manuals |
Toshiba TDP-F10U manual content summary:
- Toshiba TDP-F10U | Owners Manual - Page 1
Before Using TDP-F10 LED PROJECTOR OWNER'S MANUAL Preparations Operations Maintenance Others In the spaces provided below, record the Model and Serial No. located at the bottom of your projector. Model No. Serial No. Retain this information for future reference. - Toshiba TDP-F10U | Owners Manual - Page 2
user to the presence of important operating and maintenance (servicing) instructions in the literature accompanying the appliance. WARNING: TO MODEL NAME: TDP-F10 USA ONLY TRADE NAME: LED PROJECTOR Tested To Comply With FCC Standards FOR HOME OR OFFICE USE MODEL NAME: TDP-F10 FCC NOTICE:This - Toshiba TDP-F10U | Owners Manual - Page 3
1697 U.S.A Phone: (949) 583-3000 CAUTION: Changes or modifications made to this equipment, not expressly approved by USA ONLY Toshiba, or parties authorized by Toshiba, could void the user's authority to operate the equipment. Notice: This Class B digital apparatus complies with Canadian ICES-003 - Toshiba TDP-F10U | Owners Manual - Page 4
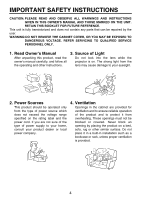
TO DANGEROUS VOLTAGE. REFER SERVICING TO QUALIFIED SERVICE PERSONNEL ONLY. 1. Read Owner's Manual After unpacking this product, read the owner's manual carefully, and follow all the operating and other instructions. 3. Source of Light Do not look into the lens while the projector is on. The strong - Toshiba TDP-F10U | Owners Manual - Page 5
cord, receptacle, or other outlet unless the blades can be inserted completely with three wire grounding type to prevent blade exposure. Failure to follow these instructions may result in fire or electric shock. 5 - Toshiba TDP-F10U | Owners Manual - Page 6
IMPORTANT SAFETY INSTRUCTIONS (Continued) 11.Lightning storms For added protection for this product temperature during normal use and may damage the other unit. 13.Do not place or keep the projector within the reach of the children. It may fall or tip over, possibly causing serious injury. - Toshiba TDP-F10U | Owners Manual - Page 7
that are covered by the operating instructions since an improper adjustment of other controls may result in damage and will often require extensive work by a qualified technician to restore the product to its normal operation. 20.Servicing Do not attempt to service this product yourself as opening - Toshiba TDP-F10U | Owners Manual - Page 8
IMPORTANT SAFETY INSTRUCTIONS (Continued) 21.Replacement Parts When replacement parts are required, be sure the service technician has used replacement parts specified by the manufacturer or have the same characteristics as the original part. Unauthorized substitutions may result in fire, electric - Toshiba TDP-F10U | Owners Manual - Page 9
holding it in your hands or lap. • Do not use the projector near a power source and the like, or in locations like a ship or vehicle that are subject to vibration or shock. Doing so may lead to a malfunction or shorten service life. Avoid Volatile Liquid Do not use volatile liquids, such as - Toshiba TDP-F10U | Owners Manual - Page 10
under abnormal conditions including erroneous or improper operation and other problems. • Toshiba Corporation bears no responsibility for incidental damages (lost profit not having followed the descriptions in this Owner's Manual. • Toshiba Corporation accepts no liability whatsoever for any damages - Toshiba TDP-F10U | Owners Manual - Page 11
local city office, your household waste disposal service or the shop where you purchased the of International Business Machines Corporation. • DLP (Digital Light Processing) is a registered respective companies. Notational Conventions Used in This Manual • References to pages with related information - Toshiba TDP-F10U | Owners Manual - Page 12
moistening the tissue with water. • Risk of explosion if battery is replaced by an incorrect type. • Dispose of the used battery according to the instructions. • Keep the battery away from the reach of children. Battery is choking hazard and can be very dangerous if swallowed. If the battery is - Toshiba TDP-F10U | Owners Manual - Page 13
Before Using AC ADAPTER Caution • Always use the AC adapter that was provided with your projector to avoid any risk of fire,electrical shock or damage to the unit. • Never use the supplied top of wet objects. • Unplug the power cord if you will not be using the projector for an extended period. 13 - Toshiba TDP-F10U | Owners Manual - Page 14
(LED 32 Using the menus 33 How to use the menus 33 Image adjustment menu 34 Display setting menu 35 Default setting menu 36 Displaying Information (Status display 37 SD/USB Memory Device Operation 38 Maintenance Lens and main unit cleaning 42 Others Indicators ...44 Before calling service - Toshiba TDP-F10U | Owners Manual - Page 15
Before Using Specifications 46 List of general specifications 46 List of supported signals (RGB signals 47 List of supported signals (Component signals 48 Pin assignment of COMPUTER IN terminals 49 15 - Toshiba TDP-F10U | Owners Manual - Page 16
if you ever have to ship your projector. For maximum protection when shipping your projector, repack the set as it was originally packed at the factory. ‹The Supplied CD-ROM The supplied CD-ROM contains an owner's manual in PDF format. (PDF: Portable Document Format) Please use Acrobat Reader 5 or - Toshiba TDP-F10U | Owners Manual - Page 17
commands from the remote control. p.21 :Expels air that has grown hot inside the projector. :Adjusts the vertical projection angle. p.28 :Use for service purpose only. :Allows tripod mounting. :Operates the projector. p.18 :Turns the power on/off. p.26 :Protects SD and USB slots. p.38 :Connects - Toshiba TDP-F10U | Owners Manual - Page 18
and adjustments, etc. p.33 :Accepts the selected mode. :Lights when internal temperature is too high. p.44 :Displays menus. p.33 :Short cut for LED brightness control and keystone correction when it is pressed and held over 2 seconds. :Selects input. p.28 :Lights when an internal error occurs. p.44 - Toshiba TDP-F10U | Owners Manual - Page 19
(6) SD/USB button (7) FREEZE button (8) MUTE button (9) AUTOSET button (10) LED + / - button (11) KEYSTONE S / T button (12) RESIZE S p.30 :Performs auto-adjustment of input signal from com puter. p.30 :Adjusts LED power. p.32 :Adjusts keystone distortion. p.30 :Digitally magnifies an image up - Toshiba TDP-F10U | Owners Manual - Page 20
Parts on the rear panel (1) (2) (3) Name (1) DC IN terminal (2) VIDEO IN terminal (3) COMPUTER IN terminal :Main Function :Connects the AC adapter here. p.26 :Inputs video signals from video equipment. :Inputs analog RGB signal from a computer or other source, or a component video signal (Y/PB/ - Toshiba TDP-F10U | Owners Manual - Page 21
that the battery surface with the mark "+" is facing up. Approx. 15° Approx. 7m Note: When operating the remote control from behind the projector, the infrared signal is reflected on the projecting surface. The operating range therefore may decrease depending on the shape and material of the - Toshiba TDP-F10U | Owners Manual - Page 22
Preparing and using the remote control (Continued) Lithium coin battery • Before using the battery, be sure to observe the Safety Precautions described in previous pages. • Remove the battery from remote control when not using for extended periods. • If the remote control stops working, or if its - Toshiba TDP-F10U | Owners Manual - Page 23
-mounted rear projection Ceiling-mounted front projection Ceiling-mounted rear projection WARNING • Always obey the instructions listed in IMPORTANT SAFETY INSTRUCTIONS when placing the unit. • If you wish to mount the projector on the ceiling, be sure to ask your dealer to do so. Mounting the - Toshiba TDP-F10U | Owners Manual - Page 24
Projection Distance and Size Use the figures, and tables below to determine the projection size and projection distance. (Projection sizes are approximate values for full-size picture with no keystone adjustment.) Screen As seen from above 90° As seen from the side Lens center 90° a projection - Toshiba TDP-F10U | Owners Manual - Page 25
Connection Before connection • Read the owner's manual of the device you are connecting to the projector. • Some computers cannot be used or connected to this projector. Check for an RGB output terminal, supported signal p.47 , etc. • Turn off the power of both devices before connecting. • The - Toshiba TDP-F10U | Owners Manual - Page 26
Insert one end of the AC adapter into the DC IN socket of the projector. Insert the power cord connector into the other end of the AC adapter. view Start-up screen CAUTION • Do not look into the lens while the projector is on. The strong light from the lens may cause damage to your eyesight - Toshiba TDP-F10U | Owners Manual - Page 27
the system to prevent the start-up screen from appearing. To do this, use the Display setting menu. p.35 • The first time you use the projector after purchase, the language selection menu will be displayed. • Do not touch the lens directly with your hand. If fingerprints or stains are left on - Toshiba TDP-F10U | Owners Manual - Page 28
by following the instructions in "Turning the power on and off". p.26 Select the language (When using the first time). When the projector is used for be set via the Default setting menu p.36 . • This owner's manual assumes that English has been selected. Activate the connected device. Turn on - Toshiba TDP-F10U | Owners Manual - Page 29
, turn off the computer's LCD display. For information on how to turn off the LCD display, see the computer's owner's manual. • If a signal not supported by the projector is input, the "Unsupport signal" will appear. • If an unavailable operation button is pressed, the icon will appear. • The - Toshiba TDP-F10U | Owners Manual - Page 30
or auto adjustment/setting may not be performed correctly for input signals other than those supported by the projector. p.47 p.48 • If auto setting fails adjustment, adjust it manually with Image adjustment menu. p.34 „ Correcting the keystone distortion (KEYSTONE) Remote Control When the - Toshiba TDP-F10U | Owners Manual - Page 31
while the freeze function is in effect. • Other operations will also release the freeze function. • Even if an image is frozen on the projector, the pictures are running on the video or other equipment. • Using this function on commercial video software, broadcast or cable-broadcasting except for - Toshiba TDP-F10U | Owners Manual - Page 32
image may be distorted. „ Adjusting LED power (LED) This function is used to adjust LED power. Remote Control • Press the LED + / - button on the remote control. LED power is increased or decreased. • You may also press and hold the MENU button on the projector over 2 seconds, and then use the - Toshiba TDP-F10U | Owners Manual - Page 33
set using key . These marks signify that there are options. Press to display a list of options. The figure shows displays given for operation instructions purposes. As the display may differ depending on the item, refer to the following applicable pages for the menu item you desire. 4. Back Press - Toshiba TDP-F10U | Owners Manual - Page 34
with . Yes SD/USB and RGB input: sRGB/Adobe RGB/WIDE Y/PB/PR and Video input: HDTV / NTSC/PAL / WIDE Adjust LED brightness. Yes LED Power Darker Brighter Adjust the brightness of the image. Yes Brightness Darker Brighter Adjust the image contrast. Yes Contrast Lower Higher Adjust - Toshiba TDP-F10U | Owners Manual - Page 35
to "Wide". Lower Higher Background Screen to display when there is no input signal. Yes Yes Yes (Logo) < > (Blue) < > (Black) Icon Display icons as function guides. On Off Yes Yes Yes Display start-up screen when power is turned on. Yes Yes Yes Start-up screen On Off White balance - Toshiba TDP-F10U | Owners Manual - Page 36
the File view mode. No Yes Slide show Set slide show mode. Auto. Manual No No No Yes Interval Adjust the interval time in Slide show auto mode. image • Set the [Fan mode] to [High] when using the projector at the high altitude (higher than 1,500m or 5,000 ft.). Do not set Fan mode to - Toshiba TDP-F10U | Owners Manual - Page 37
method of video signal. Picture mode setting. Color space setting. LED brightness. Firmware version. RGB Y/PB/PR Video Yes Yes Yes SD of supported RGB signals p.47 . • [Version] shows the version of the projector's internal control program. This version will be requested for customer service. - Toshiba TDP-F10U | Owners Manual - Page 38
device to the SD/ USB port. Note • USB HDD or hub is not supported. • If SD and USB memory device are inserted before power is on, the according to the SD/USB setting in the Default setting menu p.36 . The system supports Plug and Play function at power on regardless of SD/USB setting. • If Quick - Toshiba TDP-F10U | Owners Manual - Page 39
different file formats. • Movie files are not supported. Slide show Mode Slide show Mode • Quick start When the projector is set to the SD/USB input and or unsupported format, appears on the current picture and the projector automatically starts to read the next JPEG file. Picture transition - Toshiba TDP-F10U | Owners Manual - Page 40
file view mode. CAUTION • Be sure to follow the above instructions. Disconnecting a SD or USB card during playing slide show may 4GB). Toshiba: SD (256MB, 512MB, 1GB, 2GB), SDHC (8GB) Note • This projector does not support all SD and USB memory devices. 5 Backing up the data Toshiba recommends - Toshiba TDP-F10U | Owners Manual - Page 41
Operations 6 JPEG files • Supported file extensions are .jpg and .JPG. • Some JPEG files such as interlaced JPEG are not supported. Maximum resolution is 16384 x 16384. 7 Folders and files • Folders are limited to 4 levels. • The number of files in each folder is limited to 9986. 41 - Toshiba TDP-F10U | Owners Manual - Page 42
Lens Maintenance and main unit cleaning WARNING • Request cleaning and maintenance of a ceiling-mounted unit from your projector dealership. Attempting to clean the unit in a high location by yourself may cause you to fall, possibly resulting in injury. „ Lens cleaning • Clean the lens - Toshiba TDP-F10U | Owners Manual - Page 43
43 Maintenance - Toshiba TDP-F10U | Owners Manual - Page 44
off the power once and turn it back again. Some kinds of files may cause this problem, so please try to remove the files. F2: Flash 2Hz Note • In case an error occurs, the projector will be shut down automatically after an error message has been displayed with the power switch in - Toshiba TDP-F10U | Owners Manual - Page 45
service. Please see "Indicators" p.44 as well. . If This Happens Check No power • Is AC adapter connected to the power cord? Is AC adapter connected to the projector inserted correctly? • Is an SD/USB memory device not supported by the projector inserted? p.40 • Are there any JPEG files saved on - Toshiba TDP-F10U | Owners Manual - Page 46
12,000m (0 - 40,000 ft) Display device 1 DLP® chip Picture elements True 858 x 600 resolution, 16.7M True f=17.67mm (fixed lens) Light source LED module Projection screen size 15-60 inches Projection ) USB type B (for service only) SD terminal Supports SD and SDHC memory cards - Toshiba TDP-F10U | Owners Manual - Page 47
signals (RGB signals) This projector supports the following RGB signals. Note, however, that depending on the computer model, the screen may show flicker or streaking. Please adjust the projector if this happens. Compatibility VGA SVGA XGA SXGA Resolution 640 x 480 800 x 600 1024 x 768 1152 - Toshiba TDP-F10U | Owners Manual - Page 48
Specifications (Continued) „ List of supported signals (Component signals) Signal 480i 480p 576i 576p 720p 720p 1080i 1080i Horizontal Frequency (kHz) 15.8 kHz 31.5 kHz 15.6 kHz 31.3 kHz 45.0 kHz - Toshiba TDP-F10U | Owners Manual - Page 49
„ Pin assignment of COMPUTER IN terminals Mini D-sub 15 pin connector Pin No. 1 2 3 4 5 6 7 8 9 10 11 12 13 14 15 Signal Name RED GREEN BLUE NC GND GND GND GND VCC 5V GND NC SDA HSYNC VSYNC SCL Others 49 - Toshiba TDP-F10U | Owners Manual - Page 50
-
 1
1 -
 2
2 -
 3
3 -
 4
4 -
 5
5 -
 6
6 -
 7
7 -
8
-
9
-
10
-
11
-
12
-
13
-
14
-
15
-
16
-
17
-
18
-
19
-
20
-
21
-
22
-
23
-
24
-
25
-
26
-
27
-
28
-
29
-
30
-
31
-
32
-
33
-
34
-
35
-
36
-
37
-
38
-
39
-
40
-
41
-
42
-
43
-
44
-
45
-
46
-
47
-
48
-
49
-
50
 |
 |

Before Using
Preparations
Operations
Maintenance
Others
TDP-F10
LED PROJECTOR
OWNER’S MANUAL
In the spaces provided below, record the Model and Serial No. located at the bottom of your
projector.
Model No.
Serial No.
Retain this information for future reference.