Toshiba Tecra M9 PTM91C-TG709C Users Manual Canada; English - Page 100
Using optical disc drives, Inserting a module, Loading discs
 |
View all Toshiba Tecra M9 PTM91C-TG709C manuals
Add to My Manuals
Save this manual to your list of manuals |
Page 100 highlights
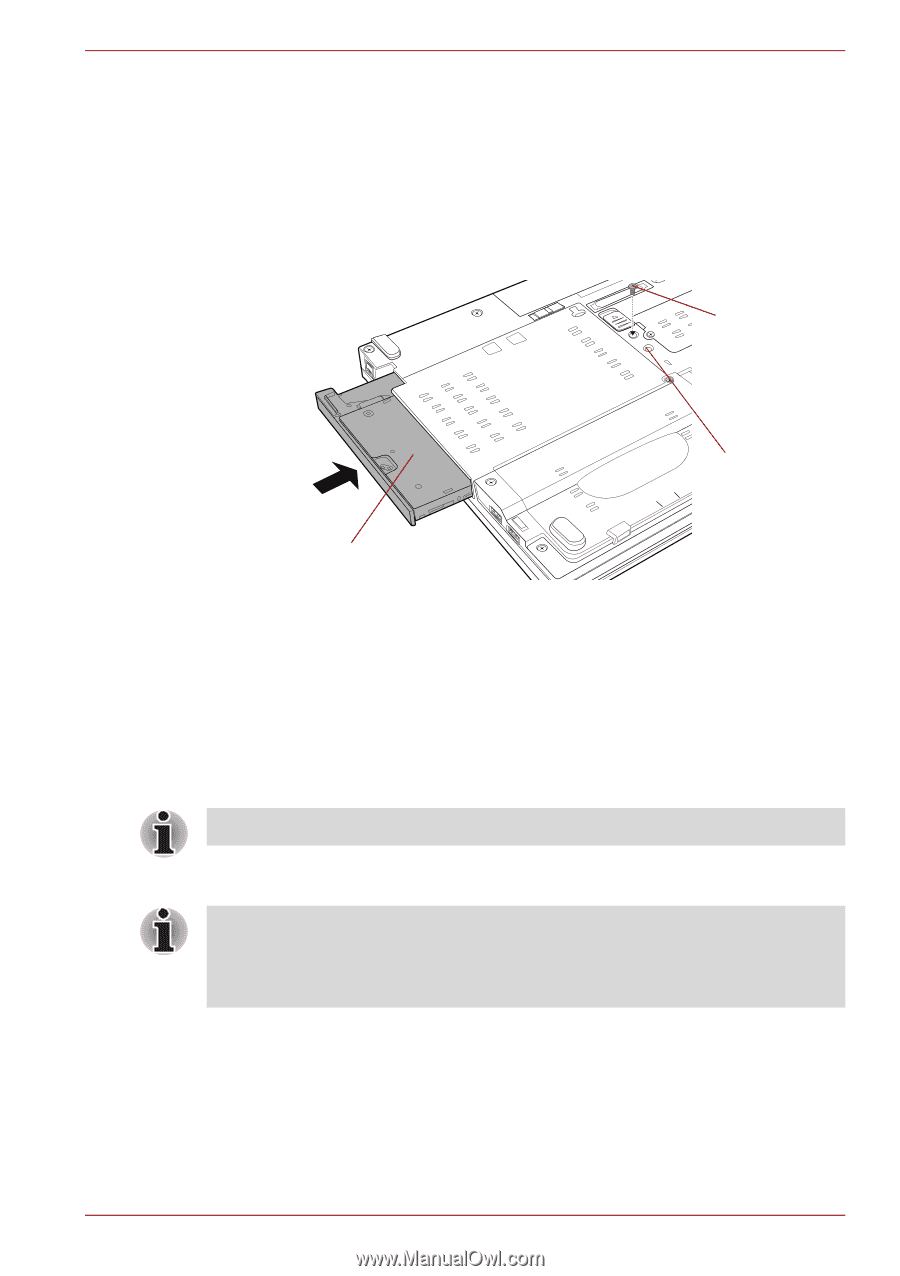
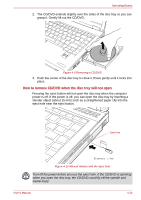
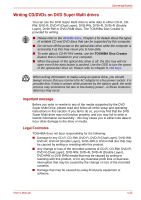
Operating Basics Inserting a module Insert the Ultra Slim Bay HDD Adaptor as described below. 1. Insert the Ultra Slim Bay HDD Adaptor in the computer as shown below and press until the ejector clicks. 2. Remove the Ultra Slim Bay lock screw from the Unlock position. 3. If you want to lock the Ultra Slim Bay HDD Adaptor, set the Ultra Slim Bay lock screw in the hole for the lock position. Lock screw (Lock position) Unlock position Ultra Slim Bay HDD Adaptor Figure 4-5 Inserting the Ultra Slim Bay HDD Adaptor Using optical disc drives The full-size drive provides high-performance execution of CD/DVD-ROMbased programs. You can run either 12 cm (4.72") or 8 cm (3.15") CD/DVDs without an adaptor. An ATAPI interface controller is used for CD/DVD-ROM operation. When the computer is accessing a CD/DVDROM, an indicator on the drive glows. Use the WinDVD application to view DVD-Video discs. If you have a DVD Super Multi drive, refer also to the Writing CD/DVDs on DVD Super Multi drives section for precautions on writing to CDs/DVDs. When the power of the optical disc drive is off, pressing the FN + Tab keys will turn the power of the optical disc drive on. Furthermore, it is possible to set it to turn the power of the optical disc drive on and eject the tray at the same time. Loading discs To load CD/DVDs, follow the steps below. 1. When the computer's power is on, press the eject button to open the disc tray slightly. User's Manual 4-11
-
 1
1 -
2
-
3
-
4
-
5
-
6
-
7
-
8
-
9
-
10
-
11
-
12
-
13
-
14
-
15
-
16
-
17
-
18
-
19
-
20
-
21
-
22
-
23
-
24
-
25
-
26
-
27
-
28
-
29
-
30
-
31
-
32
-
33
-
34
-
35
-
36
-
37
-
38
-
39
-
40
-
41
-
42
-
43
-
44
-
45
-
46
-
47
-
48
-
49
-
50
-
51
-
52
-
53
-
54
-
55
-
56
-
57
-
58
-
59
-
60
-
61
-
62
-
63
-
64
-
65
-
66
-
67
-
68
-
69
-
70
-
71
-
72
-
73
-
74
-
75
-
76
-
77
-
78
-
79
-
80
-
81
-
82
-
83
-
84
-
85
-
86
-
87
-
88
-
89
-
90
-
91
-
92
-
93
-
94
-
 95
95 -
 96
96 -
 97
97 -
 98
98 -
 99
99 -
 100
100 -
 101
101 -
 102
102 -
 103
103 -
 104
104 -
 105
105 -
106
-
107
-
108
-
109
-
110
-
111
-
112
-
113
-
114
-
115
-
116
-
117
-
118
-
119
-
120
-
121
-
122
-
123
-
124
-
125
-
126
-
127
-
128
-
129
-
130
-
131
-
132
-
133
-
134
-
135
-
136
-
137
-
138
-
139
-
140
-
141
-
142
-
143
-
144
-
145
-
146
-
147
-
148
-
149
-
150
-
151
-
152
-
153
-
154
-
155
-
156
-
157
-
158
-
159
-
160
-
161
-
162
-
163
-
164
-
165
-
166
-
167
-
168
-
169
-
170
-
171
-
172
-
173
-
174
-
175
-
176
-
177
-
178
-
179
-
180
-
181
-
182
-
183
-
184
-
185
-
186
-
187
-
188
-
189
-
190
-
191
-
192
-
193
-
194
-
195
-
196
-
197
-
198
-
199
-
200
-
201
-
202
-
203
-
204
-
205
-
206
-
207
-
208
-
209
-
210
-
211
-
212
-
213
-
214
-
215
-
216
-
217
-
218
-
219
-
220
-
221
-
222
-
223
-
224
-
225
-
226
-
227
-
228
-
229
-
230
-
231
-
232
-
233
-
234
-
235
-
236
-
237
-
238
-
239
-
240
 |
 |