Uniden ANA9320 English Owners Manual - Page 20
Charging Unit Wall Mounting
 |
View all Uniden ANA9320 manuals
Add to My Manuals
Save this manual to your list of manuals |
Page 20 highlights
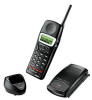
Charging Unit Wall Mounting The Charging Unit is also designed to be wall mounted. Before mounting your charging unit, consider the following: n Select a location away from electrical cables, pipes, or other items behind the mounting location that could cause a hazard when inserting screws into the wall. n Make sure the wall material is capable of supporting the weight of the Charging Unit. n Use #10 screws with anchoring devices suitable for the wall material where the Charging Unit will be placed. 1. Insert two mounting screws 1-1/5 inches apart. Allow about 3/16 of an inch between the wall and screw heads for mounting the phone. 2. Pass the one end through the hole of the wall mount stand and plug it into the Charging Unit. Wrap the AC Adapter cord around the strain relief. 14
-
 1
1 -
2
-
3
-
4
-
5
-
6
-
7
-
8
-
9
-
10
-
11
-
12
-
13
-
14
-
 15
15 -
 16
16 -
 17
17 -
 18
18 -
 19
19 -
 20
20 -
 21
21 -
 22
22 -
 23
23 -
 24
24 -
 25
25 -
26
-
27
-
28
-
29
-
30
-
31
-
32
-
33
-
34
-
35
-
36
-
37
-
38
-
39
-
40
-
41
 |
 |
