Uniden SDS200 English Owner Manual
Uniden SDS200 Manual
 |
View all Uniden SDS200 manuals
Add to My Manuals
Save this manual to your list of manuals |
Uniden SDS200 manual content summary:
- Uniden SDS200 | English Owner Manual - Page 1
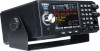
SDS200 Owner's Manual ©2018 Uniden America Corporation U01UB384ZZZ(0) Printed in Vietnam - Uniden SDS200 | English Owner Manual - Page 2
, Irving, Texas. At Uniden, we are always improving our products. This manual may not contain the latest improvements to this model. Check our Owner's Manual downloads at www.uniden.com for the latest updates. © 2018 Uniden America Corporation, Irving, Texas. Questions? Problems? Get help on the - Uniden SDS200 | English Owner Manual - Page 3
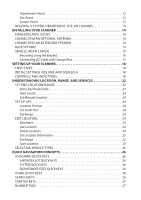
THIS MANUAL 1 SCANNER 8 BASIC USAGE INFORMATION 9 UNDERSTANDING THE MEMORY 9 FAVORITES LISTS 9 SYSTEMS 9 TRUNKING SITES 9 DEPARTMENTS 9 SENTINEL SOFTWARE 9 MANAGE PROFILES 9 MANAGE FAVORITES LISTS 10 MANAGE DATABASES 10 HOW TO INSTALL SENTINEL SOFTWARE 10 UPDATING FIRMWARE 10 UPDATING - Uniden SDS200 | English Owner Manual - Page 4
YOUR SCANNER 14 POWER RELATED ISSUES 14 CONNECTING AN OPTIONAL ANTENNA 14 SCANNER 18 FIRST STEPS 18 INITIAL SETTINGS (VOLUME AND SQUELCH 18 CONTROLS AND INDICATORS 18 UNDERSTANDING LOCATION, RANGE, AND SERVICES 22 SETTING LOCATION/RANGE 23 Enter Zip/Postal Code 23 Auto Locate 24 Set Manual - Uniden SDS200 | English Owner Manual - Page 5
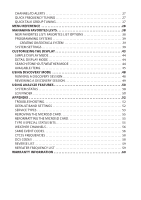
ITEMS 45 USING DISCOVERY MODE 48 RUNNING A DISCOVERY SESSION 48 REVIEWING A DISCOVERY SESSION 49 USING ANALYZE FEATURES 50 SYSTEM STATUS 50 LCN FINDER 50 APPENDIX 52 TROUBLESHOOTING 52 DEFAULT BAND SETTINGS 52 SERVICE TYPES 53 REMOVING THE MICROSD CARD 55 REFORMATTING THE MICROSD CARD - Uniden SDS200 | English Owner Manual - Page 6
- Uniden SDS200 | English Owner Manual - Page 7
describes the functions and features of your scanner. It assumes that you know the basic structure of radio systems and how they work. Just as a car owner's manual does not teach you how to drive, this manual does not teach you about radio systems. There are many resources for learning about radio - Uniden SDS200 | English Owner Manual - Page 8
Uniden, or operation of this product in any way other than as detailed by this Users Guide, could void your authority to operate this product. Warning: Modification of this device to receive cellular radiotelephone service instructions relocate the receiving antenna. • Increase the this scanner - Uniden SDS200 | English Owner Manual - Page 9
. Liquid Exposure Warning Uniden does not represent this unit to be waterproof. This product is not warranteed against water damage SCANNING LEGALLY Your scanner covers frequencies used by many different groups, including police and fire departments, ambulance services, government agencies, private - Uniden SDS200 | English Owner Manual - Page 10
version française de ce guide d'utilisation est disponible sur le site Web d'Uniden au : www.uniden.com. • Sur le site d'Uniden, sélectionnez " Support", puis " Owner's Manuals". • Au menu déroulant de sélection des produits, choisissez "Scanners". • Sélectionnez le modèle et cliquez sur le drapeau - Uniden SDS200 | English Owner Manual - Page 11
Uniden SDS200 . If you manually enter your location or connect an optional GPS receiver, your scanner will select channels Updating the radio database in your SDS200 is as simple as connecting it to your PC and running the included Sentinel software. WHAT YOU HEAR Your scanner has over 10,000 police - Uniden SDS200 | English Owner Manual - Page 12
is updatable with the Sentinel software and Uniden updates the scanner can scan any combination of Favorites Lists and the Full Database. microSD card (provided - 1 GB up to 32 GB supported review and identification. Scan by Service Types - Scan your channels by Service Type i.e. Fire, Police - Uniden SDS200 | English Owner Manual - Page 13
is transmitted. You can set up to 32 Tone-Outs. The scanner will also search and display unknown tones. PC Programming - Use the Sentinel software to manage your scanner's Profiles, Favorites Lists, Databases, and firmware updates. Priority/Priority w/DND Scan - priority channels let you keep track - Uniden SDS200 | English Owner Manual - Page 14
INCLUDED WITH YOUR SCANNER Accessories included in the box are: • AC Adapter • DC Adapter • Mobile power harness • USB Cable • MicroSD Card (installed) • BNC type Telescoping Antenna • Mounting Bracket and Hardware • Printed Material 8 - Uniden SDS200 | English Owner Manual - Page 15
systems. You can also manually add systems, departments and channels into Favorites Lists from the database as well as program new systems, departments, sites, and channels with the Sentinel software. You can save up to 256 different Favorite Lists in the scanner (and software) and associate them - Uniden SDS200 | English Owner Manual - Page 16
SENTINEL SOFTWARE 1. Go to the scanner's product page at Uniden.com and click the link for support files. 2. Download the latest version of Sentinel. 3. Unzip the file you downloaded, then click on setup.exe and follow the on-screen instructions to install Sentinel. UPDATING FIRMWARE Your scanner - Uniden SDS200 | English Owner Manual - Page 17
scanned and in order of creation. Conventional Channels and Departments within Systems are also scanned in order of creation. TGIDs are not really scanned. The scanner checks for any activity in the trunking system and: • Stops on all unavoided TGIDs when ID Search mode is set to On. • Stops only on - Uniden SDS200 | English Owner Manual - Page 18
not get a "Nothing to Scan" message on the scanner: 1. You must enable at least one Favorites List or with quick keys or through Manage Quick Key Status. 3. Service Types required for channels must be set to On. 4. when you cycle power. You must manually clear permanent avoids. Channel Avoid When - Uniden SDS200 | English Owner Manual - Page 19
Department Avoid Press DEPT (Soft Key 2) then AVOID once to Temporary Avoid. Press AVOID twice to Permanent Avoid. Site Avoid To Temporary Avoid, press F+Site (Soft Key 2) then quickly press AVOID. To Permanent Avoid, press F+Site (Soft Key 2) then quickly press AVOID twice. To Stop Avoiding, press - Uniden SDS200 | English Owner Manual - Page 20
INSTALLING YOUR SCANNER The SDS200 can be placed on a convenient surface in your home as a base station, and connected to a standard outlet that supplies 120VAC, 60Hz. You must use either the supplied antenna or an electrically correct outdoor antenna, properly and safely mounted at your chosen site - Uniden SDS200 | English Owner Manual - Page 21
rear, upper right side of the radio marked. Insert the connector of the supplied indoor telescoping antenna to the BNC Antenna Connector and apply moderate pressure to secure it. VEHICLE INSTALLATION You can mount your scanner in your vehicle, using either an optoinal bracket or DIN-E sleeve. If the - Uniden SDS200 | English Owner Manual - Page 22
bracket. 2. Insert the scanner and insert the bracket knobs to lock the scanner in position. 3. Attach the Cigarette Lighter Power Cord to the rear of the scanner and plug the adapter end into a dash mounted 12V DC socket. 4. Attach a suitable mounted mobile antenna to the antenna jack on the back - Uniden SDS200 | English Owner Manual - Page 23
the power, audio, antenna, and any other cables or wires, to the scanner before the scanner is secured. The following illustration is a typical example of the ISO technique and the general side mounting screw holes often encountered. It does not actually represent the Uniden scanner or your vehicle - Uniden SDS200 | English Owner Manual - Page 24
scanner by rotating VOLUME / clockwise. 3. When prompted, select Mass Storage mode. 4. Run Sentinel. 5. Follow the steps provided on pages 10 and 11 to update the scanner's firmware press the ZIP SERVICES button then select your country and enter your zip/postal code. The scanner loads channels for - Uniden SDS200 | English Owner Manual - Page 25
on the scanner and increase volume. • Rotate to the left to decrease volume and turn off the scanner. • • Press PUSH/FUNC then ZIP SERVICES to select Service Types to be scanned. The RECORD to start/stop recording • Press and hold to Review Recordings. • Press to select Favorites List Quick Keys in - Uniden SDS200 | English Owner Manual - Page 26
KEY 2 / SRCH2 3 / SRCH3 4 / ATT 5 / DIM 6 / WX 7 / IFX 8 / REV 9 / DISP 0 / LVL OPERATION • Press to enter the digit 2 in any numeric entry mode. • In channel hold mode, press PUSH/FUNC then 2 to toggle on/off the search you've assigned to SRCH2. • Press to enter the digit 3 in any numeric entry - Uniden SDS200 | English Owner Manual - Page 27
KEY .NO/PRI E/YES/Q. SRCH OPERATION • Press to enter a decimal point for a frequency. • Press when prompted Yes/No to select No. • Press PUSH/FUNC then.NO/PRI to toggle conventional priority scan. • Press to select a menu item or save an entry in Menu mode • In Channel hold mode, press to store a - Uniden SDS200 | English Owner Manual - Page 28
UNDERSTANDING LOCATION, RANGE, AND SERVICES All radio systems in your scanner's database are tagged with location information. A geotag has each channel is used, etc). If you use your zip code as your location, the scanner sets your location to be within 10 miles of the center of the zip code. Good - Uniden SDS200 | English Owner Manual - Page 29
In addition to the 10-mile zip code radius, the scanner uses: • Auto Locate: 30-miles radius from the discovered radio tower. • GPS or Manual Location: 0-miles radius. 0 miles means that your to enter a postal code. 3. You can also press the ZIP SERVICES button to enter your zip/postal code. 23 - Uniden SDS200 | English Owner Manual - Page 30
your exact location) and a default scan range of 30 miles. Press E/YES/Q.SRCH or .NO/PRI to accept the location. Press MENU to cancel. Set Manual Location This sets your exact location and a default scan range of 0 miles. You can then edit the location name and save the location. 1. Using the - Uniden SDS200 | English Owner Manual - Page 31
. Set Location Information See Set Manual Location, 2. Set Range Enter service types: 1. Press PUSH/FUNC then the ZIP/SERVICES button. 2. Scroll to each Service Type and press E/YES/Q.SRCH to enable or disable. Press SYSTEM to exit. If a Service Type is not in any active Favorite List, the scanner - Uniden SDS200 | English Owner Manual - Page 32
(FLQK) quickly enable or disable entire Favorites Lists for scanning. There are 100 FLQKs (00-99). These are like the bank keys used on older scanners. You do not have to assign a FLQK to a favorites list, but doing so makes it easier to modify what you are currently scanning. Each FLQK - Uniden SDS200 | English Owner Manual - Page 33
and press Channel (Soft Key 3). CHANNEL/ID ALERTS You can program your scanner to alert you when a Channel or Unit ID is received, you receive Emergency Alert or you receive a Tone-out hit. For each alert in the scanner, you can select from 9 different tone patterns, 15 volume settings, 7 colors, - Uniden SDS200 | English Owner Manual - Page 34
manual will refer to this button as MENU. When describing menu navigation, this manual similar to service searches used in older scanners. Select Lists On. Manage Full Database Review Avoids Scroll to entries in updated in the scanner. Manage Favorites See Managing Favorites Lists on page 28 - Uniden SDS200 | English Owner Manual - Page 35
Manual Location Set Up GPS Set Range Edit Location Save Location SETTING OR SUBSUB MENU SETTING Select USA or Canada then enter your zip code or the first 3 digits of your postal code. The scanner most units. Sets the range, in miles, the scanner should look out from the set location to determine - Uniden SDS200 | English Owner Manual - Page 36
Types Srch/CloCall Opt SUB MENU SETTING OR SUBSUB MENU SETTING The scanner displays a list of all service types. Scroll to a service type and press E to toggle that service type on or off. Note that if no channels in the currently scanned database or favorites list(s) include a particular - Uniden SDS200 | English Owner Manual - Page 37
set time, 3 even if transmission 4 continues. 5 . . . On Apply 20dB attenuation to all reception. Off Attenuation is off. Sets how long the scanner evaluates the received signal before opening squelch. Start a custom search. Use the 0-9 keys to turn on/off each search range. Select - Uniden SDS200 | English Owner Manual - Page 38
with Scan Close Call Only Hits with Scan Set CC Mode SETTING OR SUBSUB MENU SETTING Digital Waiting Time Sets how long the scanner evaluates the received signal before opening squelch. Search with Scan Set Avoid option lets you stop avoiding (i.e. include the search during scan), temporarily - Uniden SDS200 | English Owner Manual - Page 39
blink pattern for the alert. Set CC Pause Scroll to set how long the scanner displays the Close Call hit before resuming. Set CC Bands Scroll to each band is set by setting, below. Set Interval Select how often the scanner will check for traffic on conventional priority channels. Default is 2 - Uniden SDS200 | English Owner Manual - Page 40
MENU Tone-Out-For SUB MENU Weather Alert Review WX Alerts Program SAME Set Delay Time Set Attenuator WX Alt Priority Tone-Out Standby Tone-Out Setup SETTING OR SUBSUB MENU SETTING Select how the scanner responds to weather alerts: • Alert Only the scanner responds to any alert received when it - Uniden SDS200 | English Owner Manual - Page 41
search for tones leave both settings at 0. Set Delay Time Select how long the scanner waits after the carrier drops to return to tone-out standby mode. Set Alert Set when the display backlight is off (so you can tell the scanner is on). External Power Backlight On = Always turn on backlight - Uniden SDS200 | English Owner Manual - Page 42
Band Defaults Auto Shutoff Set LAN Settings Note: The scanner automatically restarts if you change any LAN settings and then Manual is selected. Show IPs Displays IP information such as LAN mode, IP address, etc. Set Replay Duration Set how much audio is included in the replay buffer. Review - Uniden SDS200 | English Owner Manual - Page 43
MAIN MENU SUB MENU Restore Options See Scanner Information. SETTING OR SUBSUB MENU Clear User Data Reset User Settings % Memory Used Firmware Version SETTING Delete all Favorites Lists and user settings. Clear user settings w/o affecting Favorites Lists. Displays the remaining capacity of the - Uniden SDS200 | English Owner Manual - Page 44
press E/YES/Q.SRCH. Scroll to the options below and press E/YES/Q.SRCH. Review/Edit System - See Programming Systems. Set FL Quick Key - This assigns a number tag. Set FL Startup Key - This allows you to turn on the scanner with the Favorites List enabled for scan. The default settings are all keys - Uniden SDS200 | English Owner Manual - Page 45
Use Location Control set to No, only channels that are from the selected service types are added. Rename - This allows you to rename the Favorites List you want the system to go into, then press E/YES/Q.SRCH. 2. Scroll to Review/Edit System and press E/YES/Q.SRCH. 3. To Create a New System, scroll - Uniden SDS200 | English Owner Manual - Page 46
(default is to not ignore). Sets the alert sound and alert indicator when the scanner receives an emergency status from the system. DMNE Sets the format used to enter/display N talk group IDs. Lets you review and remove avoids PMNDEL from talk group IDS Removes avoid status for all system - Uniden SDS200 | English Owner Manual - Page 47
OPTION Set Attenuator Set Avoid Set Location Information Delete Site New Site DESCRIPTION Set whether attenuation is applied for the site. Set the avoid status for the site. Select whether to use a circle or rectangles to define the site location, then enter the appropriate parameters to define the - Uniden SDS200 | English Owner Manual - Page 48
method used for C the channel Set Attenuation Set whether the channel is RF C attenuated Set Service Type Set the service tag for the channel. PMDNELC Set Delay Time Set how long the scanner holds on the channel after a transmission stops while waiting for a reply. Default is 2 seconds - Uniden SDS200 | English Owner Manual - Page 49
CUSTOMIZING THE DISPLAY The SDS200 gives you considerable control over what items are shown on cannot fit into all the different display fields. After selecting the display mode to customize, the scanner displays a sample display in the mode you selected. Rotate the scroll to highlight the area you - Uniden SDS200 | English Owner Manual - Page 50
SIMPLE DISPLAY MODE Conventional and Trunked mode share the same color scheme, but different display items are available for each mode. F Option_1 SP0 Option_5 Option_2 Option_6 Option_3 Option_7 Option_4 Option_8 SIG BAT KEY DIR System Name (30 char x 2) System Option AVOID Dept Name ( - Uniden SDS200 | English Owner Manual - Page 51
3 Option_2 Option_3 Option_4 Option_7 Option_8 Option C_1 Option C_2 Primary 1 (30 x 1) Primary 2 (30 x 1) SIG BAT KEY DIR Primary 3 (30 x 1) Sub Info Mod Detail info AVOID HOLD Option A_1 Option B_1 Option A_2 Option B_2 Option A_3 Option B_3 ICON1 ICON2 ICON3 ICON4 ICON5 ICON6 - Uniden SDS200 | English Owner Manual - Page 52
CTCSS/DCS/NAC Latitude Longitude Noise RF Sub System (RFSS) ID RSSI Graph Service Type Attenuator Site Name USB1 vbus voltage USB2 vbus voltage Volume & Squelch WACN P25 Status Date Time Modulation Broadcast Screen Close Call Digital Status GPS - Uniden SDS200 | English Owner Manual - Page 53
Icon Area Item Priority Scan Close Call WX Priority REC IF eXchange GPS Broadcast Screen Repeater Find Volume Offset Modulation P-Channel Sample PRI CC (icon) WX REC IFX GPS SCR REF V+x NFM P 47 - Uniden SDS200 | English Owner Manual - Page 54
save several sessions with different settings. Every time you start a session you create a Run that can later be reviewed in the scanner or the Sentinel software. RUNNING A DISCOVERY SESSION To start a discovery session: Press MENU → Discovery then select either Trunking Discovery or Conventional - Uniden SDS200 | English Owner Manual - Page 55
the frequency or TGID is considered "discovered." Sets how long the scanner will monitor a hit before resuming scan automatically. This prevents open discovery session, including all hits. REVIEWING A DISCOVERY SESSION In Review Discovery mode, you can review the results of discovery mode runs, - Uniden SDS200 | English Owner Manual - Page 56
USING ANALYZE FEATURES The SDS200 includes some analysis features that can help you find out LCN when you create the system, then run the LCN Finder by: MENU → Analyze → LCN Finder The scanner prompts for a trunked system. For LCN Finder to run, the system must currently be scannable (in an active - Uniden SDS200 | English Owner Manual - Page 57
Once all LCNs are found, you can save the LCNs to the system. If you abort before all LCNs are found, you can still save the LCNs that were found up to that point. Note that LCN finder works best on systems with moderate activity. Too much traffic or too little traffic make LCN finder take longer to - Uniden SDS200 | English Owner Manual - Page 58
APPENDIX TROUBLESHOOTING PROBLEM Scan Mode, Nothing to Scan Scanning Interrupted Every Few Seconds All Channels Out of Range SOLUTION • Make sure you Set Your Location to scan the Database. • Make sure Favorites Lists are enabled in Set Scan Selection. • Make sure Service Types are enabled for the - Uniden SDS200 | English Owner Manual - Page 59
from 5/6.25/7.5/8.33/10/12.5/15/20/25/50/100/AUTO (kHz). • Although TV bands are listed, the scanner cannot decode digital TV audio. SERVICE TYPES SERVICE TYPE Aircraft Business Corrections Emergency Ops DESCRIPTION For civilian aircraft and air traffic control operations most typically in the - Uniden SDS200 | English Owner Manual - Page 60
talk-around and car-to-car operations. Public agency non-public safety communications. This includes any nonpublic safety government services, such as trash, streets, roads, sewer, zoos, administration, maintenance, animal control, community initiatives, code compliance, etc. Available for use - Uniden SDS200 | English Owner Manual - Page 61
TYPE Custom 1-8 DESCRIPTION User-defined service types. REMOVING THE MICROSD CARD Turn your scanner off. Carefully remove the microSD SD Card Formatter (https://www. sdcard.org/downloads/formatter_4/). Then, you need to "Clear User Data" using Sentinel to restore all files and directories to the - Uniden SDS200 | English Owner Manual - Page 62
they do dispatch tone-outs and alarms as Multi-selects, then those communications will be on talk group 1623. WEATHER CHANNELS Channel 1 2 3 4 Frequency 162.550 162.400 162.475 162.425 Channel 5 6 7 Frequency 162.450 162.500 162.525 SAME EVENT CODES STANDARD ADR AVA AVW BHW BWW BZW CAE CDW - Uniden SDS200 | English Owner Manual - Page 63
STANDARD FLS FLW FRW FSW FZW HLS HMW HUA HUW HWA HWW IBW IFW LAE LEW LSW NAT NIC NMN NPT NST NUW POS RHW RMT RWT SMW SPS SPW SVA SVR SVS TOA TOE TOR TRA TRW TSA TSW TXB EVENT CODE Flood Statement Flood Warning Fire Warning Flash Freeze Warning Freeze Warning Hurricane Statement Hazardous Material - Uniden SDS200 | English Owner Manual - Page 64
199.5Hz 203.5Hz 206.5Hz 210.7Hz 218.1Hz 225.7Hz 229.1Hz 233.6Hz 241.8Hz 250.3Hz 254.1Hz DCS CODES The scanner can detect the following 104 hexadecimal DCS codes. 006 031 054 116 145 205 245 266 332 411 452 506 612 703 007 032 065 - Uniden SDS200 | English Owner Manual - Page 65
REVERSE LIST RANGE (MHZ) 29.5200 - 29.5800 29.6200 - 29.6800 52.0100 - 52.9900 53.0100 - 53.9900 143.7500 143.9000 144.5100 - 144.8900 145.1100 - 145.4900 146.0100 - 146.3850 146.4150 - 146.5050 146.5950 146.6100 - 146.9850 147.0000 - 147.3900 147.4150 - 147.5050 147.5950 147.6000 - 147.9900 148. - Uniden SDS200 | English Owner Manual - Page 66
than an authorized Uniden service center for a defect or malfunction covered by this warranty, (E) used in any conjunction with equipment or parts or as part of any system not manufactured by Uniden, or (F) installed or programmed by anyone other than as detailed by the Operating Guide for this - Uniden SDS200 | English Owner Manual - Page 67
- Uniden SDS200 | English Owner Manual - Page 68
-
 1
1 -
 2
2 -
 3
3 -
 4
4 -
 5
5 -
 6
6 -
 7
7 -
8
-
9
-
10
-
11
-
12
-
13
-
14
-
15
-
16
-
17
-
18
-
19
-
20
-
21
-
22
-
23
-
24
-
25
-
26
-
27
-
28
-
29
-
30
-
31
-
32
-
33
-
34
-
35
-
36
-
37
-
38
-
39
-
40
-
41
-
42
-
43
-
44
-
45
-
46
-
47
-
48
-
49
-
50
-
51
-
52
-
53
-
54
-
55
-
56
-
57
-
58
-
59
-
60
-
61
-
62
-
63
-
64
-
65
-
66
-
67
-
68
 |
 |
©2018 Uniden America Corporation
U01UB384ZZZ(0)
Printed in Vietnam
SDS200
Owner’s Manual