ViewSonic PJ506ED User Manual - Page 20
Powering On/Off the Projector
 |
View all ViewSonic PJ506ED manuals
Add to My Manuals
Save this manual to your list of manuals |
Page 20 highlights
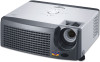
Powering On/Off the Projector Powering on the projector: 1. Remove the projector lens cap. 2. Complete the AC power cord and peripheral signal cable(s) connections. 3. Press button to turn on the projector. 4. Turn on your source (computer, notebook, DVD, etc.). The projector automatically detects your source. When searching message appears on the screen, ensure that the appropriate signal cable(s) are securely connected. The signal message will appear on the screen when the source is detected. If you are connecting multiple sources to the projector simultaneously, press Source button. Warning: Remove the lens cap first before powering on. Never look into the lens when the lamp is on. This can damage your eyes. It is especially important that children are not allowed to look into the lens. Powering Off the Projector: 1. Press button to turn off the projector lamp. You will see a message "Power Off? Press Power again" appear on the screen. 2. Press button again to confirm. 3. The cooling fans continue to operate for cooling cycle and the Lamp LED goes out. When the Power LED begins flashing, the projector has entered standby mode. If you wish to turn the projector back on, you must wait until the projector has completed the cooling cycle and has entered standby mode. Once in standby mode, simply press button to restart the projector. 4. Disconnect the power cord from the electrical outlet and the projector. 5. Do not turn on the projector immediately following a power off procedure. Please wait until the fan motor and the Lamp LED turn off before removing the AC power cord from the projector. ViewSonic 15 PJ506ED
-
 1
1 -
2
-
3
-
4
-
5
-
6
-
7
-
8
-
9
-
10
-
11
-
12
-
13
-
14
-
 15
15 -
 16
16 -
 17
17 -
 18
18 -
 19
19 -
 20
20 -
 21
21 -
 22
22 -
 23
23 -
 24
24 -
 25
25 -
26
-
27
-
28
-
29
-
30
-
31
-
32
-
33
-
34
-
35
-
36
-
37
-
38
-
39
-
40
 |
 |
