Vivitar 285-HV User Guide - Page 6
Shooting, Manually, Fill-in, Flash
 |
View all Vivitar 285-HV manuals
Add to My Manuals
Save this manual to your list of manuals |
Page 6 highlights
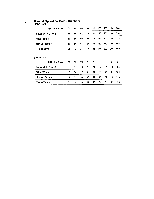
C. OFF-CAMERA DIRECT and BOUNCE FLASH An entirely new realm of photography opens up to you when you use your Vivitar 285HV off the camera for more pleasing direct lighting or for extra soft automatic bounce flash lighting. The Sensor on the flash may be removed and mounted on your camera accessory shoe via the optional Vivitar SC-3 sensor connecting cord. The flash can then be aimed either directly at the subject or at many different types of reflective surfaces such as ceilings, walls or photo umbrellas and still maintain fully automatic exposure control. From an operating standpoint, off-camera bounce flash is the same as on-camera bounce flash. For your convenience, various Vivitar accessories are currently available for use in off-camera flash work: • The Vivitar SC-3, a 1.2 meter coiled extension cord, enables mounting of the removable flash sensor onto your camera accessory shoe. Provides flash synchronization with camera. • The Vivitar PPG-1 Power Pistol Grip, or the PG-2 Pistol Grip Kit, for ease of handling. The PPG-1 also provides auxiliary power for faster recycle time and more flashes. The Kit includes the Pistol Grip, the 35mm Camera Bracket and the Cable Release. Shooting Manually A. DIRECT FLASH If you wish to use your 285HV in the Manual Mode (for taking pictures beyond the automatic flash range or when using multiple flash lighting), proceed as follows, 1. Set the Mode Selector Dial (24) to the manual "M" position. 2. Estimate the distance from the flash to the subject. The easiest way to do this is to focus your camera and refer to the distance indicated on the camera lens barrel after focusing. 18 1. In rooms of average size and color, a good general rule is to open your lens TWO f-stops wider than if you were shooting direct. OR.. . 2. After setting the proper ISO/DIN number on the Calculator Dial, find the total flash-to-reflector-to-subject distance on the Calculator Dial and note the f-stop indicated above that distance. Open your lens ONE f-stop wider than indicated on the dial. EXAMPLE: Photographing at a flash-reflector-subject distance of 20 feet with ISO 100 film, flash f-stop is f5.6, but you must set your camera lens to f4.0. OR. . . 3. If the total bounce distance exceeds the maximums appearing on the Calculator Dial, first measure the distance from the flash to the reflecting surface to the subject. Then, divide that total distance into the flash Guide Number for the film speed you are using and the Zoom/Bounce Head position. Note the resulting number (round off the the nearest f-stop), and open your lens ONE f-stop wider. NOTE: When figuring flash to subject distance using manual bounce flash. be sure to consider the light absorption of the reflective surface. Bouncing off surfaces such as curtains, for example, will add to the effective distance between the flash, the reflector and the subject. To ensure properly exposed pictures when bouncing off curtains or acoustical tile ceilings, open your lens ONE additional f-stop over the setting determined by any of the above methods. VARI-POWER There are cases where you may wish to go beyond the basic "normal" manual operation as explained above. Such cases might be for flash fill-in outdoorS, multiple flash light with light ratio control, need for faster recycle time, faster action freezing, or when you want to use a specific f-stop not available in auto mode for depth of field control. 20 3. Find the flash-to-subject distance on the Calculator Dial Distance Scale and set your lens to the f-stop indicated above that distance. (Disregard the colored wedges on the Dial when shooting in the manual mode.) EXAMPLE: If you are 40 feet from your subject and are using the NORM flash head position and ISO 100 film, set your lens f-stop to f2.8. (See photo A.) 4. Slide the On-Off Switch to the RED "ON" position. Check camera focus. Take the picture when the green Ready Light glows. CAUTION: For rapid sequence flash pictures in the manual mode, you may fire your 285HV as soon as the green Ready Light glows. However, to prevent possible damage, avoid a continuous series of more than 25 flashes and allow the unit to "rest" for 4 minutes between series. Zoom If you want to extend or retract your Zoom/Bounce Head to the TELE or WIDE setting, it will affect your f-stop and/or operating range, and you should recheck your Calculator Dial for new information. NOTE: If you wish to mathematically calculate your f-stops, divide the Guide Number by the flash-to-subject distance. Remember that the Guide Number will change with extension or retraction of the Zoom/Bounce Head. See the Manual Operation Chart for a complete listing of Guide Numbers for various films speeds (ASA/ISO and DIN) for each of the three zoom head positions and the Super Wide Angle Flash Lens. B. BOUNCE FLASH Your 285HV can be used in the manual "M" mode for bounce flash at distances beyond the maximum automatic operating range. First, set the Mode Selector Dial to manual "M." To determine the proper exposure when using bounce flash in the manual mode, use any ONE of the following methods: 19 To handle these needs, your Vivitar Model 285HV has a variable power system. With Vari-Power, you can reduce the light output levels from full power to 1/2, 1/4 or 1/16 power. To operate the Vari-Power system: 1 Set the black arrow of the VanPower Dial (inner ring of the Calculator Dial) to: 1/2 1/4 1/16 2 Set the Mode Selector Dial to: 1/2 1/4 1/16 3 Increase (open) camera aperture: 1 f-stop 2 f-stops 4 f-stops As you turn the inner ring, the Calculator Dial will automatically indicate the new f-stop above the flash-to-subject distance. Fill-in Flash Your flash can be used outdoors in the daytime, either for better lighting on overcast days or to reduce shadows on bright days. 1. Set your camera to the correct shutter speed for synchronization with electronic flash. (Refer to your camera instructions for the correct speed.) 2. Using your built-in or hand-held meter, determine the f-stop required for a daylight exposure at the flash sync speed. 3. Set the Vari-Power Dial (19) to align the camera-to-subject distance with the f-stop indicated by the meter. EXAMPLE: Zoom/Bounce Head in NORM position, ISO 100 (DIN 21), synchronized at 1/60, meter reading f16, camera-tosubject distance 5 ft. You want strong fill-in flash. Rotate the Vari-Power Dial (inner ring of Calculator Dial) until f16 aligns with 5 ft., and your resulting Vari-Power reading is 1/2. (See photo B.) Recheck the film speed setting to make sure it hasn't 21
-
 1
1 -
 2
2 -
 3
3 -
 4
4 -
 5
5 -
 6
6 -
 7
7 -
 8
8
 |
 |