Vizio E75-E3 User Manual English
Vizio E75-E3 Manual
 |
View all Vizio E75-E3 manuals
Add to My Manuals
Save this manual to your list of manuals |
Vizio E75-E3 manual content summary:
- Vizio E75-E3 | User Manual English - Page 1
VIZIO USER MANUAL Model E55-E1, E55-E2, E60-E3, E65-E0, E65-E1, E70-E3, E75-E1, E75-E3, & E80-E3 - Vizio E75-E3 | User Manual English - Page 2
service plan, visit www.VIZIO.com. WHEN READING THIS MANUAL When you see this symbol, please read the accompanying important warning or notice. It is intended to alert you to the presence of important operating instructions electrician for replacement of the could short circuit parts causing a fire - Vizio E75-E3 | User Manual English - Page 3
cord must be replaced when using different voltage servicing other than that contained in the operating instructions unless you are qualified to do so. • The lightning flash with arrowhead symbol within an equilateral triangle is intended to alert the user set to a suitable support. • Not placing - Vizio E75-E3 | User Manual English - Page 4
For DTS patents, see http://patents.dts.com. Manufactured under license from DTS Licensing Limited. DTS, the Symbol, & DTS and the Symbol together are registered trademarks, and DTS Studio Sound is a trademark of DTS, Inc. © DTS, Inc. All Rights Reserved. Manufactured under license from Dolby - Vizio E75-E3 | User Manual English - Page 5
Replacing the Batteries 9 Completing First-Time Setup 10 Navigating the On-Screen Menu 11 Changing the Input Source 11 Changing the Screen Aspect Default Settings 28 Using the Info Window 29 Troubleshooting & Technical Support 30 Specifications 34 Regulatory Information 43 Legal Information - Vizio E75-E3 | User Manual English - Page 6
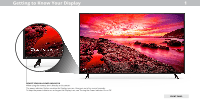
Getting to Know Your Display 1 REMOTE SENSOR & POWER INDICATOR When using the remote, aim it directly at this sensor. The power indicator flashes on when the Display turns on, then goes out after several seconds. To keep the - Vizio E75-E3 | User Manual English - Page 7
Note: The image shown here is for illustrative purposes only and may be subject to change. The actual number of ports and their locations may vary, depending on the model. 1 Ethernet - Connect an Ethernet cable to modem/ router. Optical Audio Out - Connect an optical/SPDIF audio device, such as a - Vizio E75-E3 | User Manual English - Page 8
of supporting the weight of the instructions that came with your mount. Use only with a UL-listed wall mount bracket rated for the weight E1 M6 400 mm (V) x 400 mm (H) 50.72 lb (23 kg) E70-E3 M6 400 mm (V) x 400 mm (H) 56.88 lb (25.8 kg) E75-E1 M8 400 mm (V) x 400 mm (H) 77.16 lb (35 kg) E75-E3 - Vizio E75-E3 | User Manual English - Page 9
- Go to the previous on-screen menu. 8. Info - Display supported on this model. 16. Number Pad - Not supported on this model. 17. Link - Launches pair with the VIZIO SmartCast App. 18. Dash - Not supported on this model. 17 18 1 Replacing the Batteries 1. Find the notch on the back of the remote - Vizio E75-E3 | User Manual English - Page 10
? Refer to the printed Quick Start Guide for detailed instructions on how to install your new E-Series display. You can also find a digital copy on support.vizio.com Setup with the IR Remote 1. Press the OK/Play key on your IR remote during the initial setup screen. 2. Use the Arrow Keys and the - Vizio E75-E3 | User Manual English - Page 11
remote. Use the Arrow buttons to highlight a menu option, and press the OK button to select that option. • Adjust the Network settings • Setting the Sleep Timers • Name and adjust Inputs • Adjust System settings • Access the user manual to change. The actual on-screen image and text may vary, - Vizio E75-E3 | User Manual English - Page 12
top or sides of the picture so that the picture keeps its original shape. Examples include wide-screen movies and older television programs. To change the screen aspect ratio: 1. Press the WIDE button on the remote. 2. Use the Arrow buttons to highlight the aspect ratio you wish to view and press OK - Vizio E75-E3 | User Manual English - Page 13
: 1. Press the MENU button on the remote. The on-screen menu is displayed. 2. Use the Arrow buttons on the remote to highlight Picture and press OK. The computer output. 4. To manually change each of the picture settings, use the Up/ Down Arrow buttons on the remote to highlight that picture setting - Vizio E75-E3 | User Manual English - Page 14
the backlight. The adjustment is controlled by the content on the screen. Select On or Off. • Motion Control - Adjusts motion related finished adjusting More Picture Settings, press the EXIT button on the remote. Adjusting the Color Temperature Adjusting the color temperature changes the white - Vizio E75-E3 | User Manual English - Page 15
PIN used for the System PIN. New PIN Confirm PIN Cancel Enter the 4-digit PIN using the numbers keys on the remote. 4. Press the EXIT button to exit the menu screens. To unlock all custom picture mode: 1. From the PICTURE MODE EDIT menu, use the Arrow buttons to highlight Lock Picture Mode - Vizio E75-E3 | User Manual English - Page 16
press OK. The DELETE PICTURE MODE window is displayed. To delete the user created Custom 1 picture mode, select the Delete button. Delete Cancel 2. Use Delete and press OK. 3. Press the EXIT button to exit the menu screens. Resetting a Picture Mode A preset picture mode that has been edited - Vizio E75-E3 | User Manual English - Page 17
White Balance, and test patterns allow technicians to manually calibrate the Display. Calibration requires specialized training, 0 0 Blue 0 2. Use the Arrow buttons on the remote to highlight the Gain and Color values you wish to adjust. screen image and text may vary, depending on the model. 17 - Vizio E75-E3 | User Manual English - Page 18
the Ramp Test Pattern menu is displayed. Ramp Test Pattern Off 2. Use the Arrow buttons on the remote to highlight Off. Use the Left/Right Arrow buttons to highlight On to show the SMPTE Pattern. and may be subject to change. The actual on-screen image and text may vary, depending on the model. 18 - Vizio E75-E3 | User Manual English - Page 19
Pattern menu is displayed. Uniformity Analyzer Test Pattern Off 2. Use the Arrow buttons on the remote to highlight Off. Use the Left/Right Arrow buttons to highlight On to show the Uniformity and may be subject to change. The actual on-screen image and text may vary, depending on the model. 3 19 - Vizio E75-E3 | User Manual English - Page 20
to reflect the mode. 5. Press the EXIT button on the remote. To create, modify, or replace the single custom equalizer setting: 1. Press the MENU button on the remote. The on-screen menu is displayed. 2. Use the Arrow buttons on the remote to highlight Audio and press OK. The AUDIO menu is displayed - Vizio E75-E3 | User Manual English - Page 21
To connect to a wireless network whose network name (SSID) is being broadcast: 1. Press the MENU button on the remote. The on-screen menu is displayed. 2. Use the Arrow buttons on the remote to highlight Network and press OK. The NETWORK menu is displayed. 3. If you do not see your wireless network - Vizio E75-E3 | User Manual English - Page 22
, enter your network's name (SSID), then highlight Connect and press OK 3. Using the on-screen keyboard, enter your network's password, then highlight Connect and press OK. 4. Press the EXIT button on the remote. Back Enter Access Point Name Enter your access point name. This is used to connect to - Vizio E75-E3 | User Manual English - Page 23
Display's sleep timer will turn the Display off after a set period of time. 1. Press the MENU button on the remote. The on-screen menu is displayed. 2. Use the Arrow buttons on the remote to highlight Timers and press OK. The TIMERS menu is displayed. Timers Sleep Timer Auto Power Off Back Off 10 - Vizio E75-E3 | User Manual English - Page 24
Player." See Changing the Input Source. To change the name of an input: 1. Press the MENU button on the remote. The on-screen menu is displayed. 2. Use the Arrow buttons on the remote to highlight Input and press OK. The INPUT menu is displayed. 3. Highlight the input device that you want to rename - Vizio E75-E3 | User Manual English - Page 25
set up administrative controls. 1. Press the MENU button on the remote. The on-screen menu is displayed. 4. Highlight Time Zone and press OK. The system information. 4. When you are finished reviewing the system information, press the EXIT button on the remote. 5. Highlight your time zone and - Vizio E75-E3 | User Manual English - Page 26
any additional programming. Not all HDMI devices support CEC. See your device's user manual for details. To enable, disable, or adjust CEC settings: 1. Press the MENU button on the remote. The on-screen menu is displayed. 2. Use the Arrow buttons on the remote to highlight System and press OK. The - Vizio E75-E3 | User Manual English - Page 27
the light to be on. To turn the Power Indicator Light On or Off: 1. Press the MENU button on the remote. The on-screen menu is displayed. 2. Use the Arrow buttons on the remote to highlight System and press OK. The SYSTEM menu is displayed. 3. Highlight Power Indicator and press OK. 4. Use the - Vizio E75-E3 | User Manual English - Page 28
menu. If you have trouble enabling or disabling Viewing Data, please contact VIZIO customer service by emailing [email protected] or calling (855) 472-8817. For more information, see https://www.vizio.com/viewingdata and review VIZIO's privacy policy at https://www.vizio.com/privacy Note: The - Vizio E75-E3 | User Manual English - Page 29
3 USING THE INFO WINDOW The Info Window can be displayed by pressing the INFO button on the remote: • Press the INFO button one time to Display Name, Current Input, Picture Mode, Network Information, and Time. Current Input Picture Mode Network Name Display Name - Vizio E75-E3 | User Manual English - Page 30
Troubleshooting & Technical Support Do You Have Questions? Find Answers At SUPPORT.VIZIO.COM Find help with: • New Product Setup • Connecting Your Devices • Technical Problems • Product Updates • And More Live Chat Support Available You can also contact our award-winning support team at: Phone: (877 - Vizio E75-E3 | User Manual English - Page 31
A Take A Moment To Register Your Product At VIZIO.COM/PRODUCT-REGISTRATION Why Register? Customized Support Get assistance quickly with your information on-hand. News & Offers Take advantage of the latest news and special offers from VIZIO. Safety & Satisfaction Stay up to date with important - Vizio E75-E3 | User Manual English - Page 32
button on the remote or on the back of the Display to turn the Display on. The power is on, but there is no image on the screen. • Ensure all cables are securely attached to the Display. • Ensure all devices are connected correctly. Devices differ; see your device's user manual for details. • Adjust - Vizio E75-E3 | User Manual English - Page 33
I see "noise" or static on the screen. • When your Display's digital capabilities exceed a digital broadcast signal, the signal is up-converted (improved) to match your the one on the input source you switch from, the difference may be noticeable. • See Changing the Screen Aspect Ratio.. A 33 - Vizio E75-E3 | User Manual English - Page 34
Screen Size: Viewable Area: Dimensions w/ Stand: w/o Stand: Weight w/ Stand: w/o Stand: LCD Backlight: Refresh Rate: Maximum Resolution: Dynamic Contrast Ratio: Pixel Pitch: Viewing Angle: HDMI Inputs: Component Video Inputs: Composite Inputs: RF Antenna B Remote Control Pattern: E55-E1 XRT135 C-US - Vizio E75-E3 | User Manual English - Page 35
Screen Size: Viewable Area: Dimensions w/ Stand: w/o Stand: Weight w/ Stand: w/o Stand: LCD Backlight: Refresh Rate: Maximum Resolution: Dynamic Contrast Ratio: Pixel Pitch: Viewing Angle: HDMI Inputs: Component Video Inputs: Composite Inputs: RF Antenna Spanish Yes B Remote Control Model: - Vizio E75-E3 | User Manual English - Page 36
Screen Size: Viewable Area: Dimensions w/ Stand: w/o Stand: Weight w/ Stand: w/o Stand: LCD Backlight: Refresh Rate: Maximum Resolution: Dynamic Contrast Ratio: Pixel Pitch: Viewing Angle: HDMI Inputs: Component Video Inputs: Composite Inputs: RF Antenna B Remote Control Pattern: E60-E3 XRT135 C-US - Vizio E75-E3 | User Manual English - Page 37
Screen Size: Viewable Area: Dimensions w/ Stand: w/o Stand: Weight w/ Stand: w/o Stand: LCD Backlight: Refresh Rate: Maximum Resolution: Dynamic Contrast Ratio: Pixel Pitch: Viewing Angle: HDMI Inputs: Component Video Inputs: Composite Inputs: RF Antenna Spanish Yes B Remote Control Model: - Vizio E75-E3 | User Manual English - Page 38
Screen Size: Viewable Area: Dimensions w/ Stand: w/o Stand: Weight w/ Stand: w/o Stand: LCD Backlight: Refresh Rate: Maximum Resolution: Dynamic Contrast Ratio: Pixel Pitch: Viewing Angle: HDMI Inputs: Component Video Inputs: Composite Inputs: RF Antenna Remote Hole Pattern: E65-E1 XRT135 C-US , - Vizio E75-E3 | User Manual English - Page 39
Screen Size: Viewable Area: Dimensions w/ Stand: w/o Stand: Weight w/ Stand: w/o Stand: LCD Backlight: Refresh Rate: Maximum Resolution: Dynamic Contrast Ratio: Pixel Pitch: Viewing Angle: HDMI Inputs: Component Video Inputs: Composite Inputs: RF Antenna B Remote Control Pattern: E70-E3 XRT135 C-US - Vizio E75-E3 | User Manual English - Page 40
Stand: w/o Stand: Weight w/ Stand: w/o Stand: LCD Backlight: Refresh Rate: Maximum Resolution: Dynamic Contrast Ratio: Pixel Pitch: Viewing Angle: HDMI Inputs: Component Video Inputs: Composite Inputs: RF Antenna Input: USB Port: Audio Outputs: OSD Language: Ambient Light Sensor: E75-E1 75" 74.54 - Vizio E75-E3 | User Manual English - Page 41
w/ Stand: w/o Stand: Weight w/ Stand: w/o Stand: LCD Backlight: Refresh Rate: Maximum Resolution: Dynamic Contrast Ratio: Pixel Pitch: Viewing Angle: HDMI Inputs: Component Video Inputs: Composite Inputs: RF Antenna Input: USB Port: Audio Outputs: OSD Language: Ambient Light Sensor: E75-E3 75" 74 - Vizio E75-E3 | User Manual English - Page 42
Screen Size: Viewable Area: Dimensions w/ Stand: w/o Stand: Weight w/ Stand: w/o Stand: LCD Backlight: Refresh Rate: Maximum Resolution: Dynamic Contrast Ratio: Pixel Pitch: Viewing Angle: HDMI Inputs: Component Video Inputs: Composite Inputs: RF Antenna B Remote Control Pattern: E80-E3 XRT135 C-US - Vizio E75-E3 | User Manual English - Page 43
interference that may cause undesired operation. This device operates on a no-protection no-interference basis. Should the user seek to obtain protection from other radio services operating in the same Display bands, a radio license is required. Please consult Industry Canada's document CPC-2-1-28 - Vizio E75-E3 | User Manual English - Page 44
of or recycle your VIZIO products please go to www.vizio.com/environment. Information in this User Manual is subject to change without notice. To review the most updated version of this User Manual and the associated Quick Start Guide, go to http://www.vizio.com. © 2017 VIZIO, Inc. All Right - Vizio E75-E3 | User Manual English - Page 45
. VIZIO Technical Support will provide instructions for If you feel VIZIO has not met its obligations under this warranty, you may carefully. packing and shipping the product to the VIZIO service center. attempt to resolve the issue informally with VIZIO. If you are unable to ALL USER DATA - Vizio E75-E3 | User Manual English - Page 46
REPAIR NO ARBITRATION OR PROCEEDING WILL BE JOINED, CONSOLIDATED, OR REPLACE YOUR PRODUCT, OR REFUND ITS PURCHASE PRICE. AS OR COMBINED notify This warranty gives you specific legal rights, and you may also have other VIZIO in writing within sixty (60) days of the date that you purchased the - Vizio E75-E3 | User Manual English - Page 47
be restored to its original state. You will be responsible for restoring with VIZIO's user guides and manuals. all applicable user data and downloaded applications. Recovery What to Do If You Are Not Satisfied With Service Except where restricted by law, this warranty applies only to the and - Vizio E75-E3 | User Manual English - Page 48
), VIZIO MAY, AT ITS SOLE AND EXCLUSIVE OPTION AND IN ITS DISCRETION, REPAIR OR REPLACE YOUR parts, components, supplies and accessories, you may contact the importer of record, the warranty service provider, or the establishment from whom you purchased the VIZIO product. Importer of Record VIZIO - Vizio E75-E3 | User Manual English - Page 49
© 2017 VIZIO INC. ALL RIGHTS RESERVED. 02282017DV-US-NC
-
 1
1 -
 2
2 -
 3
3 -
 4
4 -
 5
5 -
 6
6 -
 7
7 -
8
-
9
-
10
-
11
-
12
-
13
-
14
-
15
-
16
-
17
-
18
-
19
-
20
-
21
-
22
-
23
-
24
-
25
-
26
-
27
-
28
-
29
-
30
-
31
-
32
-
33
-
34
-
35
-
36
-
37
-
38
-
39
-
40
-
41
-
42
-
43
-
44
-
45
-
46
-
47
-
48
-
49
 |
 |
Model E55-E1, E55-E2, E60-E3, E65-E0, E65-E1, E70-E3, E75-E1, E75-E3, & E80-E3
USER MANUAL
VIZIO