Vizio M65-E0 User Manual
Vizio M65-E0 Manual
 |
View all Vizio M65-E0 manuals
Add to My Manuals
Save this manual to your list of manuals |
Vizio M65-E0 manual content summary:
- Vizio M65-E0 | User Manual - Page 1
USER MANUAL M50-E1, M55-E0, M65-E0, M70-E3 & M75-E1 - Vizio M65-E0 | User Manual - Page 2
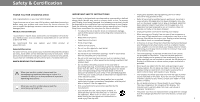
instructions. are provided for ventilation. To ensure reliable operation To purchase an extended warranty service plan, visit www.VIZIO.com. WHEN READING THIS MANUAL Display. Doing so could short circuit parts causing a fire or electric shock only from the type of power intended to alert you to - Vizio M65-E0 | User Manual - Page 3
product. • Store the accessories (remote, batteries, etc.) in a set and the supporting furniture. your Display, unplug the power cord and contact your dealer. Continuous use in this case may result in fire or electric shock. • CAUTION - These servicing instructions are for use by qualified service - Vizio M65-E0 | User Manual - Page 4
, Inc. © DTS, Inc. All Rights Reserved. Manufactured under license from Dolby Laboratories. Dolby, Dolby Audio, and the double-D symbol are registered trademarks of Dolby Laboratories. HDMI, the HDMI logo and High-Definition Multimedia Interface are trademarks or registered trademarks of - Vizio M65-E0 | User Manual - Page 5
the Display on a wall 7 Rear Panel 8 Completing The First-Time Setup 10 Using the On-Screen Menu 11 Navigating the On-Screen Menu 11 Changing the Input Source 11 Changing the Screen Aspect Ratio 12 Adjusting the Picture Settings 13 Adjusting More Picture Settings 14 Adjusting the Color - Vizio M65-E0 | User Manual - Page 6
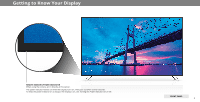
Know Your Display REMOTE SENSOR & POWER INDICATOR When using the remote, aim it directly at this sensor. The power indicator flashes on when the Display turns on, then goes out after several seconds. To keep the power indicator on as long as the Display is on, see Turning the Power Indicator On or - Vizio M65-E0 | User Manual - Page 7
Attach your display and wall mount to the wall, carefully following the instructions that came with your mount. Use only with a UL-listed wall mount bracket rated for the weight/ load of this display. Screw Size: Hole Pattern: Weight w/o Stands: M50-E1 M6 200 mm x 200 mm 29.32 lb M55-E0 M6 400 mm - Vizio M65-E0 | User Manual - Page 8
. The actual number of ports and their locations may vary, depending on the model. 1 USB - Connect a USB thumb drive to view videos Component - Connect a component device. HDMI - Connect an HDMI device. Ethernet - Connect an Ethernet cable to modem/ router. Power - Press to turn the Display on or - Vizio M65-E0 | User Manual - Page 9
the loudness of the audio. Pic Cycle through the different picture setting modes. Mute Turn the audio on or off. Power Turn Display on or off. Menu Display the on-screen menu. Arrow Navigate the on-screen menu. Closed Caption NOT SUPPORTED ON THIS MODEL. Info Display the info window. Channel Up - Vizio M65-E0 | User Manual - Page 10
. You can also find a digital copy on support.vizio.com Setup with the IR Remote 1.Press the OK/Play key on your IR remote during the initial setup screen. 2.Use the Arrow Keys and the OK/Play button to select and confirm settings. 3.Follow the instruction on the screen to complete setup. 2 10 - Vizio M65-E0 | User Manual - Page 11
remote. From this menu, you can: • Adjust the Picture settings • Adjust the Audio settings • Adjust Network Settings • Setting the Sleep Timers • Name Inputs • Adjust Display settings • Access the user manual Display Settings Picture Change Input CAST HDMI-1 HDMI-2 HDMI-3 HDMI-4 COMP Note: - Vizio M65-E0 | User Manual - Page 12
picture so that the picture keeps its original shape. Examples include wide-screen movies and older television programs. To change the screen aspect ratio: 1. Press the WIDE button on the remote HD, HDR content or for any video content on HDMI-4. Note: Aspect ratio settings may vary by Input source. - Vizio M65-E0 | User Manual - Page 13
is displayed. 3. Use the Arrow buttons on the remote to highlight Picture Mode, then use the Left/Right Arrow buttons to change the picture mode: • Standard mode sets the picture settings to the default settings. • Calibrated mode sets the picture settings to values ideal for watching Display in - Vizio M65-E0 | User Manual - Page 14
of the Gamma curve. Use lower Gamma values for bright room conditions, and higher values when it's dark. 3. When you have finished adjusting More Picture Settings, press the EXIT button on the remote. Adjusting the Color Temperature Adjusting the color temperature changes the white balance of the - Vizio M65-E0 | User Manual - Page 15
the Picture Mode Edit Settings Picture Mode Edit Settings allow you to make precise adjustments to the picture and to create picture modes to save groups of picture settings. To adjust the Picture Mode Edit settings: 1. From the PICTURE menu, use the Arrow buttons to highlight Picture Mode - Vizio M65-E0 | User Manual - Page 16
Inputs assigned to a deleted custom picture mode become assigned to the Calibrated picture mode.` To delete a custom picture mode: 1. From the PICTURE MODE EDIT menu, use the Arrow buttons to highlight Delete Picture Mode, and then press OK. The DELETE PICTURE MODE window is displayed. To delete - Vizio M65-E0 | User Manual - Page 17
white balance, turn color channels off for testing, and display color bar, flat, and ramp test patterns. The Color Tuner, 11 Point White Balance, and test patterns allow technicians to manually calibrate the Display. Calibration requires specialized training, an input with precisely set colors, and - Vizio M65-E0 | User Manual - Page 18
menu, use the Arrow buttons to highlight Calibration Test, and then press the Left/Right Arrow buttons until the Ramp Test Pattern menu is displayed. Ramp Test Pattern Off 2. Use the Arrow buttons on the remote to highlight Off. Use the Left/Right Arrow buttons to highlight On to show the - Vizio M65-E0 | User Manual - Page 19
menu, use the Arrow buttons to highlight Calibration Tests, and then press the Left/Right Arrow buttons until the Uniformity Analyzer Test Pattern menu is displayed. Uniformity Analyzer Test Pattern Off 2. Use the Arrow buttons on the remote to highlight Off. Use the Left/Right Arrow buttons - Vizio M65-E0 | User Manual - Page 20
remote to highlight Audio and press OK. The AUDIO menu is displayed. 3. Use the Arrow buttons to highlight the setting you wish to adjust, then press Left/ Right Arrow buttons to change the setting: • Speakers - Turns of processing for digital audio out and HDMI ARC output when connected to a home - Vizio M65-E0 | User Manual - Page 21
both an Ethernet port and built-in high remote. Changing the Manual Setup Settings Advanced users can fine-tune the network settings using the Manual Setup feature. To change advanced network settings: 1. From the NETWORK menu, highlight Manual Setup and Manual Setup Back press OK. The MANUAL - Vizio M65-E0 | User Manual - Page 22
. 2. The TEST CONNECTION screen displays the connection method, network name, signal strength, and download speed of your network connection. 3. Press the EXIT button on the remote. 4. Press the EXIT button on the - Vizio M65-E0 | User Manual - Page 23
sleep timer, press the EXIT button on the remote. Setting the Auto Power Off Feature To help save energy, your Display is set by default to turn off after 10 minutes without a video or audio signal. This feature can be deactivated. To set the Auto Power Off feature: 1. From the TIMERS menu, use the - Vizio M65-E0 | User Manual - Page 24
Name changes to show the custom name that you created. 5. When you have finished naming your input, press the EXIT button on the remote. Input Port Name Input HDMI-1 My DVD Back DVD Input Name Custom Name abc def ghi j k l mn o p q r s t u v wx y z 0 123456789 .@# äêí Space Ok Cancel 3 24 - Vizio M65-E0 | User Manual - Page 25
Set time zone and local settings • Adjust the CEC settings • Adjust when the power indicator is illuminated • Change your Display's name • Review and When you are finished reviewing the system information, press the EXIT button on the remote. Setting the Time and Local Settings To ensure the - Vizio M65-E0 | User Manual - Page 26
for these devices). Select Disable to turn CEC off. • Device Discovery - Use this function to determine if your device is connected and supports CEC. (Required for Enable option only) 5. Press the EXIT button on the remote. Adjusting the Power Mode Your Display is set to Eco Mode by default. When - Vizio M65-E0 | User Manual - Page 27
front of your Display normally does not glow when the Display is on. You can change this setting if you prefer the light to be on. To turn the Power Indicator Light On or Off: 1. Press the MENU button on the remote. The on-screen menu is displayed. 2. Use the Arrow buttons on the - Vizio M65-E0 | User Manual - Page 28
turn this feature On or Off in the RESET & ADMIN menu. If you have trouble enabling or disabling Viewing Data, please contact VIZIO customer service by emailing [email protected] or calling (855) 472-8817. For more information, see https://www.vizio.com/viewingdata and review VIZIO's privacy - Vizio M65-E0 | User Manual - Page 29
The Info Window can be displayed by pressing the INFO or GUIDE button on the remote: • Press the INFO button one time to display input, display name, picture mode, time, and network information. Current Input Picture Mode Network Name Display Name Living Room Cast Normal HomeNetwork 5:00 - Vizio M65-E0 | User Manual - Page 30
be formatted as FAT32. • Files on the USB thumb drive must end in a supported file extension ( .mp4 only). • The player is not designed to play media from your USB drive from the Display: 1. Turn off the Display. 2. Disconnect your USB thumb drive from the USB port on the side of the Display. Do - Vizio M65-E0 | User Manual - Page 31
Troubleshooting & Technical Support Do You Have Questions? Find Answers At SUPPORT.VIZIO.COM Find help with: • New Product Setup • Connecting Your Devices • Technical Problems • Product Updates • And More Live Chat Support Available You can also contact our award-winning support team at: Phone: (877 - Vizio M65-E0 | User Manual - Page 32
A Take A Moment To Register Your Product At VIZIO.COM/PRODUCT-REGISTRATION Why Register? Customized Support Get assistance quickly with your information on-hand. News & Offers Take advantage of the latest news and special offers from VIZIO. Safety & Satisfaction Stay up to date with important - Vizio M65-E0 | User Manual - Page 33
the Color and Tint settings in the Picture menu. See Adjusting the Picture Settings. • Select a pre-set picture mode. See Adjusting the Picture Settings. VIZIO recommends selecting Calibrated. • Check all cables to ensure they are securely attached. The buttons on the remote aren't working. • Ensure - Vizio M65-E0 | User Manual - Page 34
The image quality is not good. • For the best image quality, view high-definition programs using digital sources. Connect your devices with HDMI cables. The picture is distorted. • Move the Display away from electrical appliances, cars, and fluorescent lights. • Ensure all cables are securely - Vizio M65-E0 | User Manual - Page 35
Screen Size: Viewable Area: Dimensions w/ Stand: w/o Stand: Weight w/ Stand: w/o Stand: LCD Backlight: Active LED Zones: Refresh Rate: Maximum Resolution: Dynamic Contrast Ratio: Pixel Pitch: Viewing Angle: HDMI Inputs: Component Video Inputs: USB Port: Audio Outputs: OSD Language: Ambient Light - Vizio M65-E0 | User Manual - Page 36
Area: Dimensions w/ Stand: w/o Stand: Weight w/ Stand: w/o Stand: LCD Backlight: Active LED Zones: Refresh Rate: Maximum Resolution: Dynamic Contrast Ratio: Pixel Pitch: Viewing Angle: HDMI Inputs: Component Video Inputs: USB Port: Audio Outputs: OSD Language: Ambient Light Sensor: M55-E0 55" 54.64 - Vizio M65-E0 | User Manual - Page 37
Area: Dimensions w/ Stand: w/o Stand: Weight w/ Stand: w/o Stand: LCD Backlight: Active LED Zones: Refresh Rate: Maximum Resolution: Dynamic Contrast Ratio: Pixel Pitch: Viewing Angle: HDMI Inputs: Component Video Inputs: USB Port: Audio Outputs: OSD Language: Ambient Light Sensor: M65-E0 65" 64.50 - Vizio M65-E0 | User Manual - Page 38
Hz Effective Refresh Rate 3840 x 2160 (UHD) 50M : 1 0.4008 mm (H) X 0.4008 mm (V) 178° (H) / 178° (V) 4 1 1 (Shared with Component) Analog Stereo, Optical Digital, HDMI ARC English, French, Spanish Yes B Remote Control Model: Certifications: Voltage Range: Power Consumption: Standby Power: Zero - Vizio M65-E0 | User Manual - Page 39
Screen Size: Viewable Area: Dimensions w/ Stand: w/o Stand: Weight w/ Stand: w/o Stand: LCD Backlight: Active LED Zones: Refresh Rate: Maximum Resolution: Dynamic Contrast Ratio: Pixel Pitch: Viewing Angle: HDMI Inputs: Component Video Inputs: USB Port: Audio Outputs: OSD Language: Ambient Light - Vizio M65-E0 | User Manual - Page 40
use an AC/DC power adapter that is properly grounded. Use the AC cords listed below for each area. For USA / Canada This equipment Should be installed and operated with a minimum distance 20 cm between the antenna and your body .Users must follow the specific operating instructions for satisfying RF - Vizio M65-E0 | User Manual - Page 41
Service Arbitration Agreement; Class Action Waiver (U.S. Residents Only)" degree of protection. VIZIO Technical Support will provide instructions for If you feel VIZIO Canada. There will be no charge for parts or labor during the warranty period. WARRANTY, A BREACH OF THIS WARRANTY, OR THE VIZIO - Vizio M65-E0 | User Manual - Page 42
have no authority to award LIMITED IN DURATION TO THE WARRANTY PERIOD SET FORTH ABOVE. punitive or other damages not measured by the prevailing This warranty gives you specific legal rights, and you may also have other VIZIO in writing within sixty (60) days of the date that you purchased the - Vizio M65-E0 | User Manual - Page 43
WARRANTY. BEFORE USING YOUR VIZIO additional help and troubleshooting. To obtain warranty service, home. In-home service requires complete and easy access to the PRODUCT, PLEASE READ THIS WARRANTY CAREFULLY. IF YOU DO contact VIZIO Technical Support via email at TechSupport@VIZIO. product and does - Vizio M65-E0 | User Manual - Page 44
to the maximum extent not prohibited exchange parts and components of the product and include labor by law. and shipping expenses of the product on which this warranty is valid, within the service network, at no cost to the consumer. Changes to Warranty VIZIO is not obligated to honor the - Vizio M65-E0 | User Manual - Page 45
is required to access certain features of the VIZIO SmartCast™ App. Information in this User Manual is subject to change without notice. To review the most updated version of this User Manual and the associated Quick Start Guide, go to http://www.vizio.com. For DTS patents, see http://patents.dts - Vizio M65-E0 | User Manual - Page 46
© 2017 VIZIO INC. ALL RIGHTS RESERVED. 170407AD-US
-
 1
1 -
 2
2 -
 3
3 -
 4
4 -
 5
5 -
 6
6 -
 7
7 -
8
-
9
-
10
-
11
-
12
-
13
-
14
-
15
-
16
-
17
-
18
-
19
-
20
-
21
-
22
-
23
-
24
-
25
-
26
-
27
-
28
-
29
-
30
-
31
-
32
-
33
-
34
-
35
-
36
-
37
-
38
-
39
-
40
-
41
-
42
-
43
-
44
-
45
-
46
 |
 |
M50-E1, M55-E0, M65-E0, M70-E3 & M75-E1
USER MANUAL