Vizio VMT40-55M User Manual - Page 24
Magasin »store.
 |
View all Vizio VMT40-55M manuals
Add to My Manuals
Save this manual to your list of manuals |
Page 24 highlights
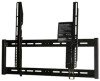
VIZIO VMT40-55M User Manual 6.0. Setting the preset position Note: The pin [04] is shipped from the factory in the "STORE" opening. (1) Insert the pin [04] into the "P1" opening for maximum preset tilt of about 6º. (2) Insert the pin [04] into the "P2" opening for maximum preset tilt of about 9º. (3) Insert the pin [04] into the "STORE" opening for full 13º tilt down position, and to store the pin [04]. (4) Insert the pin [04] into the "UP" opening to hold the TV up about 5º. 6.0. Configuration de la position préréglée Remarque : La goupille [04] est expédiée par l'usine de fabrication déjà insérée dans la fente du « MAGASIN »(STORE). (1) Introduisez la goupille [04] dans la fente « P1 » pour une inclinaison maximale préréglée de 6°. (2) Introduisez la goupille [04] dans la fente « P2 » pour une inclinaison maximale préréglée de 9°. (3) Introduisez la goupille [04] dans le Magasin (Store) pour une inclinaison totale maximale de 13°et pourranger la goupille [04]. (4) Introduisez la goupille [04] dans la fente « UP » pour maintenir le téléviseur en position redressée d'environ 5°. 6.0. Ajustando la posición predeterminada Nota: El pasador [04] es enviado de fábrica en la abertura "STORE". (1) Inserte el pasador [04] en la abertura "P1" para una posición predeterminada máxima de alrededor de 6°. (2) Inserte el pasador [04] en la abertura "P2" para una posición predeterminada máxima de alrededor de 9°. (3) Inserte el pasador [04] en la abertura "STORE" para una posición de inclinación hacia abajo de 13°y para almacenar el pasador [04]. (4) Inserte el pasador [04] en la abertura "UP" para sostener el televisor hacia arriba en unos 5°. 24
-
 1
1 -
2
-
3
-
4
-
5
-
6
-
7
-
8
-
9
-
10
-
11
-
12
-
13
-
14
-
15
-
16
-
17
-
18
-
 19
19 -
 20
20 -
 21
21 -
 22
22 -
 23
23 -
 24
24 -
 25
25 -
 26
26 -
 27
27 -
 28
28 -
 29
29 -
30
-
31
-
32
-
33
-
34
 |
 |
