Vtech V.Smile PC Pal Pink User Manual - Page 1
Vtech V.Smile PC Pal Pink Manual
 |
View all Vtech V.Smile PC Pal Pink manuals
Add to My Manuals
Save this manual to your list of manuals |
Page 1 highlights
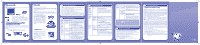
36800 M DA.indd 1 Parent letter Dear Parent, At VTech®, we know that every year, children are asking to play video games at younger and younger ages. At the same time, we understand the hesitation of most parents to expose their children to the inappropriate content of many popular video games. How can you feel confident in allowing your children to play these games, and still educate and entertain them in a healthy, age-appropriate manner? Our solution to this on-going debate is the V.SMILE® PC PalTM Learning System - a unique video game system created especially for children aged 3 to 6. V.SMILE® PC PalTM Learning System combines a kidfriendly design, age-appropriate curriculum, entertaining graphics, and fun game play into a unique experience that your child will love and you can support. V.SMILE® PC PalTM Learning System engages your child with two modes of play: Games - a set of mini games to let your child become familiar with common computer peripherals like a Mouse, Keyboard and Pen; Tools - a set of software simulating the most common computer tools like Email, a Music Player and Chat room. All of these educational modes offer your child hours of learning fun. As part of the V.SMILE® PC PalTM Learning System, VTech® offers a library of game SmartridgesTM based on popular children's characters that engage and encourage your child to play while learning. The library is organized into three levels of educational play - Early Learners (ages 3-5), Junior Thinkers (ages 4-6) and Master Minds (ages 6-8) - so that the educational content of the system grows with your child. At VTech®, we are proud to provide you with a much-needed solution to the video game dilemma, as well as another innovative way for your child to learn while having fun. We thank you for trusting VTech® with the important job of helping your child explore a new world of learning! Sincerely, Julia Fitzgerald Vice President, Marketing VTech Electronics, NA To learn more about the V.SMILE® PC PalTM Learning System and other VTech® toys, visit www.vtechkids.com Introduction Teaching computer skills the fun way, VTech® introduces the latest addition to the V.SMILE® family -- V.SMILE® PC PAL™. Your child will join three cute and cuddly computer characters for learning games that teach important computer skills. The V.SMILE® PC PAL™ simulates a kid-friendly desktop environment for little learners. Thirteen fun activities teach typing, mouse skills, letters, spelling, drawing, creativity, music and writing. V.SMILE® PC PAL™ Console V.SMILE® PC PAL™ Keyboard PRODUCT FEATURES • Smartridge™ Slot Insert the Smartridge™ into this slot to begin play. • IR Receiver • V.Link™ Port Insert a V.Link™ to download your game scores. Please see page 7 for more V.Link™ information. (V.Link™ sold separately.) • Microphone Jack You can plug a micorphone into this jack for use with some games. (Stereo and mono microphone are sold separately.) • Joystick Port You can plug in a V.SMILE® Joystick or V.SMILE® Accessories to play games. (V.SMILE® Joystick and Accessories sold separately.) • Console Battery Compartment Install 4 AA size batteries. For details please refer to Page 4. • Handle The PC Pal Keyboard has a handle for easy portability. Smartridge™ Smartridge™ Manual Included in this Package User's Manual • One VTech® V.SMILE® P��C�P�A�L�™��C�o�n�s�o�l�e� • One VTech® V.SMILE® P��C�P��A�L�™� K�e�y�b�o�a�r��d • One VTech® V.SMILE® P��C�P�A�L�™��S��ma�r�t�r�i��d�g�e™� • One VTech® Smartridge™ Manual • One User's Manual WARNING: All packing materials such as tape, plastic sheets, wire ties and tags are not part of this toy and should be discarded for your child's safety. 2 • Joystick Use this 8-directional joystick to play games and make selections. • Mouse Use the mouse to play games and make selections. • Mouse Pad Compartment Store your mouse pad here when not in use. • Drawing Pad Move the pen along the drawing pad to draw or play writing games. • AC Adaptor Jack Connect to AC adaptor. (AC Adaptor sold separately) • AV Cable Connect to TV or VCR. For details please refer to Page 5 & 6. • Smartridge™ Storage Compartment It stores up to 6 Smartridges™. • ON/RESTART Button Press the ON/RESTART Button to turn the console ON. If you press the ON/RESTART Button while playing a game, the game will start over from the beginning. • OFF Button Press the OFF Button to turn the console OFF. • IR Transmitter • Keyboard On/Off Button Press this button to turn the Keyboard ON and OFF. • Keypad Use the QWERTY Keyboard to play games and answer questions. • 4 Color Buttons Use these buttons to answer questions in select games. • Pen Storage Compartment Store the pen here when not in use. • Pen Use the pen for drawing and writing games. • Enter Buttons Use these buttons to confirm selection. • Keyboard Battery Compartment Install 4 AA size batteries. For details please refer to Page 4. • Mouse Storage Compartment Store your mouse and mouse cable under the keyboard when not in use. 3 GETTING STARTED Battery Installation • Make sure the V.SMILE® PC PAL™ Console and the V.SMILE® PC PAL™ Keyboard are turned OFF. • Locate the battery cover at the bottom of the console and the keyboard. • Insert 4 X 1.5V AA LR6 / AM-3 size batteries as illustrated for both console and keyboard. • Replace the battery covers. Notice: When the V.SMILE® PC PAL™ Console is running on batteries, you may see this icon appear on the screen. This indicates that battery power is low, and you should replace the batteries soon. Battery time remaining once the icon first appears is approximately 10-30 minutes, depending on the type of batteries in use. After that, the console will show the low battery icon for 5 seconds as indicated in the diagram, and then will turn OFF automatically. Battery Notice • Install batteries correctly observing the polarity (+, -) signs to avoid leakage. • Do not mix old and new batteries. • Do not mix batteries of different types: alkaline, standard (carbon-zinc) or rechargeable (nickel-cadmium). • Remove the batteries from the equipment when the unit will not be used for an extended period of time. • Always remove exhausted batteries from the equipment. • Do not dispose of batteries in fire. • Do not attempt to recharge ordinary batteries. • The supply terminals are not to be short-circuited. • Only batteries of the same and equivalent type as recommended are to be used. WE DO NOT RECOMMEND THE USE OF RECHARGEABLE BATTERIES. 4 AC Adaptor • Use a VTech® 9V 300mA AC/DC adaptor or a standard AC/DC adaptor with equivalent specification. • Make sure the console is turned OFF. • Plug the power jack into the 9V DC socket at the back of the unit. • Plug the AC adaptor into a wall socket. Note: The use of an adaptor will override the batteries. When the toy is not going to be used for an extended period of time, unplug the adaptor. Standard Guidelines for Adaptor Toys • This toy is not intended for use by children under 3 years old. • Only use the recommended adaptor with the toy. • The transformer is not a toy. • Never clean a plugged-in toy with liquid. • Never use more than one adaptor. • Do not leave the toy plugged-in for extended periods of time. Connecting to a TV Note: Before you connect the V.SMILE® �PC��P�A�L�™� Console to a TV, please check and make sure that the unit is working. Once you have turned the unit ON, the power indicator light (ON/RESTART Button) will glow. If not, please check to see if the adaptor is connected properly, or that the batteries are installed correctly. Make sure that your TV, the console and the keyboard are all turned OFF before you begin making any connections. Yellow White Red Stereo audio TV connection: - Connect the yellow plug on the V.SMILE® P��C�P�A�L C��on�s�o�l��e cable to the yellow video input terminal on your TV. - Connect the white plug and red plug on the V.SMILE® P��C� PAL™ C�o�n�s�o�l�e� cable to the white and red audio input terminals on your TV. Yellow White Red Mono audio TV connection: - Connect the yellow plug on the V.SMILE® P��C�P�A�L�™� Console cable to the yellow video input terminal on your TV. - Connect the white plug or red plug on the V.SMILE® P��C� PAL™ Console cable to the white or red audio input terminals on your TV. 5 2008-4-25 14:40:12
-
 1
1 -
 2
2
 |
 |
