Weider 110 User Manual
Weider 110 Manual
 |
View all Weider 110 manuals
Add to My Manuals
Save this manual to your list of manuals |
Weider 110 manual content summary:
- Weider 110 | User Manual - Page 1
. If you have questions, or if there are missing parts, we will guarantee complete satisfaction through direct assistance from our CAUTION Read all precautions and instructions in this manual before using this equipment. Save this manual for future reference. USER'S MANUAL Visit our website at - Weider 110 | User Manual - Page 2
Back Cover LIMITED WARRANTY Back Cover Note: A PART IDENTIFICATION CHART and a PART LIST/EXPLODED DRAWING are attached in the center of this manual. Remove the PART IDENTIFICATION CHART and the PART LIST/EXPLODED DRAWING before beginning assembly. WEIDER is a registered trademark of ICON Health - Weider 110 | User Manual - Page 3
Service Department toll-free at 1-800-999-3756, Monday through Friday, 6 a.m. until 6 p.m. Mountain Time, to order a free replacement decal. Apply the replacement decal to the location shown. 9. The weight bench is designed to support a maximum user weight of 300 pounds. Do not place more than 110 - Weider 110 | User Manual - Page 4
or a healthier cardiovascular system, the WEIDER® 110 weight bench will help you to achieve the specific results you want. For your benefit, read this manual carefully before using the weight bench. If you have additional questions, please call our Customer Service Department toll-free at 1-800-999 - Weider 110 | User Manual - Page 5
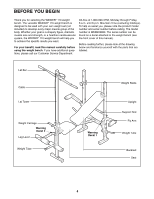
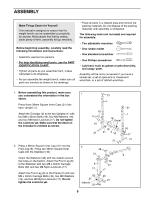
for Yourself This manual is designed to ensure that the weight bench can be assembled successfully by anyone. Most people find that by setting aside plenty of time, assembly will go smoothly. Before beginning assembly, carefully read the following information and instructions: • Assembly requires - Weider 110 | User Manual - Page 6
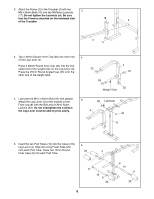
on the Leg Lever (4). Press the 25mm Round Angled Cap (20) onto the other end of the weight tube. 4 22 20 24 22 Weight Tube 5. Lubricate the M10 x 60mm Bolt (32) with grease. Attach the Leg Lever (4) to the bracket on the Front Leg (8) with the Bolt and an - Weider 110 | User Manual - Page 7
each end of the Support Rod (7). Insert the Support Rod into one of the three upper sets of holes in the Uprights (1). Rotate the Support Rod to the locked Inner Cap (24) into the end of the weight tube. Slide a Weight Stop (28) onto the weight tube. Assemble the other Fly Arm (not shown) in - Weider 110 | User Manual - Page 8
Press two 25mm Round Inner Caps (24) into the ends of the weight tube on the Weight Carriage. Slide two Weight Stops (28) onto the weight tube. Slide an M8 x 16mm Screw (45) into the bracket on the Weight Carriage (48). Slide the Weight Carriage (48) onto the Lat Tower (40). Attach the Cable (39 - Weider 110 | User Manual - Page 9
the Lat Bar (37) with soapy 15 water. Slide the two Handgrips (38) onto the Lat 38 Bar. 37 38 16. Make sure that all parts are properly tightened before you use the weight bench. The use of all remaining parts will be explained in ADJUSTMENTS starting on the next page. 9 - Weider 110 | User Manual - Page 10
with your own weight set (not included). The steps below explain how the weight bench can be adjusted. See EXERCISE GUIDELINES on page 13 for important exercise information and refer to the accompanying exercise guide to see the correct form for several exercises. Make sure all parts are properly - Weider 110 | User Manual - Page 11
Fly Arms and Uprights. Tighten the Butterfly Knobs (13) onto the Bolts. 13 25 1 19 ATTACHING THE LAT TOWER For some exercises, the Lat Tower (40) must be attached to the weight bench. To do this, remove the 38mm Square Inner Cap (21) from the Front Leg (8). Insert the Lat Tower into the - Weider 110 | User Manual - Page 12
an exercise that does not require it. 39 41 37 Lat Bar Rest 40 ADJUSTING THE WEIGHT RESTS The Weight Rests (51) can be adjusted to three heights. To move the Weight Rests, disengage the locking pins and remove the Weight Rest from the Uprights (1). Reinsert the Weight Rests into a set of - Weider 110 | User Manual - Page 13
requires moving through the full range of motion for each exercise, and moving only the appropriate parts of the body. Exercising in an uncontrolled manner will leave you feeling exhausted. On the exercise guide accompanying this manual you will find photographs showing the correct form for several - Weider 110 | User Manual - Page 14
of each workout. The chart on page 15 of this manual can be photocopied and used to schedule and record your workouts. List the date, the exercises performed, the weight used, and the numbers of sets and repetitions completed. Record your weight and key body measurements at the end of every month - Weider 110 | User Manual - Page 15
MONDAY Date: / / EXERCISE WEIGHT SETS REPS TUESDAY Date: / / AEROBIC EXERCISE WEDNESDAY Date: / / EXERCISE WEIGHT SETS REPS THURSDAY Date: / / AEROBIC EXERCISE FRIDAY Date: / / EXERCISE WEIGHT SETS REPS Make photocopies of this page for scheduling and recording your workouts. 15 - Weider 110 | User Manual - Page 16
WEIDER® 110 weight bench) • The SERIAL NUMBER of the product (see the front cover of this manual) • The KEY NUMBER and DESCRIPTION of the desired part(s) (see the PART LIST in the center of this manual an ICON authorized service center, products used duration to the terms set forth herein. Some - Weider 110 | User Manual - Page 17
REMOVE THIS PART IDENTIFICATION CHART PART LIST/EXPLODED DRAWING SAVE THIS PART IDENTIFICATION CHART PART LIST/EXPLODED DRAWING FOR FUTURE REFERENCE 81 - Weider 110 | User Manual - Page 18
CHART This chart is provided to help you identify the small parts used in assembly. The number in parenthesis below each part refers to the key number of the part from the PART LIST in the center of this manual. Important: Some parts may have been pre-assembled for shipping purposes. If you cannot - Weider 110 | User Manual - Page 19
Carriage Bolt 47 2 Square Bushing 48 1 Weight Carriage 49 1 Stabilizer 50 2 Weight Clip 51 2 Weight Rest 52 2 M8 x 50mm Carriage Bolt # 1 User's Manual # 1 Exercise Guide # 1 Grease Packet "#" Indicates a non-illustrated part. Specifications are subject to change without - Weider 110 | User Manual - Page 20
EXPLODED DRAWING-Model No. WEBE03820 R0902A 38 9 7 42 21 37 34 34 33 39 41 43 9 51 24 38 44 43 12 1 22 9 16 40 27 17 25 28 24 16 14 15 21 35 6 26 5 30 21 5 36 34 14 13 35 34 33 18 21 3 26 30 24 51 18 1 13 14 39 17 28 24 50 19 46 22 21 47 45 8 48 17 24 21 47
-
 1
1 -
 2
2 -
 3
3 -
 4
4 -
 5
5 -
 6
6 -
 7
7 -
8
-
9
-
10
-
11
-
12
-
13
-
14
-
15
-
16
-
17
-
18
-
19
-
20
 |
 |
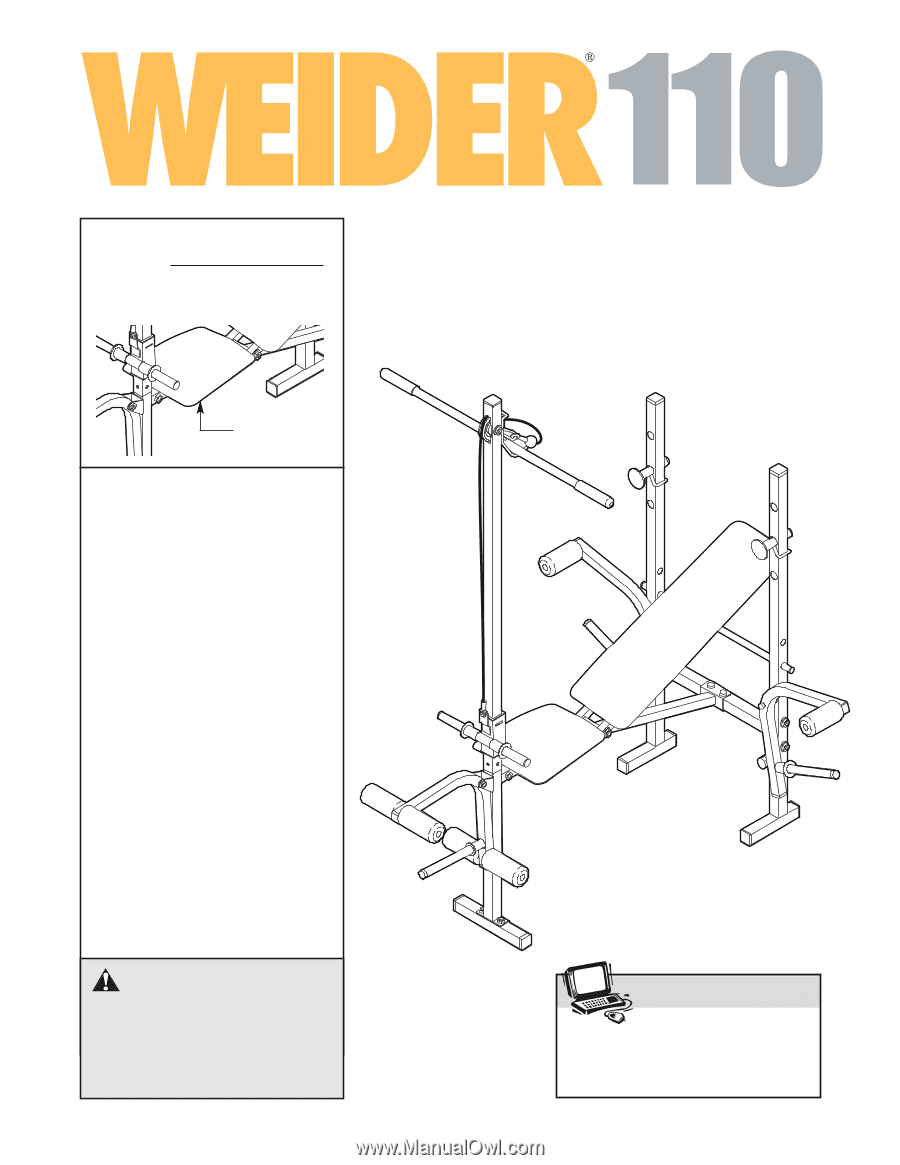
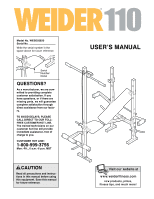
Model No. WEBE03820
Serial No.
Write the serial number in the
space above for future reference.
CAUTION
Read all precautions and instruc-
tions in this manual before using
this equipment. Save this manual
for future reference.
Serial
Number
Decal
USER’S MANUAL
Visit our website at
www.weiderfitness.com
new products, prizes,
fitness tips, and much more!
QUESTIONS?
As a manufacturer, we are com-
mitted to providing complete
customer satisfaction. If you
have questions, or if there are
missing parts, we will guarantee
complete satisfaction through
direct assistance from our facto-
ry.
TO AVOID DELAYS, PLEASE
CALL DIRECT TO OUR TOLL-
FREE CUSTOMER HOT LINE.
The trained technicians on our
customer hot line will provide
immediate assistance, free of
charge to you.
CUSTOMER HOT LINE:
1-800-999-3756
Mon.–Fri., 6 a.m.–6 p.m. MST