Weider Pro 230 Weight Bench English Manual - Page 8
Adjustment, Warning
 |
View all Weider Pro 230 Weight Bench manuals
Add to My Manuals
Save this manual to your list of manuals |
Page 8 highlights
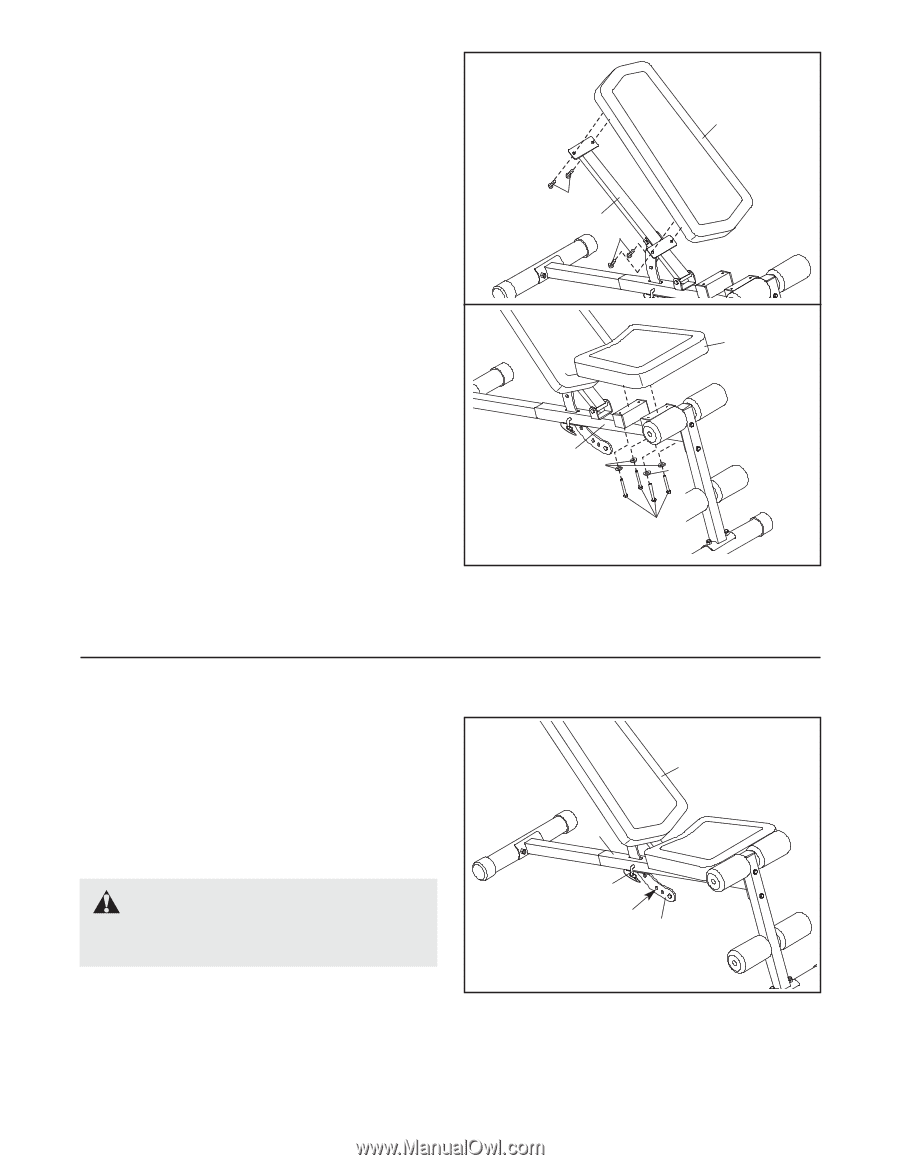
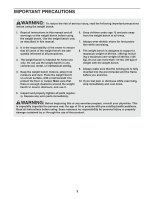
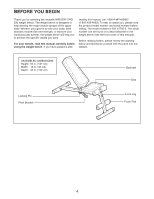
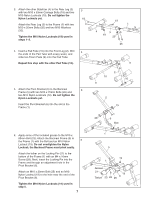
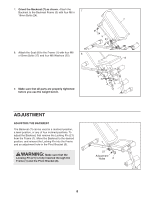
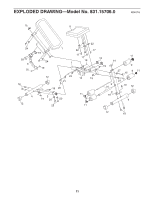
7. Orient the Backrest (7) as shown. Attach the 7 Backrest to the Backrest Frame (5) with four M6 x 16mm Bolts (24). 7 24 5 24 8. Attach the Seat (8) to the Frame (1) with four M6 8 x 60mm Bolts (17) and four M6 Washers (22). 8 9. Make sure that all parts are properly tightened before you use the weight bench. 1 22 22 17 ADJUSTMENT ADJUSTING THE BACKREST The Backrest (7) can be used in a declined position, a level position, or any of four inclined positions. To adjust the Backrest, first remove the Locking Pin (21) from the Frame (1). Move the Backrest to the desired position, and reinsert the Locking Pin into the Frame and an adjustment hole in the Pivot Bracket (6). WARNING: Make sure that the Locking Pin (21) is fully inserted through the Frame (1) and the Pivot Bracket (6). 7 1 21 Adjustment Holes 6 8
-
 1
1 -
2
-
 3
3 -
 4
4 -
 5
5 -
 6
6 -
 7
7 -
 8
8 -
 9
9 -
 10
10 -
 11
11 -
 12
12
 |
 |