Weider Pro 8900 English Manual - Page 5
Part Identification Chart - manual
 |
View all Weider Pro 8900 manuals
Add to My Manuals
Save this manual to your list of manuals |
Page 5 highlights
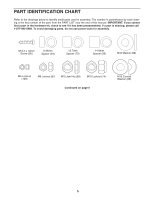
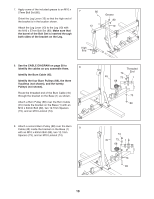
PART IDENTIFICATION CHART Refer to the drawings below to identify small parts used in assembly. The number in parentheses by each drawing is the key number of the part, from the PART LIST near the end of this manual. IMPORTANT: If you cannot find a part in the hardware kit, check to see if it has been preassembled. If a part is missing, please call 1-877-992-5999. To avoid damaging parts, do not use power tools for assembly. ST4.2 x 19mm Screw (90) 6.35mm Spacer (94) 12.7mm Spacer (73) 14.8mm Spacer (95) M10 Washer (88) M4 Locknut (108) M6 Locknut (87) M10 Jam Nut (99) M10 Locknut (74) Continued on page 6 M10 Curved Washer (86) 5
-
 1
1 -
 2
2 -
 3
3 -
 4
4 -
 5
5 -
 6
6 -
 7
7 -
 8
8 -
 9
9 -
 10
10 -
 11
11 -
12
-
13
-
14
-
15
-
16
-
17
-
18
-
19
-
20
-
21
-
22
-
23
-
24
-
25
-
26
-
27
-
28
-
29
-
30
-
31
-
32
-
33
-
34
-
35
-
36
-
37
-
38
-
39
-
40
-
41
-
42
-
43
-
44
-
45
-
46
-
47
-
48
 |
 |

5
M10 Locknut (74)
M10 Washer (88)
12.7mm
Spacer (73)
M10 Curved
Washer (86)
14.8mm
Spacer (95)
6.35mm
Spacer (94)
M10 Jam Nut (99)
M6 Locknut (87)
ST4.2 x 19mm
Screw (90)
M4 Locknut
(108)
PART IDENTIFICATION CHART
Refer to the drawings below to identify small parts used in assembly. The number in parentheses by each draw-
ing is the key number of the part, from the PART LIST near the end of this manual.
IMPORTANT: If you cannot
find a part in the hardware kit, check to see if it has been preassembled. If a part is missing, please call
1-877-992-5999. To avoid damaging parts, do not use power tools for assembly.
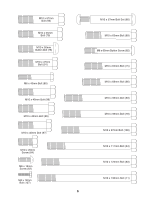
Continued on page 6