Weider Pro 9950 User Manual - Page 11
Attach the Right Press Arm 16 to the Press
 |
View all Weider Pro 9950 manuals
Add to My Manuals
Save this manual to your list of manuals |
Page 11 highlights
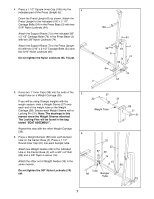
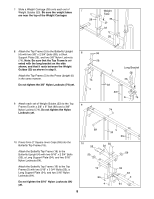
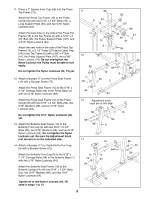
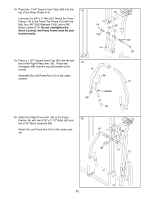
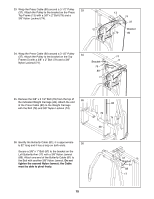
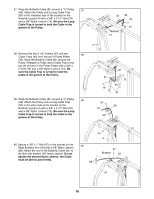
18. Press two 1 3/4" Square Inner Caps (60) into the 18 top of the Press Frame (14). 13 Lubricate the 3/8" x 9" Bolt (92). Attach the Press Frame (14) to the Press Top Frame (13) with the Bolt, four 3/8" SAE Washers (102), and a 3/8" Nylon Locknut (74). Do not overtighten the Nylon Locknut; the Press Frame must be able to pivot easily. 74 60 102 14 19. Press a 1 3/4" Square Inner Cap (60) into the bottom of the Right Press Arm (16). Press two 19 Handgrips (99) onto the top and bottom of the handle. 16 Assemble the Left Press Arm (15) in the same 99 manner. Handle 60 99 102 92 15 20. Attach the Right Press Arm (16) to the Press 20 Frame (14) with two 5/16" x 2 1/2" Bolts (63) and two 5/16" Nylon Locknuts (64). Attach the Left Press Arm (15) in the same manner. 16 64 63 14 15 11
-
 1
1 -
2
-
3
-
4
-
5
-
 6
6 -
 7
7 -
 8
8 -
 9
9 -
 10
10 -
 11
11 -
 12
12 -
 13
13 -
 14
14 -
 15
15 -
 16
16 -
17
-
18
-
19
-
20
-
21
-
22
-
23
-
24
-
25
-
26
-
27
-
28
-
29
-
30
-
31
-
32
-
33
-
34
-
35
 |
 |
