Weslo Bench 400 Uk Manual
Weslo Bench 400 Manual
 |
View all Weslo Bench 400 manuals
Add to My Manuals
Save this manual to your list of manuals |
Weslo Bench 400 manual content summary:
- Weslo Bench 400 | Uk Manual - Page 1
The serial number is found on a decal on the weight bench. Write the serial number in the space above for reference. QUESTIONS [email protected] USER'S MANUAL CAUTION Read all precautions and instructions in this manual before using this equipment. Save this manual for future reference. Visit - Weslo Bench 400 | Uk Manual - Page 2
Table of Contents Important Precautions 3 Before You Begin 4 Part Identification Chart 5 Assembly 6 Adjustments 10 Exercise Guidelines 12 Part List 14 Exploded Drawing 15 Ordering Replacement Parts Back Cover WESLO is a registered trademark of ICON Health & Fitness, Inc. 2 - Weslo Bench 400 | Uk Manual - Page 3
(50 lbs.) on the leg lever. Do not place more than 14 kg (30 lbs.) on each butterfly arm. WARNING: Before beginning this or any exercise program, consult your physician. This is especially important for persons over the age of 35 or persons with pre-existing health problems. Read all instructions - Weslo Bench 400 | Uk Manual - Page 4
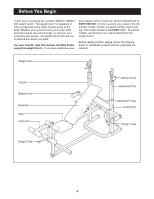
Thank you for selecting the versatile WESLO® BENCH 400 weight bench. The weight bench is designed to help you develop . For your benefit, read this manual carefully before using the weight bench. If you have additional ques- tions, please call our Customer Service Department at 08457 089 009. To - Weslo Bench 400 | Uk Manual - Page 5
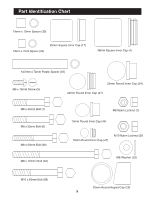
Part Identification Chart 13mm x 10mm Spacer (39) 13mm x 7mm Spacer (22) 25mm Square Inner Cap (17) 38mm Square Inner Cap (4) 14.5mm x 72mm Plastic Spacer (33) M6 x 16mm Screw (9) 25mm Round Inner Cap (24) 22mm Round Inner Cap (41) M8 x 45mm Bolt (1) M8 x 52mm Bolt (6) M8 x 55mm Bolt (38) M8 - Weslo Bench 400 | Uk Manual - Page 6
Assembly Before beginning assembly, read the following information and instructions carefully. Make Things Easier for Yourself Everything in this manual is designed to ensure that the weight bench can be assembled successfully by anyone. Most people find that by setting aside plenty of time, and by - Weslo Bench 400 | Uk Manual - Page 7
two M8 Nylon Locknuts (7). Do not tighten the Nylon Locknuts yet. 6 8 4. Attach the Bench Frame (8) to the Base (3) with an M8 x 55mm Bolt (38) and an M8 (17) into the top of the Leg Lever Tube (18). Press a Leg Lever Bushing (19) into the top of the front leg on the Bench Frame (8). Insert the - Weslo Bench 400 | Uk Manual - Page 8
7. Attach the Weight Tube (21) to the Leg Lever (27) with an M8 x 52mm Bolt (6), a 13mm x 7mm Spacer (22), 7 two M8 Washers (23), and an M8 Nylon Locknut (7). Press a 25mm Round Inner Cap (24) into the indicated end of the Weight Tube (21). Press a 25mm Round Angle Cap (25) onto the other end of - Weslo Bench 400 | Uk Manual - Page 9
wrapped around the "H"-frame. Rest one end of the Backrest (10) on the Adjustment Tube (12). Slide the Backrest Bracket (11) that is 11 attached with two screws onto the welded pin on the Bench Frame (8). Then, pivot the other Backrest Bracket over the welded pin. Fasten the Backrest Bracket - Weslo Bench 400 | Uk Manual - Page 10
8 9 Adjustments This section explains how to adjust the weight bench. See the Exercise Guidelines on page 12 for important information on how to get the most benefit from your exercise program. Also, refer to the accompanying exercise guide to see the correct form for each exercise. Inspect and - Weslo Bench 400 | Uk Manual - Page 11
onto the Weight Tube (21). WARNING: Do not place more than 23 kg (50 lbs.) on the Leg Lever (27). 21 ADJUSTING THE HEIGHT OF THE LEG LEVER 18) to the desired position and re-insert the Large Adjustment 20 Clip. 12 5 18 27 LOCKING THE BARBELL To change weights whilst your barbell (not included - Weslo Bench 400 | Uk Manual - Page 12
Determining the exact length of time for each workout, as well as the number of repetitions or sets completed, is an individual matter. It is important to avoid overdoing it during the first few months of your exercise program. You should progress at your own pace and be sensitive to your body - Weslo Bench 400 | Uk Manual - Page 13
STAYING MOTIVATED For motivation, keep a record of each workout. List the date, the exercises performed, the weight used, and the numbers of sets and repetitions completed. Record your weight and key body measurements at the end of every month. Remember, the key to achieving the greatest results is - Weslo Bench 400 | Uk Manual - Page 14
12 1 13 1 14 1 15 2 16 2 17 1 18 1 19 1 20 1 21 1 22 1 23 14 24 5 25 1 26 3 Description M8 x 45mm Bolt "U"-bracket Base 38mm Square Inner Cap "H"-frame M8 x 52mm Bolt M8 Nylon Locknut Bench Inner Cap Upright Bushing User's Manual Exercise Guide Grease Pack Note: "#" - Weslo Bench 400 | Uk Manual - Page 15
Exploded Drawing-Model No. WLEMBE73201 R0703A 14 7 10 9 7 15 40 48 15 11 16 6 23 5 48 4 39 47 12 16 31 26 23 45 41 44 7 43 42 47 9 37 41 46 24 42 23 7 41 44 17 44 35 23 33 7 42 13 - Weslo Bench 400 | Uk Manual - Page 16
ordering parts, please be prepared to give the following information: • the MODEL NUMBER of the product (WLEMBE73201) • the NAME of the product (WESLO® 400 weight bench) • the SERIAL NUMBER of the product • the KEY NUMBER and DESCRIPTION of the part(s) (see the PART LIST and the EXPLODED DRAWING on
-
 1
1 -
 2
2 -
 3
3 -
 4
4 -
 5
5 -
 6
6 -
 7
7 -
8
-
9
-
10
-
11
-
12
-
13
-
14
-
15
-
16
 |
 |
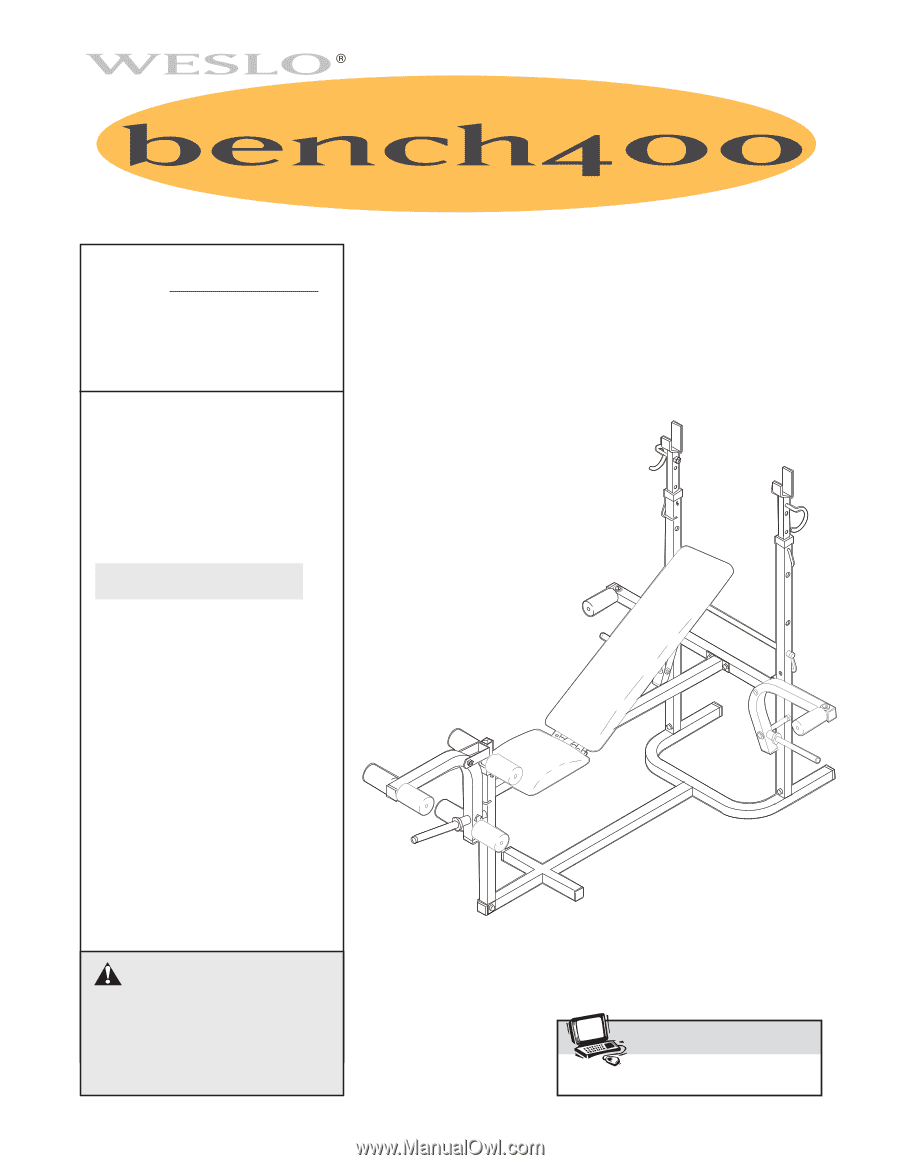
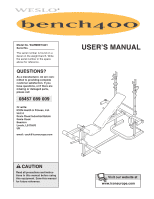
Model No. WLEMBE73201
Serial No.
The serial number is found on a
decal on the weight bench. Write
the serial number in the space
above for reference.
CAUTION
Read all precautions and instruc-
tions in this manual before using
this equipment. Save this manual
for future reference.
USER’S MANUAL
QUESTIONS?
As a manufacturer, we are com-
mitted to providing complete
customer satisfaction. If you
have questions, or if there are
missing or damaged parts,
please call:
Or write:
ICON Health & Fitness, Ltd.
Unit 4
Revie Road Industrial Estate
Revie Road
Beeston
Leeds, LS118JG
UK
email: [email protected]
08457 089 009
www.iconeurope.com
Visit our website at