Weslo Cadence 920 English Manual
Weslo Cadence 920 Manual
 |
View all Weslo Cadence 920 manuals
Add to My Manuals
Save this manual to your list of manuals |
Weslo Cadence 920 manual content summary:
- Weslo Cadence 920 | English Manual - Page 1
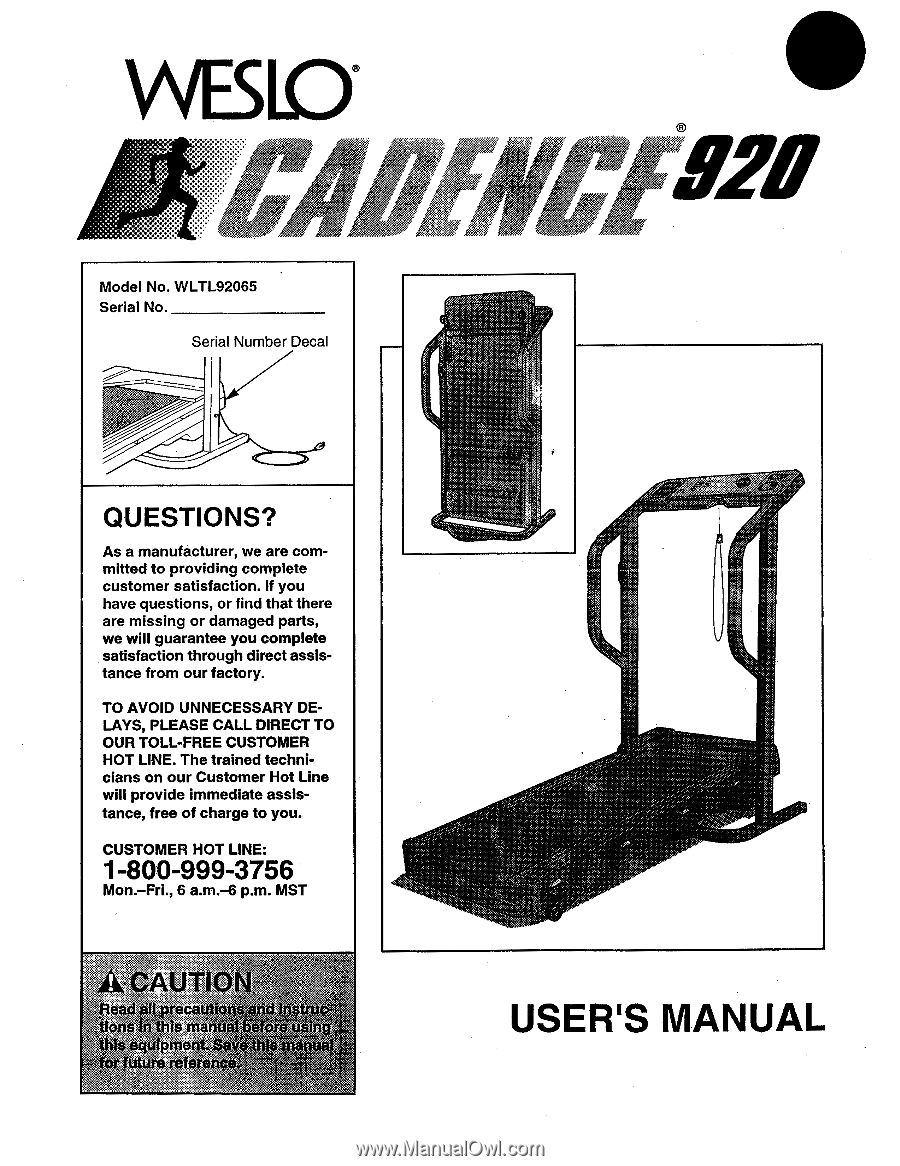
complete customer satisfaction. If you have questions, or find that there are missing or damaged parts, we will guarantee you complete satisfaction through direct assistance from our factory. TO AVOID to you. CUST0O0MER HOT L3INE:5 6 l 8 9997 Mon.-Fri., 6 a.m.-6 p.m. MST USER'S MANUAL - Weslo Cadence 920 | English Manual - Page 2
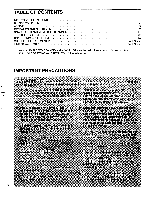
ASSEMBLY OPERATION AND ADJUSTMENT HOW TO FOLD AND MOVE THE TREADMILL TROUBLE-SHOOTING CONDITIONING GUIDELINES ORDERING REPLACEMENT PARTS LIMITED WARRANTY 2 4 5 7 11 12 14 Back Cover Back Cover Note: An EXPLODED DRAWING and a PART LIST are attached to the center of this manual. Save the EXPLODED - Weslo Cadence 920 | English Manual - Page 3
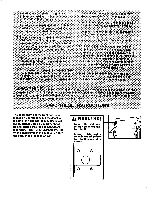
unattended while 0 remove the key Whari:::; e treadmill isnot.in use. . ; treadmill. If the decal is missing, or if it is not legible, please call our Customer Service Department, tollfree, to order a free replacement decal (see ORDERING REPLACEMENT PARTS on the back cover of this manual - Weslo Cadence 920 | English Manual - Page 4
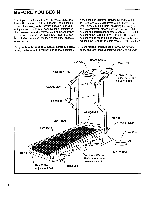
with the labeled parts. Console Speed Control Accessory Tray z77 ,.65 72F Storage Latch Key/Clip Towel Rack Water Bottle Holder (Water Bottle is not included) Handrails LEFT SIDE Foot Rails Walking Belt -- FRONT Circuit Breaker Power Cord BACK Rear Roller Adjustment Bolt 0 Incline Leg - Weslo Cadence 920 | English Manual - Page 5
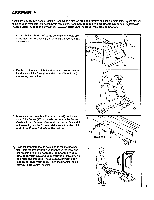
not to overtighten the Screws. Make sure that the thick end of the Frame Guide is at the bottom. 3 s 100 52 Thick end 23 4. Next, the treadmill should be raised to the storage posi-\tion. Hold the treadmill with your hands in the locations 4 shown at the right. To decrease the possibility - Weslo Cadence 920 | English Manual - Page 6
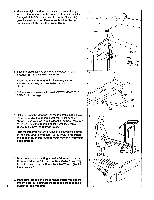
treadmill slightly until the Frame Guide (52) is past the Storage Latch. Hold the treadmill with both hands in the locations shown at the right. Lower the treadmill Clip. 9. Make sure that all parts are tightened before you use the treadmill. Note: To protect the floor or carpet, pig& a 6 - Weslo Cadence 920 | English Manual - Page 7
OPERATION AND ADJUSTMENT THE PERFORMANT LUBETM WALKING BELT electric shock. This product is equipped with a cord having an equipment-grounding conductor and a Your treadmill features a walking belt coated with grounding plug. Plug the power cord into a surge PERFORMANT LUBErm, a high- - Weslo Cadence 920 | English Manual - Page 8
DIAGRAM OF THE CONSOLE Monitor Displays Speed Control WED "zoiwd.1.4.mily THUMB PULSE," TIME PULSE CAL/FAT CAL ler on the face of the Key console, remove it. anso e, raa Betere:b .eretin. towel :re tJry 000,4 11 §.. Ya ,g3 BATTERY INSTALLATION The console requires three "AA" batteries - Weslo Cadence 920 | English Manual - Page 9
the steps below to operate the console. 11 Insert the key fully into the power switch. Note: Inserting the key will not turn on the dis- plays. The displays will ANON INSERT KEY turn on when the ON/RESET button is pressed or when the 21\ walking belt is started. If you just installed - Weslo Cadence 920 | English Manual - Page 10
, push on the back of the treadmill to make sure that the incline legs are locked in position. Make sure walking belt and remove the key. Step onto the foot rails, stop the walking belt, and remove the key from TON 0 UISIIIT KIT the console. Store the key in a secure place. After the key - Weslo Cadence 920 | English Manual - Page 11
2. Move your right hand to the position shown at the right, and hold the treadmill firmly. Raise the treadmill until the storage latch closes over the frame guide. Make sure that the storage latch closes fully over the frame guide. To protect the floor or carpet from damage, place a mat under the - Weslo Cadence 920 | English Manual - Page 12
bend your legs and keep your back straight. ( TROUBLE-SHOOTING Most treadmill problems can be solved by following the steps below. key from the console. Reinsert the key fully into the console. (See step 1 on page 9.) 12 d. If the treadmill still will not run, please call our Customer Service - Weslo Cadence 920 | English Manual - Page 13
THE POWER CORD. Using the alien wrench, turn the left rear roller adjustment bolt clockwise 1/4 of a turn. Plug in the power cord, insert the key and run the treadmill for a few minutes. Repeat until the walking belt is centered. b. If the walking belt has shifted to the right, first remove the - Weslo Cadence 920 | English Manual - Page 14
exercise to your specific goals. The key to achieving the desired results is to adjust the intensity of your exercise. It may also be helpful to turn the speed control on the console to your pulse as a guide. As you exercise, your pulse should Each workout should include three parts: (1) a warmup, - Weslo Cadence 920 | English Manual - Page 15
flexibility of your muscles and will help to prevent post-exercise problems. Exercise Frequency To maintain or improve your condition, complete three five workouts each week if desired. The key to success is to make exercise a regular and enjoyable part of your everyday life. SUGGESTED STRETCHES - Weslo Cadence 920 | English Manual - Page 16
The NAME OF THE PRODUCT (WESLO® CADENCE 920 treadmill). • The SERIAL NUMBER OF THE PRODUCT (see the front cover of this manual). • The KEY NUMBER OF THE PART(S) (see the EXPLODED DRAWING and PART LIST attached to the center of this manual). • The DESCRIPTION OF THE PART(S) (see the EXPLODED DRAWING - Weslo Cadence 920 | English Manual - Page 17
REMOVE THIS EXPLODED DRAWING AND PART LIST FROM THE MANUAL Save this EXPLODED DRAWING and PART LIST for future reference. -\ O O Note: Specifications are subject to change without notice. For information about ordering replacement parts, see the back cover of the User's Manual. - Weslo Cadence 920 | English Manual - Page 18
EXPLODED DRAWING-Model No. WLTL92065 88 R1297A 11 99 47 58 17 14 15 12 47 18 19 92 100 37 51 60 9 91 100 100 100 34'' 35 36 45 38 73 19 629,1:,) ti 20 93 32 i I 47 101 19 21 19 25 41 1 50 100 P ' 3 69 I Vi: 86 , 69 28 31 13 r. .-`°L--"30 69 87 83 86 52 19 100 85 90 - Weslo Cadence 920 | English Manual - Page 19
Left Foot Rail Walking Belt Walking Platform Platform Screw Isolator Left Console Attachment Shock Front Roller/Pulley Releasable Cable Tie Storage Latch Bracket Controller Electronics Bracket Incline Leg Bolt Incline Leg Wheel Bolt Cable Tie Clamp 8" Cable Tie Battery Cover Screw Motor Guard Latch
-
 1
1 -
 2
2 -
 3
3 -
 4
4 -
 5
5 -
 6
6 -
 7
7 -
8
-
9
-
10
-
11
-
12
-
13
-
14
-
15
-
16
-
17
-
18
-
19
 |
 |
WESLD
Model
No.
WLTL92065
Serial
No.
Serial
Number
Decal
QUESTIONS?
As
a
manufacturer,
we
are
com-
mitted
to
providing
complete
customer
satisfaction.
If
you
have
questions,
or
find
that
there
are
missing
or
damaged
parts,
we
will
guarantee
you
complete
satisfaction
through
direct
assis-
tance
from
our
factory.
TO
AVOID
UNNECESSARY
DE-
LAYS,
PLEASE
CALL
DIRECT
TO
OUR
TOLL
-FREE
CUSTOMER
HOT
LINE.
The
trained
techni-
cians
on
our
Customer
Hot
Line
will
provide
immediate
assis-
tance,
free
of
charge
to
you.
CUSTOMER
00
HOT
9997
3
LINE:
l
8
5
6
Mon.
-Fri.,
6
a.m.-6
p.m.
MST
•el
„..„
1
12
,
11
USER'S
MANUAL