Western Digital WD40000H2NC User Manual - Page 12
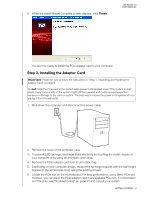
Step 3. Installing the Adapter Card
 |
View all Western Digital WD40000H2NC manuals
Add to My Manuals
Save this manual to your list of manuals |
Page 12 highlights
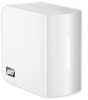
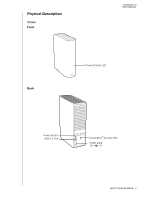
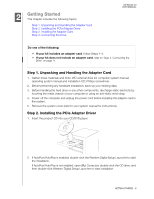
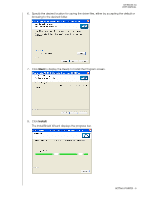
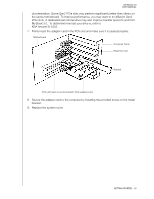
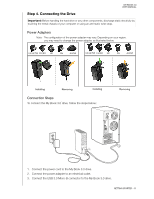
9. When the Install Wizard Complete screen displays, click Finish. MY BOOK 3.0 USER MANUAL You are now ready to install the PCIe adapter card in your computer. Step 3. Installing the Adapter Card Important: Please be sure to follow the instructions in "Step 1. Unpacking and Handling the Adapter Card" on page 6. Do not install the PCIe card in the system while power is still applied. Even if the system is shut down, many components in the system might still be powered and could cause unexpected behavior or damage to the card or system. The best way to ensure the power is completely off is to unplug it from the wall outlet. 1. Shut down the computer and disconnect the power cable. 2. Remove the cover of the computer case. 3. To prevent ESD damage, discharge static electricity by touching the metal chassis of your computer or by using an anti-static wrist strap. 4. Remove the PCIe adapter card from its anti-static bag. 5. Depending on your computer design, replace the full-height bracket with the half-height bracket (in the accessories box), using the existing screws. 6. Locate the PCIe slot on the motherboard. For best performance, use a Gen2 PCIe slot. However, you can place the PCIe adapter card in any available PCIe slot. For information on PCIe slots, see "Troubleshooting" on page 13 and consult your system GETTING STARTED - 9
-
 1
1 -
2
-
3
-
4
-
5
-
6
-
 7
7 -
 8
8 -
 9
9 -
 10
10 -
 11
11 -
 12
12 -
 13
13 -
 14
14 -
 15
15 -
 16
16 -
 17
17 -
18
-
19
-
20
-
21
 |
 |
