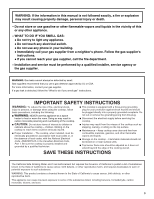
Whirlpool GLS3074VS Use and Care Guide - Page 8
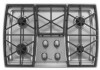
Surface Grates with Locator Pin, Home Canning, Cookware - gas cooktop
 |
UPC - 883049120072
View all Whirlpool GLS3074VS manuals
Add to My Manuals
Save this manual to your list of manuals |
Page 8 highlights
Gas tube opening: Gas must flow freely throughout the gas tube opening for the burner to light properly. Keep this area free of soil and do not allow spills, food, cleaning agents or any other A material to enter the gas tube opening. Keep spillovers out of the B gas tube by always using a burner cap. A B A. 1-1¹⁄₂" (25-38 mm) B. Burner ports Burner ports: Check burner flames occasionally for proper size and shape as shown above. A good flame is blue in color, not yellow. Keep this area free of soil and do not allow spills, food, cleaning agents or any other material to enter the burner ports. To Clean: IMPORTANT: Before cleaning, make sure all controls are off and the cooktop is cool. Do not use oven cleaners, bleach or rust removers. 1. Remove the burner cap from the burner base and clean according to "General Cleaning" section. 2. Clean the gas tube opening with a damp cloth. 3. Clean clogged burner ports with a straight pin as shown. Do not enlarge or distort the port. Do not use a wooden toothpick. If the burner needs to be adjusted, contact a trained repair specialist. C A. Left grate B. Middle grate C. Groove Locator Pin The locator pin on the grate must be positioned in the burner cap hole to hold the grate in place. A B A. Locator pin B. Burner cap 4. Replace the burner cap, making sure the alignment pins on the cap are properly aligned with the burner base. A B A. Incorrect B. Correct 5. Turn on the burner. If the burner does not light, check cap alignment. If the burner still does not light, do not service the sealed burner yourself. Contact a trained repair specialist. Surface Grates with Locator Pin Surface Grates The grates located on the left and right side of the cooktop contain grooves. These grooves must always face inward toward the control knob panel to hold the grates in place. On some models, the middle grate must be placed in position first, followed by the left and right grates. Home Canning When canning for long periods, alternate the use of surface burners between batches. This allows time for the most recently used areas to cool. ■ Center the canner on the grate. ■ Do not place canner on 2 surface burners at the same time. ■ For more information, contact your local agricultural department. Companies that manufacture home canning products can also offer assistance. Cookware IMPORTANT: Do not leave empty cookware on a hot surface cooking area, element or surface burner. Ideal cookware should have a flat bottom, straight sides, and a well-fitting lid and the material should be of medium-to-heavy thickness. Rough finishes may scratch the cooktop. Aluminum and copper may be used as a core or base in cookware. However, when used as a base they can leave permanent marks on the cooktop or grates. Cookware material is a factor in how quickly and evenly heat is transferred, which affects cooking results. A nonstick finish has the same characteristics as its base material. For example, aluminum cookware with a nonstick finish will take on the properties of aluminum. 8
-
 1
1 -
2
-
 3
3 -
 4
4 -
 5
5 -
 6
6 -
 7
7 -
 8
8 -
 9
9 -
 10
10 -
 11
11 -
 12
12 -
 13
13 -
14
-
15
-
16
-
17
-
18
-
19
-
20
-
21
-
22
-
23
-
24
 |
 |
