Whirlpool KDRP407HSS Installation Instructions
Whirlpool KDRP407HSS Manual
 |
View all Whirlpool KDRP407HSS manuals
Add to My Manuals
Save this manual to your list of manuals |
Whirlpool KDRP407HSS manual content summary:
- Whirlpool KDRP407HSS | Installation Instructions - Page 1
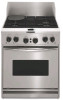
30" (76.2 CM) COMMERCIAL STYLE DUAL FUEL RANGE WITH SELF-CLEANING THERMAL/CONVECTION OVEN for residential use only INSTRUCTIONS POUR L'INSTALLATION CUISINIÈRE STYLE COMMERCIAL - 30" (76,2 CM) DEUX COMBUSTIBLES AVEC FOUR AUTONETTOYANT THERMIQUE À CONVECTION pour utilisation résidentielle seulement - Whirlpool KDRP407HSS | Installation Instructions - Page 2
and Parts 5 Location Requirements 5 Electrical Requirements - U.S.A. Only 7 Electrical Requirements - Canada Only 7 Gas Supply Requirements 8 INSTALLATION INSTRUCTIONS 9 Unpack Range 9 Level Range 9 Install Anti-Tip Bracket 10 Make Electrical Connection 10 Attach Backguard or Island Trim - Whirlpool KDRP407HSS | Installation Instructions - Page 3
RANGE SAFETY Your safety and the safety of others are very important. We have provided many important safety messages in this manual and instructions. • If you cannot reach your gas supplier, call the fire department. - Installation and service must be performed by a qualified installer, service - Whirlpool KDRP407HSS | Installation Instructions - Page 4
the State of Massachusetts, the following installation instructions apply: s Installations and repairs must be performed by tip the range and be killed. Connect anti-tip bracket to rear range foot. Reconnect the anti-tip bracket, if the range is moved. Failure to follow these instructions can result - Whirlpool KDRP407HSS | Installation Instructions - Page 5
Gather the required tools and parts before starting installation. Read and follow the safety instructions provided with any tools listed here. Tools needed s Island trim and attachment screws (3). NOTE: The island trim included with the range may be used if installed with 1" (2.5 cm) clearance from - Whirlpool KDRP407HSS | Installation Instructions - Page 6
from both sides of range to side wall or other combustible material M. For minimum clearance to top of range, see NOTE* N. 30" (76.2 cm) min. upper cabinet width O. 13" (33 cm) max If installing a hood above the range, follow the hood instructions for dimensional clearances above the cooktop surface. - Whirlpool KDRP407HSS | Installation Instructions - Page 7
electrical installer if you are not sure the range is properly grounded. s Do not have a fuse in the neutral or ground circuit. s Range must be connected to the proper electrical voltage and frequency as specified on the model/serial number rating plate. (The model/serial number rating plate - Whirlpool KDRP407HSS | Installation Instructions - Page 8
on the model/serial rating plate for use with a different gas without consulting the serving gas supplier. To convert to LP gas, use the LP gas conversion kit provided with your range. The parts for this kit are in the literature package supplied with the range. s Must include a manual shutoff - Whirlpool KDRP407HSS | Installation Instructions - Page 9
less than ½ psi (3.5 kPa). INSTALLATION INSTRUCTIONS Unpack Range WARNING Excessive Weight Hazard Use two or more people to move and install range. Failure to do so can result in back or other injury. Level Range Move range close to the cabinet opening. Place a rack in oven. Place level on rack - Whirlpool KDRP407HSS | Installation Instructions - Page 10
. Reconnect the anti-tip bracket, if the range is moved. Failure to follow these instructions can result in death or serious burns to children and adults. 1. Choose the correct anti-tip bracket for your installation. s If the wall behind the range has no baseboard or has a baseboard up to ³⁄₈" (0.95 - Whirlpool KDRP407HSS | Installation Instructions - Page 11
white (neutral) wire in the junction box using UL listed wire nuts. 8. Install junction box cover. 9. Reconnect power. Attach Backguard or Island Trim WARNING Excessive Weight Hazard Use two or more people to move and install range. Failure to do so can result in back or other injury. 1. Using - Whirlpool KDRP407HSS | Installation Instructions - Page 12
Island Trim A. Gas pressure regulator B. Use pipe-joint compound C. Adapter (must have ½" male pipe thread) D. Flexible connector HG F E. Manual the middle front of the range. 2. Apply pipe-joint simmer plate from parts package. Align notches instructions located in the Use and Care Guide. 12 - Whirlpool KDRP407HSS | Installation Instructions - Page 13
is turned on. s Check that the range is plugged in and the circuit breaker has not tripped or the fuse blown. Repeat start-up. If the oven still does not operate at this point, contact your dealer or authorized service company for assistance. Install Burner Grates Place burner grates over burner - Whirlpool KDRP407HSS | Installation Instructions - Page 14
and oven. See your Use and Care Guide for specific instruction on range operation. If range does not operate, check the following: s Household fuse has not blown or circuit breaker has not tripped. s Gas valves are turned to the "ON" position. s Electrical supply is connected. s See "Troubleshooting - Whirlpool KDRP407HSS | Installation Instructions - Page 15
with standard 3 prong grounding-type plug. Verify proper operation after servicing. Cooktop Schematic L1 BK GND GN N L2 WR VALVE SWITCHES SPARK MODULE YEL OR BRN (4) PLCS IGNITER ELECTRODES Oven Schematic *Blower remains off until oven reaches 190°F (88°C) and may continue running up to 45 - Whirlpool KDRP407HSS | Installation Instructions - Page 16
Notes 16 - Whirlpool KDRP407HSS | Installation Instructions - Page 17
le fournisseur de gaz d'un téléphone voisin. Suivre ses instructions. • À défaut de joindre votre fournisseur de gaz, appeler les pompiers. - L'installation et l'entretien doivent être effectués par un installateur qualifié, une agence de service ou le fournisseur de gaz. AVERTISSEMENT Risque de - Whirlpool KDRP407HSS | Installation Instructions - Page 18
Outillage et pièces Rassembler les outils et pièces nécessaires avant de commencer l'installation. Lire et suivre les instructions de sécurité fournies avec les outils indiqués ici. Outillage nécessaire Vérifier les codes locaux et consulter le fournisseur de gaz. Vérifier l'alimentation - Whirlpool KDRP407HSS | Installation Instructions - Page 19
Part 280). Lorsque cette norme n'est pas applicable, l'installation doit satisfaire aux critères de la norme Standard for Manufactured Home Installations . des placards muraux 13" (33 cm) rieure à : acier calibre 28 MSG, acier installation d'une hotte au-dessus de la cuisinière, suivre les instructions - Whirlpool KDRP407HSS | Installation Instructions - Page 20
és ou disjoncteurs. La taille des fusibles ne doit pas excéder le calibre du circuit de la cuisinière spécifié sur la plaque signalétique instructions peut causer un décès, une explosion ou un incendie. Observer toutes les prescriptions des codes et règlements en vigueur IMPORTANT : L'installation - Whirlpool KDRP407HSS | Installation Instructions - Page 21
une canalisation de gaz rigide de ¾" (1,9 cm) jusqu'à l'emplacement d'installation de la cuisinière. L'emploi d'une canalisation de plus petit diamètre sur une plus grande longueur peut susciter une déficience du débit d'alimentation. On - Whirlpool KDRP407HSS | Installation Instructions - Page 22
Déballage de la cuisinière AVERTISSEMENT Risque du poids excessif Utiliser deux ou plus de personnes pour déplacer et installer la cuisinière. Le non-respect de cette instruction peut causer une blessure au dos ou d'autre blessure. 1. Ôter les matériaux d'emballage, le ruban adhésif et le - Whirlpool KDRP407HSS | Installation Instructions - Page 23
. Utiliser des conducteurs de cuivre rigides de calibre 8. Relier la cuisinière à la terre. Le non-respect de ces instructions peut causer un décès, un incendie ou un de fil (homologation UL). 9. Installer le couvercle de la boîte de connexion. 10. Reconnecter la source de courant électrique. - Whirlpool KDRP407HSS | Installation Instructions - Page 24
dosseret ou de la garniture en îlot AVERTISSEMENT Risque du poids excessif Utiliser deux ou plus de personnes pour déplacer et installer la cuisinière. Le non-respect de cette instruction peut causer une blessure au dos ou d'autre blessure. 1. À deux personnes ou plus, déplacer la cuisinière près de - Whirlpool KDRP407HSS | Installation Instructions - Page 25
l'alimentation électrique. "PF" devrait apparaître sur l'affichage de l'horloge. Pour plus d'informations, se référer aux instructions de l'utilisateur situées dans le Guide d'utilisation et d'entretien. Système d'allumage électronique Allumage initial et réglages des flammes Un système d'allumage - Whirlpool KDRP407HSS | Installation Instructions - Page 26
stade, contacter votre marchand ou la compagnie de service autorisée pour obtenir de l'assistance. Installation des grilles de brûleurs Placer les grilles de et le four. Pour des instructions spécifiques concernant l'utilisation de la cuisinière, consulter le Guide d'utilisation et d'entretien. Si - Whirlpool KDRP407HSS | Installation Instructions - Page 27
SCHÉMAS DE CÂBLAGE MISE EN GARDE : Étiqueter tous les conducteurs avant de les débrancher lors d'une intervention sur le module de commande. Une erreur de rebranchement pourrait provoquer un fonctionnement incorrect et une situation dangereuse. Le cordon d'alimentation de l'appareil est doté d'une - Whirlpool KDRP407HSS | Installation Instructions - Page 28
© 2004. All rights reserved. Tous droits réservés. ® Registered Trademark/TM Trademark of KitchenAid, U.S.A., KitchenAid Canada licensee in Canada ® Marque déposée/TM Marque de commerce de KitchenAid, U.S.A., Emploi licencié par KitchenAid Canada au Canada 10/04 Printed in U.S.A. Imprimé aux É.-U.
-
 1
1 -
 2
2 -
 3
3 -
 4
4 -
 5
5 -
 6
6 -
 7
7 -
8
-
9
-
10
-
11
-
12
-
13
-
14
-
15
-
16
-
17
-
18
-
19
-
20
-
21
-
22
-
23
-
24
-
25
-
26
-
27
-
28
 |
 |

INSTALLATION INSTRUCTIONS
30" (76.2 CM) COMMERCIAL STYLE DUAL FUEL RANGE
WITH SELF-CLEANING THERMAL/CONVECTION OVEN
for residential use only
INSTRUCTIONS POUR L’INSTALLATION
CUISINIÈRE STYLE COMMERCIAL - 30" (76,2 CM) DEUX
COMBUSTIBLES AVEC FOUR AUTONETTOYANT
THERMIQUE À CONVECTION
pour utilisation résidentielle seulement
Table of Contents/Table des matières
.............................................................................
2
9759121