Whirlpool KDRP407HSS Installation Instructions - Page 14
Reinstall Bottom Vent, Complete Installation
 |
View all Whirlpool KDRP407HSS manuals
Add to My Manuals
Save this manual to your list of manuals |
Page 14 highlights
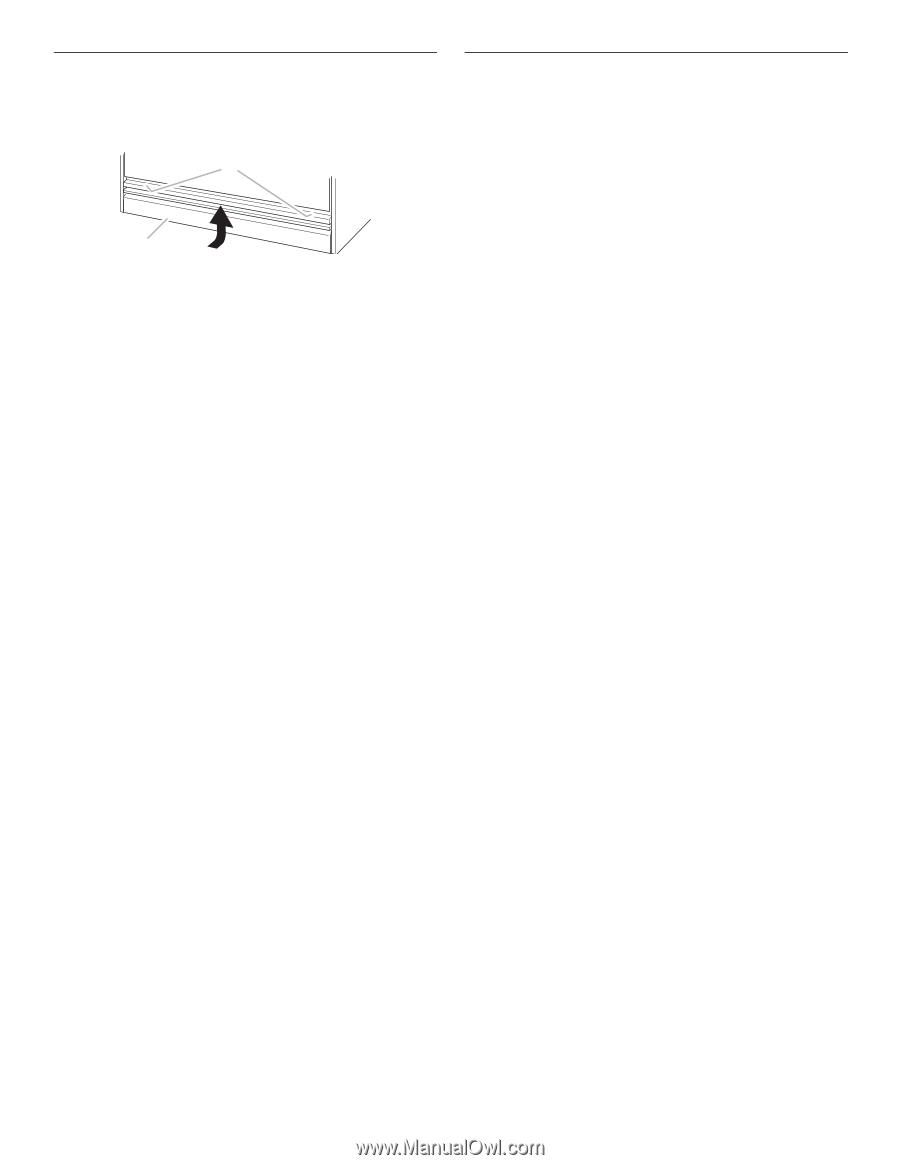
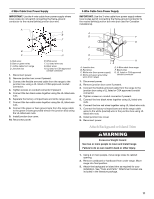
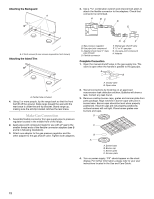
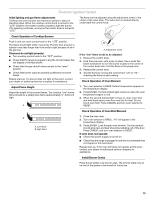
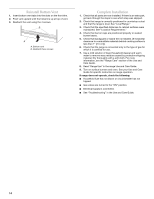
Reinstall Bottom Vent 1. Insert bottom vent tabs into the slots on the front trim. 2. Push vent upward until the holes line up at top of vent. 3. Reattach the vent using the 4 screws. B A A. Bottom vent B. Reattach these screws Complete Installation 1. Check that all parts are now installed. If there is an extra part, go back through the steps to see which step was skipped. 2. Check that range is correctly positioned in countertop cutout and that the range is level. See "Level Range." 3. Check that the specified distances to cabinet surfaces were maintained. See "Location Requirements." 4. Check that burner caps are positioned properly on sealed burner bases. 5. Check that backguard or island trim is installed. (If horizontal clearance to combustible materials behind cooking surface is less than 1" [2.5 cm]). 6. Check that the range is connected only to the type of gas for which it is certified for use. 7. Use a mild solution of liquid household cleaner and warm water to remove waxy residue caused by protective shipping material. Dry thoroughly with a soft cloth. For more information, see the "Range Care" section of the Use and Care Guide. 8. Read "Range Use" in the range Use and Care Guide. 9. Turn on surface burners and oven. See your Use and Care Guide for specific instruction on range operation. If range does not operate, check the following: s Household fuse has not blown or circuit breaker has not tripped. s Gas valves are turned to the "ON" position. s Electrical supply is connected. s See "Troubleshooting" in the Use and Care Guide. 14
-
 1
1 -
2
-
3
-
4
-
5
-
6
-
7
-
8
-
 9
9 -
 10
10 -
 11
11 -
 12
12 -
 13
13 -
 14
14 -
 15
15 -
 16
16 -
 17
17 -
 18
18 -
 19
19 -
20
-
21
-
22
-
23
-
24
-
25
-
26
-
27
-
28
 |
 |