Whirlpool LER5636PQ Installation Instructions
Whirlpool LER5636PQ Manual
 |
View all Whirlpool LER5636PQ manuals
Add to My Manuals
Save this manual to your list of manuals |
Whirlpool LER5636PQ manual content summary:
- Whirlpool LER5636PQ | Installation Instructions - Page 1
Table of Contents / Indice DRYER SAFETY 1 INSTALLATION INSTRUCTIONS 2 Tools and Parts 2 Location Requirements 2 Electrical are very important. We have provided many important messages. safety messages in this manual and on your appliance. Always read and obey all safety This is the safety - Whirlpool LER5636PQ | Installation Instructions - Page 2
2 before purchasing parts. Mobile home installations require metal exhaust system hardware available for purchase from the dealer from whom you purchased your dryer. For further information, please reference the "Service or Assistance" section of your "Dryer User Instructions." Explosion Hazard - Whirlpool LER5636PQ | Installation Instructions - Page 3
Part 3280 (formerly the Federal Standard for Mobile Home Construction and Safety, Title 24, HUD Part m) long. GROUNDING INSTRUCTIONS • For a grounded, cord-connected dryer: This dryer must be grounded. electrician or service representative or )ersonnel if you are in doubt as to whether the dryer is - Whirlpool LER5636PQ | Installation Instructions - Page 4
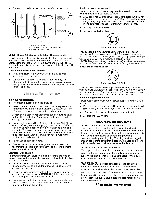
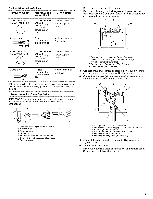
strain relief. The strain relief should have a tight fit with the dryer cabinet and be in a horizontal position. 1. Terminal block cover 2. 6. Hole below terminal block opening 4. Now complete installation following instructions for your type of electrical connection: 4-wire (recommended) 3-wire - Whirlpool LER5636PQ | Installation Instructions - Page 5
Options And you will be connecting to: Go to Section 4-wire receptacle (NEMA Type 14-30R) (_ A UL listed, 120/ 240 volt amp., dryer mcpooinrwdim*erumsu, pp3l0y 4-wire connection: Power Supply Cord 4-wire direct /,_'_ 3-wire receptacle (NEMA type 10-30R) (_ A fused circuit breaker disconnect or - Whirlpool LER5636PQ | Installation Instructions - Page 6
of 3-wire connections. Direct wire cable must have 5 ft (1.52 m) of extra length so dryer can be moved if needed. Strip 5 in. (12.7 cm) of outer covering from end relief screws. 7. Insert tab of terminal block cover into slot of dryer rear panel. Secure cover with hold-down screw. 3-wire connection: - Whirlpool LER5636PQ | Installation Instructions - Page 7
: Direct Wire Use where local codes permit connecting cabinet-ground conductor to neutral wire. Direct wire cable must have 5 ft (1.82 m) of extra length so dryer can be moved if needed. Strip 31/2in. (8.9 cm) of outer covering from end of cable. Strip insulation back 1 in. (2.5 cm). If using 3-wire - Whirlpool LER5636PQ | Installation Instructions - Page 8
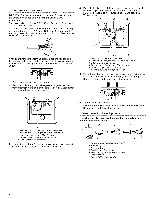
or by calling Whirlpool Parts and Accessories. For more information, see the "Assistance or Service" section of your "Dryer User instructions." Typical exhaust installations Typical installations vent the dryer from the rear of the dryer. 2 /] k3 1-- • _ _. 1. Dryer 2. Elbow 3. Wall 4, Exhaust - Whirlpool LER5636PQ | Installation Instructions - Page 9
installations are available for purchase. Please reference the "Service or Assistance" section of your "Dryer User Instructions." • Over-The-Top Installation: Part Number 4396028 • Periscope Installation (For use with dryer vent to wall vent mismatch): Part Number 4396037 - 0 in. (0 cm) to 18 in - Whirlpool LER5636PQ | Installation Instructions - Page 10
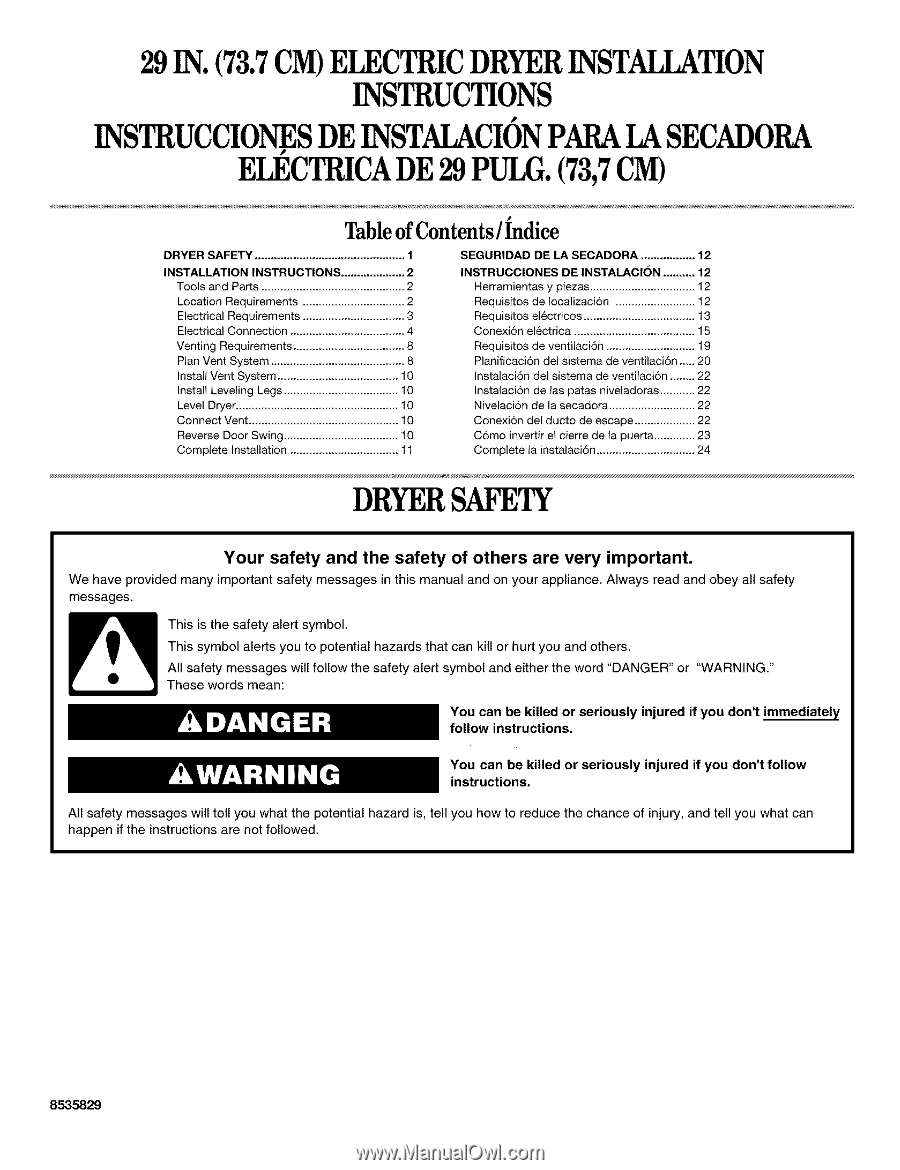
(10.2 cm) clamp. 2. Move dryer into final position. Do not crush or kink vent. Make sure dryer is level. 3. (On gas models) If flexible metal tubing is used top screws in cabinet are in large part of hinge slot. Pull door forward off screws. Set door on top of dryer. Remove top screws from cabinet. - Whirlpool LER5636PQ | Installation Instructions - Page 11
in cabinet are in large part of hinge slot. Pull door forward oft screws. Set door (handle side up) on top of dryer. Remove top screws from cabinet the dryer. 8. Read your"Dryer User Instructions." g. Wipe the dryer drum interior thoroughly with a damp cloth to remove any dust. 10. Set the dryer on - Whirlpool LER5636PQ | Installation Instructions - Page 12
,7CM) SEGURIDADDELASECADORA Su seguridad y la seguridad de los demds es muy importante. Hemos incluido muchos mensajes importantes de seguridad en este manual yen su electrodomestico. Lea y obedezca siempre todos los mensajes de seguridad. Este simbolo le llama la atenci6n sobre peligros potenciales - Whirlpool LER5636PQ | Installation Instructions - Page 13
, Titulo 24 CFR, ParLe 3280 (anteriormente conocido como Estandar federal para la seguridad y construcci6n de casas rodantes, Titulo 24, HUD Parte 280). Las instalaciones en casas rodantes necesitan: • Herramientas del sistema de escape de metal, que se encuentran disponibles para set compradas - Whirlpool LER5636PQ | Installation Instructions - Page 14
Conexibn el_ckica Para instalar su secadora adecuadamente, usted debe determinar el tipo de conexi6n electrica que va a usar y seguir las instrucciones que aqui se proveen para el caso. • Si los c6digos locales no permiten la conexi6n de un conector para conexi6n a tierra del equipo al alambre - Whirlpool LER5636PQ | Installation Instructions - Page 15
Cable de suministro el_ctrico Cable directo Peligro de Incendio Use un cable de suministro el_ctrico nuevo de 30 amperes con aprobaci6n UL. Use un protector de cables con aprobaci6n UL. Desconecte el suministro el_ctrico antes de hacer las conexiones el_ctricas. Conecte el alambre neutro (el - Whirlpool LER5636PQ | Installation Instructions - Page 16
Opciones para la conexibn el_ctrica __ Si su casa tiene: cYonuesctetadr vcaona: Maya a la secci6n Un contacto de 4 hilos (Tipo NEMA 1430r) Url cord6n de suministro electrico para secadora, UL, de 120/240 avoplrtoiobsadmo irlidmeo y 30 amperios* Conexi6n de 4 hilos: Cord6n de suministro - Whirlpool LER5636PQ | Installation Instructions - Page 17
Conexibn de 4 hilos: Cable directo IMPORTANTE: Se necesita una conexi6n de alambre de cuatro hilos para las casas rodantes y para los casos en que los c6digos locales no permitan el uso de conexiones de 3 hilos. El cable de conexi6n directa debe tener 5 pies (1,52 m) extra de largo para poder mover - Whirlpool LER5636PQ | Installation Instructions - Page 18
Conexibn de 3 hilos: Cable de suministro el_ctrico Uso cuando los cbdigos locales permitan la conexibn del conductor de tierra del gabinete al hilo neutro: 2 4 5 3 7 6 1. Contacto de 3 hitos (NEMA tipo 10-30R) 2. Enchufe de 3 hilos 3. Terminal de conexi6n a neutro 4. Bomes de horquitta con - Whirlpool LER5636PQ | Installation Instructions - Page 19
3. Coloque los extremos enganchados de los otros hilos del cable de suministro electrico debajo de los tornillos exteriores del bloque de terminal (con los ganchos mirando hacia la derecha), Apriete y junte los extremos enganchados, Apriete los tornillos. !! !! 6. Conecte un hilo de tierra de cobre - Whirlpool LER5636PQ | Installation Instructions - Page 20
comprarse en su distribuidor o Ilamando a Piezas y Accesorios Whirlpool. Para obtener m&s informaci6n tome como referencia la secci6n " conducto. Instalaciones tipicas de escape Las instalaciones tipicas tienen la ventilaci6n en la parte posterior de la secadora. 2 /q k 3 1-- 11-75 2 1. - Whirlpool LER5636PQ | Installation Instructions - Page 21
espacios Iimitados. Tome como referencia la secci6n "Ayuda o servicio tecnico" de sus "lnstrucciones para el usuario de la secadora". • Instalaci6n en la parte superior: Pieza n_mero 4396028 • Instalaci6n de periscopio (Para usar si hay desacoplo entre el ducto de escape de la pared y el conducto de - Whirlpool LER5636PQ | Installation Instructions - Page 22
fijaci6n que se extiendan dentro del conducto de salida de aire, para fijar el conducte. 2. Sujete con firmeza el cuerpo de la secadora (no la parte superior o el panel de la consola). Recueste la secadora, con cuidado, en el cart6n. 3. Examine las patas niveladoras. Localice la marca en forma de - Whirlpool LER5636PQ | Installation Instructions - Page 23
{no extraiga) los torniitos superiores de Ins bisagras deI lado dei gabinete. 3. Levante la puerta hasta que ios tornillos inferiores del gabinete est6n en Ia parte grande de Ia ranura de la bisagra. ]]re de la puerta hacia adelante para sepazada de los tornillos. Coloque la puerta (con el lado de - Whirlpool LER5636PQ | Installation Instructions - Page 24
o[or es com_n cuando se usa pot pdmera vez el elemento de calefacci6n. Et olor desaparecer& 8535829 © 2002 Whirlpool Corporation Benton Harbor, Michigan 49022 TM DURASAFE is a trademark of Whirlpool, US A TM DURASAFE es una m_tca de comercio de Whirlpool, EEUU 4/02 Printed in USA Impre_o en EEUU
-
 1
1 -
 2
2 -
 3
3 -
 4
4 -
 5
5 -
 6
6 -
 7
7 -
8
-
9
-
10
-
11
-
12
-
13
-
14
-
15
-
16
-
17
-
18
-
19
-
20
-
21
-
22
-
23
-
24
 |
 |
29 IN.
(73.7CM)ELECTRIC
DRYER
INSTALLATION
INSTRUCTIONS
INSTRUCCIONES
DE
INSTALACION
PARALA
SECADORA
ELECTRICADE
29
PULG.(73,7CM)
Table
of Contents
/
Indice
DRYER SAFETY
...............................................
1
INSTALLATION
INSTRUCTIONS
....................
2
Tools and Parts
.............................................
2
Location
Requirements
................................
2
Electrical
Requirements
................................
3
Electrical
Connection
....................................
4
Venting
Requirements
...................................
8
Plan Vent System
..........................................
8
Install Vent System
......................................
10
Install Leveling
Legs
....................................
10
Level Dryer
...................................................
10
Connect Vent
...............................................
10
Reverse Door Swing
....................................
10
Complete
Installation
..................................
11
SEGURIDAD
DE LA SECADORA
.................
12
INSTRUCCIONES
DE INSTALACION
..........
12
Herramientas
y piezas
.................
12
Requisitos
de Iocalizaci6n
.........................
12
Requisitos
el_ctricos
...................................
13
Conexi6n
el_ctrica
......................................
15
Requis[tos
de ventilaci6n
............................
19
Planificaci6n
del sistema
de ventilaci6n
..._
20
Instalaci6n
dei sistema
de ventilaci6n
........
22
Instalaci6n
de las patas niveladoras
...........
22
Nivelaci6n
de la secadora
...........................
22
Conexi6n
del ducto
de escape
...................
22
C6mo
invertir el cierre de la puerta
.............
23
Complete
la instalaci6n
...............................
24
DRYERSAFETY
Your
safety
and the safety
of others
are very
important.
We
have
provided
many
important
safety
messages
in this
manual
and
on your
appliance.
Always
read
and
obey
all safety
messages.
This is the safety alert symbol.
This symbol alerts you to potential hazards that can kill or hurt you and others.
All safety messages
will follow the safety alert symbol and either the word "DANGER"
or
"WARNING."
These words mean:
You can be killed or seriously
injured if you don't immediately
follow
instructions,
You can be killed or seriously
injured if you don't follow
instructions,
All safety messages
will tell you what the potential hazard is, tell you how to reduce the chance of injury, and tell you what can
happen if the instructions
are not followed.
8535829