Whirlpool LGR4634PQ Installation Instructions - Page 1
Whirlpool LGR4634PQ Manual
 |
View all Whirlpool LGR4634PQ manuals
Add to My Manuals
Save this manual to your list of manuals |
Page 1 highlights
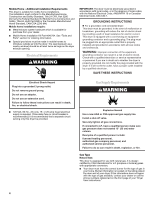
29" (73.7 CM) GAS DRYER INSTALLATION INSTRUCTIONS INSTRUCTIONS POUR L'INSTALLATION DE LA SÉCHEUSE À GAZ DE 29" (73,7 CM) Table of Contents / Table des matières DRYER SAFETY 1 INSTALLATION INSTRUCTIONS 2 Tools and Parts 2 Location Requirements 3 Electrical Requirements 4 Gas Supply Requirements 4 Venting Requirements 5 Plan Vent System 6 Install Vent System 7 Install Leveling Legs 7 Level Dryer 8 Make Gas Connection 8 Connect Vent 8 Reverse Door Swing (Optional 8 Complete Installation 9 SÉCURITÉ DE LA SÉCHEUSE 10 INSTRUCTIONS D'INSTALLATION 11 Outillage et pièces nécessaires 11 Emplacement d'installation 11 Spécifications électriques 13 Alimentation en gaz 13 Exigences concernant l'évacuation 15 Planification du système d'évacuation 15 Installation du conduit d'évacuation 17 Installation des pieds de nivellement 17 Mise à niveau de la sécheuse 18 Raccordement au gaz 18 Conduit d'évacuation 18 Inversion de l'ouverture de la porte (facultatif).......... 18 Achever l'installation 19 DRYER SAFETY Your safety and the safety of others are very important. We have provided many important safety messages in this manual and on your appliance. Always read and obey all safety messages. This is the safety alert symbol. This symbol alerts you to potential hazards that can kill or hurt you and others. All safety messages will follow the safety alert symbol and either the word "DANGER" or "WARNING." These words mean: DANGER You can be killed or seriously injured if you don't immediately follow instructions. WARNING You can be killed or seriously injured if you don't follow instructions. All safety messages will tell you what the potential hazard is, tell you how to reduce the chance of injury, and tell you what can happen if the instructions are not followed. IMPORTANT SAFETY INSTRUCTIONS When discarding or storing your old clothes dryer, remove the door. SAVE THESE INSTRUCTIONS 8562584
-
 1
1 -
 2
2 -
 3
3 -
 4
4 -
 5
5 -
 6
6 -
 7
7 -
8
-
9
-
10
-
11
-
12
-
13
-
14
-
15
-
16
-
17
-
18
-
19
-
20
 |
 |
