Whirlpool UXT5230BDS Installation Guide
Whirlpool UXT5230BDS Manual
 |
View all Whirlpool UXT5230BDS manuals
Add to My Manuals
Save this manual to your list of manuals |
Whirlpool UXT5230BDS manual content summary:
- Whirlpool UXT5230BDS | Installation Guide - Page 1
) AND 36" (91.4 CM) RANGE HOOD Installation Instructions and Use & Care Guide For questions about features, operation/performance, parts, accessories or service, call: 1-800-253-1301 or visit our website at www.whirlpool.com In Canada, for assistance, installation and service, call 1-800-807-6777 or - Whirlpool UXT5230BDS | Installation Guide - Page 2
may ignite. Heat oils slowly on low or medium settings. ■ Always turn hood ON when cooking at high heat or INSTRUCTIONS TABLE OF CONTENTS RANGE HOOD SAFETY 1 INSTALLATION REQUIREMENTS 3 INSTALLATION INSTRUCTIONS 6 RANGE HOOD USE 10 RANGE HOOD CARE 10 WIRING DIAGRAM 11 ASSISTANCE OR SERVICE - Whirlpool UXT5230BDS | Installation Guide - Page 3
set for vented installations. Models that are capable of being installed as non-vented (recirculating) require charcoal filters. See the "Assistance or Service" section for information on ordering charcoal filters. For Mobile Home Installations The installation of this range hood must conform to - Whirlpool UXT5230BDS | Installation Guide - Page 4
. ■ The vent system is optional for this model. Vent system can terminate either through the roof or Installations An additional back draft damper should be installed to minimize backward cold air flow and a thermal break should be installed to minimize conduction of outside temperatures as part - Whirlpool UXT5230BDS | Installation Guide - Page 5
/serial rating plate. The model/serial plate is located behind the filter on the rear wall of the range hood. ■ Wire sizes must conform to the requirements of the National Electrical Code, ANSI/NFPA 70 (latest edition), or CSA Standards C22. 1-94, Canadian Electrical Code, Part 1 and C22.2 No. 0-M91 - Whirlpool UXT5230BDS | Installation Guide - Page 6
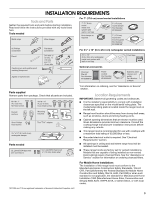
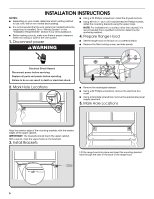
INSTALLATION INSTRUCTIONS NOTES: ■ Depending on your model, determine which venting method to use: roof, wall or non-vented (recirculating). ■ It is recommended that the vent system be installed before the range hood is installed. Go to "Venting System" in the "Installation Requirements" section if - Whirlpool UXT5230BDS | Installation Guide - Page 7
: Mark the 4 vent hole locations (C) on the top of the range hood. For a rear vented installation: Mark the 4 vent hole locations (D) on the rear of the range hood. Remove the range hood and set it aside. 6. Mark and Cut Vent Opening 3¹⁄₄" x 10" (8.3 x 25.4 cm) Rectangular Vent System ■ Using - Whirlpool UXT5230BDS | Installation Guide - Page 8
cm) round vent mounting plate (B), Part Number W10388168, are available as accessories. For information on ordering, see the "Assistance or Service" section. ■ If installing the optional round damper, position it over the round vent mounting plate. 10. Mount Range Hood Using (2) short Phillips head - Whirlpool UXT5230BDS | Installation Guide - Page 9
cord kit installations, follow the instructions supplied with the power cord kit. See the "Assistance or Service" section for information on ordering. NOTE: Use only with range hood cord connection kits that have been investigated and found acceptable for use with this model range hood. Complete the - Whirlpool UXT5230BDS | Installation Guide - Page 10
Part Number 31462A (not included): See the "Assistance or Service" section to order. B ■ For stainless steel models, rub in the direction of the grain to avoid scratching or damaging the surface. C A. Screw B. Grease filter latch C. Grease filter 3. For vented installations: Wash metal filter - Whirlpool UXT5230BDS | Installation Guide - Page 11
Filter: 1. To reinstall the filter, place the back edge of the filter into the channel at the rear of the range hood. 2. Pull the filter latch toward the front of the range hood and push the front of the filter up into place. 3. Release the filter correctly before calling service. 1. Disconnect - Whirlpool UXT5230BDS | Installation Guide - Page 12
of purchase, when this major appliance is installed, operated and maintained according to instructions attached to or furnished with the product, Whirlpool Corporation or Whirlpool Canada LP (hereafter "Whirlpool") will pay for Factory Specified Parts and repair labor to correct defects in materials - Whirlpool UXT5230BDS | Installation Guide - Page 13
province. If outside the 50 United States and Canada, contact your authorized Whirlpool dealer to determine if another warranty applies. If you need service, first see the "Troubleshooting" section of the Use & Care Guide. After checking "Troubleshooting," you may find additional help by checking - Whirlpool UXT5230BDS | Installation Guide - Page 14
le danger potentiel et vous disent comment réduire le risque de blessure et ce qui peut se produire en cas de non-respect des instructions. Avertissements de la proposition 65 de l'État de Californie : AVERTISSEMENT : Ce produit contient au moins un produit chimique connu par l'État de Californie - Whirlpool UXT5230BDS | Installation Guide - Page 15
LA CUISINIÈRE : CORPORELS, RESPECTER LES INSTRUCTIONS SUIVANTES : ■ Ne jamais laisser un tablissement de l'alimentation. ■ Tout travail d'installation ou câblage électrique doit être ré le ventilateur ou le retourner à un centre de service agréé pour examen et/ou réparation. DOMMAGES CORPORELS - Whirlpool UXT5230BDS | Installation Guide - Page 16
et pièces nécessaires avant d'entreprendre l'installation. Lire et observer les instructions fournies avec chacun des outils de la liste * *Pour des renseignements sur la commande, voir la section "Assistance ou service". Vis courtes à tête Phillips Embout de tournevis Torx®† T10® Clapet anti - Whirlpool UXT5230BDS | Installation Guide - Page 17
effectuer des découpages, consulter les instructions d'installation fournies par le fabricant de service" pour connaître le processus de commande des filtres à charbon. Installation dans une résidence mobile L'installation de cette hotte doit satisfaire aux exigences de la norme Manufactured Home - Whirlpool UXT5230BDS | Installation Guide - Page 18
il y ait une section droite de conduit d'un minimum de 24" (61 cm) entre les coudes si l'on doit utiliser plus d'un coude. ■ Ne pas installer 2 coudes successifs. ■ Utiliser des brides ou du ruban adhésif pour conduit pour assurer l'étanchéité de chaque jointure du circuit d'évacuation. ■ Le circuit - Whirlpool UXT5230BDS | Installation Guide - Page 19
m) Bouche de décharge murale Spécifications électriques Observer les dispositions de tous les codes et règlements en vigueur. Vérifier que l'installation électrique a été correctement effectuée et qu'elle est conforme aux spécifications de la plus récente édition des normes National Electrical - Whirlpool UXT5230BDS | Installation Guide - Page 20
avant de faire la remise en marche. Le non-respect de ces instructions peut causer un décès ou un choc électrique. 2. Marquage de l'emplacement des trous ■ À l'aide d'un tournevis Phillips n° 2, installer les chevilles d'ancrage. ■ À l'aide des vis à tête plate Phillips n° 2 de #8-18 x 1" (4,2 x 25 - Whirlpool UXT5230BDS | Installation Guide - Page 21
par le dessus : Marquer l'emplacement des 4 trous d'évacuation (C) sur la partie supérieure de la hotte. Pour une installation à évacuation par l'arrière : Marquer l'emplacement des 4 trous d'évacuation (D) sur la partie arrière de la hotte. Retirer la hotte et la mettre de côté. ■ À l'aide - Whirlpool UXT5230BDS | Installation Guide - Page 22
(F) de chaque côté de la hotte comme illustré. Faire tourner les vis sur environ 2 tours à travers les trous des pattes de montage. ■ Installations sans évacuation à l'extérieur (recyclage) Retirer les (2) vis Torx® T10® et retirer le couvercle rectangulaire avant supérieur (E). Passer à l'étape 12 - Whirlpool UXT5230BDS | Installation Guide - Page 23
avec l'ensemble du cordon d'alimentation Pour les installations avec l'ensemble du cordon d'alimentation facultatif, suivre les instructions fournies avec l'ensemble du cordon d'alimentation. Voir la section "Assistance ou service" pour plus d'informations sur le processus de commande. REMARQUE - Whirlpool UXT5230BDS | Installation Guide - Page 24
du câblage. REMARQUE : Pour pouvoir tirer le plus grand parti de la nouvelle hotte de cuisinière, lire la section "Utilisation de la hotte". ■ Réinstaller les 2 panneaux inférieurs. - Positionner le panneau avec les petites languettes vers l'avant de la hotte et le rebord large vers le centre de la - Whirlpool UXT5230BDS | Installation Guide - Page 25
suivant les instructions suivantes. Réinstaller le filtre à graisse avant de faire fonctionner la hotte. Remplacement du filtre : 1. Pour réinstaller le pièce n° 31462A (non inclus) : Voir la section "Assistance ou service" pour commander. ■ Pour les modèles en acier inoxydable, frotter dans - Whirlpool UXT5230BDS | Installation Guide - Page 26
BL (Commun) N (Ligne) SCHÉMA DE CÂBLAGE Neu L Terre Vis de liaison à la terre Fonctionnement du commutateur L-1 Lampes 120 V 1,5 Ohms L-2 Vitesse 1 120 V 1,5 Ohms L-3 Vitesse 2 120 V 2,0 Ohms L-4 Vitesse 3 120 V 2,5 Ohms Boutons-poussoirs mécaniques 4 boutons 3 vitesses N (Ligne) BL JA BL JA - Whirlpool UXT5230BDS | Installation Guide - Page 27
et d'entretien. ■ Ventes d'accessoires et de pièces de rechange. ■ Références aux marchands locaux, aux distributeurs de pièces de rechange et aux compagnies de service. Les techniciens de service désignés par Whirlpool Canada LP sont formés pour remplir la garantie des produits et fournir un - Whirlpool UXT5230BDS | Installation Guide - Page 28
installé, utilisé et entretenu conformément aux instructions jointes à ou fournies avec le produit, Whirlpool Corporation ou Whirlpool Canada LP (ci-après désignées "Whirlpool ée ne couvre pas : 1. Les visites de service pour rectifier l'installation du gros appareil ménager, montrer à l'utilisateur - Whirlpool UXT5230BDS | Installation Guide - Page 29
Whirlpool. Aux États-Unis, composer le 1-800-253-1301. Au Canada, composer le 1-800-807-6777. 6/13 Conservez ce manuel et votre reçu de vente ensemble pour référence ultérieure. Pour le service sous garantie, vous devez présenter un document prouvant la date d'achat ou d'installation. Inscrivez - Whirlpool UXT5230BDS | Installation Guide - Page 30
W10646405B ®/™ ©2014. Used under license in Canada. All rights reserved. Utilisé sous licence au Canada. Tous droits réservés. 1/14 Printed in Mexico Imprimé au Mexique
-
 1
1 -
 2
2 -
 3
3 -
 4
4 -
 5
5 -
 6
6 -
 7
7 -
8
-
9
-
10
-
11
-
12
-
13
-
14
-
15
-
16
-
17
-
18
-
19
-
20
-
21
-
22
-
23
-
24
-
25
-
26
-
27
-
28
-
29
-
30
 |
 |
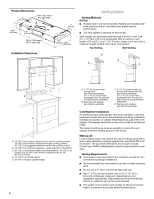
RANGE HOOD SAFETY
30" (76.2 CM) AND 36" (91.4 CM) RANGE HOOD
Installation Instructions and Use & Care Guide
For questions about features, operation/performance, parts, accessories or service, call:
1-800-253-1301
or visit our website at
www.whirlpool.com
In Canada, for assistance, installation and service, call
1-800-807-6777
or visit our website at
www.whirlpool.ca
HOTTE D’ASPIRATION DE
30" (76,2 CM) ET 36" (91,4 CM)
Instructions d’installation et Guide d’utilisation et d’entretien
Au Canada, pour assistance, installation ou service, composer
le
1-800-807-6777
ou visiter notre site Web à
www.whirlpool.ca
Table of Contents/Table des matières
.............................................................................
2
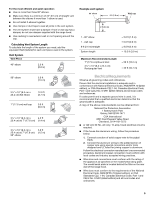
Models/Modèles:
UXT5230BD/UXT5236BD
IMPORTANT: READ AND SAVE THESE INSTRUCTIONS.
FOR RESIDENTIAL USE ONLY.
IMPORTANT : LIRE ET CONSERVER CES INSTRUCTIONS.
POUR UTILISATION RÉSIDENTIELLE UNIQUEMENT.
LI32BB/W10646405B
You can be killed or seriously injured if you don't immediately
You
can be killed or seriously injured if you don't follow
All safety messages will tell you what the potential hazard is, tell you how to reduce the chance of injury, and tell you what can
happen if the instructions are not followed.
Your safety and the safety of others are very important.
We have provided many important safety messages in this manual and on your appliance. Always read and obey all safety
messages.
This is the safety alert symbol.
This symbol alerts you to potential hazards that can kill or hurt you and others.
All safety messages will follow the safety alert symbol and either the word “DANGER” or “WARNING.”
These words mean:
follow instructions.
instructions.
DANGER
WARNING