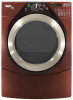
Whirlpool WED9500T Use and Care Guide - Page 3
Installation Instructions - dryer
 |
View all Whirlpool WED9500T manuals
Add to My Manuals
Save this manual to your list of manuals |
Page 3 highlights
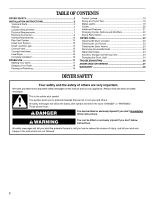
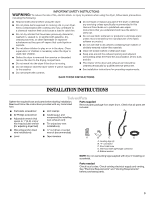
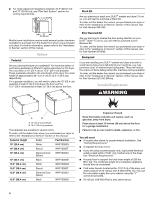
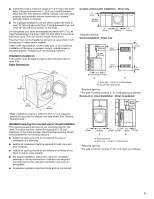
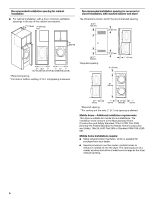
IMPORTANT SAFETY INSTRUCTIONS WARNING: To reduce the risk of fire, electric shock, or injury to persons when using the dryer, follow basic precautions, including the following: ■ Read all instructions before using the dryer. ■ Do not place items exposed to cooking oils in your dryer. Items contaminated with cooking oils may contribute to a chemical reaction that could cause a load to catch fire. ■ Do not dry articles that have been previously cleaned in, washed in, soaked in, or spotted with gasoline, drycleaning solvents, or other flammable or explosive substances as they give off vapors that could ignite or explode. ■ Do not allow children to play on or in the dryer. Close supervision of children is necessary when the dryer is used near children. ■ Before the dryer is removed from service or discarded, remove the door to the drying compartment. ■ Do not reach into the dryer if the drum is moving. ■ Do not install or store the dryer where it will be exposed to the weather. ■ Do not tamper with controls. ■ Do not repair or replace any part of the dryer or attempt any servicing unless specifically recommended in this Use and Care Guide or in published user-repair instructions that you understand and have the skills to carry out. ■ Do not use fabric softeners or products to eliminate static unless recommended by the manufacturer of the fabric softener or product. ■ Do not use heat to dry articles containing foam rubber or similarly textured rubber-like materials. ■ Clean lint screen before or after each load. ■ Keep area around the exhaust opening and adjacent surrounding areas free from the accumulation of lint, dust, and dirt. ■ The interior of the dryer and exhaust vent should be cleaned periodically by qualified service personnel. ■ See installation instructions for grounding requirements. SAVE THESE INSTRUCTIONS INSTALLATION INSTRUCTIONS Tools and Parts Gather the required tools and parts before starting installation. Read and follow the instructions provided with any tools listed here. Parts supplied Remove parts package from dryer drum. Check that all parts are included. ■ Flat-blade screwdriver ■ Vent clamps ■ #2 Phillips screwdriver ■ Adjustable wrench that opens to 1" (2.54 cm) or hex-head socket wrench (for adjusting dryer feet) ■ Caulking gun and compound (for installing new exhaust vent) ■ Tin snips (new vent installations) ■ Wire stripper (for direct wire installations) ■ ¼" nut driver or socket wrench (recommended) ■ Level ■ Tape measure A B C D E A. Leveling legs (4) B. "Y" connector C. Short inlet hose D. Inlet hose with right-angle connector E. Rubber washer NOTE: Do not use leveling legs supplied with dryer if installing on a pedestal. Parts needed Check local codes. Check existing electrical supply and venting. See "Electrical Requirements" and "Venting Requirements" before purchasing parts. 3
-
 1
1 -
 2
2 -
 3
3 -
 4
4 -
 5
5 -
 6
6 -
 7
7 -
 8
8 -
 9
9 -
10
-
11
-
12
-
13
-
14
-
15
-
16
-
17
-
18
-
19
-
20
-
21
-
22
-
23
-
24
-
25
-
26
-
27
-
28
 |
 |
