Whirlpool WFG505M0BB Installation Instructions - Page 11
If the low flame needs adjusting, Check Operation of Oven/Broil Burner, Electronic oven control
 |
View all Whirlpool WFG505M0BB manuals
Add to My Manuals
Save this manual to your list of manuals |
Page 11 highlights
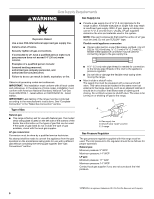
If the low flame needs adjusting: 1. Turn control knob to the "LOW" setting and remove control knob. 2. Insert a small flat-blade screwdriver into the valve stem. Turn the valve adjusting screw to obtain the smallest flame that will not go out when the control of a cold burner is quickly turned from "HIGH" to "LOW." Turn right to decrease flame height. Turn left to increase flame height. Repeat for other cooktop burners as needed. If the flame needs adjusting: 1. Turn the oven off. Wait for the oven burner to cool down. 2. Open oven door and remove oven racks and oven tray and set aside. A A A A. Valve stem 3. Replace control knob. Check Operation of Oven/Broil Burner Electronic oven control (on some models): 1. Open broiler door. 2. Press the "BAKE" pad. ■ The "BAKE" indicator will light. ■ "350" will appear in the display. 3. Press the START/ENTER pad. ■ The "TEMP" and "ON" indicators will appear. ■ The display will show the automatic countdown time (10 minutes) needed to preheat the oven for selected temperature. ■ The oven burner should light in 20-40 seconds; this delay is normal. The oven valve requires a certain time before it will open and allow gas to flow. The oven burner will burn until oven temperature has reached 350°F (175°C). After 20-40 seconds, the oven burner will begin to cycle on and off to maintain the 350°F (175°C) temperature. Broil burner and oven burner are the same burner. Check the broil function as follows: 1. Press the "BROIL" pad. ■ "525" will appear in the display. ■ The "BROIL" indicator will light. 2. Press the START/ENTER pad. ■ The oven burner should light in 20-40 seconds; this delay is normal. The oven valve requires a certain time before it will open and allow gas to flow. To avoid damaging the hot surface igniter, do not insert any object into the openings of the shield that surrounds the igniter or clean that area. 3. Check the oven burner for proper flame. The flame should be ½" (1.3 cm) long, with inner cone of bluish-green. The outer mantle should be dark blue and should be clean and soft in character. No yellow tips (not enough air), blowing or lifting (too much air) of flame should occur. A. Oven tray (lift up at area shown to remove) 3. Locate the air shutter near the rear wall of oven and loosen the shutter screw. A B A. Shutter screw B. Air shutter 4. Adjust the air shutter. 5. Turn the oven back on and check for proper flame. If the flame is still not properly adjusted, turn the oven off, wait for the oven burner to cool down and repeat Step 4 until flame is properly adjusted. 6. When the flame has been properly adjusted, turn the oven off, wait for the burner to cool down. 7. Tighten the shutter screw. 8. Reinstall flame spreader and oven tray. Reinstall the oven racks and close oven door. 9. Close the broiler door. 11
-
 1
1 -
2
-
3
-
4
-
5
-
 6
6 -
 7
7 -
 8
8 -
 9
9 -
 10
10 -
 11
11 -
 12
12 -
 13
13 -
 14
14 -
 15
15 -
 16
16 -
17
-
18
-
19
-
20
-
21
-
22
-
23
-
24
-
25
-
26
-
27
-
28
-
29
-
30
-
31
-
32
 |
 |
