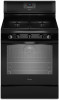
Whirlpool WFG540H0AB Use & Care Guide
Whirlpool WFG540H0AB Manual
 |
View all Whirlpool WFG540H0AB manuals
Add to My Manuals
Save this manual to your list of manuals |
Whirlpool WFG540H0AB manual content summary:
- Whirlpool WFG540H0AB | Use & Care Guide - Page 1
GAS RANGE USER INSTRUCTIONS THANK YOU for purchasing this high-quality product. If you should experience a problem not covered in TROUBLESHOOTING, please visit our website at www.whirlpool.com for additional information. If you still need assistance, call us at 1-800-253-1301. In Canada, visit our - Whirlpool WFG540H0AB | Use & Care Guide - Page 2
. • Do not touch any electrical switch. • Do not use any phone in your building. • Immediately call your gas supplier from a neighbor's phone. Follow the gas supplier's instructions. • If you cannot reach your gas supplier, call the fire department. - Installation and service must be performed by - Whirlpool WFG540H0AB | Use & Care Guide - Page 3
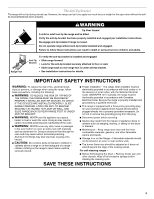
range back so rear range foot is under anti-tip bracket. • See installation instructions for details. IMPORTANT SAFETY INSTRUCTIONS WARNING: To reduce the risk of fire, electrical on the Range - Flammable materials should not be stored in an oven or near surface units. ■ Top burner flame size - Whirlpool WFG540H0AB | Use & Care Guide - Page 4
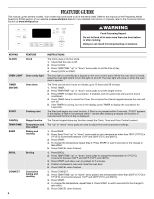
GUIDE This manual covers several models. Your model may have some or all of the items listed. Refer to this manual or the Frequently Asked Questions (FAQs) section of our website at www.whirlpool.com for more detailed instructions. In Canada, refer to the Customer Service Section at www.whirlpool - Whirlpool WFG540H0AB | Use & Care Guide - Page 5
a flame. 2. Turn knob to anywhere between HIGH and LOW. Fire Hazard Do not let the burner flame extend beyond the edge of the pan. Turn off all controls when not cooking. Failure to follow these instructions can result in death or fire. REMEMBER: When range is in use, the entire cooktop area may - Whirlpool WFG540H0AB | Use & Care Guide - Page 6
If the burner still does not light, do not service the sealed burner yourself. Contact a trained repair specialist. Burner Size Select a burner that best fits your cookware. See the following illustration and chart. Burner Size Small Medium Large Extra-Large Recommended Use ■ Low-heat cooking - Whirlpool WFG540H0AB | Use & Care Guide - Page 7
guide low heat settings. Porcelain ■ See stainless steel or cast iron. enamel-on-steel or cast iron Stainless steel ■ Heats quickly, but unevenly. ■ A core or base of aluminum or copper on stainless steel provides even heating. For best results, the cookware should be centered above the burner - Whirlpool WFG540H0AB | Use & Care Guide - Page 8
OVEN USE The normal operation of the range will include several noises that may be heard each time the Bake or Broil burners ignite during the cooking cycle: ■ gas ■ Valid pad press ■ Oven is preheated (long tone) ■ Function has been entered ■ Reminder (on some models), repeating every 20 seconds - Whirlpool WFG540H0AB | Use & Care Guide - Page 9
A Timed Bake can also be set to keep the oven on for only part of the Sabbath. The Oven Control Lockout Feature (if present) will be disabled during the the oven bottom finish, do not line the oven bottom with any type of foil or liner. For best cooking results, do not cover entire oven rack with - Whirlpool WFG540H0AB | Use & Care Guide - Page 10
. The bake and broil elements or burners cycle on and off in intervals. On convection range models, the fan may be cycled on and off for short intervals to provide the best results. Before baking and roasting, position racks according to "Positioning Racks and Bakeware" section. When roasting, it - Whirlpool WFG540H0AB | Use & Care Guide - Page 11
to the "Positioning Racks and Bakeware" section for more information. ■ For best results, use a broiler pan and grid. It is designed to drain juices and help avoid spatter and smoke. If you would like to purchase a broiler pan, one may be ordered. Please refer to the "Accessories" section for more - Whirlpool WFG540H0AB | Use & Care Guide - Page 12
the oven bottom to assist with the cleaning. To Clean: 1. Remove all racks and accessories from the oven cavity oven interior. NOTES: ■ The range should be level to ensure that the entire surface of the bottom of the oven cavity is covered by water at the beginning of the Clean cycle. ■ For best - Whirlpool WFG540H0AB | Use & Care Guide - Page 13
are off and the oven and cooktop are cool. Always follow label instructions on cleaning products. For additional information, you can visit the Frequently Asked Questions (FAQs) section of our website at www.whirlpool.com. In Canada, reference the Customer Service section at www.whirlpool.ca. Soap - Whirlpool WFG540H0AB | Use & Care Guide - Page 14
of a medium to heavy thickness. See "Cooktop Use" section. Level the range. See the Installation Instructions. If this is the first time the oven has been used, turn on any one of the surface burner knobs to release air from the gas lines. Press and hold START for 3 seconds to unlock. Press and hold - Whirlpool WFG540H0AB | Use & Care Guide - Page 15
remove any vinegar residue. Level the range. See the Installation Instructions. Double-check the recipe in a reliable cookbook. See "Oven Temperature Control" in the "Electronic Oven Controls" section. See "Baking and Roasting" section. See "Positioning Racks and Bakeware" section. See "Positioning - Whirlpool WFG540H0AB | Use & Care Guide - Page 16
to instructions attached to or furnished with the product, Whirlpool Corporation or Whirlpool Canada LP (hereafter "Whirlpool") will pay for Factory Specified Parts and repair labor to correct defects in materials or workmanship. Service must be provided by a Whirlpool designated service company - Whirlpool WFG540H0AB | Use & Care Guide - Page 17
where service by an authorized Whirlpool servicer is not available. 10. The removal and reinstallation of your major appliance if it is installed in an inaccessible location or is not installed in accordance with published installation instructions. 11. Major appliances with original model/serial - Whirlpool WFG540H0AB | Use & Care Guide - Page 18
INSTRUCTIONS D'UTILISATION DE LA CUISINIÈRE À GAZ MERCI d'avoir acheté ce produit de grande qualité. Si vous rencontrez un problème non abordé à la section DÉPANNAGE, veuillez visiter notre site Web à www.whirlpool ÈRE 19 La bride antibasculement 20 GUIDE DES CARACTÉRISTIQUES 21 UTILISATION DE - Whirlpool WFG540H0AB | Use & Care Guide - Page 19
de gaz à partir du téléphone d'un voisin. Suivre ses instructions. • À défaut de joindre votre fournisseur de gaz, appeler les pompiers. - L'installation et l'entretien doivent être effectués par un installateur qualifié, une agence de service ou le fournisseur de gaz. AVERTISSEMENT : L'odorat ne - Whirlpool WFG540H0AB | Use & Care Guide - Page 20
déficiences de naissance. La bride antibasculement Dans des conditions de service normales, la cuisinière ne bascule pas. Elle peut cependant Vérifier que la bride antibasculement est bien installée et engagée, conformément aux instructions d'installation. Réengager la bride antibasculement si la - Whirlpool WFG540H0AB | Use & Care Guide - Page 21
GUIDE DES CARACTÉRISTIQUES Ce manuel couvre différents modèles. Le modèle que vous avez peut comporter toutes les caractéristiques énumérées ou seulement certaines d'entre elles. Consulter ce manuel ou la section Service à la clientèle de notre site Web sur www.whirlpool.ca pour des instructions - Whirlpool WFG540H0AB | Use & Care Guide - Page 22
CLAVIER CARACTÉRISTIQUE INSTRUCTIONS OVEN LIGHT Lampe de la (lampe du cavité du terminé. KEEP WARM Maintien au (garder au chaud chaud) Les aliments doivent être à la température de service avant d'être placés dans le four chauffé. 1. Appuyer sur KEEP WARM (maintien au chaud). 2. La temp - Whirlpool WFG540H0AB | Use & Care Guide - Page 23
glages lorsque la cuisson est terminée. Le non-respect de ces instructions peut causer un décès ou un incendie. Des allumeurs électriques une flamme. 2. Tourner le bouton à n'importe quel réglage entre HIGH (élevé) et LOW (bas). N'OUBLIEZ PAS : Lors de l'utilisation de la cuisinière, toute la - Whirlpool WFG540H0AB | Use & Care Guide - Page 24
former les orifices. Ne pas utiliser un cure-dent en bois. Si le brûleur a besoin d'être ajusté, faire venir un technicien de réparation qualifié. 4. Réinstaller le chapeau de brûleur et s'assurer que les tiges d'alignement sont bien alignées avec le chapeau de brûleur. A B A. Incorrect B. Correct - Whirlpool WFG540H0AB | Use & Care Guide - Page 25
Utiliser le tableau suivant comme guide pour les caractéristiques du matériau d'ustensile de cuisson. ■ Chauffe très rapidement et uniformément. USTENSILE CARACTÉRISTIQUES Terre cuite ■ Suivre les instructions du fabricant. ■ Utiliser des réglages de température basse. Acier émaillé en - Whirlpool WFG540H0AB | Use & Care Guide - Page 26
mode Sabbat, elle restera éteinte durant toute la période d'utilisation du mode Sabbat. Le fait d'ouvrir la porte du four ou d'appuyer sur la touche Oven Light (lampe du four) n'affecte pas le statut de la lampe du four une fois que le four est entré au mode Sabbat. 2. Appuyer sur - Whirlpool WFG540H0AB | Use & Care Guide - Page 27
heure avant ou après la cuisson. Le non-respect de cette instruction peut causer un empoisonnement alimentaire ou une maladie. 1. Appuyer sur avant puis la retirer. Se servir de l'illustration et du tableau suivants comme guide. 3 ou 4 2 1 La plupart des produits de boulangerie, casseroles Viandes - Whirlpool WFG540H0AB | Use & Care Guide - Page 28
Cuisson sur plusieurs grilles Cuisson sur 2 grilles : Utiliser les positions de grille 2 et 5 pour la cuisson ordinaire. Cuisson sur 2 grilles (par convection uniquement) : Utiliser les positions de grille 2 et 5. Cuisson au four des gâteaux à étages, sur 2 grilles Pour des résultats optimaux - Whirlpool WFG540H0AB | Use & Care Guide - Page 29
avant ou après la cuisson. Le non-respect de cette instruction peut causer un empoisonnement alimentaire ou une maladie. Réglage d'une exacte. Voir la caractéristique de touche "Clock" (horloge) dans la section "Guide des caractéristiques". 1. Appuyer sur BAKE (cuisson au four). 2. Appuyer sur les - Whirlpool WFG540H0AB | Use & Care Guide - Page 30
ENTRETIEN DE LA CUISINIÈRE Programme de nettoyage 6. Enlever l'eau résiduelle et les saletés délogées avec une éponge ou un chiffon immédiatement après la fin du programme de nettoyage. La plupart de l'eau initiale contenue dans 1¾ tasse (14 oz [414 mL]) restera dans le four après la fin du - Whirlpool WFG540H0AB | Use & Care Guide - Page 31
instructions figurant sur les étiquettes des produits de nettoyage. Pour plus de renseignements, vous pouvez consulter la section Service à la clientèle de notre site Web à www.whirlpool pas immerger les boutons de commande. Lors de la réinstallation des boutons, s'assurer que chaque bouton est à la - Whirlpool WFG540H0AB | Use & Care Guide - Page 32
notre site Web et la section service à la clientèle pour tenter d'éviter le coût d'une visite de service. www.maytag.ca AVERTISSEMENT Risque électricien. Voir les instructions d'installation. Contacter un technicien de réparation qualifié ou voir les Instructions d'installation. Enfoncer le bouton - Whirlpool WFG540H0AB | Use & Care Guide - Page 33
". Régler l'aplomb de la cuisinière. Voir les instructions d'installation. Si c'est la première fois que le four est utilise du gaz propane, contacter un technicien de service ou consulter la page de couverture pour des (mise en marche) à la section "Guide des caractéristiques". Appuyer sur CANCEL ( - Whirlpool WFG540H0AB | Use & Care Guide - Page 34
tarte brunissent trop tôt. SOLUTIONS Régler l'aplomb de la cuisinière. Voir les instructions d'installation. Vérifier la recette dans un livre de recettes fiable. Voir "Commande de propane, contacter un technicien de service ou consulter la page de couverture pour des renseignements de contact. 34 - Whirlpool WFG540H0AB | Use & Care Guide - Page 35
une région éloignée où un service d'entretien Whirlpool autorisé n'est pas disponible. 10. La dépose et la réinstallation de votre gros appareil si celui-ci est installé dans un endroit inaccessible ou n'est pas installé conformément aux instructions d'installation fournies. 11. Les gros appareils - Whirlpool WFG540H0AB | Use & Care Guide - Page 36
All rights reserved. Tous droits réservés. ® Registered Trademark/TM Trademark of Whirlpool, U.S.A., Whirlpool Canada LP Licensee in Canada ® Marque déposée/TM Marque de commerce de Whirlpool, U.S.A., emploi sous licence par Whirlpool Canada LP au Canada 10/11 Printed in U.S.A. Imprimé aux É.-U.
-
 1
1 -
 2
2 -
 3
3 -
 4
4 -
 5
5 -
 6
6 -
 7
7 -
8
-
9
-
10
-
11
-
12
-
13
-
14
-
15
-
16
-
17
-
18
-
19
-
20
-
21
-
22
-
23
-
24
-
25
-
26
-
27
-
28
-
29
-
30
-
31
-
32
-
33
-
34
-
35
-
36
 |
 |

THANK YOU for purchasing this high-quality product. If you should experience a problem not covered in TROUBLESHOOTING,
please visit our website at
www.whirlpool.com
for additional information. If you still need assistance, call us at 1-800-253-1301.
In Canada, visit our website at
www.whirlpool.ca
or call us at 1-800-807-6777 for additional information.
You will need your model and serial number, located on the oven frame behind the top right side of the oven door.
Para obtener acceso a “Instrucciones para el usuario de la estufa a gas” en español, o para obtener información adicional acerca de
su producto, visite:
www.whirlpool.com
Deberá tener a mano el número de modelo y de serie, que están ubicados en el marco del horno, detrás del lado derecho superior
de la puerta del horno.
GAS RANGE
USER INSTRUCTIONS
Table of Contents
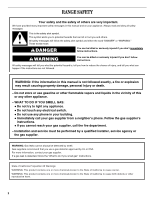
RANGE SAFETY
.......................................................................................
2
The Anti-Tip Bracket
.............................................................................
3
FEATURE GUIDE
.....................................................................................
4
COOKTOP USE
........................................................................................
5
Sealed Surface Burners
........................................................................
6
Burner Size
............................................................................................
6
Cookware
..............................................................................................
7
Home Canning
......................................................................................
7
OVEN USE
................................................................................................
8
Electronic Oven Controls
......................................................................
8
Sabbath Mode
......................................................................................
9
Aluminum Foil
........................................................................................
9
Positioning Racks and Bakeware
.......................................................
10
Oven Vent
............................................................................................
10
Baking and Roasting
...........................................................................
10
Broiling
................................................................................................
11
Convection Baking and Roasting
.......................................................
11
Cook Time (on some models)
.............................................................
11
RANGE CARE
.........................................................................................
12
Clean Cycle
.........................................................................................
12
General Cleaning
.................................................................................
13
Oven Light
...........................................................................................
13
TROUBLESHOOTING
............................................................................
14
ACCESSORIES
......................................................................................
16
WARRANTY
............................................................................................
16
W10392927A