Whirlpool WGD4850BW Installation Guide - Page 18
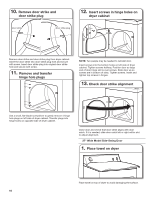
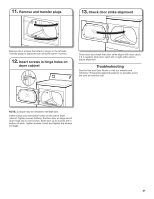
Check door strike alignment, Insert screws in hinge holes on, dryer cabinet, Attach door hinges,
 |
View all Whirlpool WGD4850BW manuals
Add to My Manuals
Save this manual to your list of manuals |
Page 18 highlights
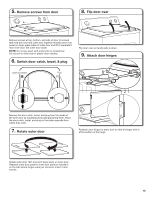
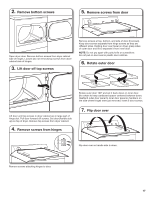
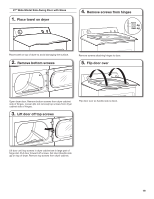
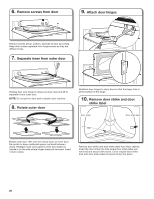
8. Attach door hinges 10. Insert screws in hinge holes on dryer cabinet NOTE: 2 people may be needed to reinstall door. Insert screws into the bottom holes on left side of dryer cabinet. Tighten screws halfway. Position door so large end of door hinge slot is over screws. Slide door up so screws are in bottom of slots. Tighten screws. Insert and tighten top screws in hinges. 11. Check door strike alignment Reattach door hinges to dryer door so that the larger hole is at the bottom of the hinge. 9. Remove and transfer plugs Remove the 4 screws that attach 2 plugs on the left side. Transfer plugs to opposite side using the same 4 screws. Close door and check that door strike aligns with door catch. If it is needed, slide door catch left or right within slot to adjust alignment. 18
-
 1
1 -
2
-
3
-
4
-
5
-
6
-
7
-
8
-
9
-
10
-
11
-
12
-
 13
13 -
 14
14 -
 15
15 -
 16
16 -
 17
17 -
 18
18 -
 19
19 -
 20
20 -
 21
21 -
 22
22 -
 23
23 -
24
-
25
-
26
-
27
-
28
-
29
-
30
-
31
-
32
-
33
-
34
-
35
-
36
-
37
-
38
-
39
-
40
-
41
-
42
-
43
-
44
 |
 |
