Whirlpool WMC10007AW Installation Guide - Page 4
Mark and Drill Holes, Install the Microwave Oven
 |
View all Whirlpool WMC10007AW manuals
Add to My Manuals
Save this manual to your list of manuals |
Page 4 highlights
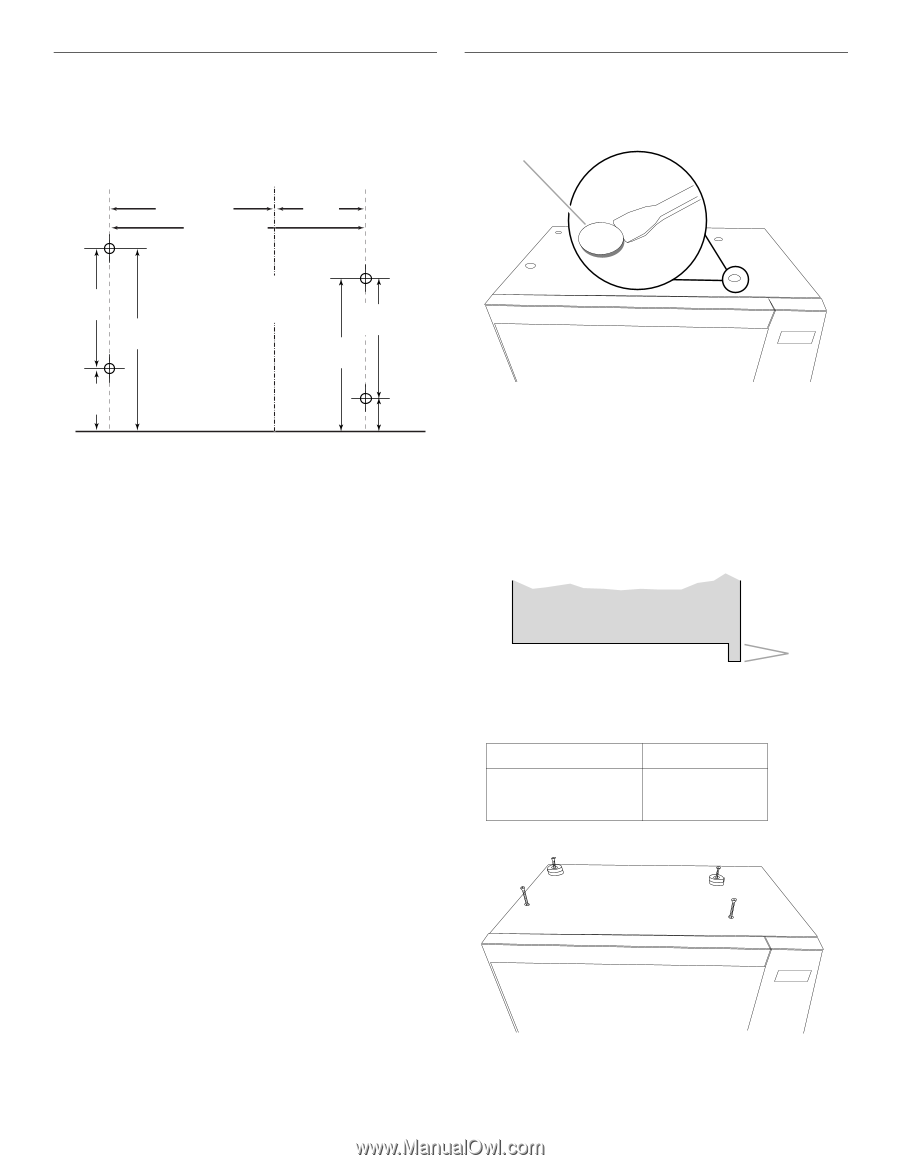
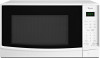
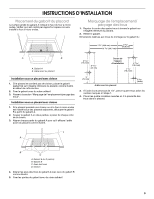
Mark and Drill Holes 1. Mark the four hole centers through the template onto the lower shelf of the cabinet. 2. Remove the template. Following are the dimensions for the mounting holes on Template A: Install the Microwave Oven 1. Remove the plugs from the four mounting holes on the top of the microwave oven. Save the plugs in case the microwave oven is used as a countertop unit in the future. A 7 ³⁄₄" (19.8 cm) 12 30.7 cm) 4 10.9 cm) ¹⁄₂" (13 mm) diam. 5 14.4 cm) 8 22.0 cm) Center of installation space 5 14.4 cm) 7 ¹⁄₄" (18.4 cm) 3" (7.6 cm) Cabinet front edge 1 4.0 cm) 3. Using 1/2" drill, drill four holes through the centers marked in Step 1. 4. Place the four C-washers near the holes inside the cabinet. A. Plugs (4) 2. Start the four bolts into the mounting holes. Turn each bolt three or four times. 3. If the front edge of the cabinet is flush with the bottom of the cabinet (if there is no "lip" or trim overhang that extends below the cabinet bottom), proceed to Step 7. 4. If the front edge of the cabinet has a "lip" or trim overhang that extends below the bottom of the cabinet, measure the length of the overhang. Spacers may need to be used on the back bolts. A B A. Cabinet B. Trim overhang 5. Determine the number of spacers needed for the back bolts. If the trim overhang is: Use: less than 1/2" (13 mm) 1/2"-3/4" (13-19 mm) 3/4"-1" (19-25 mm) 0, 1 or 2 spacers 2 or 3 spacers 3 or 4 spacers 6. Place the appropriate number of spacers on the back bolts. 4
-
 1
1 -
 2
2 -
 3
3 -
 4
4 -
 5
5 -
 6
6 -
 7
7 -
 8
8 -
 9
9 -
 10
10 -
11
-
12
 |
 |