Whirlpool WOD51EC0H Owners Manual - Page 4
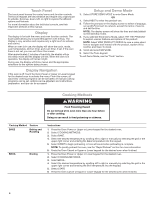
Warning
 |
View all Whirlpool WOD51EC0H manuals
Add to My Manuals
Save this manual to your list of manuals |
Page 4 highlights
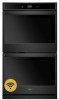
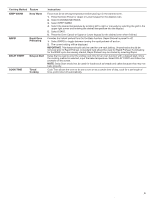
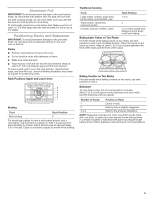
Touch Panel The touch panel houses the control menu and function controls. The touch keypads are very sensitive and require only a light touch to activate. Scroll up, down, left, or right to explore the different options and features. For more information about the individual controls, see their respective sections in this manual. Display The display is for both the menu and oven function controls. The touch panel allows you to scroll through the oven menus. The display is very sensitive and requires only a light touch to activate and control. When an oven is in use, the display will show the clock, mode, oven temperature, kitchen timer, and oven timer, if set. If the oven timer is not set, you can set it from this screen. After approximately 2 minutes of inactivity, the display will go into sleep mode and the display will dim. When the oven is in operation, the display will remain bright. During use, the display will show menus and the appropriate selections for the options being chosen. Display Navigation If the oven is off, touch the Oven Power or Upper or Lower keypad for the desired oven to activate the menu. From this screen, all automatic cooking programs can be activated, all manual cooking programs can be set, options can be adjusted, and instructions, preparation, and tips can be accessed. Setup and Demo Mode 1. Select STORE DEMO MODE to enter Demo Mode. OR 1. Select NEXT to enter into product use. 2. Follow the prompts on the display screen to select a language, set up Wi-Fi/connect to network, accept the terms of service and set the time. NOTE: The display screen will show the time and date (default screen/standby mode). 3. If you selected Store Demo Mode, select TRY THE PRODUCT to explore various features and options of the product. NOTE: Select VIEW PRODUCT VIDEOS to view a video about how to navigate and interact with the product, explore Voice Control, and Scan-To-Cook. 4. Scroll and select EXPLORE. 5. Select the Tools keypad. To exit Demo Mode, see the "Tools" section. Cooking Methods WARNING Food Poisoning Hazard Do not let food sit in oven more than one hour before or after cooking. Doing so can result in food poisoning or sickness. Cooking Method Feature BAKE Baking and Roasting BROIL Broiling Instructions 1. Press the Oven Power or Upper or Lower keypad for the desired oven. 2. Select COOKING METHODS. 3. Select BAKE. 4. Select the desired temperature by scrolling left to right or manually by selecting the grid in the upper right corner and entering the Bake temperature into the keypad. 5. Select START to begin preheating. A tone will sound when preheating is complete. NOTE: To quickly preheat the oven, see the "Rapid Preheat" section for more information. 6. Press the Oven Cancel or Upper or Lower keypad for the desired oven when finished. 1. Press the Oven Power or Upper or Lower keypad for the desired oven. 2. Select COOKING METHODS. 3. Select BROIL. 4. Select the desired temperature by scrolling left to right or manually by selecting the grid in the upper right corner and entering the Broil temperature into the keypad. 5. Select START. 6. Press the Oven Cancel or Upper or Lower keypad for the desired oven when finished. 4 22-Sep-2017 17:17:20 EDT | RELEASED In some European factories the letter "W" of the part code mentioned herein will be automatically replaced by the number "4000" (e.g. "W12345678" becomes "400012345678")
-
 1
1 -
 2
2 -
 3
3 -
 4
4 -
 5
5 -
 6
6 -
 7
7 -
 8
8 -
 9
9 -
 10
10 -
11
-
12
-
13
-
14
-
15
-
16
-
17
-
18
-
19
-
20
-
21
-
22
-
23
-
24
-
25
-
26
-
27
-
28
-
29
-
30
-
31
-
32
-
33
-
34
-
35
-
36
-
37
-
38
-
39
-
40
-
41
-
42
-
43
-
44
-
45
-
46
-
47
-
48
-
49
-
50
-
51
-
52
 |
 |
