Whirlpool WOED3030LS Owners Manual - Page 17
Cutout Height is Between 51, and 52, 130.0 cm and, Go to the Make Electrical Connection
 |
View all Whirlpool WOED3030LS manuals
Add to My Manuals
Save this manual to your list of manuals |
Page 17 highlights
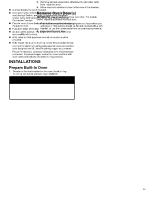
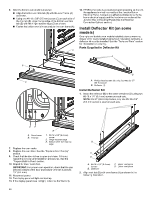
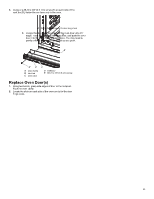
Cutout Height is Between 513/16" and 523/16" (130.0 cm and 132.6 cm) NOTE: For installation, the tall shield is also required to replace the shield that came with the unit. Please refer to your Quick Start Guide for the service number to call and request at no charge. 1. Using 2 or more people, place the oven on its back on a covered surface. 4. Install a front foot on the left front using a #8-18 x 3/8" (9.5 mm) screw. NOTE: Position the foot so the short side of the foot is facing toward the top of the oven. 2. Install a rear foot on the left rear spacer using a #8-18 x 3/8" (9.5 mm) screw. NOTE: Position the foot so the short side of the foot is facing toward the top of the oven. A. Front Foot B. #8-18 x 3/8" (9.5 mm) screw C. Spacer 5. In the same manner, install a front foot on the right front of the oven. 6. Using 2 or more people, place the oven in its upright position. A. Spacer B. Rear foot C. #8-18 x 3/8" (9.5 mm) screw 3. In the same manner, install a foot on the right rear of the oven. 7. Go to the "Make Electrical Connection" section. 17
-
 1
1 -
2
-
3
-
4
-
5
-
6
-
7
-
8
-
9
-
10
-
11
-
 12
12 -
 13
13 -
 14
14 -
 15
15 -
 16
16 -
 17
17 -
 18
18 -
 19
19 -
 20
20 -
 21
21 -
 22
22 -
23
-
24
-
25
-
26
-
27
-
28
-
29
-
30
-
31
-
32
-
33
-
34
-
35
-
36
-
37
-
38
-
39
-
40
-
41
-
42
-
43
-
44
-
45
-
46
-
47
-
48
-
49
-
50
-
51
-
52
-
53
-
54
-
55
-
56
-
57
-
58
-
59
-
60
-
61
-
62
-
63
-
64
-
65
-
66
-
67
-
68
-
69
-
70
-
71
-
72
 |
 |
