Whirlpool WRX988SIBM Use & Care Guide - Page 8
Replace Drawer Front, Reconnect Wiring, Freezer Drawer, Remove Drawer Front, Final Steps
 |
View all Whirlpool WRX988SIBM manuals
Add to My Manuals
Save this manual to your list of manuals |
Page 8 highlights
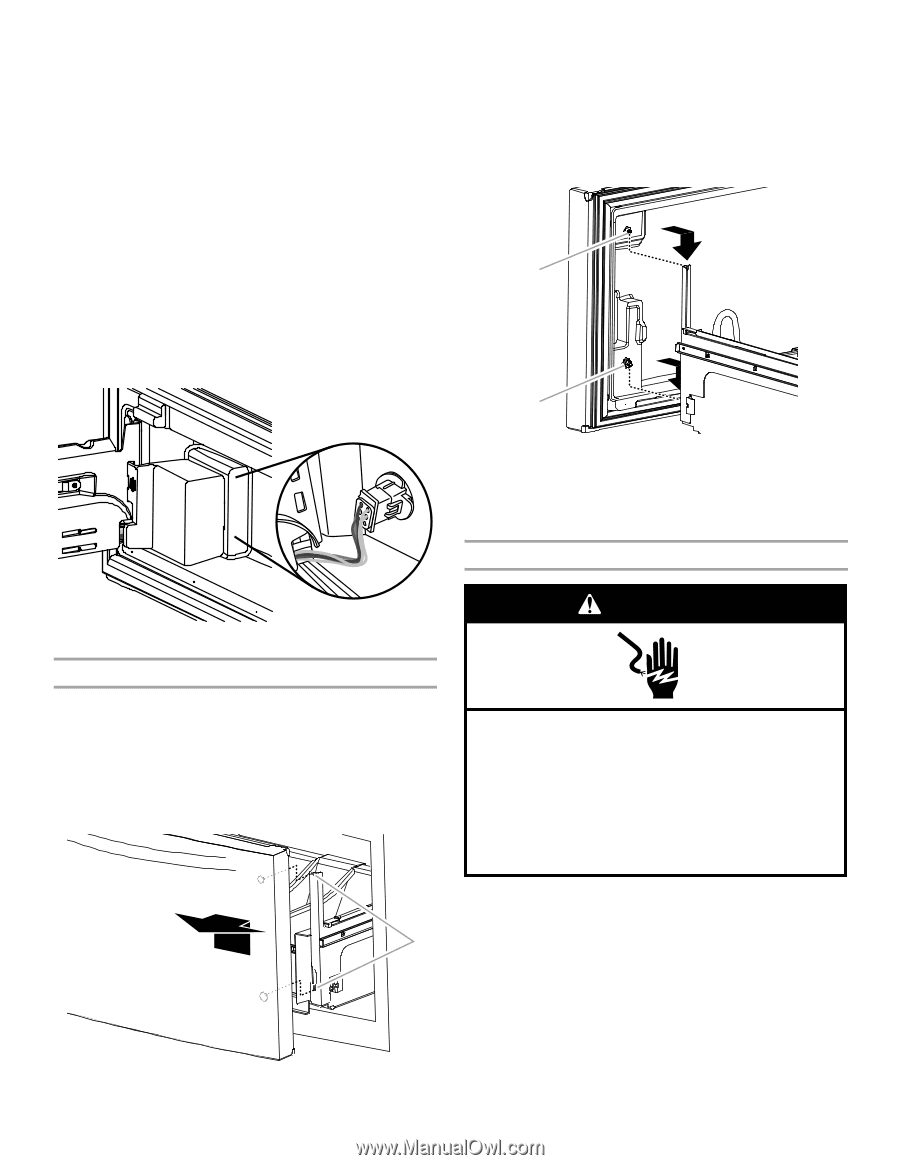
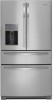
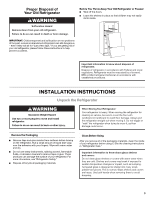
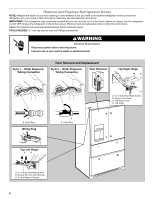
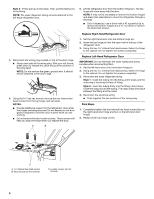
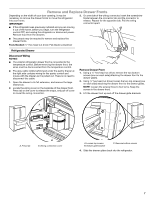
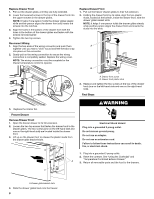
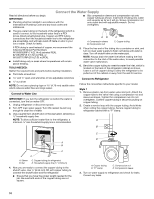
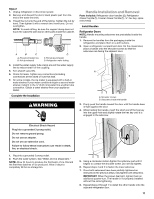
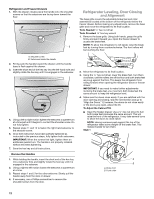
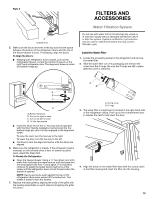
Replace Drawer Front 1. Pull out the drawer glides until they are fully extended. 2. Lower the loosened screws in the top of the drawer front into the upper notches in the drawer glides. NOTE: It helps if one person holds the drawer glides steady while another person aligns the drawer front and inserts the screws into the notches. 3. Align the holes in the bottom of the drawer front with the holes in the bottom of the drawer glides and fasten with the screws removed earlier. 4. Tighten the two top screws. Reconnect Wiring 1. Align the two ends of the wiring connector and push them together until you hear a "click" sound and feel the tabs snap into place on the connector. 2. Gently pull on the wiring connection to ensure the wiring connection is completely seated. Replace the wiring cover. NOTE: The wiring connection must be complete for the drawer temperature control to operate. Replace Drawer Front 1. Pull out the freezer drawer glides to their full extension. 2. Holding the drawer front by its sides, align the two plastic studs, located at the bottom, inside the drawer front, with the drawer glide bracket slots. NOTE: It helps if one person holds the drawer glides steady while another person aligns the drawer front and inserts the studs into the slots. A B A. Drawer front screw B. Drawer front plastic stud 3. Replace and tighten the two screws at the top of the drawer front (one on the left-hand side and one on the right-hand side). Final Steps 3. Replace the interior bin. Freezer Drawer Remove Drawer Front 1. Open the freezer drawer to its full extension. 2. Loosen the two top screws that fasten the drawer front to the drawer glides. The two screws (one on the left-hand side and one on the right-hand side) are located inside the drawer front. 3. Lift up on the drawer front to release the plastic studs from the drawer glide bracket slots. WARNING Electrical Shock Hazard Plug into a grounded 3 prong outlet. Do not remove ground prong. Do not use an adapter. Do not use an extension cord. Failure to follow these instructions can result in death, fire, or electrical shock. 1. Plug into a grounded 3 prong outlet. 2. Reset the controls. See "Using the Control(s)" and "Temperature Controlled Exterior Drawer." A 3. Return all removable parts and the food to the drawers. A. Drawer glide bracket slots 4. Slide the drawer glides back into the freezer. 8
-
 1
1 -
2
-
 3
3 -
 4
4 -
 5
5 -
 6
6 -
 7
7 -
 8
8 -
 9
9 -
 10
10 -
 11
11 -
 12
12 -
 13
13 -
14
-
15
-
16
-
17
-
18
-
19
-
20
-
21
-
22
-
23
-
24
-
25
-
26
-
27
-
28
-
29
-
30
-
31
-
32
-
33
-
34
-
35
-
36
-
37
-
38
-
39
-
40
-
41
-
42
-
43
-
44
-
45
-
46
-
47
-
48
-
49
-
50
-
51
-
52
-
53
-
54
-
55
-
56
-
57
-
58
-
59
-
60
-
61
-
62
-
63
-
64
-
65
-
66
-
67
-
68
-
69
-
70
-
71
-
72
-
73
-
74
-
75
-
76
-
77
-
78
-
79
-
80
-
81
-
82
-
83
-
84
-
85
-
86
-
87
-
88
-
89
-
90
-
91
-
92
-
93
-
94
-
95
-
96
 |
 |